Are you ready to share your creativity with the world? Uploading videos to YouTube from your iPad is a breeze! Whether you're a budding filmmaker, a passionate vlogger, or just want to share those precious family moments, your iPad has everything you need to get started. In this post, we'll walk through the process step by step, making sure you feel confident and excited to hit that upload button!
Preparing Your Video for Upload
Before you dive into the uploading process, there are a few essential steps to ensure your video is ready for prime time. Here’s a handy checklist to guide you:
- Choose the Right Format: YouTube supports various formats, but the most common are MP4 and MOV. Make sure your video is in one of these formats for seamless uploading.
- Edit Your Video: Use editing apps like iMovie or LumaFusion on your iPad to trim unnecessary parts, add music, or insert transitions. A well-edited video attracts more viewers!
- Add a Thumbnail: Thumbnails are the first thing viewers see. Create an engaging thumbnail that represents your video’s content. You can use apps like Canva to design eye-catching images.
- Write a Compelling Title and Description: Think of your title as the bait that hooks potential viewers. Use keywords that reflect your content and ensure your description is informative and engaging.
- Check Your Audio: Good audio can make or break a video. Use external microphones if possible, and ensure your video has clear sound quality before uploading.
Once you’ve prepped your video, it’s time to think about the content itself. Here are some tips to consider:
| Tip | Description |
|---|---|
| Length | Keep your video concise. Aim for 5-10 minutes, unless your content warrants a longer format. |
| Engagement | Encourage viewers to like, comment, and subscribe! Include questions or prompts during your video. |
| Quality | Ensure your video is recorded in high definition (at least 1080p) for a professional look. |
Remember, the more effort you put into preparing your content, the better your chances of gaining views and subscribers. So, take your time to polish that video before sharing it with the world. Once it’s ready, you’re all set to embark on your YouTube journey right from your iPad!
Also Read This: How to Reach a Million Views on YouTube: Proven Growth Strategies
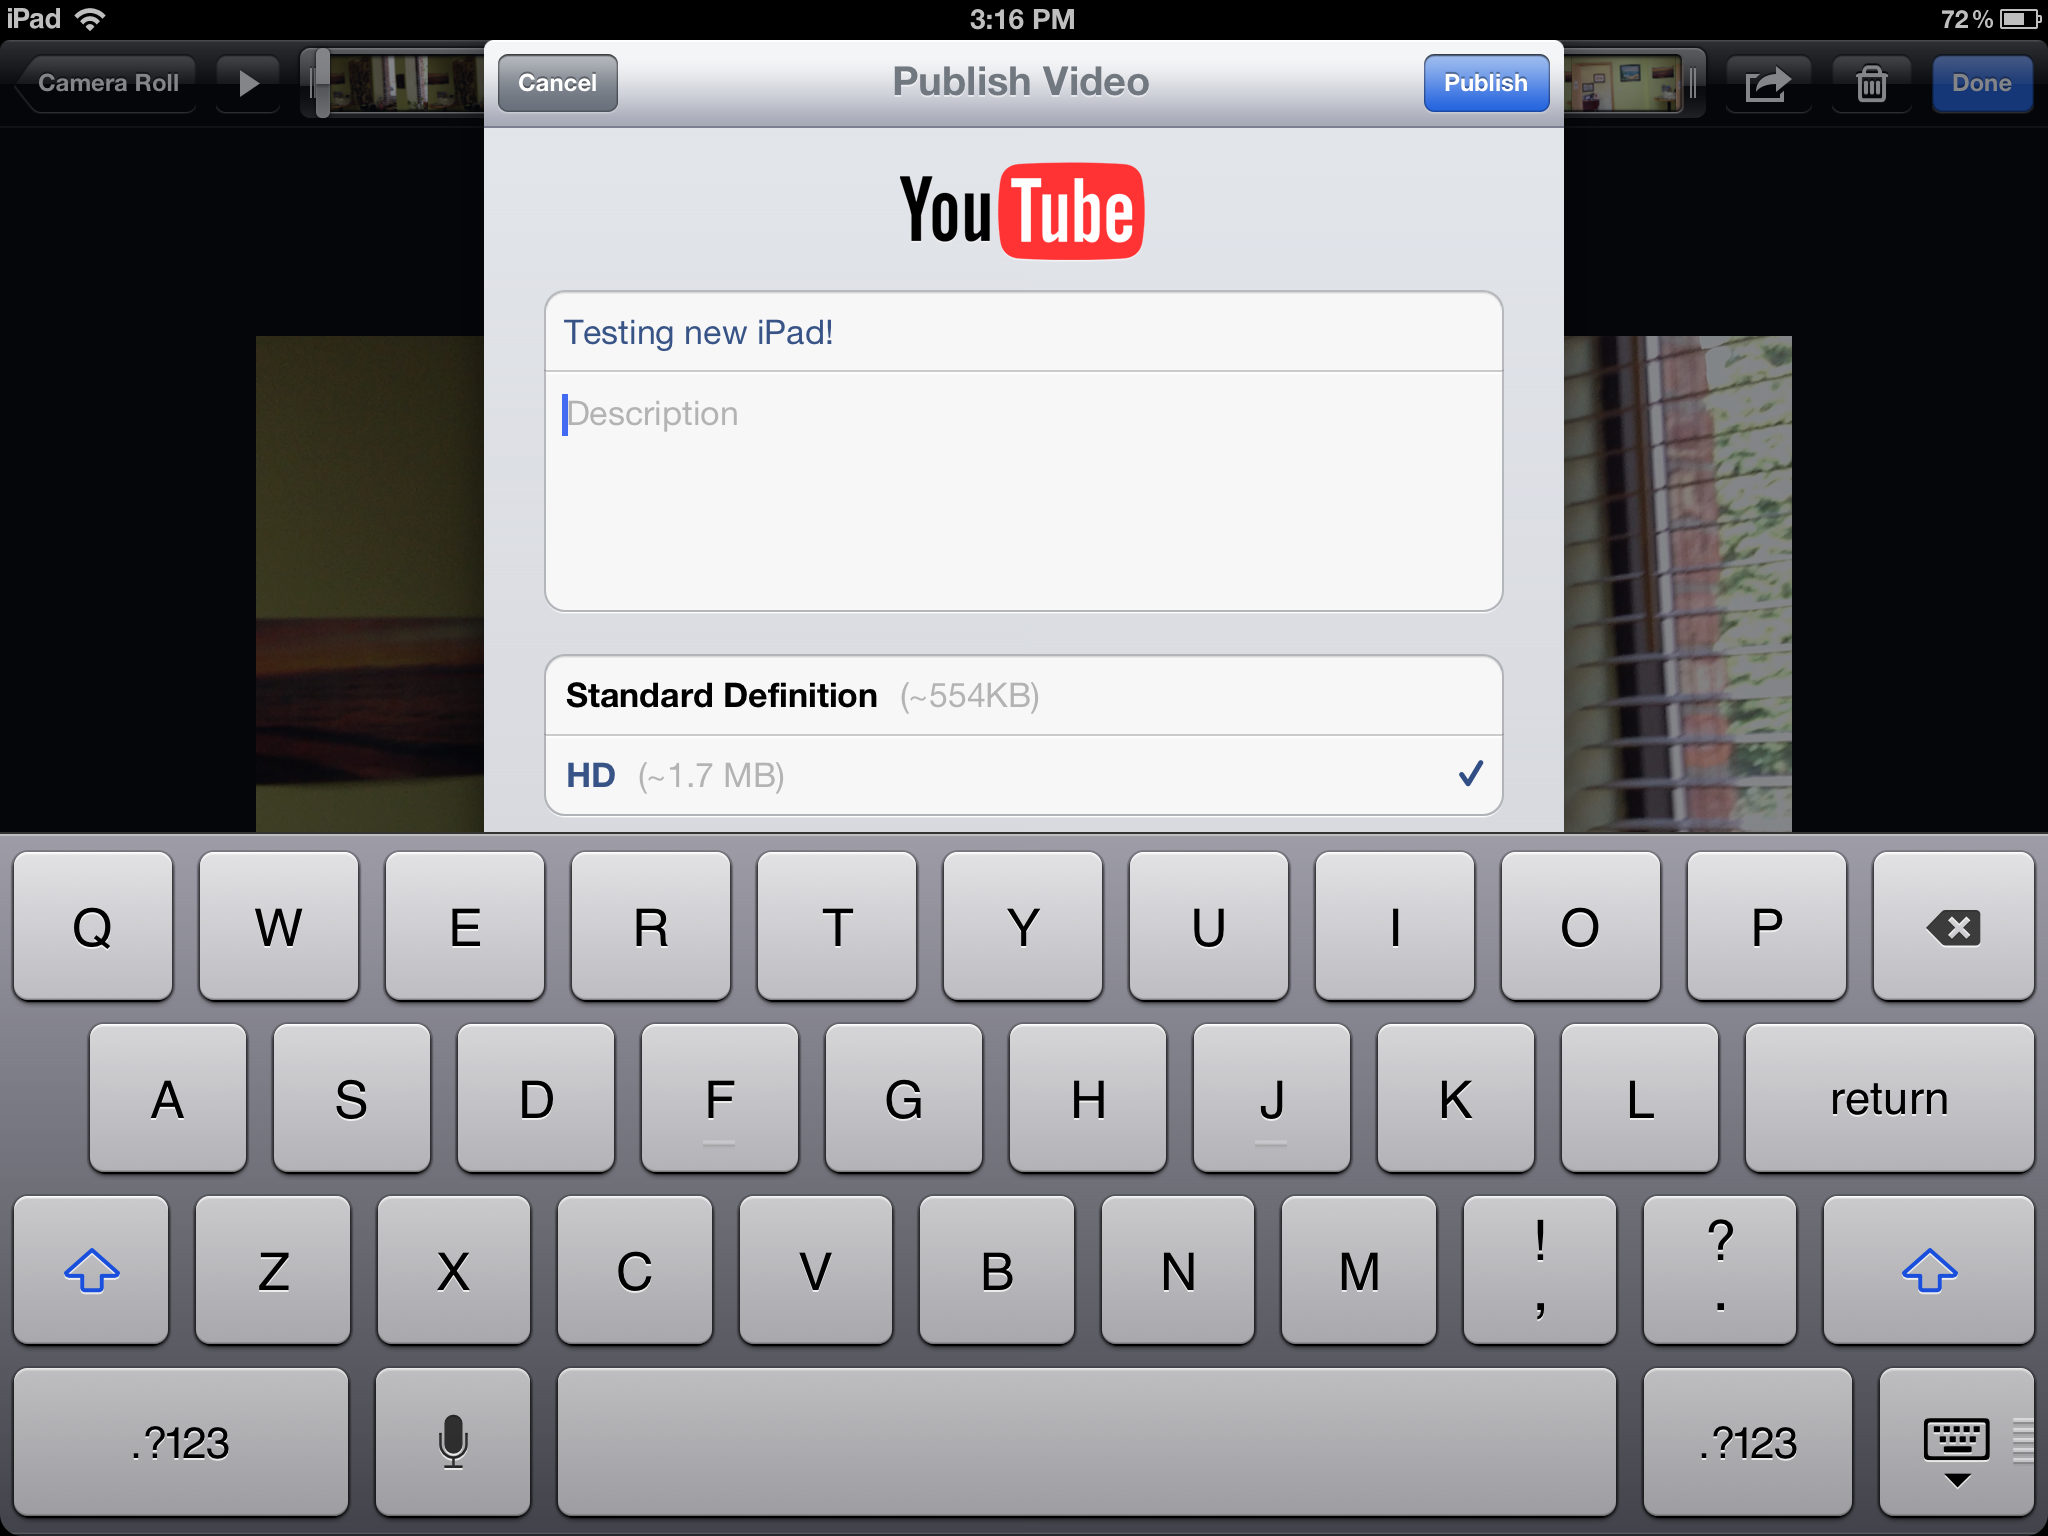
3. Step-by-Step Guide to Uploading Videos on YouTube
Ready to share your creativity with the world? Uploading a video to YouTube from your iPad is a breeze once you know the steps! Here’s a straightforward guide to get you started:
- Open the YouTube App: First, ensure you have the YouTube app installed on your iPad. Launch the app and sign in with your Google account if you haven't already.
- Tap the Create Button: Look for the '+' icon at the bottom center of the screen. This is your gateway to uploading content.
- Select 'Upload a Video': After tapping the '+' icon, you'll see options like 'Go live' or 'Upload a video.' Choose 'Upload a video' to proceed.
- Choose Your Video: Your iPad will prompt you to select a video from your library. Browse through your saved videos and tap the one you want to upload.
- Add a Title and Description: Once you select your video, it’s time to give it a catchy title and a detailed description. This helps viewers understand what your video is all about.
- Select Privacy Settings: You have options here! Choose between 'Public,' 'Unlisted,' or 'Private' to control who sees your video. If you're just testing the waters, consider starting with 'Unlisted.'
- Add Tags and Thumbnails (Optional): Tags help with searchability. Adding a custom thumbnail can also make your video stand out. You can create a thumbnail using apps like Canva if you want a professional touch!
- Publish Your Video: Finally, tap 'Upload' in the top right corner. Your video will begin uploading, and you’ll receive a notification once it’s live on the platform.
And just like that, your video is on YouTube! It’s exciting to see your hard work come to life. Don’t forget to share the link with friends and family so they can enjoy it too!
Also Read This: Income Analysis How Much Per 10000 Views on YouTube
4. Tips for Optimizing Your Video Before Sharing
Now that you’ve uploaded your video, let’s talk about how to optimize it for maximum visibility and engagement. Here are some helpful tips:
- Craft an Engaging Title: Your title should be eye-catching and relevant. Use keywords that people might search for. For example, instead of "My Vacation," try "Exploring the Stunning Beaches of Bali!"
- Write a Compelling Description: The description is your chance to provide more context. Include important details and relevant keywords. Don't forget to add links to your social media or websites!
- Utilize Tags Wisely: Tags improve discoverability. Use a mix of broad and specific tags. If your video is about baking, you might use tags like “baking,” “desserts,” and “easy recipes.”
- Choose Eye-Catching Thumbnails: A good thumbnail grabs attention. Use bright colors and clear images. Tools like Canva can help you design an appealing thumbnail.
- Add Captions: Consider enabling captions to make your video accessible to a broader audience, including those who are hearing impaired or non-native speakers.
- Engage with Viewers: Encourage comments and questions at the end of your video. Responding to viewer comments can boost engagement and build a community!
- Promote Across Social Media: Share your video on platforms like Instagram, Facebook, and Twitter. Create a teaser or a short clip to catch attention and direct traffic to your YouTube video.
By following these tips, you’re not just uploading a video; you’re setting yourself up for success. Happy sharing!
Also Read This: How to Earn Money from Music on YouTube: Monetization Tips
5. Common Issues When Uploading and How to Fix Them
Uploading videos from your iPad to YouTube can be a breeze, but sometimes, you might hit a few bumps along the way. Let’s tackle some common issues you might encounter and how to fix them quickly.
1. Slow Upload Speeds
One of the most frustrating problems is experiencing slow upload speeds. This can stem from various factors, including your internet connection or the size of your video file. Here’s how to remedy this:
- Check Your Internet Connection: Ensure you’re connected to a stable Wi-Fi network. Try resetting your router if the connection seems weak.
- Reduce Video File Size: If your video is too large, consider compressing it using an app like iMovie before uploading.
2. Error Messages During Upload
If you’re getting error messages, it can be both confusing and annoying. Here’s what to do:
- Update Your YouTube App: Make sure you have the latest version of the app installed. Go to the App Store and check for updates.
- Clear Cache: Sometimes, clearing the cache can help. Go to your iPad settings, find the YouTube app, and clear its cache.
3. Video Format Issues
Not all video formats are compatible with YouTube. Ensure you’re using a format that’s accepted:
- The best formats for uploading are MP4, AVI, and MOV.
- If your video is in another format, consider converting it using a video converter app.
4. Uploading Fails
If your upload keeps failing, try these steps:
- Restart Your iPad: Sometimes, a simple restart can clear up any glitches.
- Free Up Space: Ensure you have enough storage on your iPad, as low storage can hinder uploads.
By addressing these common issues, you can make your uploading experience smoother and more efficient!
6. Sharing Your YouTube Video: Best Practices
Once your video is uploaded, the next step is sharing it with the world! Here are some best practices to ensure your video gets the attention it deserves:
1. Create Eye-Catching Thumbnails
Your video thumbnail is the first impression viewers will have, so make it count. Use bright colors, clear images, and bold text to capture attention. A well-designed thumbnail can significantly increase your click-through rate!
2. Optimize Your Video Title and Description
Make sure your title is compelling and includes relevant keywords. This helps in search visibility. For the description:
- Include a brief overview of the video.
- Add relevant hashtags to improve discoverability.
3. Utilize Social Media
Share your video across your social media platforms. Here’s how:
- Facebook: Post your video in groups related to your content.
- Instagram: Use Stories or Reels to tease the video, directing viewers to watch the full version on YouTube.
4. Engage with Your Audience
Encourage viewers to comment and share your video. Respond to comments to build a community around your content. This interaction can enhance viewer loyalty and help your video gain traction.
5. Embed Your Videos
If you have a blog or website, embed your YouTube videos there. This not only drives traffic to your video but also keeps viewers engaged with your other content.
By following these best practices, you’ll not only share your videos effectively but also grow your audience over time. Happy sharing!
 admin
admin


