Friendship bracelets are a beautiful way to express your bond with a friend! These colorful, handmade accessories have been a symbol of friendship for generations, originating in various cultures around the world. With just a few materials and a bit of creativity, you can make personalized name bracelets that hold special meaning. Whether you’re looking to gift one to a bestie or want to try making them as a new hobby, this step-by-step guide on Dailymotion will help you navigate the process easily and enjoyably.
Materials Needed for Making Name Friendship Bracelets
Before diving into the fun of making friendship bracelets, it’s essential to gather all the materials you'll need. Here’s a comprehensive list to ensure you're fully equipped for the task:
- Embroidery Floss: Choose a variety of colors that resonate with you and your friend's personality. You’ll need at least 5-7 different shades for a vibrant bracelet.
- Scissors: A good pair of sharp scissors will help you cut the floss to the desired lengths.
- Tape or Clip Board: Use these to secure your bracelet while you work on it. This keeps your strands organized and prevents tangling.
- Beads (Optional): Add some flair to your bracelet by incorporating beads. You can find letters or decorative beads that match your theme.
- Measuring Tape or Ruler: To ensure your strands are the right length, measuring is key. Aim for about 24 inches for each color.
- Markers or Pencils (Optional): If you’re planning to sketch out your design or lettering, having these handy will help in planning before you start knotting.
Now that you have everything you need, you’re ready to embark on your friendship bracelet-making journey. Feel free to personalize your bracelet with unique color combinations or patterns that reflect your friendship. Happy crafting!
Also Read This: Don’t Challenge the Lady Billionaire on Dailymotion: Watch Now
3. Choosing the Right Techniques for Your Bracelets
So, you’re ready to dive into the world of friendship bracelets, but with so many techniques out there, how do you choose the right one? Not to worry! Let’s break it down into some simple options. Each technique has its own charm, and it ultimately depends on what style you’re going for.
1. Basic Knotting - This is probably the easiest technique to start with. It involves a series of square knots that create a sturdy and colorful bracelet. Perfect for beginners, you can play around with colors to reflect your friendship. To create a basic knot bracelet:
- Cut strands of embroidery floss to your desired length.
- Tie a knot at the top and tape it down to keep it secure.
- Work your way down using square knots.
2. Chevron Pattern - If you want to step it up a notch, the chevron pattern is a great choice. It’s visually striking and gives a more intricate look. To make a chevron bracelet:
- Arrange your strings in a V shape.
- Use a combination of knotting techniques to create the chevron effect, alternating colors.
- This technique takes a bit more practice, but the result is totally worth it!
3. Braiding - For a classic and timeless look, braiding is your go-to technique. Simple yet effective, you can create a beautiful braided bracelet using just three strands. Here's how:
- Take three strands of different colors and secure them at the top.
- Braid them together until you reach your desired length.
- Finish with a knot to keep everything in place.
Whichever technique you choose, remember to enjoy the process! Each bracelet tells a story and symbolizes your friendship. Plus, you can always mix and match techniques for a unique flair. Now that you’ve got the techniques down, let’s move on to the fun part!
Also Read This: How to Directly Download Videos from Dailymotion: A Guide for Easy Video Access
4. Step-by-Step Instructions for Crafting Name Bracelets
Ready to make some name bracelets that your friends will cherish? Follow these easy steps to create a personalized masterpiece! Grab your supplies – you’ll need some colorful embroidery floss, scissors, and a clipboard or tape to hold your work in place.
Step 1: Measure and Cut Your Threads
Start by measuring out your threads. A good length is about 24-30 inches for each strand, depending on wrist size. Cut two strands of each color you want to use, making sure to include the color for the name.
Step 2: Tie a Secure Knot
Once your threads are cut, align them and tie a knot about 2-3 inches from the top. This will be the starting point of your bracelet. Use tape or clip it to a flat surface to keep it steady while you work.
Step 3: Start Knotting
Now, here’s where it gets exciting! If you’re going for a basic knot pattern, use the first string (usually the leftmost) to tie a knot around the second string. Repeat this twice for a secure knot. Then, move to the next string and repeat the process.
Step 4: Spell Out the Name
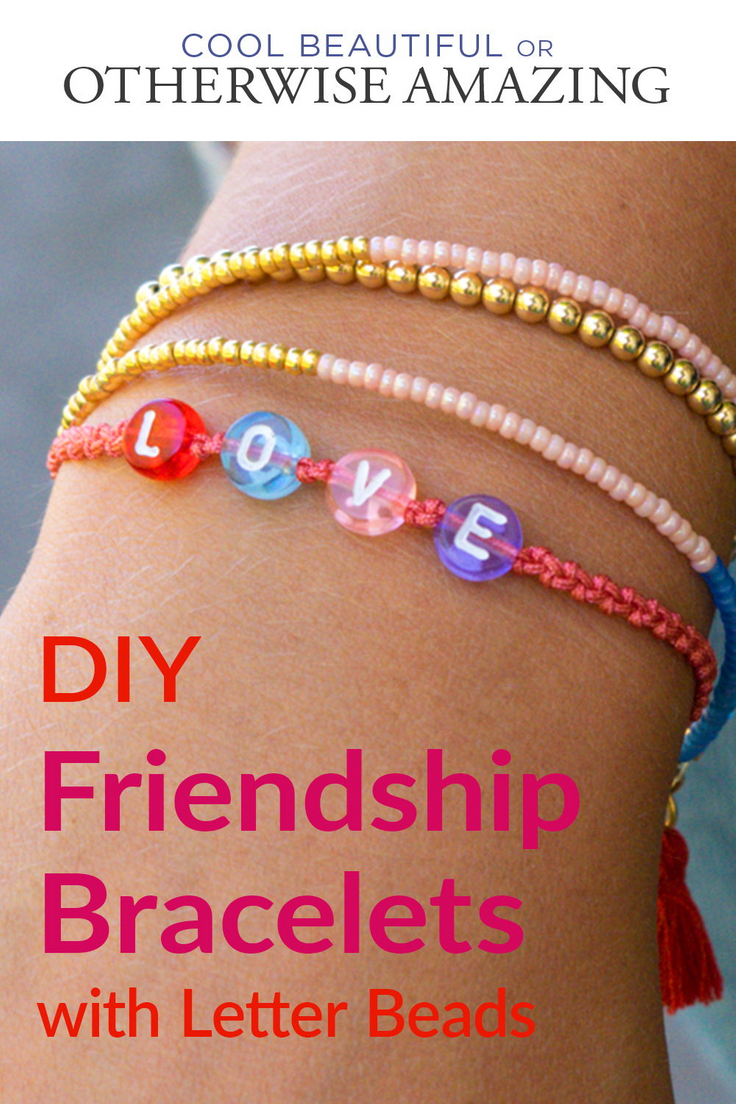
If you want to incorporate a name, consider using a simple bead-and-knot method. String small beads with the letters of the name onto the thread, separating them with knots to keep them in place. For example:
- Bead A - Knot - Bead B - Knot - Bead C
Step 5: Finish Strong
Once you’ve reached your desired length, tie everything off with a secure knot. Leave some extra thread at the end for tying the bracelet later. You can embellish it with charms or additional beads if you like!
There you have it! Your very own name friendship bracelet, crafted with love and care. Remember, the beauty of these bracelets lies not just in their design, but in the memories they represent. So, gather your friends for a crafting session and let the fun begin!
Also Read This: How to Wear Hijab with Dupatta on Dailymotion
5. Tips for Personalizing Your Friendship Bracelets
Personalizing your friendship bracelets is a fantastic way to make each piece unique and meaningful. Here are some creative tips to help you add that special touch:
- Choose Favorite Colors: Use colors that resonate with you or your friend's personality. For example, if your friend loves the ocean, consider blues and greens to reflect those hues.
- Add Charms: Incorporate small charms that signify something special between you and your friend, like a heart, a star, or even initials. You can find these charms at craft stores or online.
- Experiment with Patterns: Instead of sticking to basic knotting patterns, try combining different styles. The chevron, for instance, looks great when paired with a simple braid.
- Include Beads: Adding beads can elevate your bracelet’s design. Mix various sizes and colors for a playful look, or opt for a more sophisticated style by using uniform beads.
- Incorporate Text: Use letter beads to spell out names, initials, or meaningful words. This makes the bracelet not just a piece of jewelry, but a heartfelt message.
These small details can transform a basic bracelet into a cherished keepsake. Remember, the goal is to reflect the bond you share, so let your imagination run wild!
6. Where to Find Inspiration on Dailymotion
Dailymotion is a treasure trove for creativity, especially when it comes to making friendship bracelets. Here are some ways to tap into that inspiration:
- Search for DIY Tutorials: Dailymotion features a variety of step-by-step video tutorials. Just type “friendship bracelet tutorial” into the search bar, and you’ll find countless videos demonstrating different techniques and designs.
- Follow Craft Channels: Many creators focus on DIY projects. Following channels that specialize in crafts can keep your feed full of new ideas. Channels like Crafty Corner often post innovative ways to customize bracelets.
- Explore Trendy Styles: Keep an eye out for trending bracelet styles. You might come across boho chic designs or minimalist watches that inspire you to incorporate those themes in your own creations.
- Engage with the Community: Comment on videos and ask questions! Other viewers and creators might share their tips or inspiration, enriching your own crafting experience.
- Save Your Favorite Videos: Dailymotion allows you to create playlists. Save videos that inspire you so you can easily refer back to them while you craft.
By exploring Dailymotion, you’ll not only learn new techniques but also connect with a community of fellow bracelet makers. So dive in and let the creativity flow!
 admin
admin