Hey there, beauty enthusiasts! Are you ready to elevate your makeup game? Smokey eyes are a timeless and versatile look that can take you from a casual brunch to a glamorous night out. The beauty of the smokey eye lies in its ability to enhance your natural features while adding a touch of drama. Plus, it’s surprisingly easy to master! Whether you prefer a subtle taupe or a bold charcoal, this tutorial will guide you through the steps to achieve that stunning, sultry look.
Essential Tools and Products for Smokey Eyes
Before diving into the application process, let's talk about the tools and products you'll need to create the perfect smokey eye. Having the right items on hand makes all the difference in achieving a flawless finish!
1. Eyeshadow Palette: A quality eyeshadow palette is your best friend. Look for one that contains a range of shades from light to dark. You’ll want a mix of matte and shimmer finishes. Popular palettes like the Urban Decay Naked Smoky or Morphe 35O are fantastic choices!
2. Eyeliner: A good eyeliner is key to defining your eyes. You can choose between gel, liquid, or pencil. For a smokey eye, a gel liner works wonders, as it’s easy to smudge and blend. Try the Maybelline Eye Studio Gel Eyeliner for a long-lasting finish.
3. Mascara: Don’t forget mascara! It adds volume and length to your lashes, making your eyes pop. Consider a volumizing mascara like Too Faced Better Than Sex for that stunning, full-bodied look.
4. Brushes: Having the right brushes is crucial. Here’s a quick list of what you’ll need:
- Flat Shader Brush: For applying eyeshadow on the lid.
- Blending Brush: To seamlessly blend out harsh lines.
- Pencil Brush: For detailing and applying color to the lower lash line.
- Angled Brush: Perfect for eyeliner and defining the crease.
5. Primer: A good eye primer ensures your makeup stays put and intensifies the color of your eyeshadow. Try the Urban Decay Eyeshadow Primer Potion for a smooth base.
6. Setting Spray: Finish off your look with a setting spray to lock everything in place. A product like the Urban Decay All Nighter Setting Spray will keep your smokey eyes looking fresh all night long!
With these essentials in hand, you’re all set to create a stunning smokey eye look. Remember, practice makes perfect, so don’t be afraid to experiment and find the combination that works best for you. Ready to dive into the application steps? Let’s get started!
Also Read This: Learn to Make a Pineapple Cream Cake: Video Guide on Dailymotion
3. Preparing Your Eyelids for Makeup
Before diving into the world of smokey eyes, it's essential to prep your eyelids properly. This step is often overlooked, but trust me, it can make a world of difference in the final look!
Step 1: Cleanse Your Eyelids
Start with a clean canvas. Gently cleanse your eyelids with a makeup remover or a gentle cleanser. This removes any oils or residues that might interfere with your makeup application.
Step 2: Apply an Eye Primer
An eye primer is your best friend when it comes to achieving those stunning smokey eyes. It not only helps your eyeshadow stay put but also enhances the vibrancy of the colors you choose. Apply a small amount of primer on your eyelids, blending it outwards towards the brow bone. Let it sit for a minute to dry, which helps create a smooth base for your eyeshadow.
Step 3: Set with Translucent Powder
To ensure your primer doesn’t crease, lightly dust some translucent powder over your eyelids. This will help your eyeshadow glide on smoothly. Plus, it keeps everything in place throughout the day (or night!).
Step 4: Define Your Brows
Don't forget about your brows! Well-groomed brows frame your eyes beautifully. Use a brow pencil or powder to fill in any sparse areas, and brush them into place with a clear brow gel. This will help your smokey eye look polished and intentional.
By following these simple steps, your eyelids will be perfectly prepped, setting the stage for a gorgeous smokey eye look. Remember, a little preparation goes a long way!
Also Read This: How to Make a Website on Google: Simple Tutorial on Dailymotion
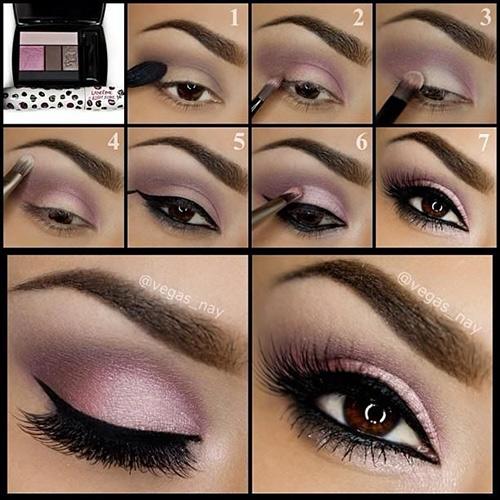
4. Choosing the Right Colors for Your Smokey Eyes
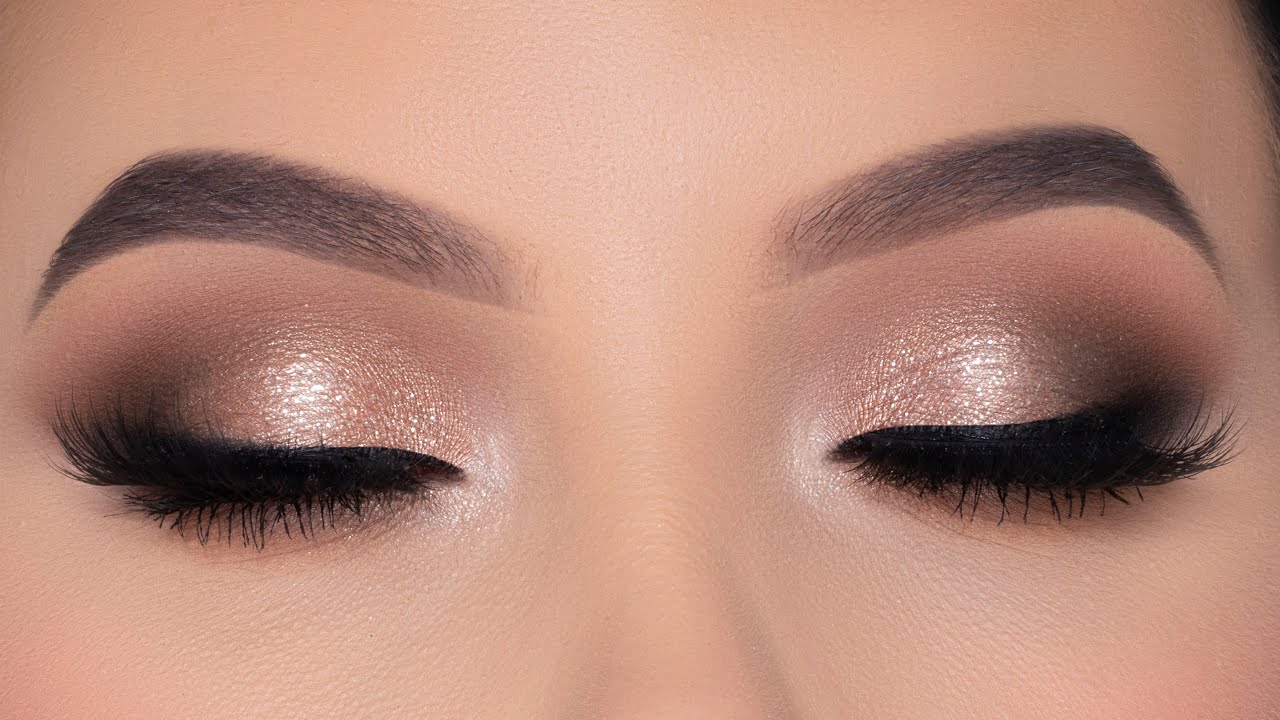
Now that your eyelids are prepped and ready, it’s time to choose the colors for your smokey eyes! The great thing about smokey eyes is their versatility; you can create a sultry look using various color combinations!
Classic Black Smokey Eye
The traditional route is always a winner. For a classic black smokey eye, you’ll need:
- Black eyeshadow
- Dark gray eyeshadow
- Light gray or white eyeshadow for the inner corners
Start with the dark gray as your base, transition into the black on the outer corners, and finish off with a pop of light gray to brighten the look.
Warm Tones: Browns and Coppers
If you’re looking for something earthy and warm, consider using browns and coppers. This is especially flattering for those with warm undertones. A palette might include:
- Dark brown eyeshadow
- Medium brown eyeshadow
- Copper or gold shimmer eyeshadow
The medium brown acts as a base, while the dark brown adds depth. The copper shimmer can then be applied on the lids for a hint of sparkle!
Bold and Colorful: Blues and Purples
Feeling adventurous? Go bold with blues and purples! This vibrant combo can be eye-catching. Here’s what to gather:
- Deep navy or royal blue eyeshadow
- Dark purple eyeshadow
- Light lavender or silver shimmer eyeshadow
Blend the navy on the outer corners, the dark purple in the crease, and finish with a pop of light lavender on the lid for an electrifying look!
Remember, the key to a stunning smokey eye is blending! No matter which colors you choose, take your time to blend them seamlessly for that perfect gradient effect. Happy makeuping!
Also Read This: How to Apply Stick Foundation: Watch the Video Tutorial on Dailymotion
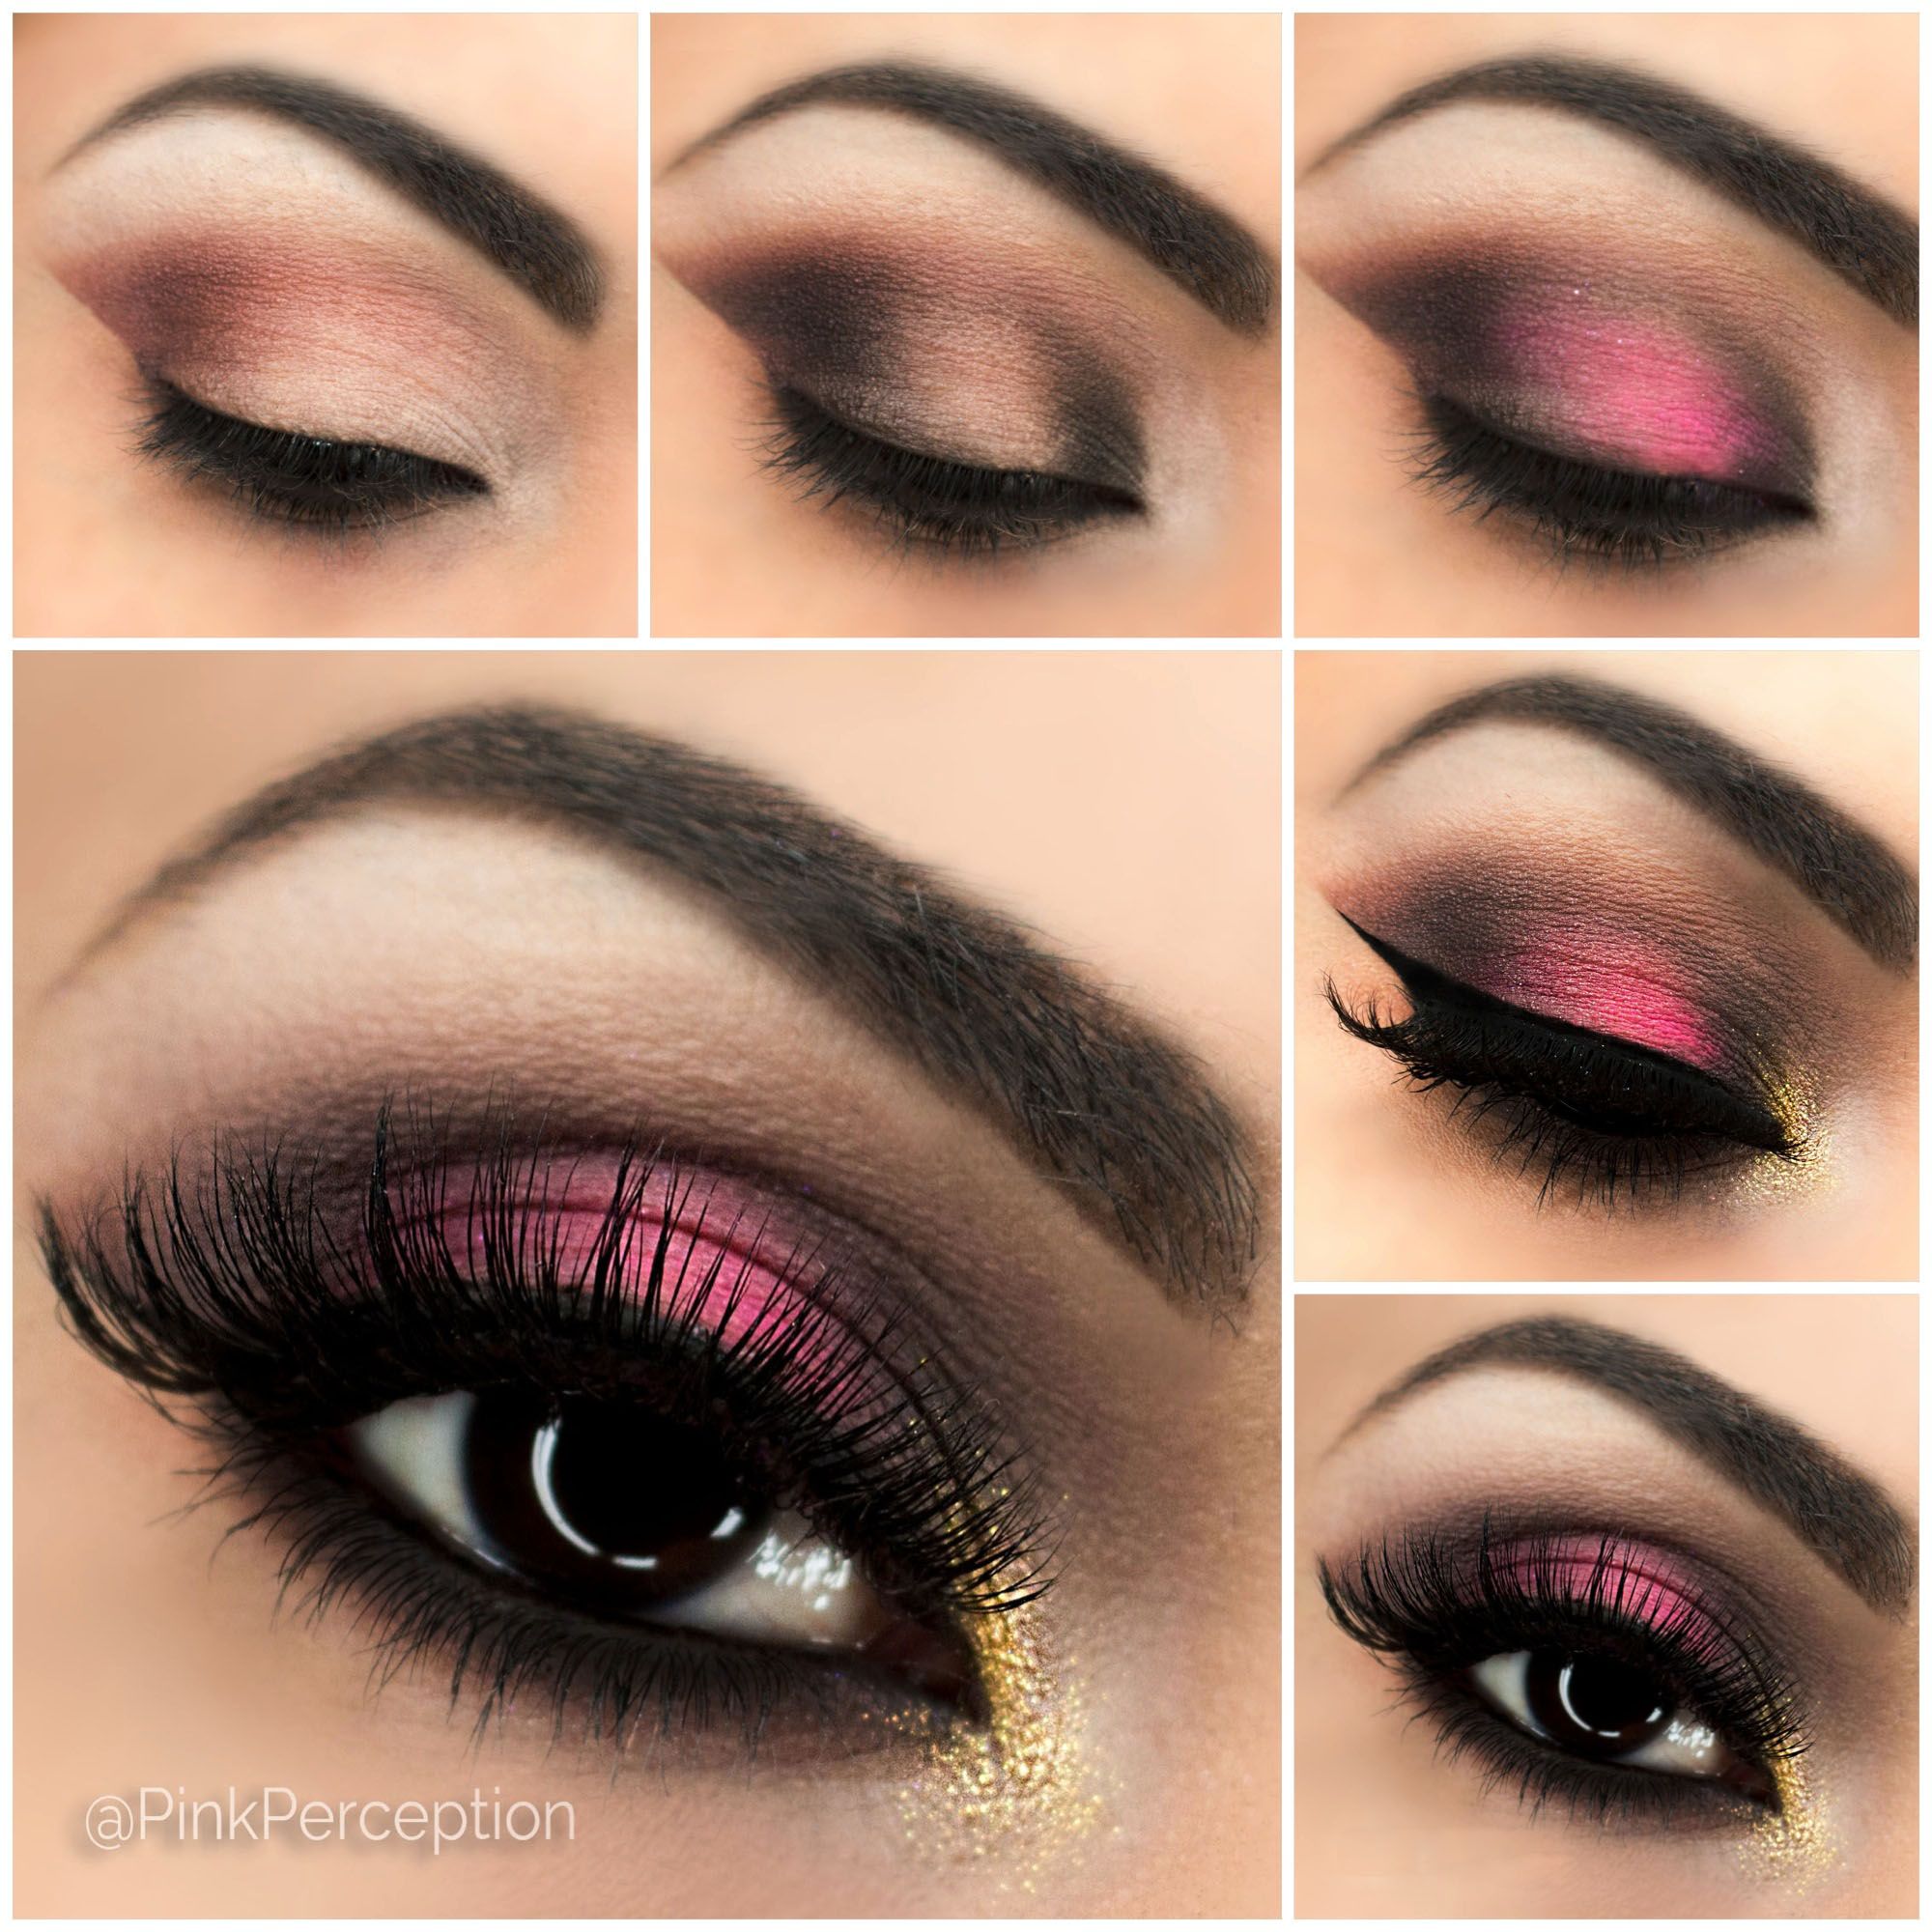
5. Step-by-Step Guide to Creating Smokey Eyes
Ready to dive into the world of smokey eyes? This look is all about that sultry vibe, and with a few simple steps, you’ll be turning heads in no time! Grab your brushes and let’s get started!
Step 1: Prep Your Eyelids
Before applying any makeup, it’s essential to prep your eyelids. Use an eyeshadow primer to ensure your makeup lasts all day and reduces creasing. A good primer creates a smooth canvas for the eyeshadow.
Step 2: Choose Your Shades
For a classic smokey eye, you’ll need three shades: a base color, a mid-tone, and a darker shade. Here’s a simple palette you can work with:
- Base Color: Soft beige or taupe
- Mid-Tone: Charcoal gray or medium brown
- Darker Shade: Deep black or dark plum
Step 3: Apply the Base Color
Using a flat eyeshadow brush, apply the base color all over your eyelid, extending from the lash line to the brow bone. This helps to create a balanced look.
Step 4: Add the Mid-Tone
Next, switch to a blending brush and pick up your mid-tone shade. Apply this in the crease of your eyelid, blending it gently to create depth. The goal is to achieve a smooth transition between the base and mid-tone colors.
Step 5: Time for the Darker Shade
Using a smaller, denser brush, apply the darker shade to the outer V of your eye. This is where the smokiness comes into play! Blend this shade into the crease and slightly onto the lid, ensuring you maintain that gradient effect.
Step 6: Lower Lash Line
Don’t forget about the lower lash line! With a small pencil brush, apply the mid-tone shade under your lashes, about halfway in. To add more drama, use the darker shade and apply it to the outer corner of the lower lash line. Blend it well!
Step 7: Highlight the Inner Corner
To make your eyes pop, use a light, shimmery shade on the inner corners. This brightens the look and creates a beautiful contrast with the smokey effect.
Step 8: Finishing Touches
Finish off your smokey eyes with a generous coat of mascara to emphasize your lashes. For an extra touch, you can apply false lashes for that wow factor!
Also Read This: How to Bypass Ads on Dailymotion Videos Using Tampermonkey: A Simple Method
6. Tips for Blending and Finishing Touches
Now that you’ve followed the steps to create your smokey eyes, let’s discuss a few tips that will elevate your makeup game. Blending is key, and here are some pro tips to help you perfect the art:
1. Use the Right Tools
Invest in quality brushes! A good set of blending brushes can make a huge difference. Look for a fluffy blending brush for soft edges and a flat brush for precise application.
2. Blend, Blend, Blend!
The secret to a stunning smokey eye is seamless blending. Take your time! Use circular motions and back-and-forth movements to blend the colors together without harsh lines.
3. Start Light and Build Up
It's easier to build color than to take it away. Start with a light application of your darker shade and gradually build it up. This helps to avoid overwhelming your eyes with too much color at once.
4. Clean Up the Edges
If you accidentally go a bit too far outside your desired shape, don’t panic! Use a bit of makeup remover on a cotton swab to clean up the edges. This gives your look a polished finish.
5. Set It All
To ensure your smokey eye lasts throughout the day and night, finish with a setting spray. This not only locks in your look but also helps to blend everything together for a more cohesive appearance.
With these tips in your arsenal, you’re well on your way to mastering the smokey eye look. Remember, practice makes perfect, so don’t hesitate to try different color combinations and techniques. Happy blending!
Also Read This: Steps to Save Dailymotion Videos Directly to Your Phone Gallery
7. Common Mistakes to Avoid When Doing Smokey Eyes
Creating stunning smokey eyes can be a little tricky, especially if you’re just getting started. Here’s a list of common mistakes to steer clear of, ensuring your look is flawless and chic!
- Skipping Primer: One of the biggest blunders is forgetting to apply an eyeshadow primer. This step is crucial as it helps your eyeshadow adhere better, prevents creasing, and enhances color payoff.
- Using the Wrong Shades: Not all shades work for everyone. It’s essential to choose colors that complement your eye color and skin tone. For instance, if you have blue eyes, warm browns and bronzes can really make your eyes pop!
- Overdoing It with Black: While black can create a dramatic look, layering too much can make your eyes look heavy or raccoon-like. Instead, start with softer shades and build up the intensity gradually.
- Neglecting Blending: Blending is key to achieving that smooth gradient effect. Use a fluffy blending brush and take your time; harsh lines can ruin your entire look.
- Applying Too Much Product: Less is often more. Apply your eyeshadow in thin layers, building up as needed. This prevents fallout and keeps your look polished.
- Ignoring Lower Lash Line: The lower lash line is essential for a balanced smokey eye. A little shadow or eyeliner here ties the whole look together, so don’t skip it!
- Forgetting to Set Your Makeup: After all that hard work, make sure to set your makeup with a good setting spray. This will keep your smokey eyes looking fresh throughout the day or night.
By being aware of these common mistakes, you can refine your technique and achieve beautifully blended, stunning smokey eyes every time!
8. Conclusion and Final Looks
Congratulations! You’ve made it through our step-by-step tutorial on creating smokey eyes. Whether you're prepping for a night out or just want to elevate your everyday look, mastering smokey eyes can transform your appearance in a matter of minutes.
Remember, the key to a perfect smokey eye is practice and patience. With each attempt, you’ll find your flow, discover what colors work best for you, and improve your blending skills. Here’s a quick recap of the final looks you can achieve:
| Look | Description | Recommended Colors |
|---|---|---|
| Classic Smokey Eye | A timeless look with dark shadows, perfect for any occasion. | Black, Grey, Charcoal |
| Bronze Smokey Eye | A warm, inviting look ideal for daytime or summer evenings. | Bronze, Gold, Soft Brown |
| Colorful Smokey Eye | Fun and vibrant, perfect for parties or festivals. | Purple, Teal, Burgundy |
Feel free to mix and match shades, and don’t hesitate to experiment with different techniques. And remember, the beauty of makeup lies in its imperfection—so have fun with it!
Now, go ahead and rock those stunning smokey eyes, and be sure to share your creations with friends or on social media! Happy blending!
 admin
admin


