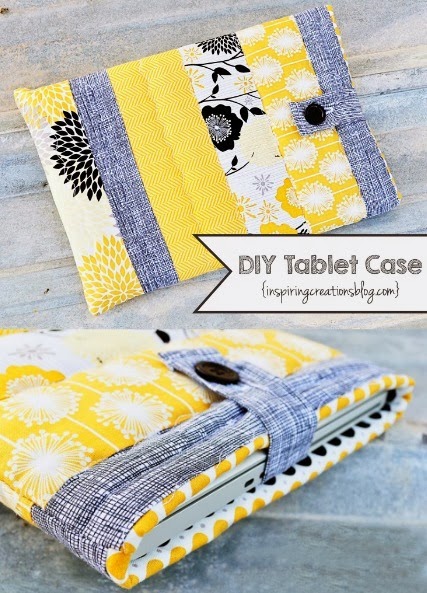
Have you ever wanted to personalize your tablet but found the options in stores a bit lackluster? Well, you’re in luck! Creating your own tablet cover is not only a fun and creative project but also a fantastic way to express your style. Plus, it’s a great way to protect your device without spending a fortune. In this tutorial, we’ll guide you through the steps to make a unique tablet cover that fits your personality perfectly. Let’s get those creative juices flowing!
Materials Needed for Your Tablet Cover
Before we dive into the crafting process, it’s essential to gather all the materials you’ll need. Don’t worry; most of these items are likely lying around your home or can be easily purchased. Here’s a handy list:
- Fabric: Choose a fabric that resonates with you. Cotton, felt, or even an old T-shirt can work wonders!
- Cardboard or Craft Foam: This will give your tablet cover structure and protection.
- Scissors: A good pair of scissors is crucial for cutting your materials accurately.
- Glue or Fabric Adhesive: Depending on your fabric choice, make sure to have a strong adhesive to hold everything together.
- Sewing Kit (optional): If you prefer a sewn finish, grab a needle and thread that match your fabric.
- Measuring Tape or Ruler: Accurate measurements are key to ensuring a snug fit for your tablet.
- Markers or Fabric Paint (optional): For personalizing your cover with unique designs or patterns.
- Iron (optional): If you are using fabric, an iron can help to smooth out wrinkles and help with the final look.
Once you have all your materials ready, you’ll be well on your way to crafting a stunning tablet cover that showcases your creativity. Remember, the best part of DIY is that it can be as simple or as elaborate as you want. So, let’s get started and unleash your inner designer!
Also Read This: Following Dailymotion Channels on Apple TV Effortlessly
3. Step-by-Step Guide to Making Your Tablet Cover
Ready to dive into the fun world of DIY? Making your own tablet cover is not only a creative outlet but also a practical way to protect your device. Let’s get started with a simple, step-by-step guide that will have you crafting in no time!
Materials You’ll Need:
- Fabric of your choice (canvas, felt, or even an old T-shirt)
- Scissors
- Measuring tape
- Glue or sewing kit (needle and thread)
- Cardboard (optional, for added sturdiness)
- Decorative items (buttons, ribbons, patches)
Step 1: Measure Your Tablet
Start by measuring your tablet. Note the dimensions (height, width, and thickness) so you can cut your fabric accurately. Add an extra inch on each side for seams or adjustments. For instance, if your tablet measures 10 inches by 7 inches, cut your fabric to 12 by 9 inches.
Step 2: Cut the Fabric
Using your scissors, carefully cut out the fabric according to the measurements. If you want to reinforce the cover, cut a piece of cardboard to the same size. This will add some sturdiness to your creation!
Step 3: Fold and Pin
Fold the fabric around the tablet like a book cover. Pin the edges together to hold them in place. If you’re using cardboard, place it in between the fabric layers before pinning.
Step 4: Sew or Glue the Edges
You have two options here: sew or glue. If you’re sewing, a simple straight stitch along the edges will do just fine. If you’re using glue, make sure it’s fabric glue and apply it evenly along the edges. Allow it to dry completely before moving on to the next step.
Step 5: Add Custom Touches
Now comes the fun part! Decorate your tablet cover with buttons, patches, or any embellishments that reflect your personality. Maybe you want to stitch on your favorite quote or add a cute pocket to hold your stylus!
Step 6: Final Touches
Once everything is dry, give your cover a final look. Make sure all edges are secured and that it fits your tablet snugly. And voilà! You now have a beautiful, personalized tablet cover that’s all your own!
Also Read This: Stream Don’t Tell Thomas on Dailymotion Now
4. Tips for Customizing Your Tablet Cover
Customization is what makes your DIY tablet cover truly stand out! Here are some creative tips to help you personalize your cover:
1. Play with Patterns and Colors
Don't be afraid to mix and match! Stripes, polka dots, or floral patterns can add a unique touch. Consider using different fabrics for a patchwork effect. For example, a solid color paired with a patterned fabric can create a stunning contrast.
2. Incorporate Functional Elements
Think about adding pockets for your charger or headphones. You can create a small pocket on the front or side of the cover. This not only adds functionality but also enhances the design!
3. Personalize with Monograms
Adding your initials or name can make your cover feel even more special. You can use fabric paint or sew on letters. A simple monogram on the front can add an elegant touch!
4. Experiment with Textures
Combine different textures to make your cover more interesting. For instance, pair soft felt with shiny leather or denim. This can make your tablet cover not just stylish but also fun to touch!
5. Use Inspirational Quotes
Add a quote that inspires you! You can paint it on or use iron-on letters. Imagine how motivating it will be to see a quote like "Stay Curious" every time you open your tablet cover!
With these tips, your DIY tablet cover will not only protect your device but also express your creativity and style. Enjoy the process, and don’t hesitate to experiment! Happy crafting!
Also Read This: How to Wear Hijab with Different Styles and Techniques on Dailymotion
5. Common Mistakes to Avoid When Making a Tablet Cover
Creating your own tablet cover can be a fun and rewarding project, but it’s easy to trip up along the way. Here are some common mistakes to watch out for, so you can enjoy the process without any hiccups:
- Not Measuring Correctly: One of the biggest pitfalls is failing to measure your tablet accurately. Trust me, guessing can lead to a cover that’s either too tight or way too loose. Always use a ruler or measuring tape for precise dimensions.
- Choosing the Wrong Materials: Using materials that are too heavy or not durable enough can ruin your cover. For example, while cardboard might seem like a good option for structure, it can bend or break easily. Opt for fabrics that are both durable and lightweight, such as canvas or denim.
- Skipping the Prototype: Jumping straight into your final design without a prototype can be risky. A rough draft allows you to test the fit and function of your cover before committing to the final version. Don’t skip this step!
- Ignoring Seam Allowances: When cutting your fabric, don’t forget to account for seam allowances. A common mistake is cutting the fabric too close to the edge, leading to seams that pull or fray. A good rule of thumb is to add at least half an inch around the edges.
- Forgetting About Accessibility: Ensure that all buttons, ports, and cameras are accessible after your cover is completed. It’s easy to get caught up in aesthetics and forget about functionality, but a beautiful cover that doesn’t work well is a disappointment.
Avoiding these mistakes will save you time, materials, and frustration. Take your time, plan, and enjoy the process of making your own tablet cover!
6. Conclusion and Final Thoughts on DIY Tablet Covers
Making your own tablet cover is not just a creative endeavor; it’s a chance to express your personality and style while protecting your device. As we wrap up this tutorial, here are a few final thoughts to consider:
- Personalization is Key: Feel free to customize your cover with patches, paints, or even embroidery. Your tablet cover can be a reflection of your interests and style, so let your creativity shine!
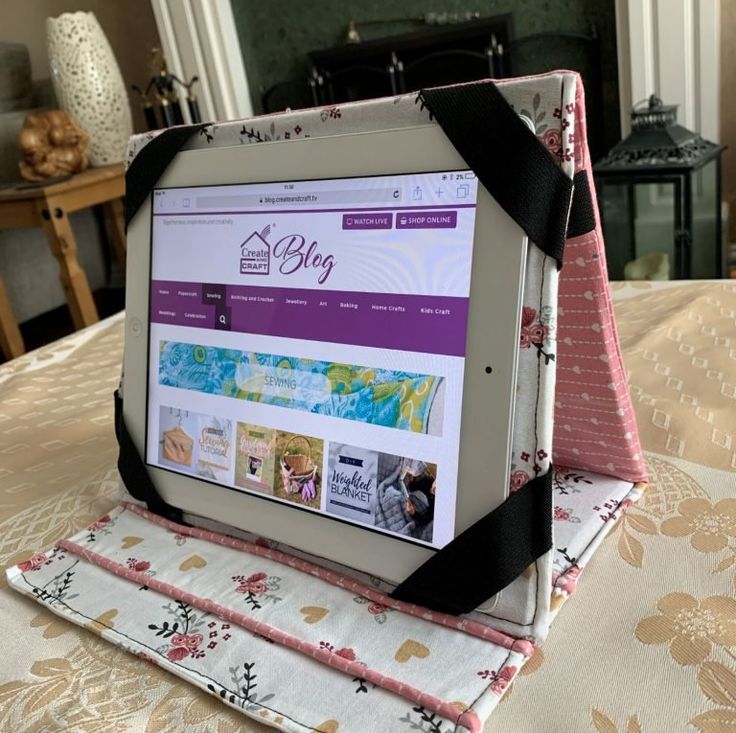
- Consider Functionality: Think about what you need from your cover. Do you want a stand feature? Extra pockets for accessories? Plan these functionalities into your design from the start.
- Care and Maintenance: Depending on the materials you choose, be aware of how to care for your cover. For instance, fabric covers may need regular washing, while leather might require conditioning to keep it supple.
- Share Your Creation: Don’t keep your beautiful work to yourself! Share pictures with friends or on social media. You might inspire others to take on their own DIY projects!
So, gear up and get creative! With some patience and imagination, you’ll end up with a tablet cover that’s not only functional but also uniquely yours. Happy crafting!
 admin
admin


