Uploading videos on YouTube from your iPhone can be a breeze, especially with the right steps in hand! Whether you're sharing your latest travel vlog, a cooking tutorial, or just capturing memorable moments, this guide will walk you through the process. YouTube is a fantastic platform to showcase your creativity and connect with a broad audience. Let’s dive into the basics of how to get your videos online without any hassle!
Preparing Your Video for Upload
Before you hit that upload button, it’s crucial to prepare your video to ensure the best quality and engagement. Here are some steps to guide you through the preparation process:
- Choose the Right Video Format: Ensure your video is in a compatible format. YouTube supports formats like MP4, MOV, and AVI. Most videos on iPhones are recorded in high-quality formats, so you should be good to go!
- Edit Your Video: Use editing apps like iMovie or InShot to refine your video. Trim unnecessary clips, add transitions, and incorporate engaging elements like music or text overlays. A polished video captures viewers' attention better!
- Optimize for Quality: Pay attention to the resolution. Aim for at least 1080p for a clear and professional look. You can check this in your video settings before uploading.
- Create an Eye-Catching Thumbnail: Thumbnails are the first thing viewers see, so make yours attractive! Use apps like Canva to design a custom thumbnail that reflects your video’s content. Ensure it’s vibrant and engaging to encourage clicks.
- Add a Descriptive Title and Tags: While this is done during the upload, thinking ahead can save time. Choose a title that is catchy yet descriptive. Use relevant tags to improve discoverability on YouTube. Think about keywords your audience might search for!
- Check Your Internet Connection: Before uploading, ensure you have a stable Wi-Fi connection. Large video files can take a long time to upload on mobile data, leading to interruptions.
By following these preparation steps, you’ll set yourself up for a successful upload. Remember, the effort you put into preparing your video can make a significant difference in how your content is received. Happy uploading!
Also Read This: Using a YouTube Video as Your Alarm: A Step-by-Step Guide
3. Step-by-Step Guide to Uploading from Your iPhone
So, you’re ready to share your creativity with the world! Uploading videos from your iPhone to YouTube is a breeze if you follow these simple steps. Let’s dive right in!
Step 1: Open the YouTube App
First things first, make sure you have the YouTube app installed on your iPhone. If you haven’t downloaded it yet, hop onto the App Store, search for “YouTube,” and tap that install button. Once it’s ready, open the app.
Step 2: Sign In
If you’re not signed in yet, tap on the profile icon in the top right corner. Enter your Google account credentials, and voilà, you’re in! If you already have an account, you can skip this step.
Step 3: Start Uploading
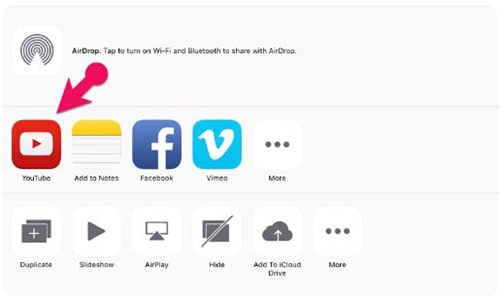
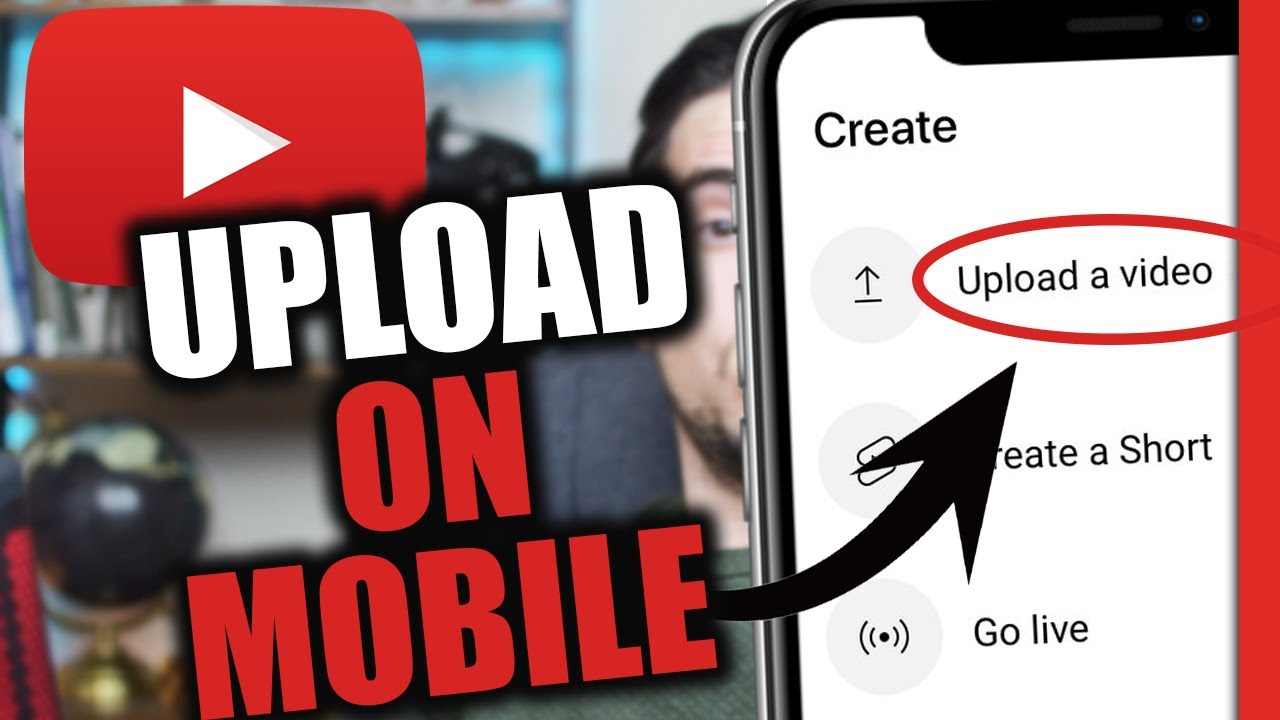
Now that you’re in, look for the + icon at the bottom center of the screen. Tap it, and you’ll see several options. Select “Upload a Video.”
Step 4: Choose Your Video
Next, you’ll be prompted to select a video from your camera roll. Here’s where you can choose the masterpiece you want to share. Just tap on the video you want, and you’ll see a preview of it.
Step 5: Add Details
Once you’ve selected your video, it’s time to spice it up! Here’s what you can do:
- Title: Create a catchy title that grabs attention.
- Description: Write a brief description of what your video is about. This helps viewers understand what to expect.
- Tags: Add relevant tags to make your video discoverable.
- Thumbnail: You can choose a frame from your video or upload a custom thumbnail.
Step 6: Privacy Settings
Before you hit that upload button, decide on your privacy settings. You can choose from:
- Public: Anyone can see your video.
- Unlisted: Only people with the link can view it.
- Private: Only you can see it.
Step 7: Upload
Feeling good about your video? Tap “Upload” in the top right corner, and let the magic happen! Your iPhone will start uploading the video, and you can track the progress. Once it’s done, you’ll receive a notification!
And there you have it! Your video is officially on YouTube, ready for everyone to see. You did it!
Also Read This: Can I Block Channels on YouTube? A Step-by-Step Guide to Managing Your YouTube Preferences
4. Editing Videos Before Uploading
Before hitting that upload button, it’s always a good idea to polish your video a little bit. Editing can drastically improve the quality of your content, making it more engaging for your viewers. Here’s how to do it right from your iPhone!
Why Edit?
Editing helps to:
- Remove any awkward pauses or mistakes.
- Add music or sound effects that enhance the viewing experience.
- Include text overlays or captions for clarity.
- Create a more professional-looking video overall.
Step 1: Choose an Editing App
There are tons of editing apps out there, but here are a few favorites:
- iMovie: A user-friendly app that comes pre-installed on most iPhones.
- InShot: Perfect for quick edits and adding music.
- Adobe Premiere Rush: Offers more advanced features for those looking to dive deeper.
Step 2: Import Your Video
Once you’ve downloaded your editing app, import the video you want to edit. This usually just involves tapping a few buttons to select your video from your camera roll.
Step 3: Cutting and Trimming
Look for options to trim or cut your video. Remove any parts that don’t add value to your content. Keep your video concise and engaging.
Step 4: Adding Music and Effects
Enhance your video with background music or sound effects. Most editing apps come with a library of royalty-free music you can use. Just make sure the music matches the vibe of your video!
Step 5: Text and Captions
Consider adding text overlays or captions. This can help emphasize key points or make your video more accessible. Make sure the text is easy to read against the video background.
Step 6: Save and Export
Once you’re happy with your edits, save your project and export the video. Make sure to choose the right resolution for YouTube, typically 1080p for HD quality.
Editing might feel daunting at first, but with practice, it becomes a fun part of your video creation process. Remember, the goal is to make your video shine and keep your viewers engaged. Happy editing!
Also Read This: How Much Does 30 Million Views on YouTube Pay? Breaking Down Earnings
5. Optimizing Your Video for Better Reach
So, you've filmed your masterpiece and are ready to upload it to YouTube. But wait! Before hitting that "upload" button, let’s talk about optimizing your video to ensure it reaches as many viewers as possible. Here are some key tips:
- Catchy Title: Your video title is the first thing viewers will see. Make it engaging and relevant. For example, instead of "Cooking Tutorial," try "5 Easy Recipes You Can Cook in Under 30 Minutes!"
- Compelling Description: Use the description box to provide more details about your video. Include keywords that people might search for. This helps YouTube understand what your video is about. For instance, if your video is about fitness, include terms like "workout," "exercise routine," and "health tips."
- Tags Matter: Tags help categorize your video and make it discoverable. Use a mix of broad and specific tags. For example, if you’re posting a travel vlog, use tags like "travel vlogs," "adventure tips," and "destination reviews."
- Custom Thumbnails: A great thumbnail can significantly increase your click-through rate. Use bright colors and clear images. Tools like Canva can help you design eye-catching thumbnails that reflect your video content.
- Engage with Your Audience: Encourage viewers to like, comment, and subscribe. The more engagement your video receives, the more likely YouTube will promote it. You might say, "If you found this video helpful, please give it a thumbs up!"
By taking these steps to optimize your video, you’ll not only enhance its visibility but also attract a larger audience. Remember, it’s all about making your content as appealing and accessible as possible!
6. Troubleshooting Common Upload Issues
Even with the best intentions, uploading videos can sometimes lead to hiccups. Here are some common issues you might encounter when uploading to YouTube from your iPhone, and how to troubleshoot them:
- Slow Upload Speeds: If your upload is taking forever, check your internet connection. Switch to Wi-Fi if you’re on mobile data or try resetting your router. Sometimes, simply waiting a few minutes can help!
- File Size Limit Exceeded: YouTube has a limit of 128GB or 12 hours for each video. If your video exceeds this, consider trimming it down or compressing it using apps like iMovie or Adobe Premiere Rush.
- Unsupported File Format: Ensure your video is in a YouTube-supported format (like MP4 or MOV). If you encounter a format issue, you can convert your video using apps available on the App Store.
- App Crashes: If the YouTube app crashes during the upload, try restarting your iPhone or updating the app to the latest version. Keeping your apps up-to-date can often resolve unexpected crashes.
- Video Processing Delays: After uploading, it may take some time for YouTube to process your video. If it seems stuck, give it some time. Check back after a few minutes; sometimes, patience is the key!
By understanding these common upload issues and how to troubleshoot them, you'll be better prepared for a smooth video upload experience. Don't let technical difficulties hold you back—keep creating and sharing your awesome content!
 admin
admin


