Rubber band bracelets are not just a fun craft; they’re a creative expression! Whether you're a seasoned DIY enthusiast or a beginner looking to dive into a new hobby, making these colorful accessories is a fantastic way to spend your time. They come in various styles and patterns, allowing you to showcase your personality or create meaningful gifts for friends and family. Plus, it’s incredibly satisfying to wear something you've made with your own hands! Let’s get started on this exciting journey of bracelet-making.
Materials Needed for Making Rubber Band Bracelets
Before you dive into crafting your rubber band bracelets, it's essential to gather all the necessary materials. Don't worry; you won’t need a ton of fancy tools! Here’s a simple list of what you’ll need:
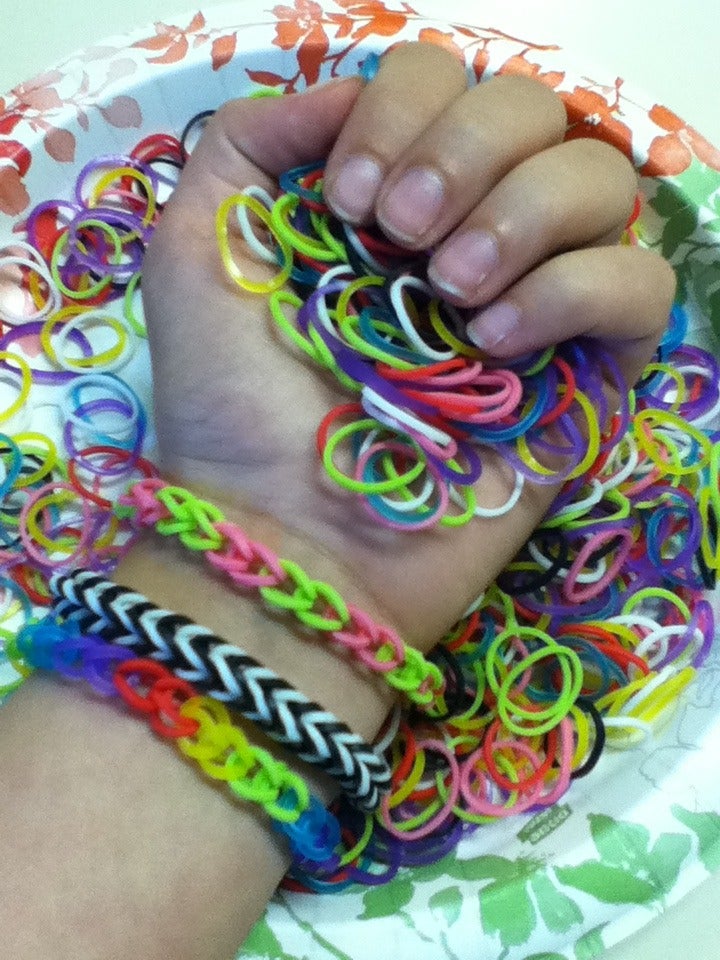
- Rubber Bands: Choose a variety of colors! You can find them in craft stores or online. Make sure they are specifically made for bracelet-making, as they are more durable.
- Bracelet Loom (optional): While you can make bracelets without a loom, it can help you create more intricate designs. If you prefer a simpler approach, your fingers will do just fine!
- Hook or Crochet Tool: This is useful for pulling bands through the loops, especially if you’re making more complex patterns.
- Clip/Clasp: To secure your bracelet at the end. These come in various styles, including S-clips and C-clips, and are essential for keeping your design intact.
- Scissors: Handy for trimming any excess rubber bands or cutting the stretchy material if needed.
- Work Surface: A flat, clean area to lay out your materials and work on your bracelet comfortably.
Once you have your materials ready, you're all set to unleash your creativity! As you experiment with different colors and patterns, you’ll discover unique designs that reflect your style. So, gather your friends or family, and let’s make some fabulous rubber band bracelets together!
Also Read This: How to Make a Bracelet with Loom Bands
3. Choosing Your Rubber Band Colors and Patterns
When it comes to making rubber band bracelets, the fun really begins with selecting your colors and patterns. The right choices can transform a simple bracelet into a stunning accessory that reflects your personality! Here are some tips to help you make the best decisions:
- Consider Your Style: Think about what colors you wear the most. Do you have a favorite outfit or a particular color palette that you gravitate towards? For example, if you love wearing blues and greens, perhaps a combination of turquoise and lime green would work perfectly.
- Mix and Match: Don’t be afraid to experiment! Choosing complementary colors can create a beautiful effect. You could try pairing bright colors like pink and yellow for a vibrant look or muted tones like peach and gray for something more subtle.
- Patterns Matter: Patterns can add depth to your bracelet. You might want to create a striped pattern with alternating colors or a checkerboard style for a fun twist. Using a combination of solid and glitter bands can also add a nice touch.
- Seasonal Themes: Why not create bracelets that match the seasons? For example, you can use pastels for spring, vibrant colors for summer, earthy tones for fall, and cool colors for winter. This not only makes your bracelets timely but can also be a great gift idea.
- Personal Significance: Use colors that have personal meaning for you or your friends. Maybe your best friend loves purple, or your favorite sports team has specific colors. Incorporating these can turn a simple bracelet into a meaningful keepsake.
Before you start, lay out your rubber bands and see how they look together. Sometimes, a combination that seems perfect in theory may not look as good in practice. Don’t hesitate to switch things up until you find the perfect match!
Also Read This: How to Change Your Dailymotion Username Easily
4. Basic Techniques for Creating Rubber Band Bracelets
Now that you’ve picked your colors and patterns, it’s time to dive into the world of bracelet-making! Here are some basic techniques you can use to create beautiful rubber band bracelets:
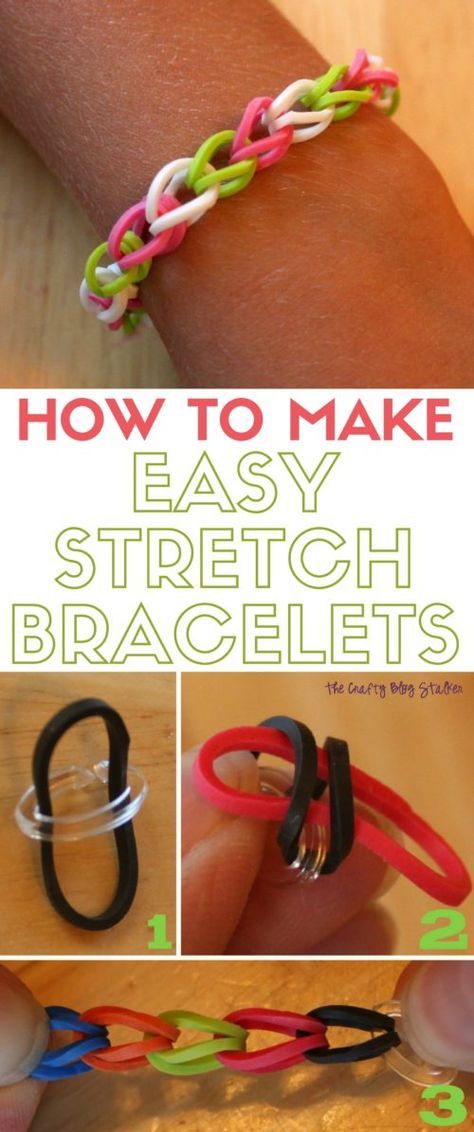
1. The Single Chain
This is the most straightforward technique, ideal for beginners. Here’s how to do it:
- Start with a rubber band, twist it into a figure-eight, and place it on your finger.
- Add another band, just like the first one.
- Pull the bottom band over the top one and off your finger.
- Continue adding bands, repeating this process until you reach your desired length.
2. The Fishtail
The fishtail technique is a bit more advanced but yields a stunning result:
- Begin with two rubber bands, looping them into a figure-eight on your finger.
- With your other hand, grab the left band and pull it over to the center.
- Then, grab the right band and do the same.
- Keep alternating sides until your bracelet is complete!
3. The Ladder
This technique creates a unique, textured look:
- Start with a base band stretched across your loom or finger.
- Add bands vertically, crossing them over each other, like rungs on a ladder.
- Once you've filled your base, carefully remove the bracelet, and you’re done!
Remember, practice makes perfect! Don’t be discouraged if your first few attempts don’t come out perfectly. Each bracelet is a step toward mastering your skills. Enjoy the process, and soon you'll be creating amazing designs in no time!
Also Read This: How to Make a Makeup Cake Creative Dailymotion Guide
5. Popular Bracelet Designs to Try
If you’re diving into the world of rubber band bracelets, you’re in for a colorful treat! There are so many fun designs to explore that can cater to different skill levels. Here are some popular bracelet designs that you can try your hand at:
- Single Chain: This is the most basic design and a great starting point for beginners. Just use one rubber band at a time to create a simple yet stylish chain.
- Fishtail Bracelet: A step up from the single chain, this design resembles a fishtail. It’s made using two colors of rubber bands and is visually striking!
- Chevron Bracelet: This design features a zigzag pattern and is perfect for showcasing multiple colors. It’s a bit more complex but totally worth it!
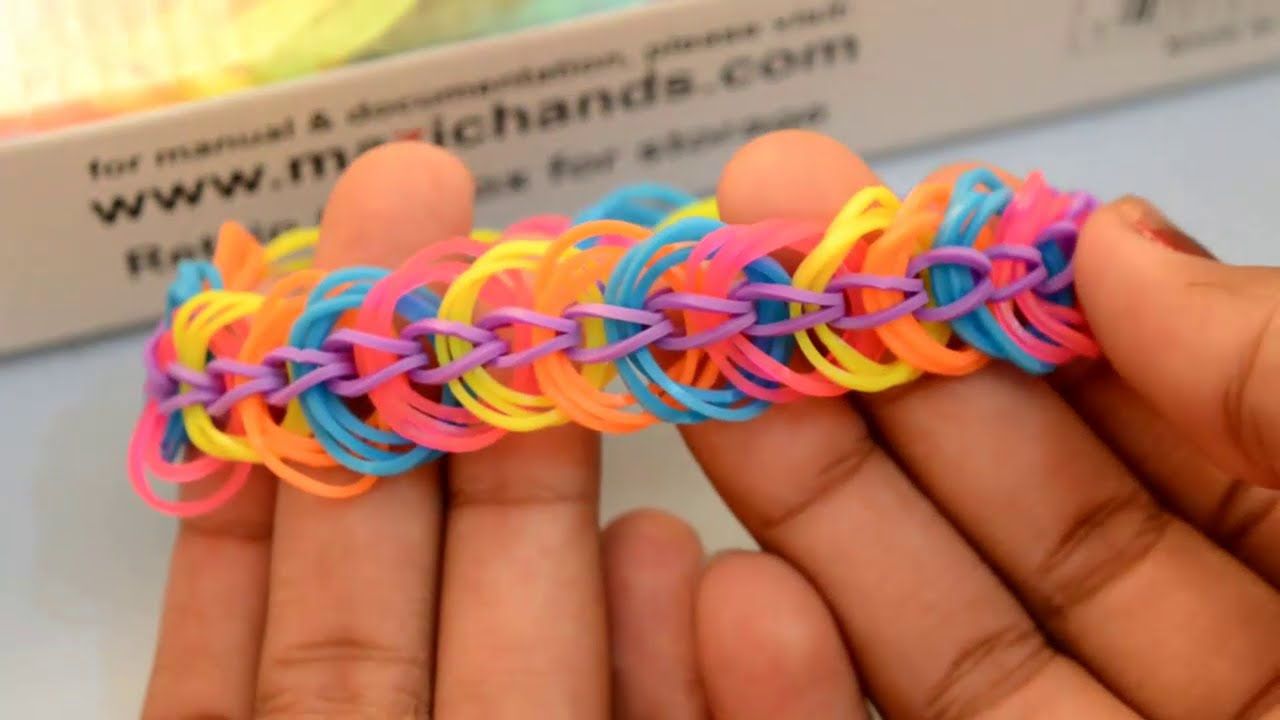
- Starburst Bracelet: This design has a unique, star-like shape. It’s fun to make and can be a great conversation starter.
- Hexafish Bracelet: A combination of hexagons and fishtails, this design is intricate but beautiful. It’s recommended for those who have mastered the basics.
As you become confident in your bracelet-making skills, feel free to mix and match colors and patterns. The possibilities are endless! You can even create themed bracelets for special occasions, such as holidays or birthdays. Remember, the more you practice, the more designs you’ll discover. So grab your rubber bands and get creative!
Also Read This: How to Download Dailymotion Videos Using IDM
6. Tips for Perfecting Your Rubber Band Bracelets
Creating beautiful rubber band bracelets can be a rewarding hobby, but like any craft, it takes a bit of practice to truly master. Here are some handy tips to help you perfect your rubber band bracelets:
- Choose Quality Rubber Bands: Not all rubber bands are created equal. Opt for high-quality bands that are stretchy but durable. Brands like Rainbow Loom or Cra-Z-Loom often provide better results.
- Use a Loom: While it’s possible to make bracelets without a loom, using one can significantly simplify the process. It helps keep your bands in place and allows for more intricate designs.
- Keep Tension Even: When you’re looping rubber bands, make sure you maintain even tension. Too tight and your bracelet will be stiff; too loose and it might fall apart. Find that sweet spot!
- Experiment with Colors: Don’t be afraid to mix and match colors. Use a color wheel for inspiration and experiment with complementary colors for a visually appealing look.
- Practice Makes Perfect: Just like learning an instrument, bracelet-making gets easier with practice. Don’t be discouraged by initial attempts that don’t turn out as expected. Keep trying, and you’ll improve!
And lastly, enjoy the process! Making rubber band bracelets is not just about the final product but also the joy of creating something unique. So, gather your friends, share tips, and make it a fun group activity!
Also Read This: How to Download Videos from Dailymotion on PC
7. Where to Share Your Creations
Once you've crafted your stunning rubber band bracelets, it’s time to show them off! Sharing your creations not only brings joy to others but can also inspire new ideas and techniques. Here are some fantastic platforms and communities where you can showcase your work:
- Social Media: Platforms like Instagram, Facebook, and Pinterest are perfect for sharing photos of your bracelets. Use popular hashtags like #RubberBandBracelets and #DIYJewelry to reach a broader audience.
- Etsy: If you’re feeling entrepreneurial, consider setting up a shop on Etsy. This can be an excellent way to sell your creations and make some pocket money. Don’t forget to take high-quality photos that showcase the details of your work!
- Craft Forums: Join craft forums like Craftster or Reddit's r/crafts. Share your projects, ask for feedback, and connect with fellow crafters who share your passion!
- YouTube: Consider creating a channel to showcase your bracelet-making process! Many people love watching tutorials, so you could easily turn your love for making rubber band bracelets into a series of engaging videos.
- Local Craft Fairs: Look for local craft fairs or community events where you can set up a booth. This is an excellent opportunity not just to sell, but to connect with other local artisans.
Don’t forget to engage with your audience! Respond to comments, participate in discussions, and share tips and tricks that you’ve learned along the way. Creating a community around your creations can be incredibly rewarding and can lead to new friendships and collaborations.
8. Conclusion and Final Thoughts
Making rubber band bracelets is more than just a fun craft—it's a creative outlet that allows you to express yourself and connect with others. As you’ve seen throughout this guide, the process is simple yet versatile, offering endless possibilities for design and customization.
Whether you're making bracelets for yourself, as gifts, or even to sell, each piece tells a story and carries a bit of your personality. Remember, the key to enjoying this craft is to have fun and experiment. Don’t be afraid to try new techniques or color combinations!
As you continue on your bracelet-making journey, keep these tips in mind:
- Practice Makes Perfect: The more you create, the better you’ll get. Don’t be discouraged by initial failures—every mistake is an opportunity to learn!
- Stay Inspired: Follow other crafters online, watch tutorials, and seek out new designs to spark your creativity.
- Share Your Passion: Engage with the crafting community, share your work, and don’t hesitate to ask for feedback. You’d be surprised by how supportive and encouraging fellow crafters can be!
So grab your rubber bands, get your fingers ready, and let your imagination run wild. Happy crafting!
 admin
admin


