Changing your email address on LinkedIn might seem daunting, but it's usually a straightforward process! Whether you’ve switched jobs, improved your online privacy, or simply want to update your contact info, knowing how to navigate LinkedIn’s settings will make the transition seamless. Let’s dive into why you might need to make this change and how to do it easily!
Why You Might Need to Change Your LinkedIn Email
There are several reasons why updating your email address on LinkedIn can be beneficial. Here are a few common scenarios:
- Job Changes: If you've switched to a new job, you might want to use your personal email instead of your work email. This helps ensure you retain access to your account if you leave the company.
- Privacy Concerns: Many professionals prefer using personal emails for networking to keep their work and personal lives separate. This can also help maintain privacy, especially if your work email is visible to colleagues.
- Outdated Email: Sometimes, people change their email providers or simply want a more professional-sounding address. Updating your LinkedIn email keeps your profile current and relevant.
- Security Reasons: If you suspect that your email address has been compromised, it’s wise to change it promptly. A fresh email can enhance your account's security.
Additionally, changing your email can improve your overall LinkedIn experience. For instance, you may want to ensure you’re receiving notifications at an address you check regularly. Here’s a quick overview of when you might consider making that change:
| Reason | Action |
|---|---|
| Changed jobs | Update to a personal email |
| Privacy concerns | Switch to a personal email |
| Outdated info | Change to a new professional email |
| Security issues | Replace with a new email |
Ultimately, keeping your LinkedIn email updated is crucial to maintaining your professional persona and ensuring you stay connected with your network smoothly. If any of these scenarios resonate with you, it’s time to consider changing your email on LinkedIn! Stay tuned for the next section, where we’ll walk you through the steps to make this change effortlessly.
Also Read This: How to Add Awards to Your LinkedIn Profile: A Quick Guide
3. How to Access Your LinkedIn Account Settings
Alright, let’s get down to business! To update your email address on LinkedIn, the first step is to access your account settings. Don’t worry; it’s super simple! Just follow these friendly steps:
- Log into LinkedIn: Start by visiting www.linkedin.com and enter your login credentials. If you’re already signed in, great! You’re just a few clicks away from your settings.
- Navigate to Your Profile: Click on your profile picture, which is usually found at the top right corner of the homepage. This will take you directly to your profile page.
- Find the Settings: Look for the 'Me' icon—it’s right next to your profile picture. Click on it, and a drop-down menu will appear. From there, select 'Settings & Privacy'.
- Explore the Settings Menu: Now you’re in the settings area! Here, you’ll see various sections related to your account. Don’t worry if it seems overwhelming; we’ll focus on what you need right now!
Once you’ve accessed your settings, you’re on the right track to changing that email address. Easy peasy, right? Let’s move on to the next step!
Also Read This: How to Add Achievements to LinkedIn? Highlighting Your Career Successes on LinkedIn
4. Steps for Updating Your Email Address
Now that you're in the settings, it's time to update your email address. This part is just as straightforward as getting to the settings. Here’s how to do it:
- Locate the 'Login and Security' Section: In the settings menu, scroll until you find 'Login and Security'. This is where you’ll manage your email and password.
- Click on 'Email Addresses': Within this section, look for 'Email addresses' and click on it. Here, you’ll see your current email address and options to add a new one.
- Add New Email Address: Want to change it? Click on the 'Add email address' option. A new field will pop up where you can enter your new email. Make sure to double-check for typos!
- Verify Your New Email: Once you’ve entered your new email address, LinkedIn will send a verification link to that email. Be sure to check your inbox (and maybe your spam folder!) to find this email and click the verification link.
- Set Your New Email as Primary: After verifying, you can go back to the email address section. Click on your new email and select 'Set as primary'. This means LinkedIn will use this email for all communication moving forward.
- Remove Old Email (Optional): If you no longer want the old email linked to your account, you can remove it. Just click the 'Remove' option next to your old email.
And there you have it! You’ve successfully updated your email address on LinkedIn. Now you can stay connected without missing a beat!
Also Read This: Should You Put Your Resume on LinkedIn? Tips for Building Your Profile
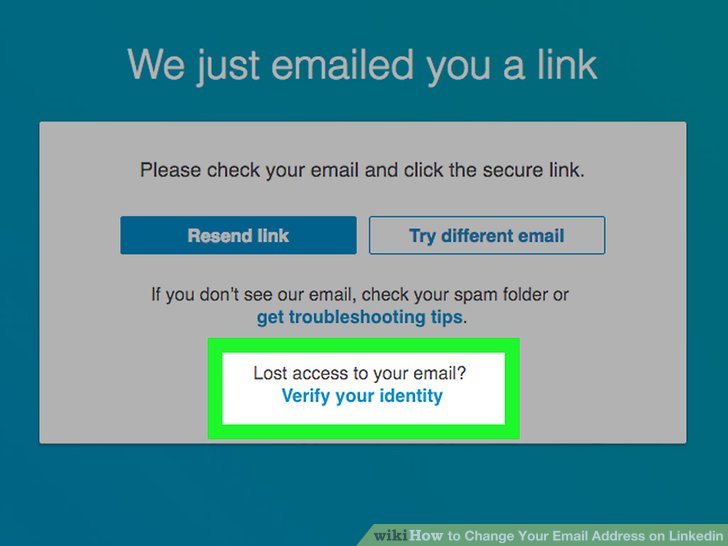
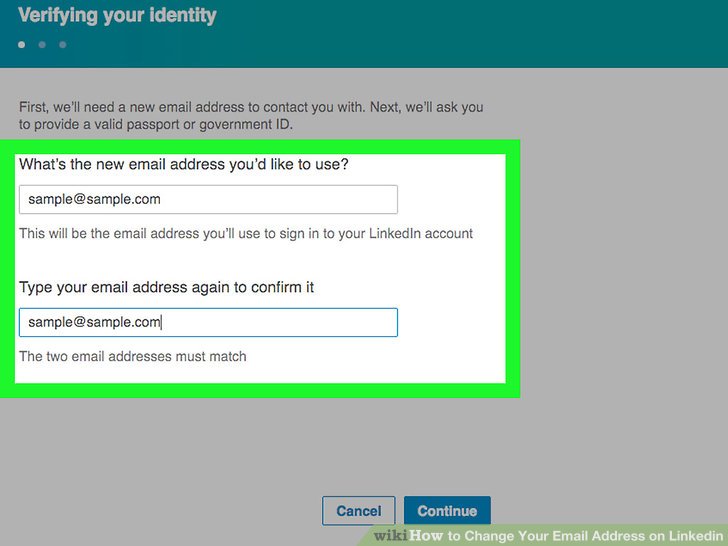
5. Verifying Your New Email Address
After you’ve changed your email address on LinkedIn, the next crucial step is verifying that new email. This step ensures that LinkedIn confirms you own this new address, securing your account. Don't worry; it's a straightforward process!
Here’s how you can verify your new email address:
- Check Your Inbox: Once you update your email, LinkedIn will send a verification email to the new address you provided. Make sure to check your inbox for an email from LinkedIn.
- Open the Email: The subject line will typically say something like “Verify Your Email Address.” Open that email.
- Click the Verification Link: Inside the email, there will be a button or link that says “Verify Email” or something similar. Click on that link.
- Confirmation: After clicking, you’ll be redirected to LinkedIn. If everything is in order, you’ll see a confirmation message stating that your email has been successfully verified.
If you don't see the verification email, it might have landed in your spam or junk folder, so be sure to check there too. If you’re still having trouble, you can resend the verification email from your LinkedIn account settings.
Pro Tip: Ensure that your email provider's settings allow emails from LinkedIn, as some strict filters might block these verification emails. Adding LinkedIn to your contact list can help prevent this issue!
6. Common Issues and Troubleshooting Tips
Even with a straightforward process, you might encounter a few hiccups while changing your email address on LinkedIn. Don’t fret! Here are some common issues and how to troubleshoot them:
- Didn’t Receive the Verification Email: If you haven’t received the email, first check your spam folder. If it’s not there, try resending the verification email from your settings.
- Email Already in Use: If you get a message saying your new email is already associated with another LinkedIn account, you’ll need to recover that account or choose a different email address.
- Link Expired: Sometimes, the verification link can expire if not used within a specific time frame. If that happens, just request a new verification email.
- Temporary Glitches: Occasionally, LinkedIn may face technical issues. If you can’t change your email or verify it, try logging out and logging back in or using another device or browser.
If you’ve tried all these steps and are still having issues, don’t hesitate to reach out to LinkedIn support. They’re there to help and can provide more specific troubleshooting for your unique situation.
By staying proactive and following these tips, you’ll ensure a smooth transition to your new email address and keep your LinkedIn experience hassle-free!
 admin
admin


