Drawing eyes can be one of the most rewarding aspects of sketching. They are often referred to as the "windows to the soul," and capturing their essence can bring your artwork to life. In this guide, we'll explore the steps and techniques to help you master the art of drawing eyes, specifically for a sketching tutorial on Dailymotion. Get ready to dive into the world of eye drawing, where we'll cover everything from materials to techniques!
Materials Needed for Drawing Eyes
Before you start sketching, gathering the right materials is essential. The quality of your tools can significantly impact the outcome of your drawing. Here’s a list of materials you’ll need:
- Graphite Pencils: A range of pencils from HB to 6B will help you achieve different shades and details.
- Eraser: A kneaded eraser is perfect for corrections without leaving residue.
- Sketchbook: Smooth, high-quality paper is ideal for pencil sketches, allowing for better blending.
- Blending Stumps: These help to smooth out shading and create realistic textures.
- Reference Images: Collect a variety of eye references to capture different shapes and expressions.
- Fine Liner Pens: Use these for outlining or adding details, especially if you want to enhance your sketch later.
Here’s a quick reference table summarizing the materials:
| Material | Purpose |
|---|---|
| Graphite Pencils | Shading and detail work |
| Eraser | Correction and refinement |
| Sketchbook | Drawing surface |
| Blending Stumps | Smoothing and blending |
| Reference Images | Inspiration and accuracy |
| Fine Liner Pens | Detailing and outlining |
Once you have these materials in hand, you’re all set to start your eye-drawing journey! Each tool serves a unique purpose, so make sure to familiarize yourself with them. Happy sketching!
Also Read This: How to Curl Hair with a Curling Iron for Gorgeous Curls
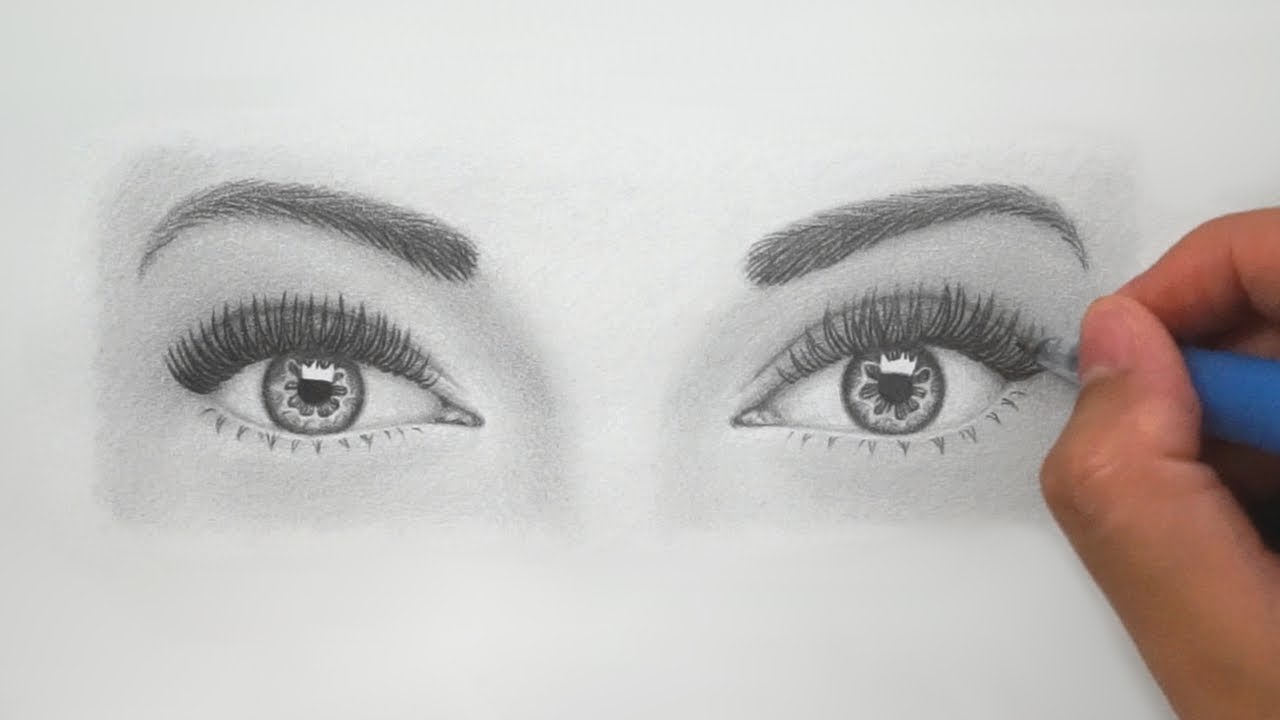
Step-by-Step Guide to Sketching Eyes
Sketching eyes can seem daunting, but with a clear step-by-step approach, you'll find it much easier! Let's break it down:
- Start with Basic Shapes: Begin by drawing an almond shape for the outline of the eye. This will serve as your foundation.
- Add Guidelines: Lightly draw a horizontal line through the center of the almond shape. This will help you place the iris and pupil correctly.
- Draw the Iris and Pupil: Inside the almond shape, add a circle for the iris, making sure it touches the horizontal guideline. Draw a smaller circle in the center for the pupil.
- Create the Eyelids: Sketch the upper eyelid by adding a curved line above the almond shape. For the lower eyelid, draw another curve below, making sure it’s more subtle.
- Add Eyelashes: Draw short, curved lines extending from the eyelid. Remember, eyelashes aren’t uniform; vary their lengths for a more natural look.
- Shade and Texture: Begin shading the iris, adding depth by darkening the outer edges. You can also add little lines within the iris to mimic texture.
- Highlight the Eye: Leave a small area of the pupil and iris unshaded to represent reflection. This will bring your eye to life!
- Final Touches: Go over your lines to darken them and add any additional details you feel necessary.
With practice, your eye sketches will improve significantly. Don’t rush; enjoy the process!
Also Read This: How to Make Air Conditioner at Home: DIY Cooling System on Dailymotion
Tips for Enhancing Eye Drawings
Ready to take your eye drawings to the next level? Here are some handy tips and tricks:
- Study Real Eyes: Spend some time observing real eyes or reference photos. This will give you insights into shapes, colors, and textures.
- Experiment with Angles: Eyes look different from various angles. Try sketching eyes from side views or looking up or down for variety.
- Focus on Expression: Eyes convey emotions. Adjust your sketches by altering the eyebrow position and eyelid shape to reflect different feelings.
- Use Quality Materials: Invest in good pencils and paper. Higher quality supplies can make a significant difference in the final result.
- Practice Shading Techniques: Explore various shading methods like hatching, cross-hatching, or stippling to add dimension to your drawings.
- Seek Feedback: Share your work with friends or online art communities. Constructive criticism can help you improve faster!
Remember, every artist has their unique style. Embrace yours and keep practicing!
Also Read This: How to Change Dress Color in Photoshop CS6: A Complete Guide for Beginners
Common Mistakes to Avoid
When it comes to drawing eyes, even seasoned artists can slip up. Here are some common pitfalls to watch out for:
- Neglecting Proportions: One of the biggest mistakes is getting the proportions of the eye wrong. The distance between eyes is typically one eye-width apart. If you skew this, it can lead to a distorted look.
- Overly Simplifying Shapes: Many beginners tend to draw eyes as flat shapes. Remember, eyes are three-dimensional! Incorporating curves and varying line thickness can add depth.
- Ignoring Reflections: Highlights in the eye can bring it to life. Forgetting to include them makes your drawing look lifeless. Consider the light source and add small white dots or areas to indicate reflection.
- Overdoing the Eyelashes: While eyelashes can enhance an eye, too many can make it look cartoonish. Focus on the natural flow and varying lengths for realism.
- Not Paying Attention to Skin Tone: The area around the eye is just as important. Make sure to blend softly and consider the undertones to match the skin color accurately.
By being mindful of these common mistakes, you’ll find your eye drawings becoming more realistic and engaging. Remember, practice makes perfect, so don't hesitate to retry until you feel satisfied with your work!
Conclusion
In conclusion, drawing eyes can be a rewarding yet challenging endeavor. It’s an essential skill that adds character and emotion to your sketches. Here’s a quick recap of what you’ve learned:
- Understanding Anatomy: Eyes aren’t just simple shapes; they have structure and depth.
- Practice Makes Perfect: The more you draw, the better you’ll get. Experiment with different styles!
- Embrace Mistakes: Every error is a stepping stone to improvement. Don’t shy away from them.
Make use of resources like Dailymotion to watch tutorials and observe different techniques. Over time, you’ll find your unique style emerging. So grab your sketchpad, unleash your creativity, and enjoy the process of capturing the beauty of eyes in your art!
 admin
admin


