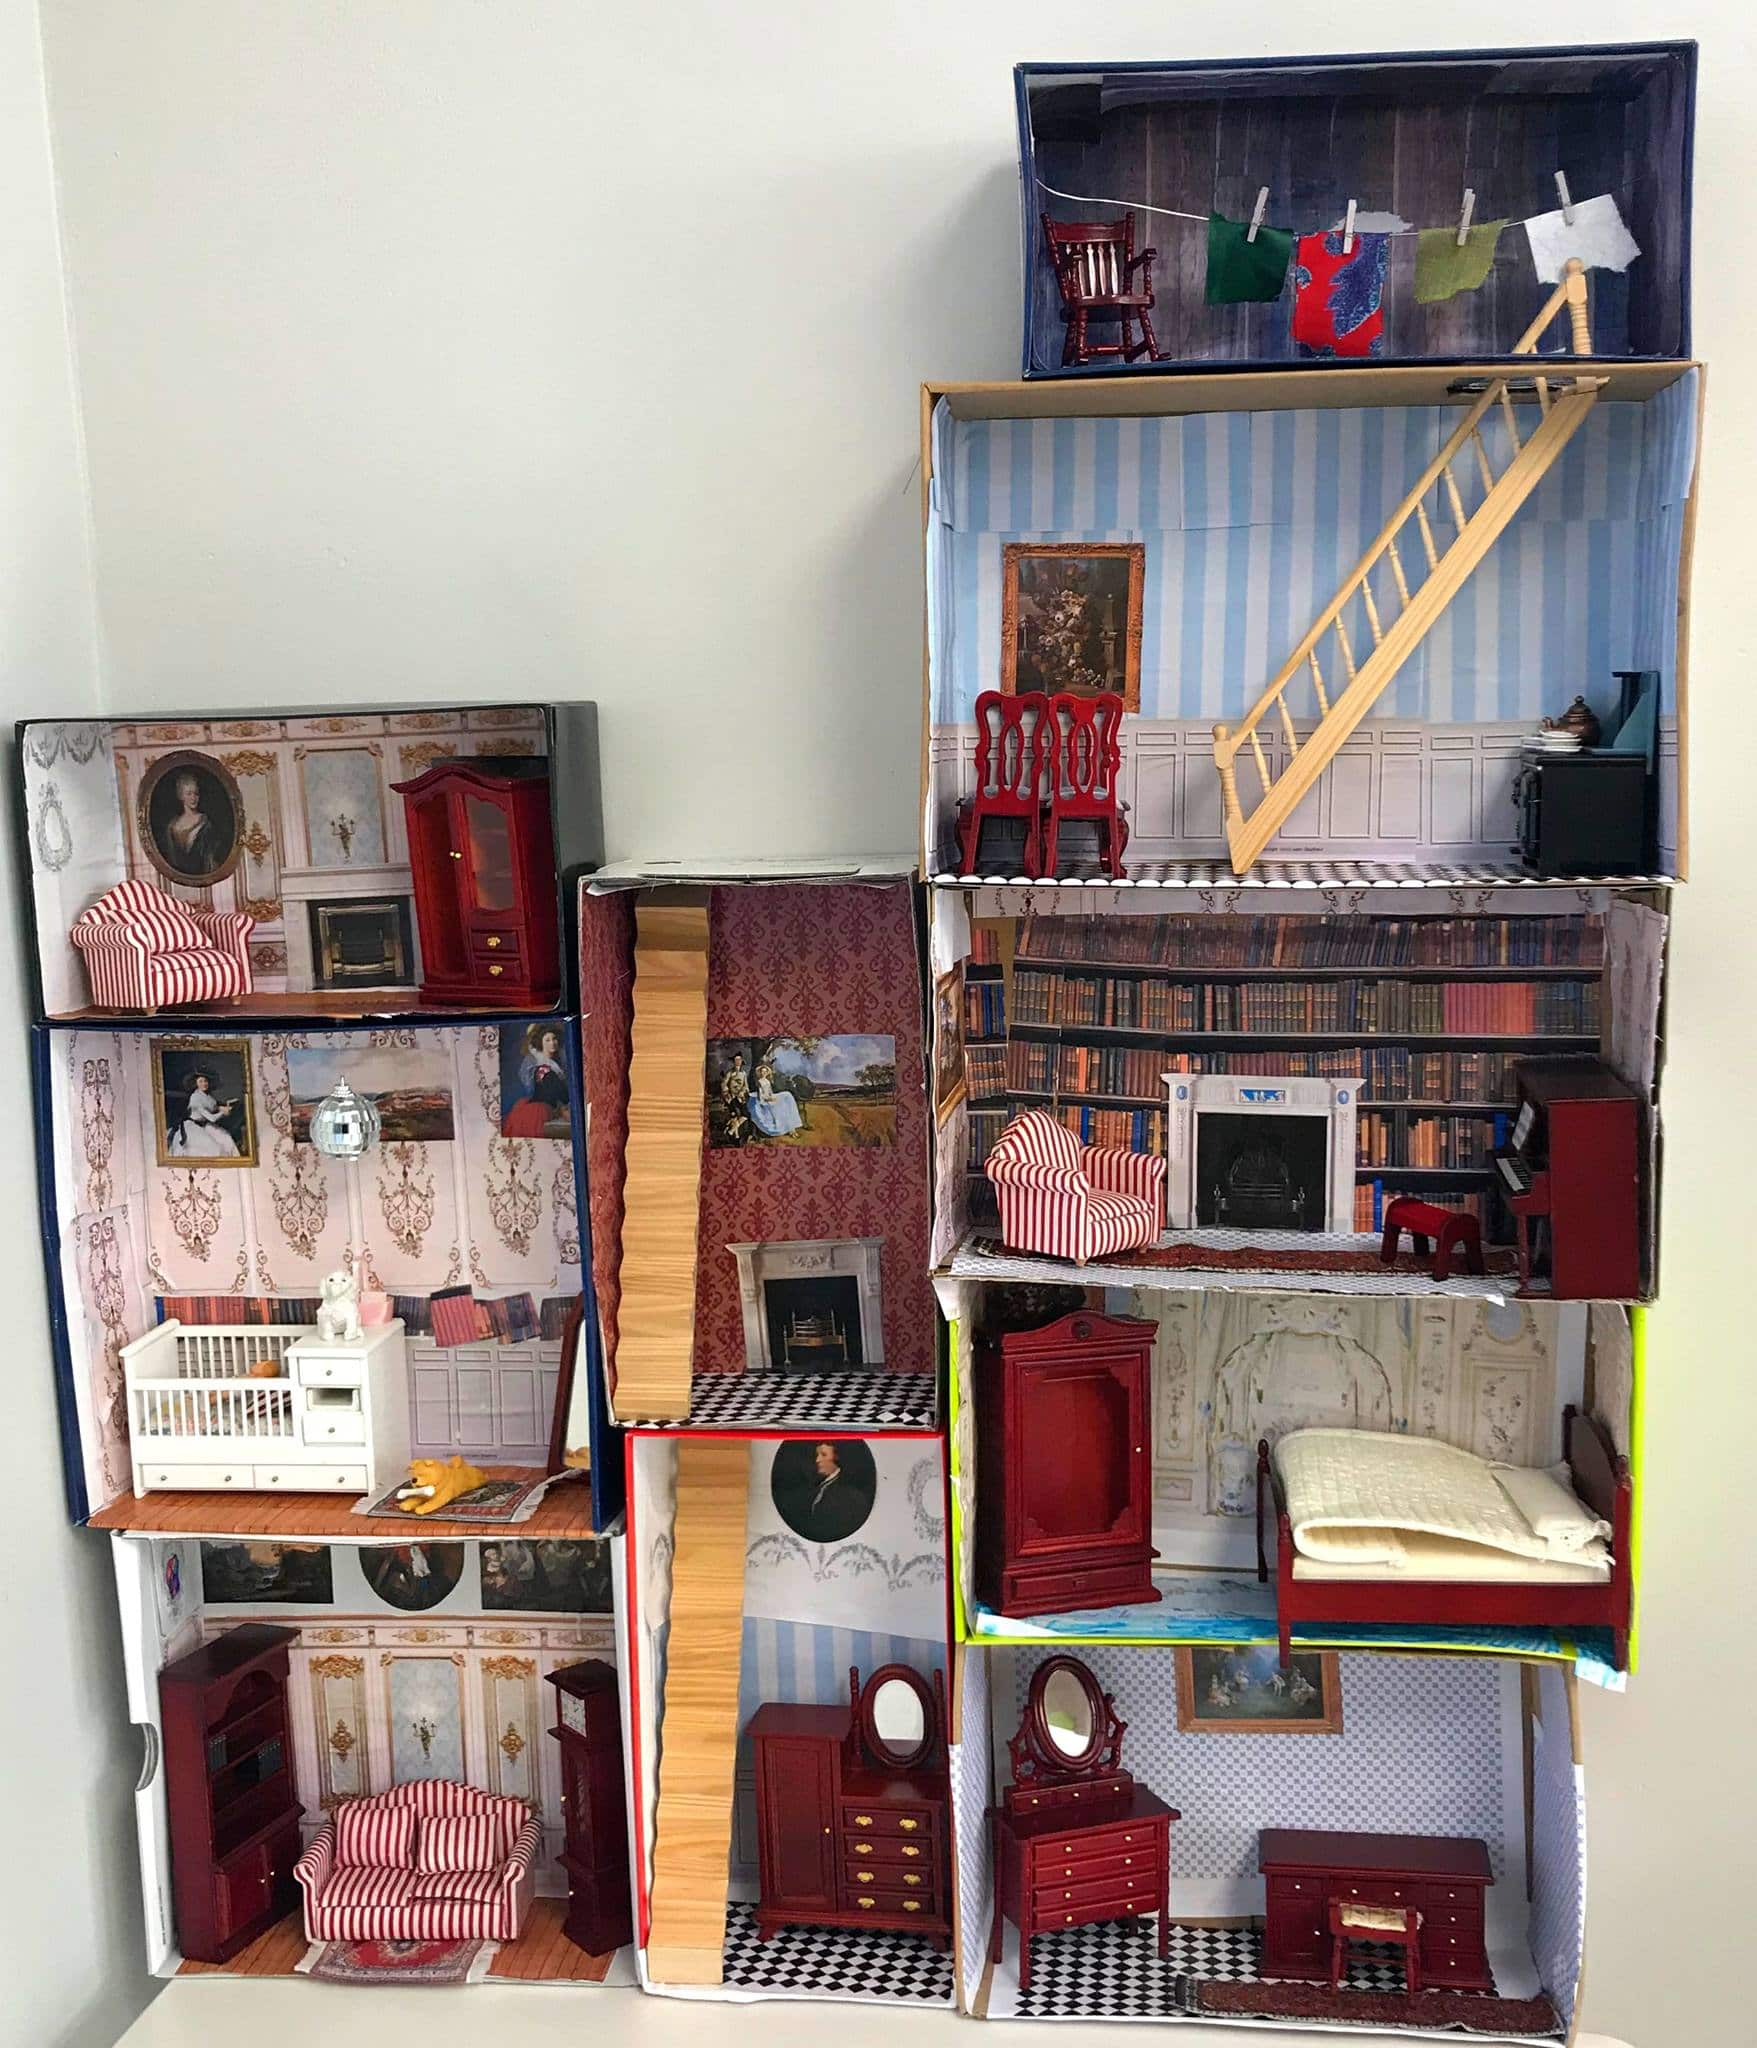
Creating a dollhouse from a shoebox is a delightful project that merges creativity with resourcefulness. Whether you're a parent looking to engage your child in a fun activity or an adult seeking a nostalgic craft, this DIY project is perfect for you. Not only does it spark imagination, but it also gives a second life to an otherwise discarded shoebox. Let’s dive into what you’ll need to bring your miniature home to life!
Materials Needed
Before you get started, it’s essential to gather everything you'll need for your shoebox dollhouse project. Here’s a handy list to ensure you have all the materials ready:
- Shoebox: A standard shoebox will serve as the main structure. Consider any size, but one with a lid is great for creating a roof!
- Scissors: You'll need a pair to cut openings for windows and doors.
- Glue or Tape: A strong adhesive or clear tape will help secure different parts of your dollhouse.
- Paint or Markers: Use these to decorate the exterior and interior. Acrylic paint works wonderfully for a vibrant finish.
- Craft Paper or Fabric: These can create beautiful wallpapers or flooring. Choose patterns that inspire you!
- Buttons, Beads, or Other Small Items: These make fantastic decorations or can serve as furniture in your dollhouse.
- Miniature Figures: You might want some tiny dolls or figures to inhabit your new creation.
- Ruler: For measuring and ensuring your cuts are straight.
Having these materials will set you up for a successful and enjoyable crafting experience, allowing you to unleash your inner architect!
Also Read This: How to Make a Side Puff Hairstyle: Quick Styling Ideas on Dailymotion
Step-by-Step Instructions
Making a dollhouse out of a shoebox is a fun and simple project that you can complete in a few hours. Here’s a step-by-step guide to get you started:
- Gather Your Materials: Before diving in, collect everything you’ll need. You’ll require a shoebox, scissors, glue, colored paper, markers, small furniture (you can make your own or use miniatures), and decorative items.
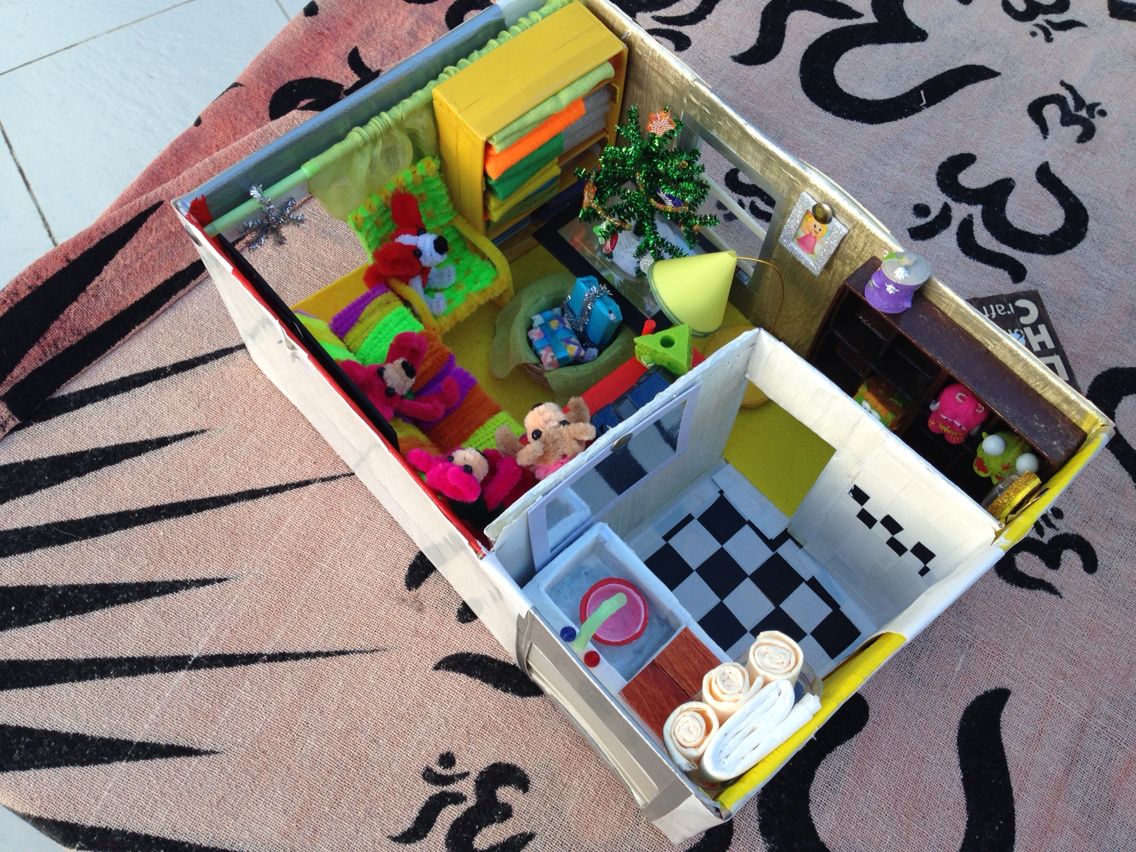
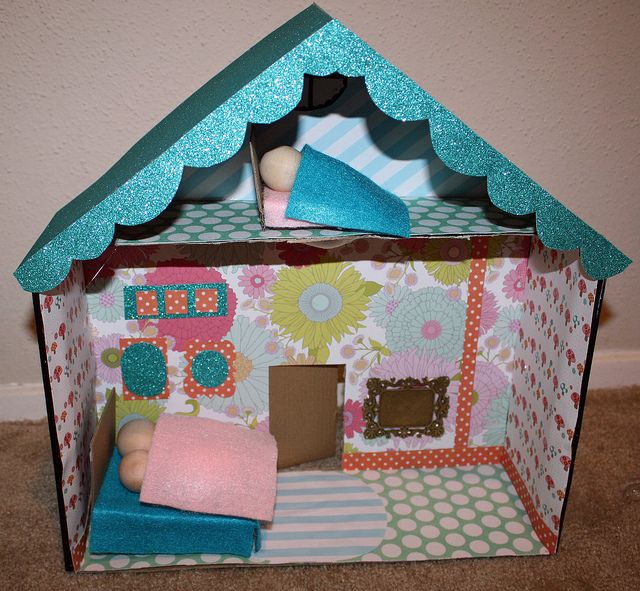
- Prepare the Shoebox: Start by cutting the lid off the shoebox. If you want multiple rooms, you can cut the box in half or create partitions inside using cardboard.
- Design Your Layout: Sketch a rough layout of your dollhouse rooms on a piece of paper. Consider where to place the living room, bedroom, kitchen, and bathroom. This will help you visualize the space.
- Paint or Cover the Walls: Use paint or colored paper to cover the walls and floor. This is where you can get creative! Choose bright colors or patterns to make it vibrant.
- Add Windows and Doors: Cut out small squares for windows and rectangles for doors. You can use clear plastic or transparent paper for window panes.
- Arrange Furniture: Place your furniture inside the rooms. If you’re making your own furniture, you can use cardboard, bottle caps, or even clay to create mini tables and chairs.
- Final Touches: Once everything is in place, add personal touches like artwork on the walls, rugs on the floor, and any decorative items you’ve collected.
Also Read This: Quick Methods to Embed Dailymotion Videos into HTML Pages
Creative Decoration Ideas
Now that your dollhouse is built, it’s time to decorate it! Here are some fun and creative ideas:
- Furniture DIY: Create furniture from recycled materials. For example, use an old matchbox as a bed, or bottle caps as stools.
- Wall Art: Use stickers or print out tiny pictures to hang on the walls. You could even draw your own art for a personal touch!
- Textiles: Fabric scraps can be turned into curtains, cushions, or even bedspreads. Just glue or sew them into place for a cozy look.
- Outdoor Space: If there’s space, create a little garden using small stones, twigs, and faux flowers. A mini picnic area with a blanket can add charm!
- Lighting: Consider adding tiny LED lights to illuminate your dollhouse. A small battery-operated fairy light can do wonders!
Remember, the key is to let your creativity flow. The more personal touches you add, the more unique your dollhouse will become!
Also Read This: How to Make a Cake in a Microwave: Dailymotion’s Quick Baking Guide
Tips for Success

Creating a dollhouse out of a shoebox is an exciting project, but there are some tips to ensure that your crafting experience is smooth and enjoyable. Here are some handy suggestions:
- Choose the Right Box: Not all shoeboxes are created equal! Look for a sturdy, clean box with a removable lid if possible. This makes it easier to decorate the inside.
- Plan Your Layout: Before diving in, sketch out a rough layout. Decide where each room will be and how you want to divide the space. This will help you visualize the end result.
- Use Recycled Materials: Get creative with what you have! Old magazines, fabric scraps, and even buttons can become furniture or decor. The more unique your materials, the more special your dollhouse will be.
- Paint with Care: If you’re painting the inside of the box, use non-toxic paints and let them dry completely before placing any decorations inside. This avoids smudges and mess.
- Involve the Kids: If this is a family project, involve your kids in every step! Let them choose colors, decorate rooms, and make furniture. It enhances creativity and fun.
- Be Patient: Crafting takes time. Don’t rush through the process. Take breaks and admire your progress. Remember, it’s all about enjoying the journey!
Conclusion
Building a dollhouse from a shoebox is not only a fun and creative project, but it also encourages imagination and resourcefulness. By following the tips shared above, you can create a charming miniature home that reflects your personality or that of your child.
In the end, it’s not just about the finished product; it’s about the memories made along the way. Each little detail you add tells a story, whether it’s a simple drawing on the wall or a tiny piece of furniture crafted from recycled bits. So gather your materials, invite some friends or family, and let your creativity shine!
So grab that shoebox and get started—it’s time to create a one-of-a-kind dollhouse that will be cherished for years to come!
 admin
admin


