Rubber bracelets have become a popular fashion accessory, transcending mere trends to become symbols of personal expression and support for various causes. These versatile bands are not just stylish but also serve as reminders of commitments or affiliations, making them a favorite among different age groups. Whether you’ve seen them at charity events, sports games, or as part of fashion statements, their appeal is undeniable.
Creating rubber bracelets at home can be a fun and rewarding experience. It allows you to unleash your creativity while crafting something meaningful. Plus, making them yourself can save you money and give you the chance to customize your designs in ways that store-bought options can't. So, if you're ready to dive into a creative project that’s both enjoyable and simple, let’s explore what you’ll need and how to get started!
Materials Needed for Your DIY Project
Before you start making your own rubber bracelets, it's essential to gather the right materials. Here's a handy list to get you prepared:
- Silicone Rubber Bands: The main material for your bracelets. They come in various colors and sizes, so choose the ones that resonate with your style.
- Bracelet Molds: These are helpful if you want specific shapes for your bracelets. You can find flexible molds in various designs.
- Coloring Agents: If you want to add unique colors or effects, consider using liquid dyes or pigments specifically made for silicone.
- Cutting Tools: Scissors or a craft knife will help you trim your rubber bands into the desired lengths.
- Heat Source: A heat gun or a pot of boiling water can help shape and mold your rubber bands.
- Gloves: To keep your hands clean and to protect from any dyes.
- Measuring Tape: For precise measurements to ensure your bracelets fit comfortably.
Gathering these materials will set you up for a successful DIY bracelet-making session. The beauty of this project is that you can customize it to your liking, making each piece uniquely yours!
Also Read This: How to Stream Dailymotion on PS4 for Seamless Video Playback
Step-by-Step Instructions
Making your own rubber bracelets is a fun and creative project that anyone can dive into! Let’s break it down into simple steps you can follow to create your unique designs.
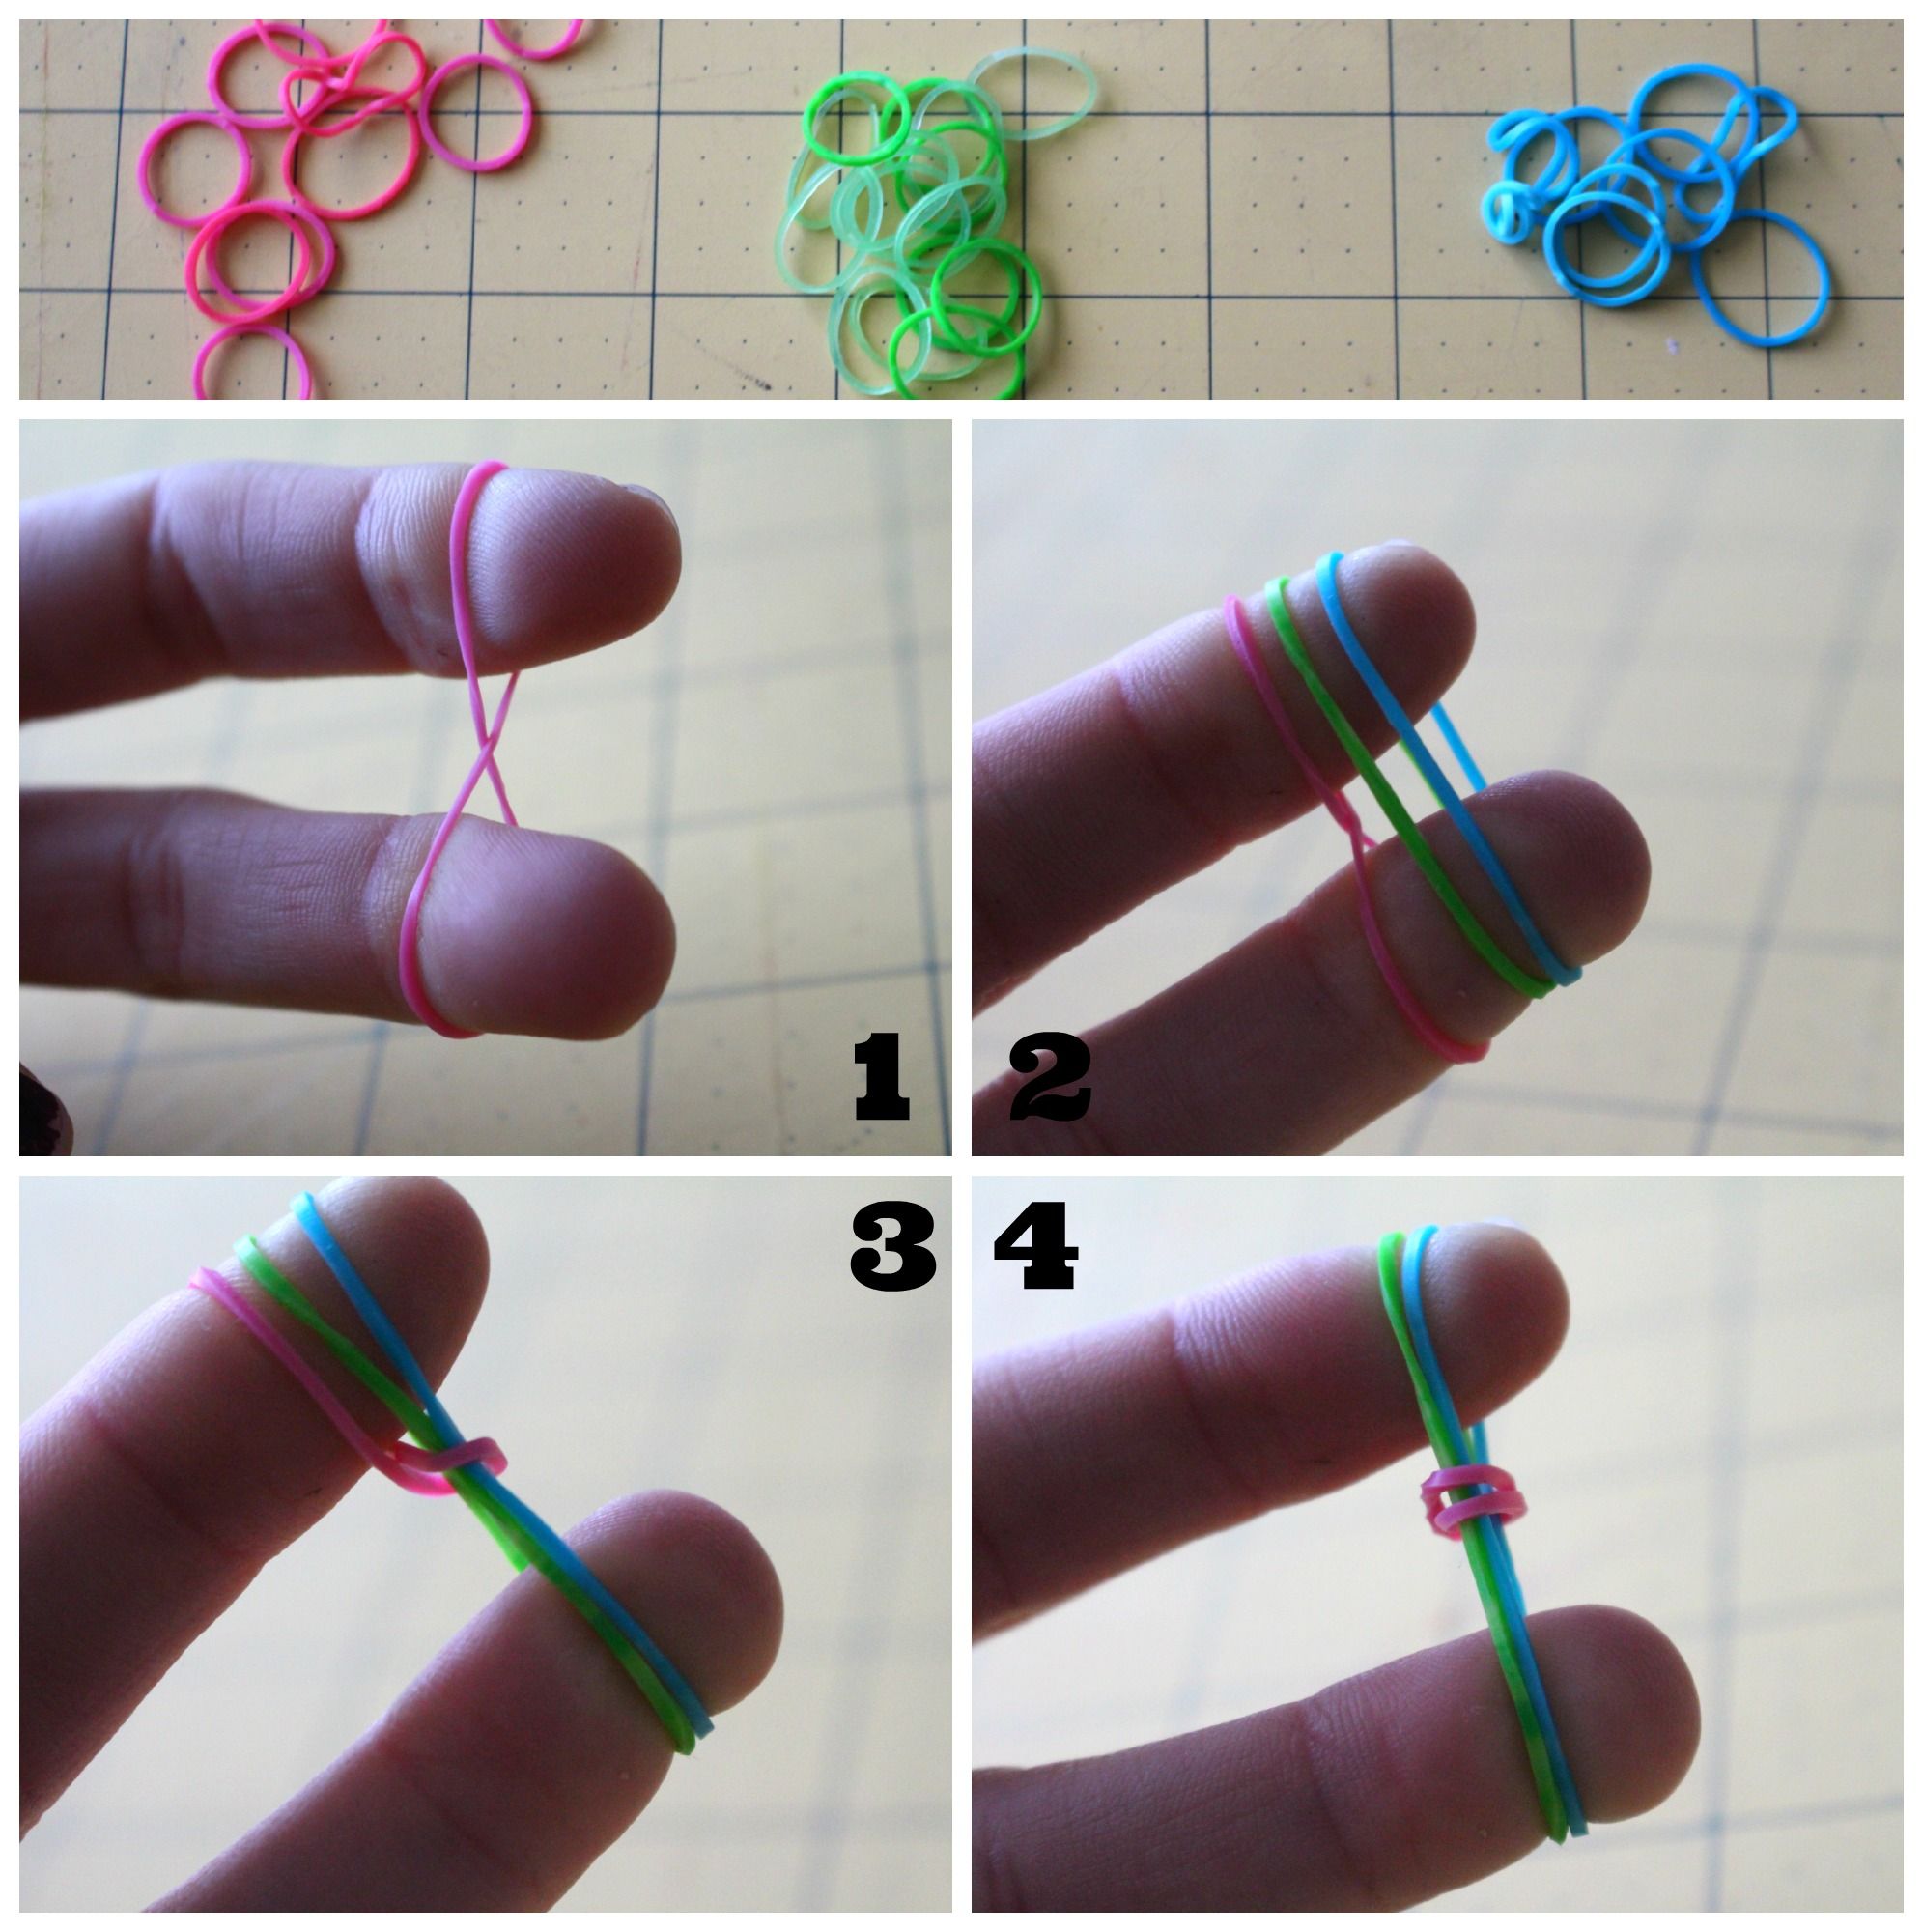
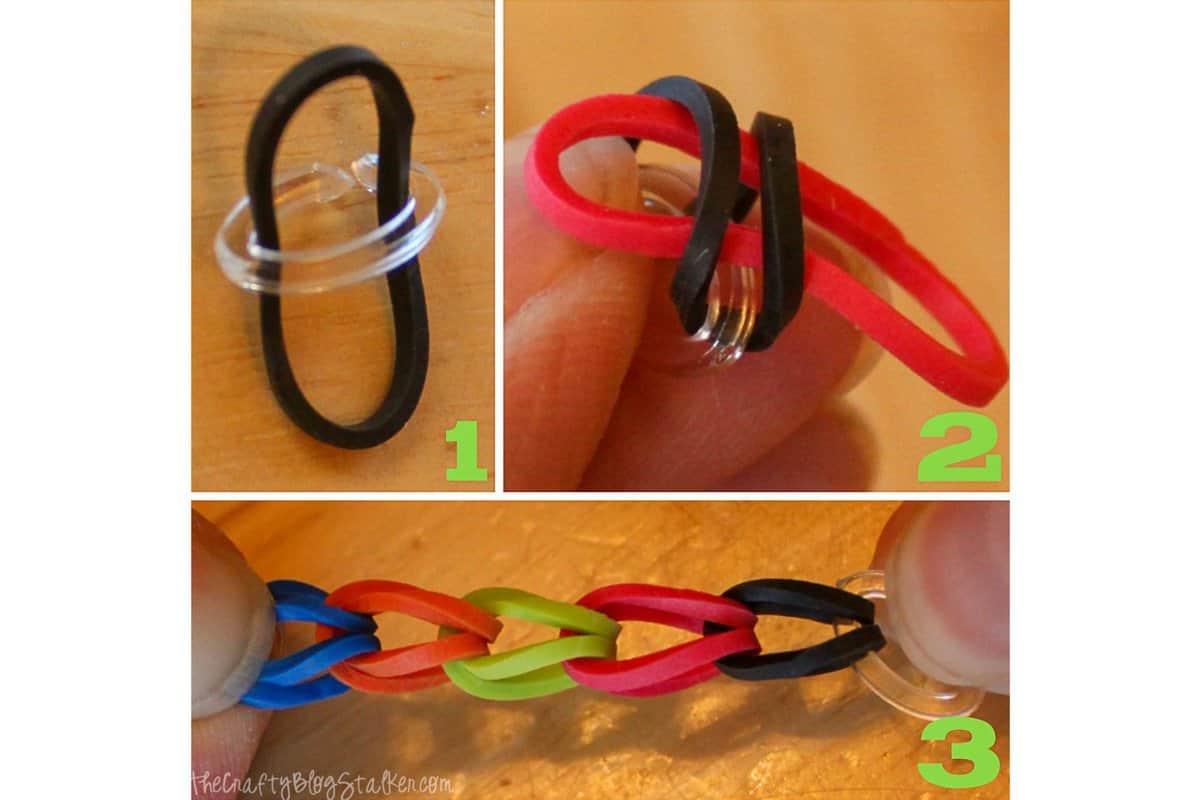
- Gather Your Materials: You’ll need rubber bands, a loom (or a crochet hook), scissors, and any charms or beads you want to add for flair. Having everything ready will make the process smoother.
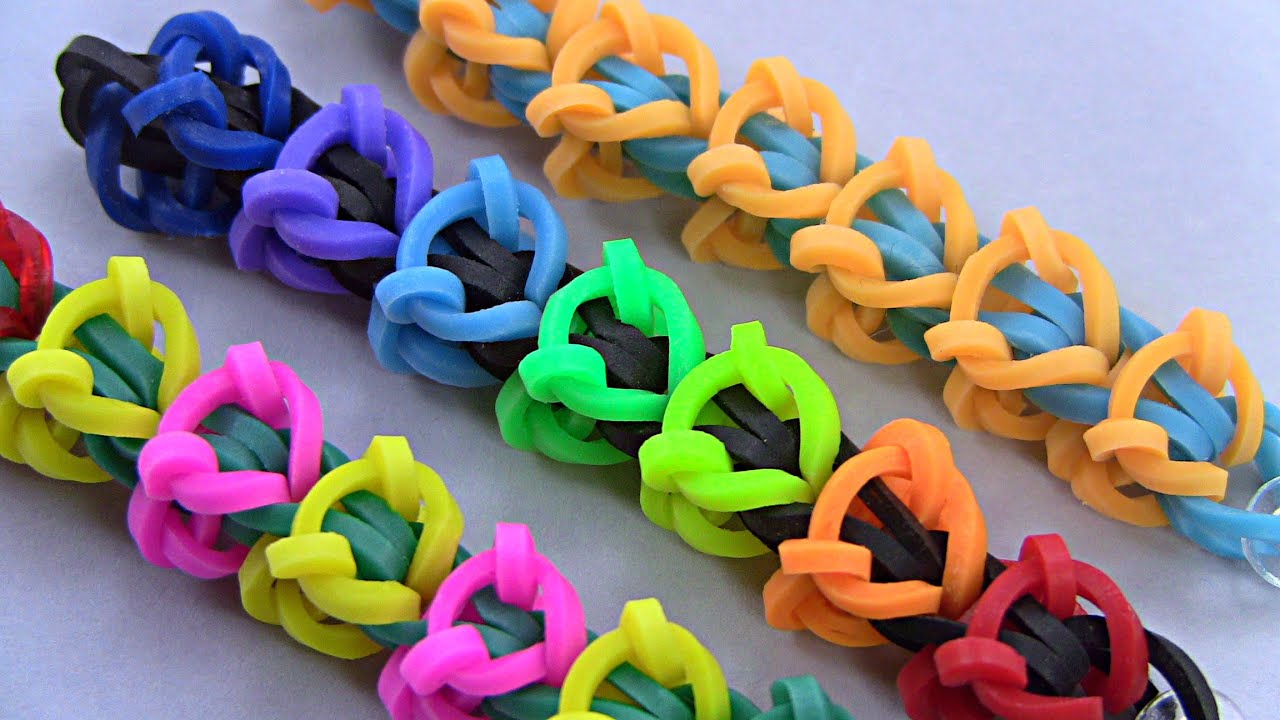
- Choose Your Design: Decide on the type of bracelet you want to make. Popular styles include the single chain, fishtail, or even intricate patterns. Look at some examples for inspiration!
- Prepare the Loom: If you’re using a loom, set it up by placing the pegs in the desired pattern for your chosen design. If you’re using a crochet hook, you can skip this step.
- Start Looping: Take your first rubber band and stretch it over two pegs in your loom or hold it with your fingers if using a hook. Continue adding bands, following your design, making sure to loop them securely.
- Finish the Bracelet: Once you reach your desired length, carefully remove the bracelet from the loom or your fingers. Use a clip or a small piece of rubber band to secure the ends together.
- Add Charms: If you want to make it even more special, now’s the time to attach any charms or beads you’ve picked out. Just slide them onto your finished bracelet!
- Enjoy Your Creation: Wear your new bracelet or gift it to a friend. You’ve made something unique and personal!
Also Read This: How to Make Black Seed Oil at Home: Natural DIY Guide on Dailymotion
Tips for Customizing Your Rubber Bracelets
Customization is what makes your rubber bracelets stand out! Here are some tips to help you personalize your creations:
- Color Combinations: Experiment with different color combinations. For a bold look, use contrasting colors like neon and black. For a softer style, pastels can create a lovely effect.
- Add Patterns: Consider creating patterns or ombre effects by gradually changing colors. This adds depth and visual interest to your bracelet.
- Incorporate Text: Use alphabet beads or small tags to spell out names, initials, or fun phrases. This adds a personal touch that makes the bracelet special.
- Mix Materials: Don’t hesitate to mix rubber bands with other materials like fabric ribbons or metal charms. This creates a unique texture and look!
- Experiment with Sizes: Try making bracelets of different sizes! A mixture of large and small bracelets can create a trendy stacked look.
With these customization tips, your rubber bracelets will truly reflect your personality and style. Get creative and have fun!
Also Read This: How to Change Eye Color in Photoshop CS5: Detailed Tutorial
Common Mistakes to Avoid
When diving into the world of DIY rubber bracelets, it's easy to get caught up in the excitement and overlook some essential details. Here are some common mistakes to steer clear of to ensure your bracelet-making experience is smooth and enjoyable:
- Skipping the Pre-planning Phase: Before you start, take a moment to sketch out your design. This helps in visualizing the final product and avoiding unnecessary errors.
- Using Incompatible Materials: Ensure that the rubber bands you choose are suitable for the type of bracelet you want to create. Not all rubber bands are created equal; some are too thick or too thin for certain designs.
- Neglecting Durability: While vibrant colors and patterns are fantastic, don't forget about the strength of the materials. Make sure to choose high-quality rubber to prevent breakage.
- Ignoring Sizing: Take accurate measurements of your wrist before starting. A bracelet that's too tight can be uncomfortable, while one that's too loose may not stay on.
- Rushing the Process: DIY is about enjoying the journey. If you're too hurried, you might overlook critical steps, leading to a less-than-perfect result. Take your time!
By being mindful of these common pitfalls, you can enhance your rubber bracelet-making skills and create beautiful pieces that you’ll be proud to wear or gift.
Conclusion and Final Thoughts
Creating your own rubber bracelets is not just a fun activity; it’s a great way to express your creativity and even make personalized gifts for friends and family. Whether you’re new to DIY projects or a seasoned crafter, this simple tutorial gets you started on a charming and satisfying journey.
As you wrap up your project, remember these key takeaways:
- Experiment with Colors: Don’t shy away from mixing vibrant colors and patterns. The more unique your design, the more it reflects your personality!
- Practice Makes Perfect: You might not get it right on your first try, and that's completely okay! Each attempt is a learning experience.
- Share Your Creations: Once you’ve made some fabulous bracelets, share them with friends on social media or even set up a little crafting party!
So grab your rubber bands and tools, put on your creative hat, and start crafting! You’ll be amazed at what you can accomplish. Remember, the joy is in the process as much as the finished product!
 admin
admin


