Image tracing is a powerful technique in digital art and design that allows you to convert raster images into vector graphics. This process enables artists and designers to create scalable, high-quality illustrations that can be adjusted without losing detail or quality. Whether you're working on logos, illustrations, or any design project, mastering image tracing in Photoshop can elevate your work significantly.
In a world where visuals speak louder than words, understanding how to transform images effectively is essential. Photoshop isn’t just for photo editing; it's a flexible platform that provides various tools to create, manipulate, and enhance your digital artwork. The image tracing process allows for cleaner lines and more vibrant colors, making it a valuable skill for anyone in the design realm.
Throughout this post, we’ll explore the ins and outs of image tracing, including practical tips, tools, and techniques that will guide you to achieve stunning results. So, let’s dive in and unlock the artistic potential that comes with mastering image tracing!
Setting Up Your Workspace in Photoshop

Before diving into image tracing, it’s crucial to set up your workspace in Photoshop properly. A well-organized workspace not only enhances your productivity but also lets you access the tools and features you need quickly. Here’s how to create your ideal workspace:
- Open Photoshop: Launch the application and create a new project or open an existing image that you want to trace.
- Workspace Layout: Navigate to the top menu and select Window > Workspace. Opt for the “Essentials” workspace or choose one that is tailored to your needs.
- Arrange Panels: You’ll want to have key panels such as Layers, Paths, and Color easily accessible. You can drag panels around to place them in a layout that suits you best.
- Customize Shortcuts: Speed up your workflow by setting keyboard shortcuts for frequently used tools. Go to Edit > Keyboard Shortcuts to personalize them to your liking.
- Zoom and View: Adjust your zoom level for better visibility when tracing. Consider using the Navigator panel to quickly shift your view around the image.
- Save Your Workspace: Once you’re satisfied with your layout, save it. Go to Window > Workspace > New Workspace to keep your customized setup for future projects.
With your workspace set up, you're now ready to dive into the exciting world of image tracing. Each set tool will be at your fingertips, allowing you to focus entirely on unleashing your creativity!
Also Read This: Flying a Sharper Image Drone: Tips and Tricks
Choosing the Right Image for Tracing

When it comes to image tracing in Photoshop, selection is crucial. Not every image is created equal, and some work better than others for tracing purposes. Here are a few tips that can help you choose the perfect image for your project:
- High Resolution: Always opt for high-resolution images. This means you’ll have more detail to work with, which is essential for achieving a clean and crisp trace.
- Simple Shapes: Look for images with clear, simple shapes. This makes it easier to create accurate paths without getting bogged down by unnecessary details.
- Contrast: Choose images that have a strong contrast between the subject and the background. This will help in distinguishing the edges more clearly when tracing.
- Defined Edges: Images with well-defined edges make your job easier by giving you clear outlines to follow. Consider selecting images with bold lines or shapes.
- Avoid Clutter: Try to avoid busy images that are packed with too many elements. Focus on one main subject for a more manageable tracing process.
By paying attention to these factors when selecting your image, you'll set the stage for a smooth tracing experience in Photoshop.
Also Read This: How to Measure the Height of an Image for Accuracy
Using the Pen Tool for Precise Tracing

The Pen Tool in Photoshop is one of the most powerful features for anyone looking to master image tracing. It allows for precision that other tools simply can't match. Here’s how to get the most out of it:
- Select the Pen Tool: You can find the Pen Tool in the toolbar or simply press P to activate it.
- Set Your Preferences: Adjust the options bar based on your needs, like setting the tool to "Shape" or "Path" for different outcomes.
- Zoom In: Don’t hesitate to zoom in on your image for more accurate tracing. Ctrl + (or Cmd +) + scroll will do the trick!
- Click and Drag: For curves, click and drag to create anchor points and adjust the Bezier handles to mold your path precisely.
- Close Your Paths: When you reach the starting point, click on it to close the path. This is essential for filling or stroking the shape later.
Mastering the Pen Tool takes practice, but it can give your projects a professional touch. Don't be afraid to experiment and take your time, as that's the key to becoming a pro at tracing in Photoshop!
Also Read This: How Much YouTubers Earn from Sponsorships
Using Layers Effectively

When it comes to image tracing in Photoshop, mastering layers is essential. They allow you to work non-destructively, enabling you to edit and adjust specific elements of your image without affecting the whole composition. Think of layers as transparent sheets stacked on top of each other—each can hold different components of your design.
Tips for Using Layers Effectively:
- Organize Your Layers: Use folders to group similar layers together. This can make your workspace look neater and help you find specific elements quicker.
- Rename Your Layers: Instead of keeping the default names, give your layers descriptive names. For example, name your outline layer "Outline," your base color layer "Base Color," etc.
- Utilize Adjustment Layers: These layers let you apply effects such as color corrections without permanently changing the original layers.
- Learn to Use Layer Masks: This is a powerful tool that lets you hide or reveal parts of layers. You can create smoother transitions and refine the edges of your traces effortlessly.
- Experiment with Layer Styles: Add effects like shadows, strokes, or glows to make your designs pop. Just double-click on any layer and explore the options!
By mastering layers, you can enhance your image tracing process, making it easier to modify and finalize your artwork.
Also Read This: How to Duet a Video on YouTube Shorts
Applying Colors and Finishing Touches
Once you've completed the tracing process, it’s time to inject some life into your artwork through color. Applying colors effectively can drastically affect the mood and impact of your image. Here's how to do it right:
Steps for Applying Colors:
- Choose a Color Palette: Before diving in, decide on a color palette that resonates with your message or theme. Tools like Adobe Color can help you find complementary colors.
- Use the Brush Tool: Select the Brush Tool for more control when painting. Adjust the opacity and flow settings to add depth to your colors.
- Layer Blending Modes: Experiment with different blending modes to see how colors mix. This can create stunning effects depending on your layering strategy.
- Add Gradients: Applying gradients can lend a realistic touch to your traced images. Use the Gradient Tool to create smooth transitions between colors.
- Final Touches: Don’t forget to zoom in! Refine edges, and tweak colors as necessary. Pay attention to the overall balance of your image.
By applying colors thoughtfully and incorporating finishing touches, your traced images can transform from simple line art into powerful visual pieces that engage and communicate effectively.
Also Read This: Mastering Creative Storytelling with Imago Images in Content Production
7. Saving and Exporting Your Traced Image
Once you’ve put in all that effort into tracing your image in Photoshop, you certainly want to save it in a way that keeps all your hard work intact. Let’s walk through the process of saving and exporting your traced image effectively.
First off, it's important to choose the right file format. Different formats serve different purposes. Here’s a quick rundown:
- JPEG: Great for photographs; however, it doesn’t support transparency and compresses images, which can lead to quality loss.
- PNG: Ideal for web graphics, supporting transparency and maintaining image quality without compression artifacts.
- SVG: A vector format that keeps your tracing sharp and scalable for web use.
- PSD: A Photoshop format that retains layers, so you can return to edit later.
To save your traced image, just follow these simple steps:
- Click on File in the menu bar.
- Select Save As.
- Choose your desired file format from the dropdown menu.
- If applicable, tick the box for layers if you want to maintain them (this is crucial for PSD).
- Click Save and adjust any format-specific settings.
For exporting, go to File > Export. This gives you options to optimize your image for web or other platforms. Always remember to keep a master copy in PSD format for future edits!
Also Read This: YouTube Editor Salaries and Opportunities Explained
8. Tips and Tricks for Perfect Tracing
When it comes to image tracing in Photoshop, a few tips can make all the difference in achieving that polished look you want. Let’s explore some practical strategies that can refine your tracing skills.
First, always start with a high-resolution image. The clearer your reference, the easier it will be to capture all the details. Now, here are some additional tips:
- Use the Pen Tool: This tool offers precision and control, allowing you to create perfect paths. Mastering it can elevate your tracing game.
- Layer Management: Organize your layers effectively. Name them and group similar elements together, so it’s easier to navigate.
- Zoom In: Work at a closer view for intricate details. Zooming in lets you ensure accuracy in your paths.
- Utilize Smart Guides: These are handy for aligning objects perfectly. Just go to View > Show > Smart Guides.
- Practice Patience: Tracing can be time-consuming. Don’t rush; take breaks and approach your artwork with fresh eyes.
Lastly, keep experimenting! Use different brushes, colors, and effects. Each project is a new opportunity to learn and perfect your skills. Happy tracing!
Mastering Image Tracing in Photoshop
Image tracing in Photoshop is a powerful technique that allows designers and artists to transform raster images into scalable vector graphics. This process is invaluable for those who want to create clean, crisp images that maintain their quality at any size. In this guide, we’ll explore the essential steps and best practices for mastering image tracing in Photoshop.
Here are the key steps to achieve effective image tracing:
- Open Your Image: Start by launching Photoshop and importing the image you want to trace.
- Create a New Layer: To keep your original image intact, create a new layer for your tracing work.
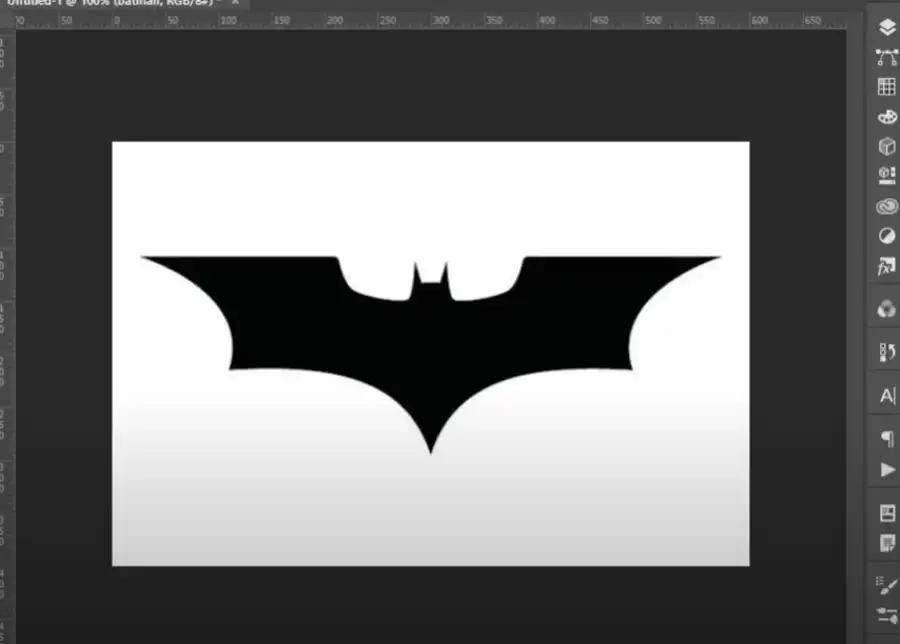
- Select the Pen Tool: Use the Pen Tool (P) for precise control over your tracing. This tool allows you to create paths that closely follow the contours of the image.
- Trace the Outlines: Begin by clicking along the edges of your image to create anchor points. Use the handles to adjust curves for smooth lines.
- Add Details: After outlining the main shapes, fill in any important details using additional paths.
- Color Your Tracing: Once you have completed the outlines, add color layers beneath your tracing layer. Use the Eyedropper Tool (I) to select colors from the original image.
- Refine Your Work: Adjust paths and colors as necessary, utilizing the Direct Selection Tool (A) for any fine-tuning.
To enhance your tracing skills, explore keyboard shortcuts and experiment with different brushes and layer styles.
In summary, mastering image tracing in Photoshop not only enhances your design capabilities but also expands your creative horizons, allowing you to produce professional-grade artwork with precision and efficiency.
 admin
admin


