iTunes is more than just a music player; it’s a powerful tool that helps you manage your iPhone, whether it's backing up your data, syncing content, or even restoring your device. Understanding how to effectively use iTunes can save you time and ensure your favorite music, videos, and apps are just a click away. Let’s dive into how you can get started with iTunes and make the most of it for your iPhone!
Getting Started with iTunes

Before you can really harness the power of iTunes, you need to get it set up. Here’s a step-by-step guide to help you get started:
- Download iTunes: If you’re using Windows, go to the Apple website to download iTunes. For Mac users, iTunes comes pre-installed with macOS, but ensure it’s up to date.
- Install iTunes: Follow the prompts to install iTunes on your device. It’s relatively straightforward. Just click "Next" on the installer screens and agree to the terms.
- Launch iTunes: Open iTunes for the first time and sign in with your Apple ID. If you don’t have one, you can create it from the app itself.
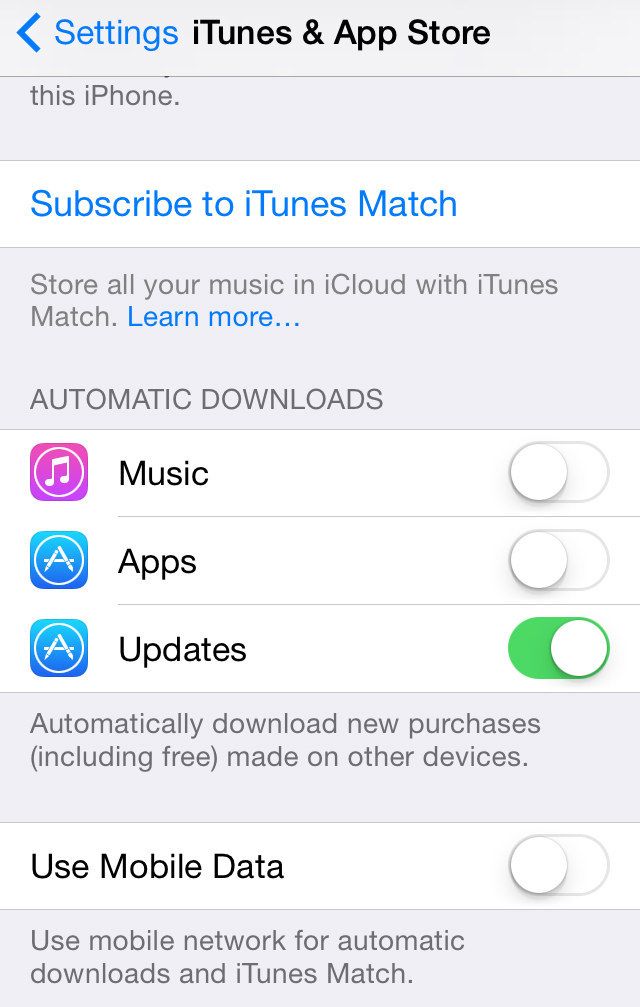
- Set Preferences: Go to 'Edit' > 'Preferences' (or 'iTunes' > 'Preferences' on a Mac) to tailor how you want iTunes to behave, like enabling Automatic Downloads or adjusting import settings for music.
After you have it installed and set up, connect your iPhone to your computer using a USB cable. Your device should automatically appear in iTunes. If it doesn’t, make sure both your iTune and iPhone are updated to the latest version.
With iTunes ready, you’re all set to start syncing your content. You will find options for music, movies, TV shows, and more on the left sidebar. Feel free to explore, as iTunes allows you to personalize your experience by creating playlists and organizing your favorite content!
Managing Music on Your iPhone

Managing music on your iPhone through iTunes can be a breeze once you understand the ins and outs of the application. Whether you're looking to download new songs, organize your existing library, or sync music from your computer, here’s how to do it effectively.
First things first, if you haven’t already installed iTunes on your computer, grab the latest version from the official Apple website. Once you’ve got it set up, you'll want to connect your iPhone using a USB cable or via Wi-Fi if you prefer a wireless connection.
Now, let’s break down the process of managing your music:
- Adding Music: To add new tracks, click on the 'Music' tab in iTunes and then select 'File' → 'Add to Library'. Choose the files you want to import from your computer.
- Creating Playlists: Organizing your music is essential. You can create playlists by clicking on the 'File' menu, selecting 'New', and then 'Playlist'. Drag and drop your favorite songs into the playlist for easy access.
- Syncing Music: To transfer your playlists to your iPhone, navigate to your device's summary page in iTunes, check the 'Sync Music' box, and select the playlists you want. Don’t forget to hit 'Apply'!
- Updating Metadata: If you find any albums without the right cover art or artist names, you can edit these by right-clicking on the track and selecting 'Get Info'.
Finally, consider using Apple Music. If you subscribe, you can easily access millions of songs and sync them to your iPhone without overwhelming your local storage. With these tools, managing your music becomes a fun and effortless activity!
Installing and Managing Apps
Installing and managing apps on your iPhone using iTunes might be less common nowadays, especially with the rise of the App Store on the device itself. However, there are still some great reasons to explore this option, especially for users who prefer managing everything from their desktop. Here’s a friendly guide on how to do it!
To get started, launch iTunes on your computer and connect your iPhone. Once your device is recognized, follow these steps:
- Accessing the App Store: Within iTunes, go to the ‘App Store’ tab. You can browse apps, just like on your iPhone.
- Installing Apps: When you find an app you like, click the download button (the cloud icon). If it’s a paid app, follow the prompts to purchase it.
- Syncing to Your iPhone: After downloading, go to your device's icon in iTunes. Click on the 'Apps' tab, check the boxes for the apps you want, and hit 'Apply' to sync them to your iPhone.
- Updating Apps: To keep your apps fresh, check for updates periodically. Navigate to the 'Updates' section in the App Store tab and download any available updates.
One important tip is to regularly manage your storage. If you're running low on space, you might want to consider keeping only essential apps on your iPhone and deleting the ones you rarely use. Remember, you can always redownload them later!
So, don’t shy away from using iTunes for your app management needs! It can significantly streamline your experience and keep everything in one neat package.
5. Syncing Photos and Videos
Syncing your photos and videos with iTunes is a fantastic way to keep your media organized and ensure that your memories are safely stored. This method allows you to manage your library in an efficient manner and frees up space on your iPhone. Let’s dive into how you can do this!
To sync your photos and videos with iTunes, follow these simple steps:
- Connect your iPhone to your computer using a USB cable.
- Open iTunes on your computer. If you have macOS Catalina or later, use Finder instead.
- Select your iPhone when it appears in iTunes/Finder.
- Click on the “Photos” tab in the sidebar.
- Check the box that says “Sync Photos.”
- Choose the folder you want to sync with your iPhone. You can also select “All folders” if you’re feeling adventurous!
- Hit the “Apply” button in the bottom right corner, and let the syncing process begin.
Tip: Always ensure that you have the latest version of iTunes installed to avoid compatibility issues. Also, consider syncing videos from a dedicated folder so that they’re easy to find later.
Once synced, your photos and videos will be accessible in the Photos app on your iPhone, making it easy for you to relive those special moments anytime!
6. Backing Up Your iPhone with iTunes
Backing up your iPhone with iTunes is essential to keep your data safe. Whether you’re upgrading to a new device or just want peace of mind, a backup ensures your important files and settings are not lost. Doing it through iTunes is straightforward. Let’s break it down!
Here’s how to back up your iPhone using iTunes:
- Connect your iPhone to your computer using a USB cable.
- Launch iTunes on your computer. (Remember, for macOS Catalina and later, it’s all in Finder!)
- Select your device when it appears. If prompted, enter your device passcode.
- Under the “Summary” tab, you’ll see a section for backups.
- Choose “This Computer” to store the backup on your device.
- If you want to back up your health and activity data, check the box for “Encrypt local backup” and create a password.
- Finally, click “Back Up Now.”
Pro Tip: Regular backups are key to avoiding data loss. Consider setting up automatic backups through iCloud for additional peace of mind. You never know when an unexpected issue might pop up!
Once the backup process is complete, you can rest easy knowing your photos, messages, apps, and settings are securely stored. Remember to perform regular backups, especially before software updates or if you’re planning any device migrations!
Troubleshooting Common iTunes Issues
Let's face it, using iTunes can sometimes feel like a labyrinth, especially when things don't go as planned! But don't worry! We've all been there, and I'm here to help guide you through the common troubleshooting steps. Whether you’re facing syncing issues or problems with audio playback, here's a handy guide to set things right.
Here’s a quick list of common issues and their fixes:
- Syncing Problems: If your iPhone isn’t syncing with iTunes, try the following:
- Ensure your iTunes is updated to the latest version.
- Check the USB cable and port for any damage. Switching USB ports can sometimes do the trick.
- Restart both your iTunes and iPhone.
- iTunes Not Recognizing iPhone: If iTunes doesn’t see your iPhone, consider these points:
- Verify your iPhone is unlocked and on the home screen.
- Update the iPhone drivers on your computer.
- Try a different computer to see if the issue persists.
- Error Messages: Encounter a puzzling error message? Look them up online, as many error codes have specific fixes. For example:
Error Code Possible Fix 4013 Restart the devices and attempt the update again. 50 Check your internet connection or try a different network.
Remember, sometimes a quick reset or an update can put everything back in its place. Don’t hesitate to reach out to Apple Support if the problems persist—they’ve got your back!
Conclusion
So there you have it—a comprehensive guide on how to effectively use iTunes for your iPhone! From setup to troubleshooting, iTunes can truly enhance your iPhone experience when used properly.
To recap, here are some of the key takeaways:
- Always keep your iTunes updated to avoid compatibility issues.
- Regularly back up your iPhone to safeguard your data.
- Explore the features like playlists and sharing to enhance your media management.
It can be a bit of a learning curve, but once you get the hang of it, you'll be able to manage your music, videos, and apps like a pro! So don’t shy away from diving into iTunes, experiment with its features, and keep your content organized. If you encounter any bumps along the way, just revisit the troubleshooting section, and you'll be back on track in no time. Happy syncing!


