Are you ready to dive into the sparkling world of DIY jewelry making? Whether you're looking to create unique pieces for yourself or gifts for your loved ones, crafting your own jewelry can be both satisfying and fulfilling. It’s not just a fun hobby; it’s an excellent way to express your creativity and add a personal touch to your style. Plus, there’s something special about wearing or gifting something handmade. So, if you’re ready to roll up your sleeves and unleash your inner artisan, keep reading!
Jewelry making allows you to customize designs according to your personal taste and preferences. You can experiment with various materials, colors, and techniques to create truly one-of-a-kind pieces. In this blog post, we’ll explore essential tools and materials, easy tutorials, and tips to help you embark on your DIY jewelry journey.
Essential Tools and Materials Needed

Before you start crafting beautiful pieces of jewelry, it's crucial to gather the right tools and materials. Having a well-stocked jewelry-making kit means you can dive right into your projects without any hiccups. Here’s a handy list of essentials:
- Pliers: You'll need round-nose pliers, flat-nose pliers, and wire cutters to shape, bend, and cut wire.
- Wire: A variety of wires (like beading wire, jewelry wire, and elastic cord) are essential for stringing beads and creating structure.
- Beads: The sky's the limit! Choose from gemstones, glass beads, and even wooden or plastic options.
- Findings: These include hooks, clasps, and jump rings that help put your jewelry together. Quality findings can make or break your project.
- Adhesives: Strong jewelry glue is essential for securing some components, especially in rings and bracelets.
- Workspace: A flat, well-lit table or desk will help you keep your materials organized and your projects free from clutter.
As you gain more experience, you might want to explore advanced tools and techniques. But starting with these essentials will set you up for success!
3. Step-by-Step Tutorials for Beginner Jewelry Projects

Starting your journey in jewelry making can be both exciting and a bit intimidating. But guess what? With some basic materials and a little creativity, you can create beautiful pieces right at home. Let’s dive into a couple of beginner-friendly projects that will spark your interest!
Simple Beaded Bracelet
*What You'll Need:
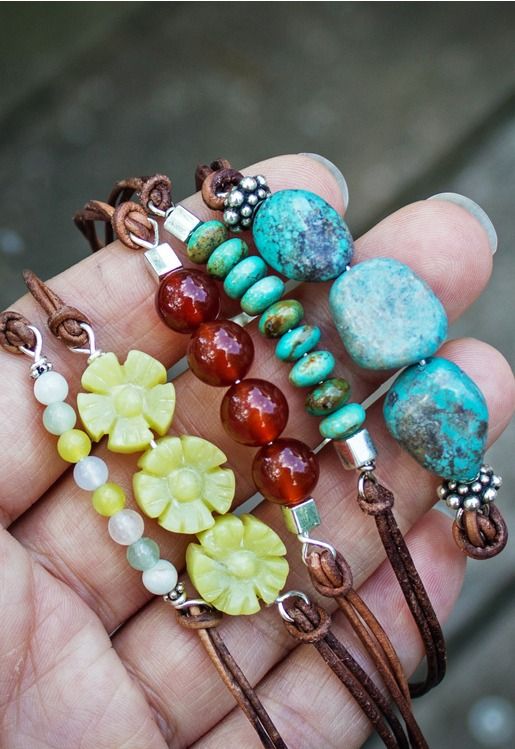
- Elastic cord (about 10 inches)
- Assorted beads (choose your favorites!)
- Scissors
- Sterile needle (optional)
Instructions:
- Cut the elastic cord to your desired length, plus a couple of extra inches for tying.
- Begin threading the beads onto the elastic cord. Mix and match colors and sizes to get a unique look!
- Once you’ve reached your desired length, tie a tight knot with the ends of the cord, making sure the beads are snug.
- For extra security, apply a little glue to the knot and let it dry before trimming any excess cord.
Pearl and Chain Necklace
What You'll Need:
- Chain length (choose your favorite metal)
- Pearls (or any focal beads)
- Jump rings
- Pliers
Instructions:
- Cut your chain to your preferred length.
- Decide where you’d like to place the pearls along the chain and use jump rings to attach them.
- Make sure everything is secure, and you’re good to go!
And just like that, you have two beautiful pieces of jewelry. Feel free to experiment with different materials and styles as you grow more confident in your skills!
4. Tips and Tricks for Successful Jewelry Making

Creating jewelry can be a rewarding experience, but sometimes it’s the little things that can make a world of difference. Here are some handy tips and tricks to ensure your DIY jewelry projects go as smoothly as possible.
Stay Organized
In jewelry making, having an organized workspace can save you a lot of time and frustration. Consider using:
- A small tackle box for storing beads
- Labels for identifying tools and materials
- A clean, flat surface to work on
Invest in Good Tools
Using the right tools can make a significant difference in the quality of your jewelry:
- Needle-nose pliers are great for bending wire and opening jump rings.
- Wire cutters help you trim materials neatly.
- Beading mats* prevent beads from rolling away and keep your workspace tidy.
Practice Patience
It’s easy to get excited and rush through making jewelry, but taking your time will pay off:
- Double-check your measurements before cutting.
- Give glue time to dry before wearing your creations.
Don’t Fear Mistakes
Remember, even seasoned jewelers make mistakes. Embrace them as part of your learning curve. You can always repurpose materials or turn errors into new designs!
With these tips and a positive attitude, you're all set to explore the wonderful world of DIY jewelry making. Happy crafting!
5. Creative Ideas for Personalizing Your Jewelry
Personalizing your jewelry can be a fun and fulfilling experience. It allows you to express your unique style and make pieces that hold special meaning. Here are some creative ideas to get your imagination flowing!
- Name Necklaces: Use a simple chain and charms or letter beads to spell out names, initials, or meaningful words. This is a great way to wear something that resonates with you or your loved ones.
- Incorporate birthstones into your designs. You can either nestle them in pendants or string them along bracelets, celebrating loved ones' birthdays like a little reminder of them every day.
- Engravings: Consider engraving a favorite quote, date, or coordinates of a significant place. Many jewelry stores offer engraving services, or you can DIY it at home using engraving pens.
- Color Themes: Select colors that reflect your personality. You can create matching jewelry sets using colored beads, wire, and strings, ensuring everything feels cohesive and uniquely "you".
- Themed Sets: Create sets based on your hobbies or passions! For instance, if you love travel, make a necklace with airplane charms or a world map pendant. This could inspire conversations too!
Personalizing your jewelry opens up endless possibilities. It’s all about what resonates with you and makes you feel good when you wear it. So let your creativity shine and enjoy the process!
6. Resources for Further Learning and Inspiration
As you dive deeper into the world of DIY jewelry making, you’ll definitely want to tap into various resources that can guide and inspire you. Here’s a handy list to get you started:
| Resource Type | Name | Description |
|---|---|---|
| Books | The Jewelry Making Bible | A comprehensive guide covering everything from basic techniques to advanced crafting. |
| Online Courses | Skillshare | Wide range of classes on jewelry making, taught by industry professionals. |
| Websites | Beadaholique | A treasure trove of tutorials and supplies for all your jewelry-making needs. |
| YouTube Channels | JewelryTutorialHQ | Step-by-step video tutorials for all skill levels, covering a variety of techniques. |
| Social Media Groups | Facebook Groups | Join groups dedicated to jewelry making for community support, tips, and sharing your creations. |
These resources will provide you with a wealth of knowledge and inspiration. Don't hesitate to explore, connect with others, and most importantly, keep creating! The more you learn, the more you’ll fall in love with this art form.
DIY Jewelry Tutorials for Home
Creating your own jewelry can be a rewarding and fulfilling endeavor. Not only does it allow you to express your creativity, but it also provides an opportunity to craft unique pieces that reflect your style. Below are some engaging DIY jewelry tutorials that you can easily follow at home.
1. Beaded Bracelets
This is one of the simplest DIY jewelry projects suitable for beginners. You will need:
- Beads of your choice
- Stretch cord
- Scissors
Instructions:
- Cut a piece of stretch cord about 10 inches long.
- String the beads onto the cord in your desired pattern.
- Tie the ends firmly together and trim any excess cord.
2. Wire-Wrapped Rings
This project adds a touch of elegance to your jewelry collection. For this, you need:
- Jewelry wire (20-22 gauge)
- Beads or stones
- Wire cutters
- Pliers
Instructions:
- Cut a piece of wire about 30 inches long.
- Wrap the wire around a cylindrical object to form the ring shape.
- Add beads by threading them onto the wire as you shape it.
- Secure the ends of the wire by twisting them together.
3. Simple Pendant Necklace
This chic piece can be created with minimal materials:
- A pendant (could be a charm or a stone)
- Chain or cord
- Jump ring and clasp
Instructions:
- Attach the pendant to a jump ring.
- String the chain through the jump ring.
- Secure the chain with the clasp to create a necklace.
These tutorials provide an excellent starting point for your DIY jewelry journey. Feel free to experiment with different techniques, materials, and designs!
Conclusion: Embrace your creativity with DIY jewelry. By exploring these projects, you not only make beautiful accessories but also allow your personal style to shine through your handcrafted pieces.


