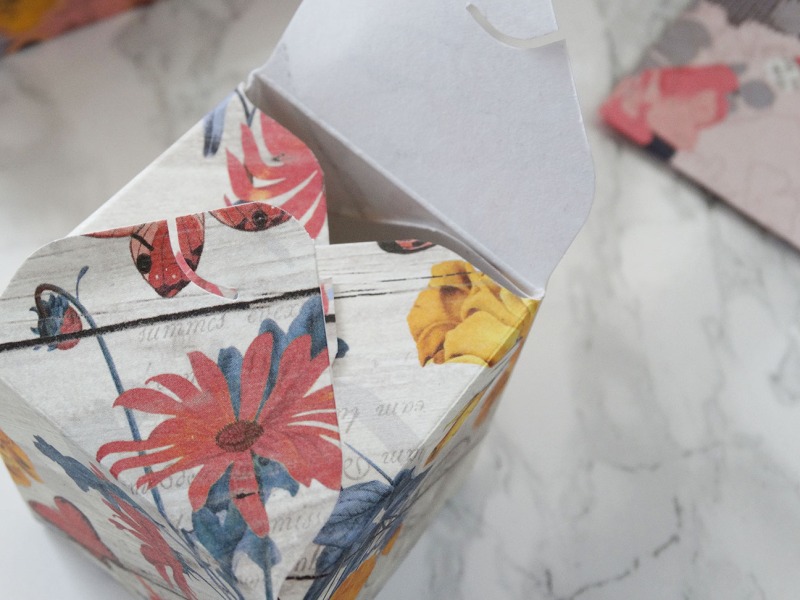
Have you ever had a stash of coins or small bills lying around, just collecting dust? Creating your own paper money box is not only a fun DIY project but also a great way to organize your savings! In this blog post, we'll walk you through the simple steps to craft a charming paper money box. It’s an excellent project for both kids and adults, and you'll be amazed at how quick and easy it is to complete it. So, roll up your sleeves, grab some materials, and let’s dive in!
Materials Needed

Before we get started on this exciting money box project, let's gather all the necessary materials. Don’t worry; you might already have most of them at home!
- Cardstock or thick paper: Aim for a sturdy type to give your money box stability. Choose a fun pattern or color to make it more visually appealing!
- Scissors: A good pair of scissors will help you cut your paper accurately.
- Ruler: This will help you measure and draw straight lines, ensuring your box is symmetrical and neat.
- Pencil: Use this for marking measurements before cutting, which helps avoid mistakes.
- Glue or double-sided tape: This will be essential for assembling your box securely. Use strong adhesive for a sturdy construction.
- Decorative items (optional): Think stickers, washi tape, or markers to add some personality to your money box.
- Box cutter (optional): If you want to create a specific slot for inserting money, a box cutter can help make clean cuts. Just be careful!
- Template (optional): If you prefer, you can find templates online for various box designs. This can simplify the process!
Once you have all these materials ready, you're all set to get crafty! Don't worry about perfection—a personal touch makes your money box unique!
Step-by-Step Instructions

Creating your very own paper money box is an exciting project that requires just a few materials and a bit of your creativity. Let’s walk through the process step by step. Grab your supplies and let’s get started!
Materials Needed:
- Sturdy paper or cardstock
- Scissors
- Glue or tape
- Ruler
- Pencil
- Decorative items (markers, stickers, etc.)
Step 1: Measure and Cut
Begin by cutting a rectangular piece of paper. A great size to start with is 15 inches by 10 inches, but feel free to adjust according to your needs. Use the ruler and pencil to mark the dimensions before cutting.
Step 2: Create the Slots
Next, you’ll want to create a slot for inserting money. Draw a horizontal line about 1 inch wide and 5 inches long near the top of your rectangle. Cut this slot carefully.
Step 3: Fold the Box
Now it's time to fold! Fold the two long sides inward, then fold the bottom up and glue or tape it securely. Make sure to leave the top open for inserting money.
Step 4: Decorate!
You’ve made the basic box—now the fun part! Use markers, stickers, or any decorative embellishments you have to make your money box uniquely yours. Let your imagination run wild!
Step 5: Let it Dry
If you’ve used glue, let the box dry completely. And there you have it—your very own paper money box is ready to collect coins, bills, or even little treasures!
Tips for Customization
Customizing your paper money box can really make it special and suited to your style. Here are some fun and creative tips to help you make it stand out!
1. Choose Fun Themes:
Think about a theme that resonates with you or the person you’re making it for. It could be anything from a favorite cartoon character to nature motifs. You can even use themed paper—like wrapping paper or scrapbook sheets—that matches the vibe!
2. Use Photos:
Print out pictures that mean something to you or the recipient. Cut them out and stick them on the sides of the money box to create a personal touch. It adds character and charm!
3. Add Functionality:
Consider making additional compartments inside your box for different currencies or purposes. You can achieve this by adding divider sheets made from another piece of paper.
4. Change-up the Shape:
Your box doesn't have to be just rectangular! Play around with shapes like square, circular, or even themed (like a treasure chest). Just modify the dimensions and folding technique accordingly.
5. Color Choices:
The color scheme matters! Bright and cheerful colors can make your box eye-catching, while pastels lend a more subtle elegance. Use paint, colored paper, or washi tape to jazz it up.
6. Use Quotes or Labels:
Incorporate motivational quotes or fun labels to give your box a personal touch. You can write these by hand or print them on sticky labels. Making it personal will inspire you to use it more!
Remember, this is your creation, so feel free to let your creativity shine. Happy crafting!
Common Mistakes to Avoid
When crafting your own paper money box, it's easy to get caught up in the excitement and overlook some key details. Here are a few common mistakes that you definitely want to avoid:
- Skipping the Planning Stage: Jumping straight into crafting without a plan can lead to a chaotic final product. Take some time to sketch out your design and gather your materials before you start.
- Ignoring Measurements: Accurate measurements are crucial. If your dimensions are off, the box may not hold together well or may not close properly. Always double-check and use a ruler or measuring tape.
- Using Weak Adhesives: Opting for low-quality glue or tape can result in a flimsy structure. Invest in a good adhesive that’s suitable for paper projects to ensure your box holds up over time.
- Overlooking Reinforcement: Just because it’s made of paper doesn't mean it shouldn’t be sturdy. Consider adding additional layers or reinforcements in corners and edges for added durability.
- Forgetting to Personalize: It’s easy to get focused on the construction, but forget to personalize it! Whether it's adding colors, stickers, or your name, make it uniquely yours.
By avoiding these mistakes, you can ensure that your paper money box turns out beautifully and functions as intended. Happy crafting!
Conclusion
In conclusion, crafting your own paper money box can be a fun and rewarding experience. It allows for creativity, personalization, and even a bit of practicality! Whether you’re using it to save for a rainy day or simply looking to add a unique decoration to your space, making this craft your own is truly satisfying.
The best part? It doesn’t require expensive materials or complicated skills. With just a few supplies and a bit of time, you can create something special. Remember to take your time, follow the tips we've discussed, and don’t be afraid to make it your own.
So gather your materials, put on some music, and dive into the world of crafting. And remember, the journey of creating is just as enjoyable as the finished product. Happy crafting!
Where to Share Your Finished Project
Once you've successfully crafted your own paper money box, it's time to showcase your handiwork! Sharing your finished project not only brings you joy but also inspires others to get creative. Here are some fantastic platforms where you can share your paper money box:
- Social Media Platforms:
- Instagram: Use relevant hashtags like #DIY, #Crafting, and #PaperMoneyBox to reach a larger audience.
- Facebook: Join crafting groups where you can share your project and receive feedback.
- Pinterest: Pin images of your money box along with a brief description, directing users to your blog for details.
- Blogging Platforms:
- Personal Blog: Write a detailed post about your crafting process, including challenges and tips.
- Medium: Share your crafting experience with a wider audience by publishing an article.
- Crafting Communities:
- Reddit: Share on subreddits such as r/DIY or r/crafts to connect with fellow enthusiasts.
- Craftster: Post your project on this forum to get advice and showcase your creativity.
- Video Platforms:
- YouTube: Create a tutorial video demonstrating how to make your money box and share your tips.
- TikTok: Film a short, engaging clip showcasing your finished project in a fun way.
By utilizing these platforms, you can not only demonstrate your creative skills but also foster a sense of community among fellow crafters.


