Uploading your wonderful designs to Behance can feel like a daunting task, especially if you're unsure how to go about it. But don’t worry! This step-by-step guide will walk you through the entire process—from preparing your Illustrator file to the final upload on Behance. By the end, you’ll feel confident sharing your artwork with the world.
Preparing Your Illustrator File

Before diving into the upload process, it's essential to prepare your Illustrator file properly. A well-prepared file not only ensures a smoother upload but also enhances the quality of your project display on Behance. Follow these steps to make sure your file is ready:
- Finalize Your Design: Before exporting, make sure your artwork is complete. Double-check for any errors or elements that might need tweaking.
- Organize Your Layers: Keep your layers tidy. Group related items and label them clearly. This helps in both exporting and when someone looks at your project on Behance.
- Set the Artboard Size: Make sure your artboard dimensions match your intended final output. Common sizes might be A4, letter, or custom dimensions that suit your design.
- Check Color Settings: Use RGB color mode for web-friendly colors, as Behance is an online platform. Ensure all colors are set to RGB before exporting.
- Export for Web: When you’re ready to export, navigate to File > Export > Export As. Choose JPEG or PNG to maintain good quality while keeping file size manageable.
By following these steps, you’ll ensure that your Illustrator file is polished and ready for its audience on Behance. Happy designing!
Also Read This: Getting a YouTube Music License for Your Channel
3. Creating a Behance Account

Starting your journey on Behance is easy-peasy! If you're eager to showcase your amazing Illustrator creations, you'll need a Behance account first. Let me walk you through the simple steps of setting up your account.
- Visit Behance’s Website: Open your browser and head over to www.behance.net.
- Sign Up: Look for the “Sign Up” button, which is usually at the top right corner of the homepage. Click on it!
- Choose Your Method: You can sign up using your email, or you can connect with your Adobe ID or any of your social media accounts, such as Google or Facebook. Choose what works best for you!
- Fill Out Your Info: If you go with email, fill in the necessary details like your name, email address, and a secure password.
- Personalize Your Profile: After signing up, to make your account stand out, you can upload a profile picture and write a short bio about yourself.
- Verify Your Account: Don’t forget to check your email for any verification links sent by Behance. Click it to confirm your account!
And just like that, you're officially a member of the Behance community! Now get ready to share your creativity with the world.
Also Read This: Exploring the Different Uses of Adobe Stock
4. Navigating to the Upload Section

Now that you have your Behance account all set up, it’s time to get into the exciting part—uploading your Illustrator files! Navigating to the upload section is straightforward, and I’ll guide you through it step by step.
- Log In: Make sure you're logged into your Behance account. Just click on the “Log In” button and enter your credentials.
- Go to Your Profile: Once logged in, look for your profile picture or avatar in the top right corner and click on it. This will take you to your profile dashboard.
- Find the Upload Option: On your profile page, locate the “Create a Project” button. It’s usually pretty prominent—just click on it!
- Choose the Upload Method: You’ll see options to either drag-and-drop files directly or click to browse your computer. Select your Illustrator file (or files) from where they're stored.
That’s it! You're in the upload section and ready to make your project shine. With a few clicks, you’ll be sharing your creative work with the vibrant Behance community in no time!
Also Read This: Making Circular Images in Google Slides
5. Uploading Your Illustrator File

So, you've created a stunning illustration in Adobe Illustrator and you’re ready to share your masterpiece with the world on Behance. Let’s walk through the steps to upload your file smoothly! It’s super easy and doesn’t take much time. Here’s how to do it:
- Log in to Behance: First things first, head over to the Behance website and log into your account. If you don’t have an account yet, signing up is quick and easy.
- Create a New Project: Once you're logged in, click on the 'Create a Project' button, usually located at the top right of the screen. This will open a new window for your project upload.
- Upload Your File: In the new project window, you’ll see an option to drag and drop files or browse your computer. Click on the 'Choose Files' button to open your file explorer. Find the Illustrator file (AI) you want to upload and select it. Remember, Behance supports various formats, but with Illustrator, your best bet is to export the design as either a JPG, PNG, or PDF to maintain the quality.
- Previewing Your Project: Once the upload is complete, you'll see a preview of your illustration. Take a moment to make sure everything looks just right. You can even adjust the order of the images if you’ve uploaded multiple files.
- Save Your Progress: Don’t forget to click on the 'Save' button at any point to ensure your work isn’t lost while you’re filling in the details.
And voila! You’ve successfully uploaded your Illustrator file. But wait, we’re not done yet; the next step is to add those all-important project details!
Also Read This: Creating a Youtuber in Infinite Craft – A Step-by-Step Guide for Beginners
6. Adding Project Details
Now that you’ve uploaded your Illustrator file to Behance, it’s time to jazz up your project with some details that will grab viewers’ attention. This part is crucial because the way you present your work can make a huge difference in how it’s perceived. Here’s a simple guide for adding project details:
- Project Title: Start with a catchy title. Make it descriptive yet intriguing enough that someone clicking through would want to learn more about your project.
- Description: This is where you tell the story behind your work. Discuss the inspiration, the process, and perhaps what tools you used. Be engaging, and don’t hesitate to let your personality shine through! Aim for around 150-300 words.
- Tags: Tags are essential for making your project discoverable. Think of keywords that encapsulate your work – terms like 'illustration', 'graphic design', or even the specific style you used can help.
- Creative Fields: Select the appropriate fields related to your project. This helps categorize your work and connects you with projects of similar themes. Behance has options like 'Illustration', 'Graphic Design', 'Photography', etc.
- Cover Image: Choose a captivating cover image that encapsulates the essence of your project. This image will be the first thing that viewers see, so make it count!
Finally, before hitting ‘Publish’, preview everything to ensure it looks great. Once satisfied, go ahead and share your project with the community. Happy showcasing!
Also Read This: Find Out What Content You Can Sell on Shutterstock
7. Publishing Your Project
Once you've created a stunning project in Adobe Illustrator and you're ready to share it with the world, the next step is to publish your project on Behance. Don't worry; this process is quite straightforward! Follow these steps to make sure your project shines.
- Finalize Your Project: Before you publish, double-check your artboard. Make sure all elements are in place and the design looks exactly how you want it.
- Export Your Work: In Illustrator, go to File > Export > Export As. Choose the format you want – a JPEG or PNG usually works well. Make sure to select the appropriate resolution for web viewing, typically 72 dpi.
- Create a New Project on Behance: Sign in to your Behance account and click on the Create a Project button. This will take you to the editing interface.
- Upload Your Files: Drag and drop your exported images into the project area or click the upload button to select files from your device. Behance allows multiple uploads, so feel free to include different views or elements.
- Add Project Details: Describe your work! Include a title, and a brief description, and tag relevant keywords. This will help others find your project. Remember, tags are crucial for searchability!
- Set the Visibility: Decide if you want your project to be public or private. Public projects can be seen by everyone, while private ones are viewable only by you.
- Click Publish!: Finally, review everything one last time and hit that Publish button. Congratulations, your project is now live!
Also Read This: How to Add a Link to an Image in Word for Convenient Navigation
8. Troubleshooting Common Issues
Even the most seasoned creatives run into bumps along the way when uploading their Illustrator files to Behance. Fear not – most issues are straightforward to resolve! Here are some common problems you might encounter and how to tackle them.
| Issue | Solution |
|---|---|
| File Won't Upload | Check your internet connection and ensure the file is within Behance's size limits (up to 50 MB per file). |
| Images Look Blurry | Make sure you're exporting your images with a resolution of at least 72 dpi. If necessary, re-export your files at a higher quality. |
| Project Tags Missing | Tags are important for visibility! Ensure you've added relevant tags in the editing section before you publish. |
| Project Displays Incorrectly | Preview your project before publishing. If something looks off, you can edit the layout or re-upload the images. |
Remember, troubleshooting is part of the creative process. Don't hesitate to reach out to the Behance community or support team if you're stuck. Happy sharing!
Step by Step Guide to Uploading an Illustrator File to Behance
Uploading your creative work to Behance can elevate your artistic presence, connect you with like-minded individuals, and even attract potential clients. If you've designed a stunning project in Adobe Illustrator and wish to showcase it on Behance, follow these simple steps to ensure a smooth upload process.
Step 1: Prepare Your Illustrator File
Before uploading, ensure your file is optimized for web display.
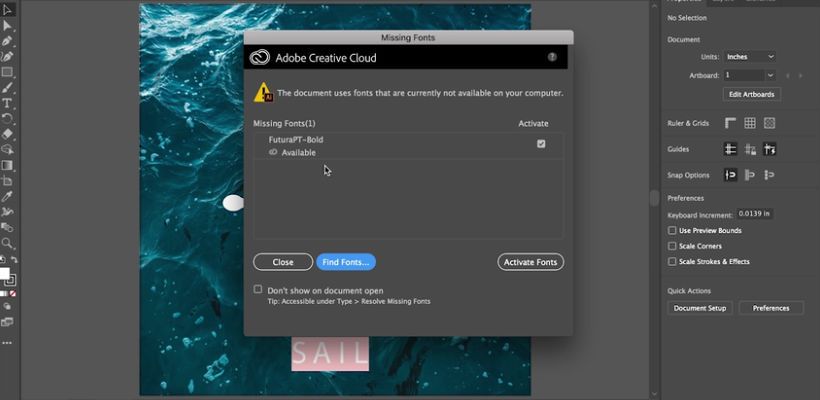
- Convert your text to outlines to avoid font issues.
- Export your file in a suitable format (JPEG, PNG, or PDF).
- Check the resolution; 72 DPI is standard for web images.
Step 2: Log into Behance
Navigate to Behance.net and log in using your credentials. If you don't have an account, you will need to sign up for one.
Step 3: Start a New Project
Click on the "Create a Project" button. This will take you to the project editor, where you can add your work.
Step 4: Upload Your File
In the project editor, click on the "Upload" button. Choose the file you previously prepared and drag it into the specified area, or select it by browsing through your computer.
Step 5: Add Project Details
Enhance your project by adding:
- Title: Craft a catchy and descriptive title.
- Description: Provide insights into your creative process and the inspiration behind your design.
- Tags: Use relevant keywords for better discoverability.
- Covers: Select a stunning cover image for your project.
Step 6: Publish Your Project
Once all details are filled out and you're satisfied with the layout, click on the "Publish" button. You can also choose to save it as a draft if you'd like to review it later.
Conclusion: Following these steps will help you successfully upload your Illustrator file to Behance, allowing you to share your creativity with the world and potentially gain valuable exposure.
 admin
admin


