Pancake makeup is a popular choice for those wanting to achieve a flawless, long-lasting finish. Originating in theater and film, this heavy-duty foundation is designed to withstand the rigors of performance under bright lights and camera flashes. However, it has also made its way into everyday beauty routines, thanks to its high coverage and ability to create a perfectly smooth complexion. Whether you're preparing for a special event or simply want to elevate your makeup game, pancake makeup can be your best friend when applied correctly. In the following sections, we'll explore the fundamentals of pancake makeup and how to apply it effectively for a stunning look.
Understanding Your Skin Type

Knowing your skin type is essential before diving into the world of pancake makeup. Your skin's characteristics—whether oily, dry, combination, or sensitive—play a crucial role in how makeup interacts with your complexion. Let’s break it down:
- Oily Skin: If your skin tends to shine and feels greasy, you likely have oily skin. This type produces excess sebum, making it essential to use a mattifying primer and setting powder to keep shine at bay.
- Dry Skin: If your skin feels tight and looks flaky, then you’re dealing with dryness. Hydrating serums or moisturizers should be your go-to prior to applying pancake makeup. This will help the makeup glide on smoothly, avoiding the appearance of dry patches.
- Combination Skin: Many of us fall into this category. Combination skin is characterized by having both oily and dry areas, typically with an oily T-zone. Tailoring your makeup prep to address both concerns can make all the difference.
- Sensitive Skin: If your skin reacts easily to products or environmental factors, then you have sensitive skin. It’s crucial to choose products labeled as hypoallergenic or fragrance-free to prevent irritation.
Once you’ve identified your skin type, you'll have a better understanding of how to prep your skin and choose the right products for a flawless pancake makeup application. This knowledge is a game-changer and sets the stage for a perfect base!
Also Read This: how to show tiff image in browser
3. Essential Tools for Application

Before diving into the world of pancake makeup, it's crucial to gather the right tools. The quality of your application can significantly affect your final look, so let's ensure you have everything you need!
- Pancake Makeup Cake: Of course, the star of the show! Choose a pancake makeup cake that suits your skin tone. Test a few shades if possible, and pick one that makes you glow.
- Makeup Sponge: A damp makeup sponge is perfect for blending your pancake makeup seamlessly into your skin. It helps in achieving that airbrushed finish!
- Foundation Brush: For those who prefer a more structured approach, a foundation brush can aid in even application, especially in areas that require extra coverage.
- Setting Powder: To lock your pancake makeup in place, a lightweight setting powder is a must. This helps to avoid any unwanted shine and keeps your makeup looking fresh throughout the day.
- Setting Spray: A good setting spray can enhance longevity and provide a dewy finish, ensuring your pancake makeup stays put all day long.
- Mirror: A well-lit mirror makes a world of difference. Investing in a good vanity mirror can ensure you catch every little detail during your makeup application.
- Cotton Swabs and Pads: They’re handy for correcting mistakes or cleaning up any excess makeup around the eyes or mouth.
With these essential tools at your side, you'll be well-equipped to create a flawless pancake makeup look!
Also Read This: Understanding Why Adobe Stock Images Have Watermarks
4. Step-by-Step Guide to Applying Pancake Makeup

Applying pancake makeup may seem daunting at first, but it can be a fun and rewarding process. Let’s break it down into simple steps to help you achieve that flawless finish.
- Prep Your Skin: Start with a clean, moisturized face. A good primer can also help in creating a smooth base.
- Wet Your Sponge: Dampen your makeup sponge. This helps in picking up product easily and ensures an even application.
- Pick Your Cake: Use your sponge to lightly swipe onto the pancake makeup cake. You don’t need much product; less is more!
- Apply to Your Face: Start applying the pancake makeup from the center of your face and blend outward. This technique helps in achieving a natural gradient effect.
- Even Out the Tone: Use gentle tapping motions with your sponge to blend the product seamlessly into the skin. Pay special attention to areas like your chin, forehead, and around your nose.
- Layer as Needed: If some spots need more coverage, add a bit more pancake makeup to those areas, blending as you go.
- Set Your Makeup: Once you’re happy with the coverage, lightly dust a setting powder all over your face. This will lock everything in place.
- Finishing Touches: Spritz with a setting spray for an extra boost of longevity and complete your look with your favorite blush, eyeshadow, and lip color.
And voila! You’re ready to take on the world with your flawless pancake makeup. Enjoy the compliments!
Also Read This: Easy Guide to Transferring Images onto Fabric
Blending Techniques for a Natural Finish

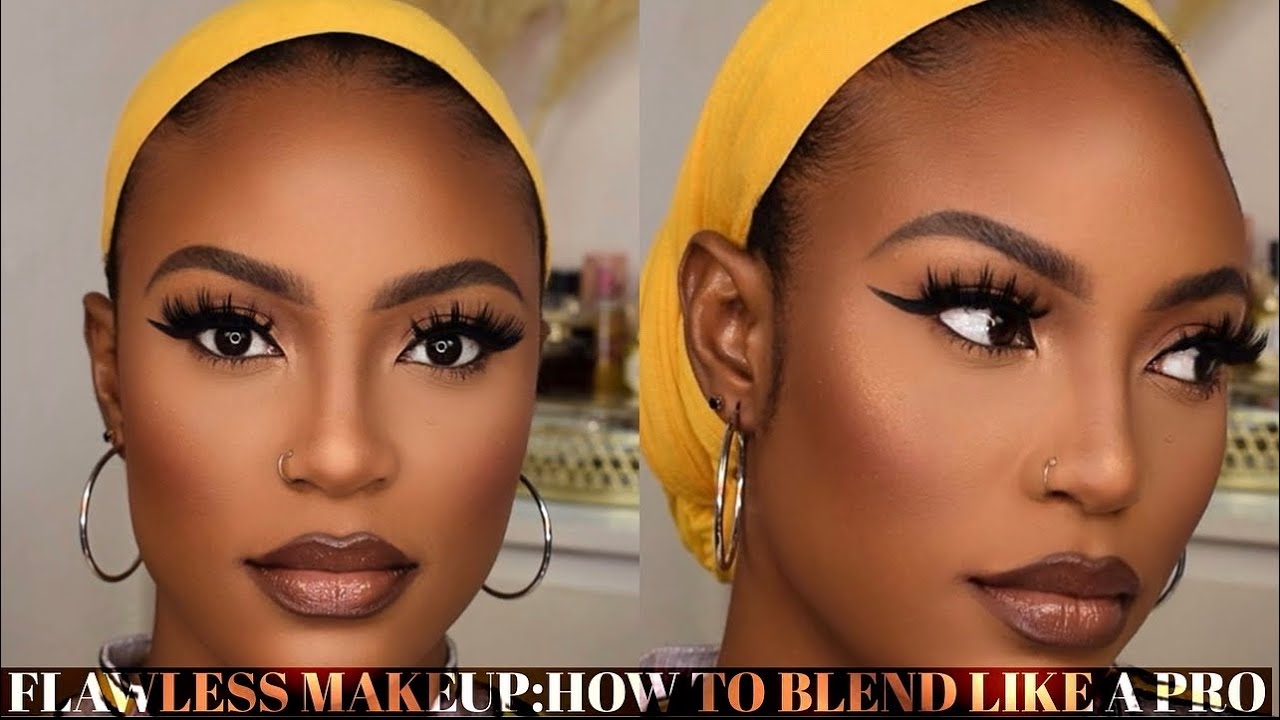
When it comes to pancake makeup, blending is the key to achieving a beautiful, seamless look. Even the most vibrant colors can appear harsh if not blended correctly. Here are some effective techniques to help you achieve that flawless finish:
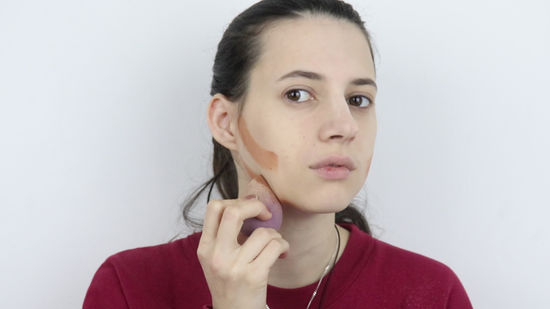
- Use a Damp Sponge: A damp makeup sponge is a game-changer. It helps to melt the pancake makeup into your skin, resulting in an airbrushed appearance. Remember to dab, not swipe!
- Fingers for Precision: Sometimes, your fingers are the best tools you have! They can warm up the product, making it easier to blend, especially around harder-to-reach areas like the nose and under the eyes.
- Buffing Brush: A fluffy buffing brush can do wonders for blending pancake makeup. Use circular motions to ensure even coverage and to soften any harsh lines.
- Layering Technique: Start with a thin layer and build up. This method allows for better blending and helps avoid that cakey appearance. Always blend thoroughly before applying additional product.
- Highlight and Contour: To achieve dimension, use two different shades (lighter and darker) to highlight and contour. Blend these with care to ensure transitions are smooth and natural.
Practice makes perfect! The more you blend, the more confident you'll become in your technique, leading to a flawless, natural look that lasts all day.
Also Read This: IMDb Awards Galore: Adding IMDb Accolades – Showcasing Your Accomplishments
Setting the Makeup for Longevity
After spending time perfecting your pancake makeup application, the last thing you want is for it to fade or smudge throughout the day. Setting your makeup is crucial for longevity, and there are a few tried-and-true methods to keep you looking fabulous:
- Translucent Powder: Apply a light dusting of translucent powder over your makeup to absorb excess oil and set the foundation. Use a fluffy brush to ensure an even application.
- Setting Spray: Consider using a makeup setting spray. This step seals everything in, providing a long-lasting finish. Hold it about 8-10 inches away from your face and spritz lightly.
- Avoiding Touch-ups: Try not to touch your face throughout the day. This can cause makeup to wear off more quickly, leading to those dreaded streaks.
- Carry Blotting Papers: If you tend to get oily, blotting papers are your best friend. They absorb excess oil without disturbing your makeup, keeping your look fresh.
- Choose the Right Formula: Opt for long-wear pancake makeup formulas that are designed to resist fading and smudging. Look for products labeled as “waterproof” or “long-wearing” for the best results.
With these setting techniques, you're sure to keep your pancake makeup looking pristine from morning until night, making every moment photo-ready!
Also Read This: Does Getty Images Have a Free Trial? Exploring Options for Exploring the Platform
Common Mistakes to Avoid
When it comes to pancake makeup, even seasoned pros can trip over common pitfalls that can derail an otherwise flawless finish. Let’s dive into some of the most frequent mistakes and how you can sidestep them for that picture-perfect look.
- Skipping Primer: One of the biggest mistakes is applying pancake makeup directly onto bare skin. A good primer creates a smooth canvas, helping your makeup adhere better and last longer.
- Using the Wrong Shade: It’s tempting to grab the first pancake makeup that looks good on the shelf, but testing shades is crucial. Your ideal tone should match your skin's undertone for a natural appearance.
- Applying Too Much Product: Pancake makeup is dense, and a little goes a long way. Start lightly and build coverage as needed—layering too much can lead to a cakey look.
- Neglecting to Blend: If you’re in a rush, it’s easy to forget the blending part. Take your time, and use a damp sponge or your fingers to effortlessly merge the makeup into your skin.
- Ignoring Your Skin Type: Each skin type has unique needs. If your skin is oily, opt for a mattifying primer; if it's dry, consider a hydrating base. Not catering to your skin type can lead to an uneven application.
- Forgetting to Set: After applying pancake makeup, don’t forget to set it with powder or a setting spray. This step ensures that your look stays put throughout the day.
Conclusion and Final Tips
So there you have it—your ultimate guide to achieving a flawless pancake makeup look! Now that you know the essentials, let’s wrap things up with a few final tips to help you shine.
First and foremost, practice makes perfect. Don’t be discouraged if your first attempt isn’t what you dreamed of; just keep experimenting! Here are some handy tips to keep in mind:
| Tip | Description |
|---|---|
| Start Light | Remember, it’s easier to add more coverage than to take away. Start light and gradually build up. |
| Invest in Quality Tools | A good sponge or brush can make all the difference in blending and achieving that seamless look. |
| Practice Skin Care | Your skin’s health directly influences your makeup. Keep your skin clean and hydrated for the best results. |
| Take Your Time | Don’t rush this process. Give yourself ample time to get everything just right. |
With these considerations in mind, you’ll be well on your way to mastering pancake makeup. Enjoy the process, have fun experimenting, and don’t forget to flaunt your stunning look!
 admin
admin


