Rubber band bracelets have taken the crafting world by storm! Whether you're a seasoned DIY enthusiast or a beginner just dipping your toes into the art of bracelet making, these fun accessories are an excellent way to express your creativity. Unlike traditional jewelry-making, rubber band bracelets are affordable, easy to make, and can be personalized in countless ways. Best of all, you don't need a loom to create stunning designs! In this blog post, we'll explore how to make rubber band bracelets without a loom and have a blast doing it!
Materials Needed

Before diving into the world of rubber band bracelets, it’s essential to gather all the materials you'll need. Luckily, the list is short and sweet! Here’s what you'll require:
- Rubber Bands: The star of the show! Choose from a variety of colors and sizes to create unique patterns and styles. Regular-sized bands work well, but mini ones add a cute touch!
- Hook Tool: While optional, a hook tool (similar to a crochet hook) can make it easier to manipulate the bands and weave them together. If you don’t have one, your fingers can work just fine!
- Clips or S-Clips: These handy accessories are used to fasten the ends of your bracelet securely. They come in various shapes; just ensure they're strong enough to hold your design together.
- Scissors: A pair of scissors is useful for trimming any excess bands or cutting the rubber if it needs adjusting.
- Optional Decorative Elements: Think charms, beads, or any embellishments that resonate with your style! These additions can give your bracelet a more personalized touch.
Once you've rounded up your materials, you're all set to unleash your creativity and start crafting some fantastic rubber band bracelets without a loom!
Also Read This: how to make an image background transparent in google slides
3. Basic Techniques for Making Bracelets

Creating beautiful rubber band bracelets without a loom might sound tricky, but it’s really quite simple! There are a few fundamental techniques that can help you get started on this fun craft. Here’s a rundown of the most popular methods:
- Single Chain Technique:
This is the most basic style and perfect for beginners. Simply take one rubber band and twist it into a figure-eight shape, then loop another band through it. Keep repeating this process, adding more bands until your bracelet is the desired length. It’s like a crochet stitch, but way easier!
- Triple Chain Technique:
This technique adds a bit of flair to your bracelets! Start by looping a band around your fingers (or a pencil) three times, creating a thicker base. Then, use a separate band to wrap around all three loops and secure it in place. This thicker chain looks stunning on your wrist!
- Fishtail Technique:
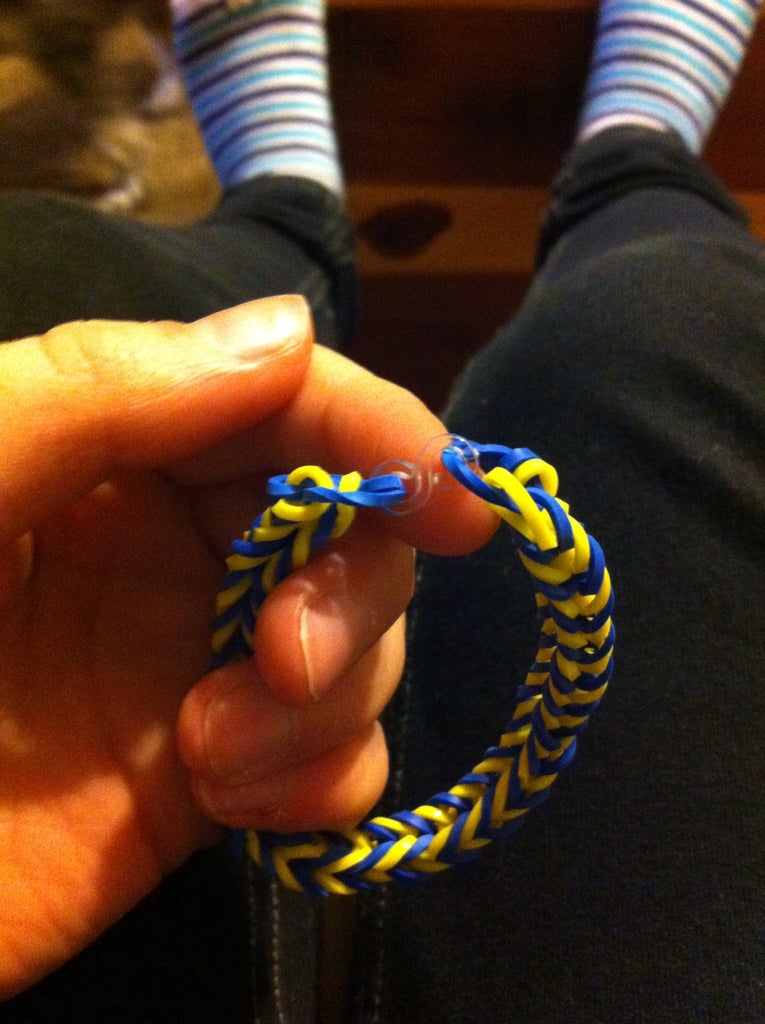
The fishtail technique is a crowd-pleaser. It involves using two different colors of rubber bands. Simply place the first band at an angle across your fingers, then loop the second band around the first, followed by a return to the first band. Repeat this pattern until it’s long enough. The result? An eye-catching bracelet!
- Infinity Bracelet:
This is a lovely way to symbolize friendship and eternity. Simply create a chain using the single chain technique but make it long enough to tie in a knot or connect both ends with a clip. This way, you can share it with a friend!
With these basic techniques at your disposal, you’re ready to unleash your creativity and craft beautiful rubber band bracelets in no time!
Also Read This: Tracing Images in Canva: A Step-by-Step Tutorial
4. Awesome Craft Ideas Using Rubber Bands
Rubber bands aren’t just for holding papers together—they can unleash some serious creativity! Beyond creating stunning bracelets, there are plenty of other crafty projects you can dive into. Here are some awesome ideas to inspire you:
- Rubber Band Art:
Turn rubber bands into colorful art by creating abstract designs. Simply stretch and twist bands onto a canvas or a sturdy piece of cardboard to make geometric shapes, patterns, or even 3D sculptures!
- Rubber Band Ball:
Why not make a rubber band ball? It’s simple! Just keep wrapping bands around each other until it forms a giant ball. Kids adore this project, and it doubles as a stress-relief tool!
- Decorative Keychains:
Using rubber bands and a bit of creativity, you can craft vibrant keychains. Simply braid or weave bands together and attach them to your keys. You can personalize it with various colors or patterns!
- Rubber Band Stamps:
Create custom stamps using rubber bands. Wrap bands around a block of wood or a cardboard base to form a unique design. Dip your creation in ink and stamp away—it’s a fun way to add flair to cards or letters!
- Catapult or Slingshot:
If you're feeling adventurous, why not build a simple catapult with rubber bands? Use some popsicle sticks or a small plastic spoon to launch small items. Just make sure to use it in a safe environment!
These creative ideas showcase just how versatile rubber bands can be! So gather those bands and let your imagination run wild!
Also Read This: how to print large image
5. Step-by-Step Guide to Making Your First Bracelet
Creating your very first rubber band bracelet can be a fun and rewarding experience! With just a few materials and simple steps, you’ll be rocking a colorful accessory in no time. Let’s jump right into it!
What You’ll Need:
- Rubber bands (in your favorite colors)
- A simple clip or connector (like a C-clip or S-clip)
- A pencil or your fingers (to hold the bracelet while weaving)
Step-by-Step Instructions:
- Choose Your Colors: Pick out 2-4 rubber band colors that you want to use. This will help you create a vibrant design.
- Start with the First Band: Take your first rubber band and twist it into a figure-eight shape. This is the foundation of your bracelet.
- Layer Bands: Place another rubber band over the first one, making sure it’s in the same direction and not twisted.
- Weaving: Carefully pull the bottom band up and over the top one. This is also where your pencil or fingers will help keep things stable.
- Continue Adding Bands: Keep layering and weaving bands until you’ve reached your desired length. Don’t forget to mix up the colors as you go!
- Connect the Ends: Once you’ve finished, secure the ends using your clip. Make sure it’s snug but not too tight!
And there you have it—your very first rubber band bracelet! Just remember to have fun and be creative with your color choices!
Also Read This: Mastering OK.ru for Effective Personal Brand Building and Promotion
6. Tips for Experimenting with Designs
Once you’ve mastered the basics of making rubber band bracelets, it’s time to explore the endless design possibilities! Here are some fun tips to help you get creative and add a personal touch to your bracelets:
Mix and Match Colors: Don’t be afraid to experiment with different color combinations. Try using contrasting colors for a bold look, or similar shades for a more subtle effect. Create patterns with color blocks, or alternate between colors for a fun twist!
Use Various Band Sizes: While standard rubber bands work just fine, using different sizes can give your bracelet a unique texture. Larger bands can create a chunkier look, while smaller ones offer a delicate finish.
Try Different Weaving Techniques: As you gain confidence, look up various weaving techniques like the “Fishtail” or “Chevron” designs. Each method offers a different final look and can be really exciting to try out!
Play with Lengths: Experiment with different lengths for your bracelets. Shorter ones can be stacked for a trendy layered look, while longer ones can be worn as necklaces or anklets!
Incorporate Charms: Personalize your creations by adding small charms or beads to your bracelets. You can thread them onto the rubber bands as you weave or connect them later for a fun touch.
Have fun with it! The beauty of creating rubber band bracelets is that there are no strict rules—just let your imagination run wild!
Creating Rubber Band Bracelets Without a Loom
Rubber band bracelets have surged in popularity, particularly among kids and teenagers. These colorful accessories are not only fun to make, but they also allow for artistic expression. While loom kits are widely available, creating rubber band bracelets without a loom opens up a world of creativity. Below are the methods, materials, and step-by-step instructions to help you craft beautiful rubber band bracelets effortlessly.
Materials Needed
- Colorful rubber bands
- Scissors
- Clips (S-clips or jump rings)
- Two fingers (to use as a loom alternative)
Basic Techniques
Here are two popular techniques for creating rubber band bracelets without a loom:
- Two-Finger Technique: Use two fingers to create a chain or zig-zag pattern. Simply place a rubber band over your two fingers, twist it, and add another band on top, repeating until you've reached your desired length.
- Single-Finger Technique: This technique involves wrapping bands around a single finger in a figure-eight pattern. Each layer will create a distinctive design. Secure it with a clip once completed.
Steps to Create a Simple Bracelet
- Choose your rubber bands in desired colors.
- Begin by wrapping a rubber band over your fingers in the chosen technique.
- Continue layering rubber bands and changing colors as desired.
- Once you've reached the desired length, secure the bracelet by attaching the ends with a clip.
- Remove the bracelet from your fingers and enjoy your handmade creation!
Creating rubber band bracelets without a loom is a delightful and easy activity that encourages creativity and fine motor skills. By using simple materials and techniques, your bracelets can reflect personal style and flair. With practice, you can master complex designs and perhaps even invent your own unique patterns!
Conclusion and Final Thoughts
Using your hands and a few supplies, making rubber band bracelets without a loom is not just a craft, but an enjoyable activity that promotes creativity and can easily turn into a fun pastime or a bonding experience with friends.
 admin
admin


