Posting a video on YouTube from your iPad can feel a bit daunting if you're not familiar with the platform. But don’t worry! It’s a straightforward process that anyone can master. Whether you're sharing a fun family moment, a creative project, or even a vlog, this guide will walk you through the steps needed to get your video online quickly and easily. So, let’s dive right in!
Preparing Your Video

Before you hit that upload button, it’s essential to ensure your video is ready for the world to see. Here’s how to prepare your video for posting on YouTube:
- 1. Choose the Right Format: Make sure your video is in a compatible format. YouTube supports several formats but the most common ones are MP4, MOV, and AVI.
- 2. Edit Your Video: If you haven’t already, consider using iMovie or another editing app on your iPad. Edit for clarity, trim any unnecessary parts, and add transitions or music. A polished video is more likely to attract viewers!
- 3. Optimize for Quality: Aim for a resolution of 1080p for high-quality uploads. You can check the video quality in the settings of your recording app or video editing software.
- 4. Add Metadata: Before uploading, jot down some thoughts on your video title, description, and tags. These will help your video be discovered. Titles should be catchy and relevant!
- 5. Ensure Good Audio: If your video includes narration or sound, make sure the audio quality is clear. Background noise could be distracting for your viewers.
Taking these steps will help ensure your video turns out great and attracts viewers once it’s uploaded to YouTube. Happy editing!
Also Read This: Can You Screen Record YouTube Videos?
Downloading the YouTube App

If you're planning to post a video on YouTube from your iPad, the first step is to download the YouTube app. Thankfully, this process is a breeze and only takes a few minutes! Here's how you can do it:
- Open the App Store: Locate the App Store icon on your iPad's home screen and tap on it to open.
- Search for YouTube: Tap on the search bar at the bottom of the screen, then type in "YouTube." Hit search to see the results.
- Select the YouTube App: The official YouTube app should appear at the top of the search results. Make sure to choose the one developed by Google.
- Download the App: You'll see a cloud icon or a "Get" button. Tap it, and the app will begin downloading. If prompted, you may need to enter your Apple ID password or use Face ID/Touch ID.
- Open the App: Once the app has downloaded, tap "Open" or find the YouTube icon on your home screen and tap it to launch the app.
Now that you have the YouTube app installed, you're one step closer to sharing your videos with the world. With the app ready to go, we can now move on to creating your YouTube account, which will allow you to upload your videos and manage your channel.
Also Read This: Shipping Settings: Turning Off International Shipping on eBay
Creating a YouTube Account

Before you can upload videos to YouTube, you’ll need a YouTube account. Don't worry; creating one is super simple! You have a few options, but the most common way is to use your Google account. Here’s how to get started:
- Open the YouTube App: Launch the app you just downloaded.
- Sign In: Tap on the profile icon in the top right corner of the screen. If you don’t have an account yet, you may see an option that says "Sign in." Tap on it.
- Create Account: You'll be prompted to either sign in with an existing Google account or create a new one. If you choose to create a new account, follow the prompts to fill in your name, birth date, and gender.
- Complete Your Profile: You’ll also need to set up a username and password. Make sure to choose something memorable. Once you’ve filled everything out, tap “Next.”
- Agree to Terms: You’ll then be shown Google’s terms of service and privacy policy. After reviewing them, tap “I agree” to proceed.
Congratulations! You now have a YouTube account. With this account, you'll be able to upload videos, subscribe to other channels, and engage with the YouTube community. So now that your account is set up, you’re ready to dive into the fun part—uploading your videos!
Also Read This: Adding Image Textures in Blender for Realistic Designs
Uploading Your Video
So, you've got your video ready, and you're itching to share it with the world! Here's how to get that masterpiece from your iPad to YouTube in just a few simple steps:
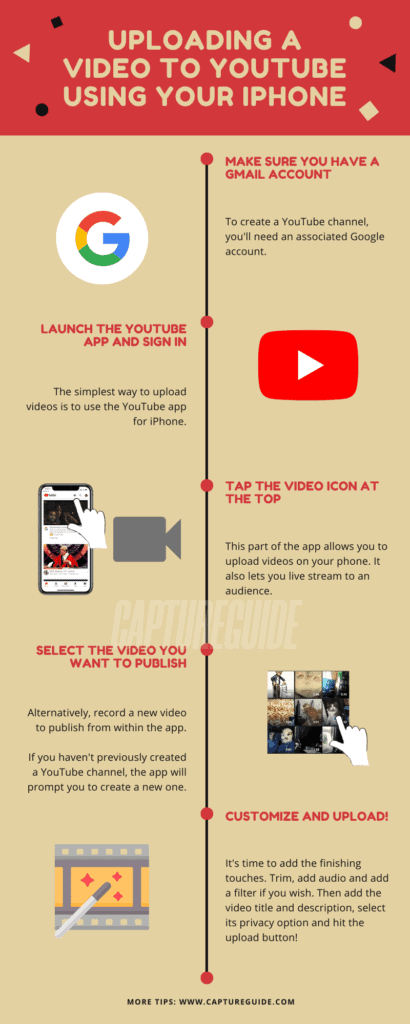
- Open the YouTube App: First things first, launch the YouTube app on your iPad. Make sure you're logged into your account.
- Tap on the Camera Icon: Look for the camera icon (it’s usually at the top or bottom of the screen) and give it a tap. This is where the magic begins!
- Select Your Video: Choose the video you want to upload from your iPad’s library. You can preview it to ensure you’ve picked the right one.
- Edit Your Video: YouTube offers some tools for basic video editing right there in the app. If necessary, trim clips or add filters to make your video shine!
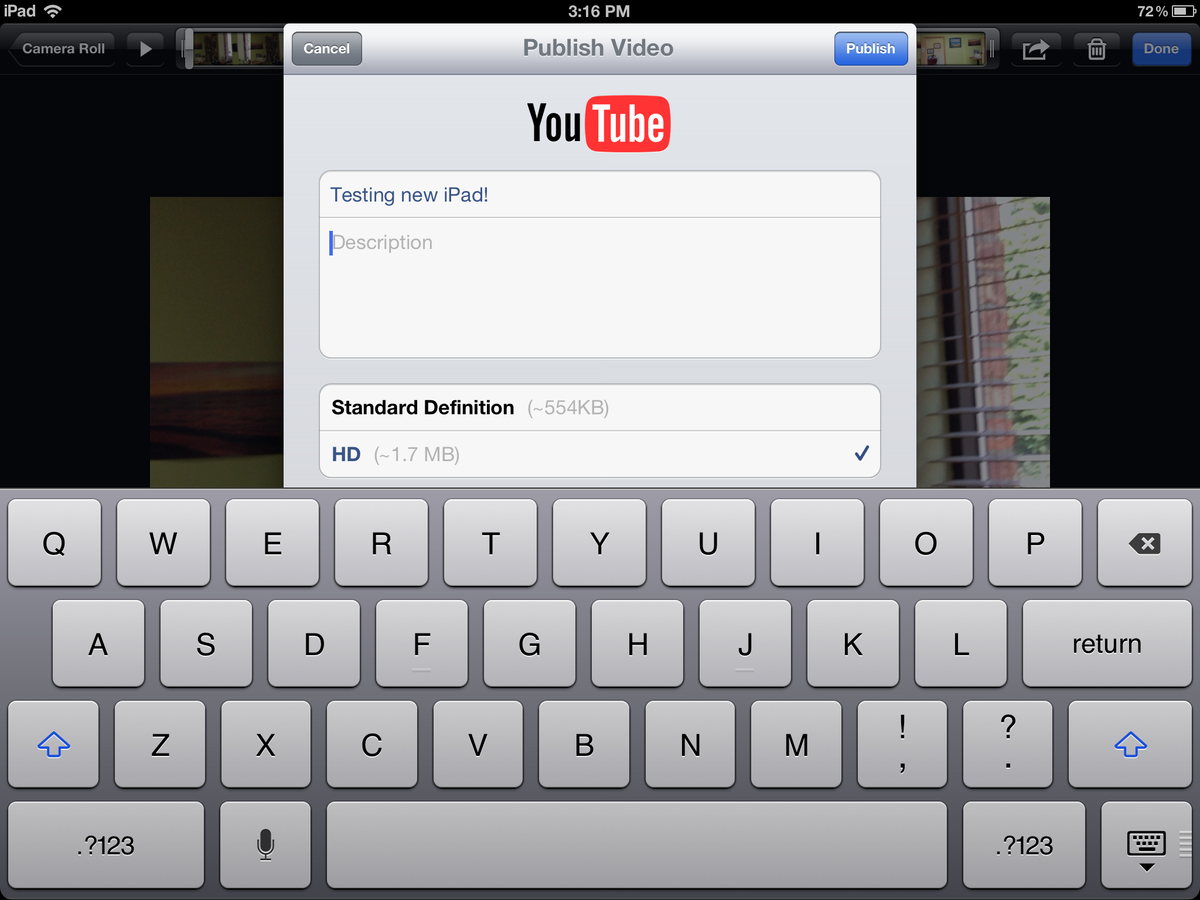
- Add Your Title and Description: Now’s the time to make it catchy! Create a title that captures attention and write a brief description that gives viewers a taste of what your video is about.
- Set Privacy Settings: Decide if you want your video to be Public, Unlisted, or Private. Public makes it accessible to everyone, while Unlisted means only those with the link can view it, and Private keeps it completely to yourself.
- Finalize Your Upload: Once everything looks good to go, hit that "Upload" button. Sit back and relax as your video begins to upload!
That's it! Your video is now live on YouTube, and soon, viewers around the globe will be able to see your creation!
Also Read This: Maximizing Sales on Getty Images: Strategies for Optimizing Your Portfolio Performance
Optimizing Your Video for Search
Uploading your video is just the first step; now it's time to make sure it gets the attention it deserves! Here are some nifty tips for optimizing your video for search:
- Keywords in the Title: Use relevant keywords in your video title. Think about what potential viewers might be typing into the search bar.
- Detailed Description: In the description, provide context and use keywords more freely. Aim for a compelling introductory paragraph followed by a more detailed outline or summary of the content.
- Tags Matter: Use tags wisely! Adding relevant tags can help your video appear in related searches. Think about specific terms and broader categories.
- Custom Thumbnails: Create an eye-catching thumbnail to enhance your click-through rates. You can design it using apps like Canva before uploading!
- Engagement Encouragement: Don't forget to prompt viewers to like, comment, and subscribe. Engagement can boost your video's visibility.
By optimizing your video, you’ll increase its chances of being discovered by the right audience. With a little effort, you can turn your video into a hit!
Also Read This: How to Find a Place from an Image
7. Publishing and Sharing Your Video
Congratulations! You’ve successfully uploaded your video to YouTube using your iPad. Now it’s time for the fun part: publishing and sharing your masterpiece with the world. You're just a few taps away from showing off your creativity!
Before you hit that publish button, let’s make sure everything looks perfect. Here’s a quick checklist:
- Title: Make it catchy and clear. A great title will attract viewers and help your video show up in searches.
- Description: This is your chance to explain what your video is about. Include relevant keywords to boost discoverability.
- Thumbnail: Choose an eye-catching thumbnail. You can pick a frame from the video or upload a custom image. Thumbnails play a HUGE role in getting clicks!
- Tags: Add tags that relate to your video content. They help categorize your video and improve search visibility.
Now, once you’re ready, hit that “Publish” button! Your video is now live on YouTube. But wait, there's more! Here are some ways to share your creation:
- Social Media: Share your video on platforms like Facebook, Twitter, and Instagram. A few friends' shares could lead to a larger audience!
- Email: Send a link to your video via email to your contacts or newsletter subscribers.
- Embed: If you have a blog or website, embed the video directly for your readers to view seamlessly!
Remember, engaging with your audience by responding to comments and asking for feedback can really help build your community. So go ahead—publish and share away!
8. Conclusion
And there you have it! Posting a video on YouTube from your iPad is not just easy, it’s also fun! Whether you’re a vlogging pro or a first-time creator, this guide has equipped you with all the knowledge you need to navigate the process smoothly.
We’ve walked through:
- Preparing your video for upload.
- Using the YouTube app to upload directly from your iPad.
- Editing your video’s details for maximum impact.
- Publishing and sharing your video effectively.
So, take that leap! Create something amazing and share your passion with the world. Remember, each video you post is an opportunity to learn and improve, so don’t hesitate to experiment with different styles and formats.
Feel free to come back to this guide whenever you need a refresher. The YouTube community is vast, and there’s room for your voice. Happy uploading!
 admin
admin


