Hand embroidery is a delightful and creative craft that allows you to embellish fabric with stunning designs and patterns using just a needle and thread. If you’ve ever admired beautifully stitched patterns on clothing, linens, or home decor, you might have felt inspired to try your hand at it yourself. And guess what? You don’t need to be a sewing expert to start!
Embroidery can be both relaxing and fulfilling. It offers a chance to express your individuality and creativity while also providing a sense of accomplishment as you watch your designs come to life, stitch by stitch. In this blog post, we’ll explore easy techniques that even beginners can master, enabling you to turn fabric into a canvas for your imagination.
So, whether you're looking to personalize a gift, spruce up your home, or just have fun while learning a new skill, hand embroidery can be an incredibly rewarding endeavor. Let’s get started on this exciting journey!
Essential Tools and Materials Required
Before you dive into the world of hand embroidery, it’s important to gather your tools and materials. Having the right supplies will make your embroidery journey smoother and more enjoyable. Here’s a handy guide to what you’ll need:
- Embroidery Needles: These are designed with a larger eye to accommodate embroidery thread. Choose needles that are appropriate for your fabric type.
- Embroidery Thread: You can use different types of threads such as floss, specialty threads, or even yarn. Each has its own texture and finish, so feel free to experiment!
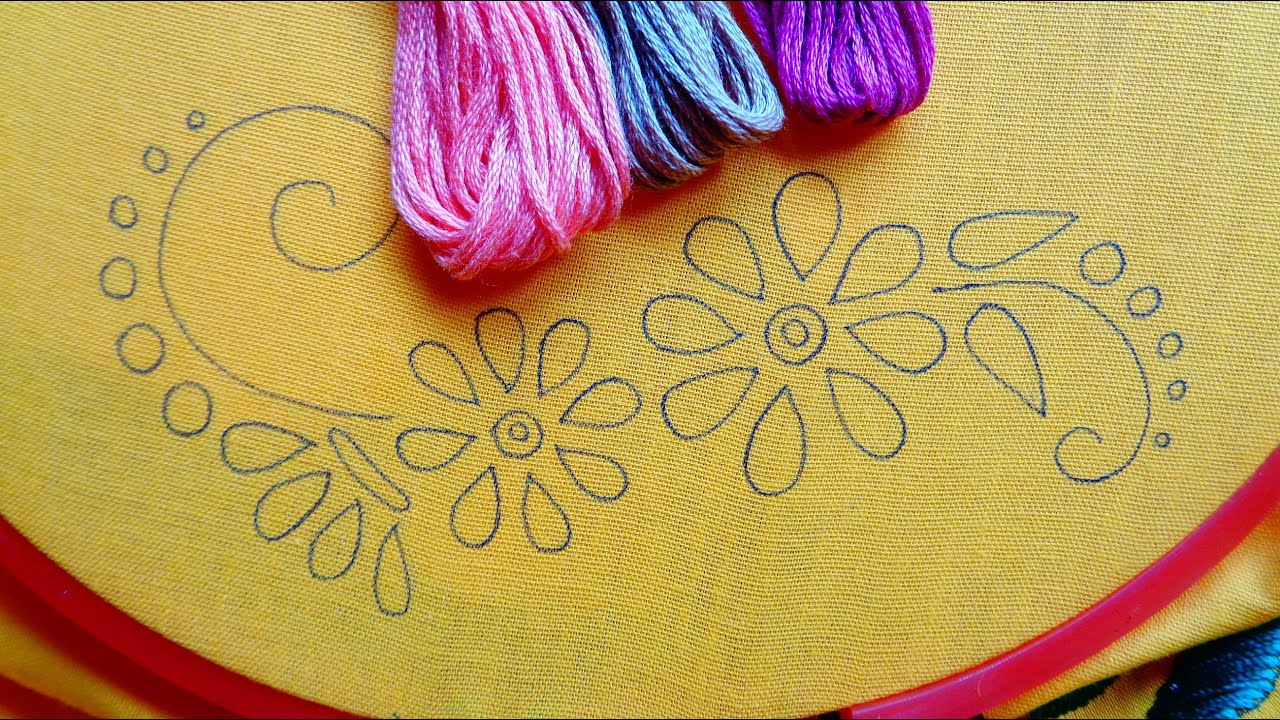
- Fabric: Cotton, linen, and canvas are great starting points. Ensure it's sturdy enough to hold the stitches without fraying.
- Embroidery Hoop: This tool holds your fabric taut, making it easier to stitch and preventing puckering.
- Scissors: A pair of small, sharp scissors is essential for trimming threads and making precise cuts.
- Marking Tools: Use fabric pens or chalk to mark your designs on the fabric. Ensure these are removable to avoid any unwanted marks on your finished piece.
- Pattern or Design: You can find free patterns online or create your own! Having a design in mind will guide your stitching.
Having these essential tools and materials at your fingertips will set you on the right path toward success in mastering hand embroidery. So, gather your supplies, roll up your sleeves, and let your creativity flow!
Also Read This: How to Change the Color of an Image in Figma for Custom Designs
3. Basic Stitches Every Beginner Should Know
Hand embroidery can seem daunting at first, but mastering a few basic stitches will help you build confidence and create beautiful designs! Let's dive into the essential stitches that every beginner should familiarize themselves with.
- Running Stitch: This is the most fundamental stitch and serves as a great starting point. Simply push your needle through the fabric and pull it back out a short distance away, repeating the process to create a dashed line.
- Backstitch: Ideal for outlines, the backstitch offers a continuous line. Insert the needle where you want the stitch to start, go back a little to create a stitch, then move forward and repeat. Your line will appear solid!
- Chain Stitch: This stitch creates looped chains that look decorative and can be used for filling in shapes. Start with a small running stitch, then bring the needle back through the last stitch to create a loop. Keep repeating!
- Satin Stitch: Perfect for filling in shapes, the satin stitch involves laying down multiple parallel stitches side by side. This helps achieve a smooth and luscious surface, making your design pop!
- French Knot: A tiny, charming knot that adds flair to your work. Wrap the thread around the needle a few times, then push it through the fabric while holding the wrap. It creates a lovely, textured dot.
Practicing these basic stitches will not only improve your skills but will also open up a whole new world of creative possibilities in your embroidery projects!
Also Read This: How to Transfer an Image Onto Paper with Ease
4. Step-by-Step Guide to Starting Your First Project
Ready to embark on your own hand embroidery journey? Follow these simple steps to kick off your first project and unleash your creativity!
- Gather Your Supplies: Start with the essentials. You’ll need:
- Embroidery floss or thread
- A needle with a larger eye (for easier threading)
- Fabric (like cotton or linen)
- Embroidery hoop (to keep your fabric taut)
- Scissors
- A water-soluble fabric marker or pencil (to sketch your design)
Starting your first project doesn’t have to be intimidating. By following these steps and practicing your stitches, you'll be on fast track to becoming a confident embroidery artist!
Also Read This: How to Put an Image on a Shirt: Step-by-Step Guide for Custom Apparel
Tips for Maintaining Even Tension while Embroidering
Mastering hand embroidery isn't just about picking the right thread and needle; it's also about achieving that perfect tension. You want your stitches to be uniform, creating that beautiful texture we all love. Here are some handy tips to help you maintain even tension as you stitch:
- Practice makes perfect: The more you embroider, the better you'll understand how much pull you need with each stitch. So don’t be afraid to practice on scrap fabric!
- Keep your hands relaxed: Tension in your hands can lead to uneven stitches. Make sure to relax your grip on your needle and thread, letting your hands move naturally.
- Use consistent stitch techniques: Whether it’s a backstitch or a satin stitch, try to use consistent methods. Make those stitches the same length and shape—this will help a lot!
- Count your threads: This one might be surprising, but keeping track of how many strands you're using (1, 2, or more?) can help you maintain tension. Use the same amount throughout your project.
- Adjust your fabric tautness: Ensure your fabric is not too tight in the embroidery hoop. If it’s too loose or too tight, it can affect your stitching. Aim for a comfortable tension!
By keeping these tips in mind, you'll be well on your way to achieving that flawless look in your hand embroidery. Remember, it’s all about finding your rhythm and enjoying the process!
Also Read This: Achieve a Flawless Look with Liquid Foundation Application
Exploring Different Fabrics Suitable for Hand Embroidery
Choosing the right fabric can make or break your embroidery project. Not all fabrics are created equal when it comes to hand embroidery! Here, we'll explore different fabrics that are beginner-friendly and suitable for stitching.
| Fabric Type | Key Characteristics | Recommended Stitches |
|---|---|---|
| Cotton Muslin | Soft, lightweight, and easy to work with; holds stitches well. | Backstitch, Satin stitch |
| Linen | Strong and durable with a lovely texture; gives a rustic feel. | Cross stitch, Chain stitch |
| Canvas | Thicker and sturdier; ideal for heavier threads and embellishments. | Appliqué, Free-motion embroidery |
| Silk | Smooth, luxurious, and delicate; best suited for lighter threads. | Outline stitch, French knots |
| Felt | Thick and plush; easy to cut and handle without fraying. | Straight stitch, Whip stitch |
Now that you have an idea of some fabrics to experiment with, go ahead and grab a few! Each fabric brings its distinct flair and texture to your embroidery work, allowing you to explore your creativity. Happy stitching!
Also Read This: how to print large image
7. Common Mistakes to Avoid as a Beginner
Starting out in hand embroidery can be a bit like learning a new language; it’s easy to make mistakes, but with a little awareness, you can greatly improve your skills. Here are some common pitfalls that many beginners encounter:
- Skipping the Basics: It’s tempting to jump straight into complex patterns, but mastering basic stitches first will make your experience much smoother.
- Poor Thread Management: Not ensuring your thread is untangled can lead to frustration and uneven stitching. Always keep your thread organized!
- Inadequate Tension: Whether you’re stitching too tightly or loosely, inconsistent tension can ruin the appearance of your embroidery. Practice until you find a comfortable balance.
- Ineffective Use of Fabric: Choosing the wrong type of fabric can make your work difficult. Start with cotton or linen—they’re beginner-friendly!
- Neglecting Tools: Using dull needles or low-quality thread can hinder your work. Invest in good tools to see a noticeable improvement.
- Skipping the Practice: Like any skill, embroidery takes time to master. Don’t get discouraged; the more you stitch, the better you'll become!
By being aware of these common mistakes and taking steps to avoid them, you'll find that your embroidery journey becomes much more enjoyable and fruitful!
Also Read This: Adding a Getty Images Watermark to Your Photos
8. Resources for Further Learning and Inspiration
If you're eager to dive deeper into the world of hand embroidery, there’s a treasure trove of resources out there just waiting for you! Here’s a list of some fantastic ways to expand both your knowledge and creativity:
- Books: Check out titles like “The Embroidery Book” or “Doodle Stitching” for step-by-step guides and project ideas.
- YouTube Channels: Channels like “Salley Mavor” and “Needle 'n Thread” offer excellent tutorials that are easy to follow.
- Online Courses: Websites like Skillshare and Craftsy provide structured courses on various embroidery techniques.
- Social Media: Instagram and Pinterest are goldmines for inspiration. Follow hashtags like #handembroidery to discover new styles and patterns.
- Forums and Groups: Join online communities such as Facebook Groups or forums like r/Embroidery on Reddit to connect with fellow enthusiasts.
With these resources at your fingertips, you'll never run out of ideas or techniques to explore. Happy stitching!
How to Master Hand Embroidery with Simple Techniques for Beginners
Hand embroidery is a timeless art that combines creativity with craftsmanship. For beginners, it can seem daunting, but with the right techniques and a bit of practice, anyone can create beautiful embroidered pieces. Below are some essential techniques and tips to help you master hand embroidery.
Essential Tools You'll Need
- Embroidery Hoop: Keeps your fabric taut and prevents distortion.
- Embroidery Needles: These needles have a larger eye to accommodate embroidery floss.
- Embroidery Floss: A six-strand thread available in various colors.
- Fabric: Choose cotton or linen for easy handling.
- Scissors: A pair of sharp embroidery scissors will help snip threads cleanly.
Basic Stitches to Start With
| Stitch | Description |
|---|---|
| Running Stitch | A simple stitch for outlines and basic designs. |
| Backstitch | Creates a solid line ideal for outlines. |
| Chain Stitch | Forms a decorative chain-like border. |
| French Knot | Adds texture and dimension to your work. |
Tips for Successful Hand Embroidery
Here are some tips to help you improve your hand embroidery skills:
- Start with simple patterns and gradually tackle more complex designs.
- Practice regularly to develop your hand-eye coordination.
- Use quality thread and fabric for better results.
- Watch tutorials online to learn various techniques.
- Join embroidery groups to gain inspiration and feedback.
By following these guidelines, beginners can find joy and satisfaction through hand embroidery. Don't be discouraged by initial challenges; instead, embrace them as a learning opportunity. The more you practice, the more confident you will become, transforming your creative ideas into beautiful stitched art. Keep pushing your boundaries and enjoy the process of creating!
 admin
admin


