Creating a paper sword can be a delightful and creative endeavor that sparks imagination for both kids and adults alike! Whether you're preparing for a themed party, a fun costume, or just looking for a crafty project to pass the time, a paper sword is an easy and affordable option. In this blog post, we'll explore the materials you'll need to create your very own paper sword and guide you through the simple steps to make it come to life. Let’s get started and unleash your inner warrior!
Materials Needed
Before diving into the paper sword-making process, let’s gather all the essential materials you'll need. Fortunately, most of these items can be found around your home or easily obtained from a local store. Here’s a quick checklist to help you out:
- Paper: You’ll need sturdy paper, such as cardstock or construction paper, to ensure your sword is durable. You can also use plain printer paper, but keep in mind it may bend easily.
- Scissors: A pair of scissors will be crucial for cutting the paper into the desired sword shape.
- Marker or Paint: To add some flair, use markers, paint, or colored pencils to decorate your sword. Get creative with colors and designs!
- Tape or Glue: You might need tape or glue to keep different parts of the sword secure and intact.
- Ruler: A ruler helps you measure and ensures that your sword is proportional and balanced.
- Pencil: Use a pencil to sketch the outline of your sword before cutting, allowing for precision.
- Optional Embellishments: Consider adding decorative elements like glitter, stickers, or ribbons for a unique touch.
With these materials in hand, you’re ready to embark on your sword-building adventure. Gather your supplies, and let’s get crafting!
3. Step-by-Step Instructions
Creating a paper sword can be a delightful and simple project that sparks creativity and fun! Gather your supplies, and let’s dive into the step-by-step instructions that will guide you through the process.
*Materials Needed:
- Cardstock or thick paper
- Scissors
- Glue or tape
- Pencil
- Ruler
- Markers, crayons, or colored pencils
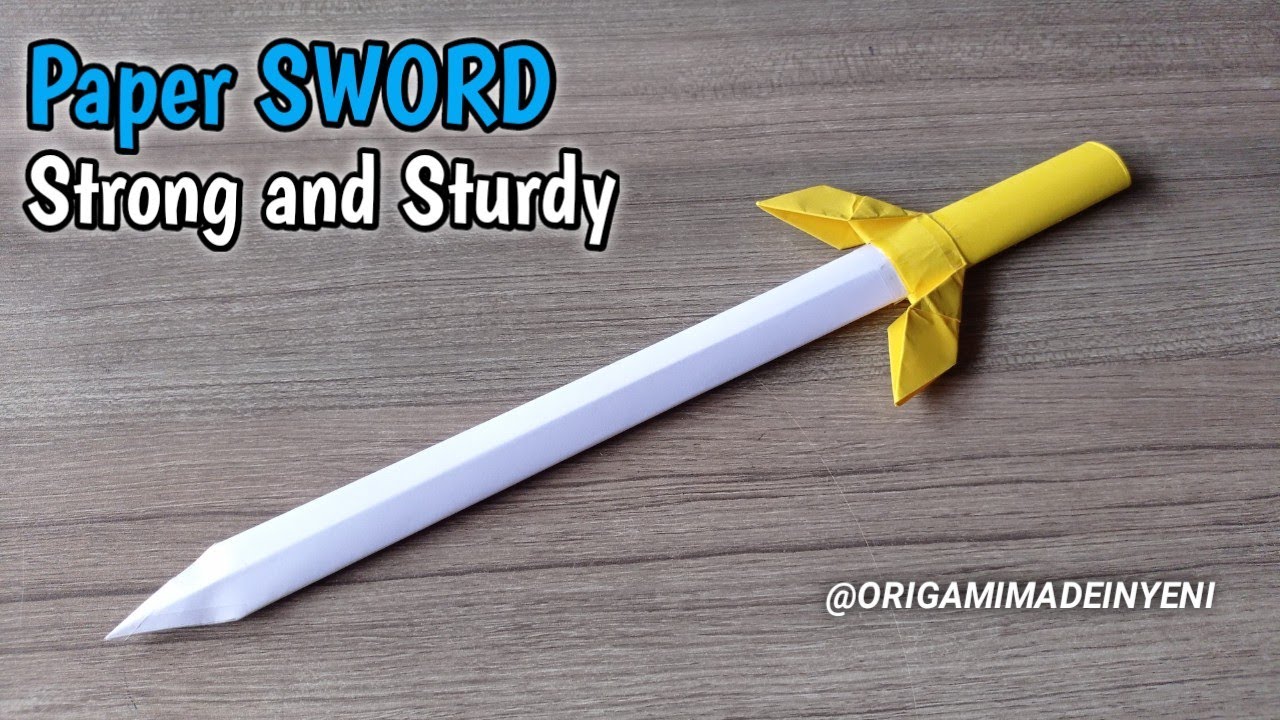
Step 1: Drawing the Sword Shape
Take a piece of cardstock and use the ruler to measure a long rectangle for the blade. A standard sword blade can be about 3 inches wide and 24 inches long.
Step 2: Cutting the Blade
Now, carefully cut along the lines you drew. Remember, safety first! Go slow, and if you need help, don’t hesitate to ask an adult.
Step 3: Making the Handle
For the handle, draw another smaller rectangle—around 6 inches long and 1.5 inches wide—at one end of the blade. Cut it out, and optionally, you may want to create a cross-guard by cutting two smaller rectangles, one for each side of the handle.
Step 4: Assembling Your Sword
Glue or tape the handle and the cross-guard to the blade. Make sure they’re securely attached for the best sword-wielding experience!
Step 5: Final Touches
Once everything is glued and dried, it’s time to decorate your sword! You can add designs, color it in, or even write a name on it. Let your imagination run wild!
4. Decorating Your Paper Sword
Now that you’ve crafted your paper sword, it’s time to let your creative juices flow and decorate it! This is where the real fun begins, and there are so many exciting ways to personalize your sword.
Tips for Decorating:*
- Color it Up: Grab those markers or colored pencils! Bright colors can make your sword look magical. Consider using shiny metallic colors for a royal look.
- Patterns and Designs: Try adding stripes, swirls, or even a dragon or knight pattern. There are no limits to what you can draw!
- Stickers and Gems: If you've got stickers or faux gems lying around, stick them on for an extra embellishment. They can represent jewels or magical effects.
- Fantasy Themes: Think about the theme of your paper sword. Is it a knight’s sword? A wizard’s staff? Decorate it according to your theme!
Remember, the decoration process is all about expressing yourself, so don’t worry about making it perfect. It’s your unique creation, after all! Also, consider adding some sparkle or shine with glitter or glitter glue for that extra flair.
In the end, the joy comes from making it your own. Enjoy wielding your beautifully decorated paper sword and let your imagination soar!
Creative Uses for Your Paper Sword
So, you've crafted an awesome paper sword—congratulations! Now, what do you do with it? The fun doesn’t stop at making it. Here are some creative uses for your paper sword that will add an extra layer of excitement to your crafty creation:
- Playtime Adventures: Use your paper sword in imaginative role-playing games with friends. Whether you’re a knight on a quest or a pirate searching for treasure, the paper sword can enhance your playtime experience!
- Decorative Display: Once you’re done playing, why not display your sword as art? Hang it on your wall or lean it against a bookshelf. You can even decorate it with paint or glitter to make it a standout piece in your room.
- Crafting Challenge: Organize a crafting session with friends where everyone makes their own paper weapon. You can have a mini competition to see who designs the most creative sword!
- Photo Props: Paper swords can be fantastic props for a photoshoot, especially themed ones. Dress up as your favorite fantasy character and strike a pose with your sword. Your social media followers will love it!
- Gift for Kids: If you have a little one at home or need a gift for a child's birthday, a personalized paper sword makes a thoughtful DIY present. Kids love to pretend, and this can encourage their imaginative play!
All in all, the possibilities are endless! Your paper sword isn’t just a piece of art; it’s a gateway to creativity and fun.
Conclusion
Creating a paper sword is much more than just a simple craft; it’s an opportunity to unleash your creativity and dive into a world of imaginative play. Remember, it doesn’t have to be perfect or fancy. The beauty of making a paper sword is in the joy it brings, both in the creation process and the adventures that follow!
In conclusion, here’s a quick recap of why you should give this fun project a try:
| Benefits | Description |
|---|---|
| Enhances Creativity | Crafting a paper sword allows you to express your artistic flair. |
| Encourages Play | They are perfect for role-playing games that spark the imagination of both kids and adults. |
| Great for Social Engagement | Invite friends or family to join in on the fun; it’s a wonderful way to bond over a shared activity. |
So gather your materials, get creative, and most importantly, have fun with your paper sword! Every slice of imagination will lead you to new adventures!
Create a Paper Sword for Fun
Making a paper sword is a fun, creative activity that engages both children and adults. Whether you're planning a themed party, role-playing, or simply enjoying a DIY project, crafting a paper sword can unleash your imagination. This simple guide outlines the steps to create your very own paper sword, with tips on decoration and handling.
Materials Needed
- Cardstock or thick paper
- Scissors
- Glue or tape
- Markers or colored pencils
- Ruler
- Pencil
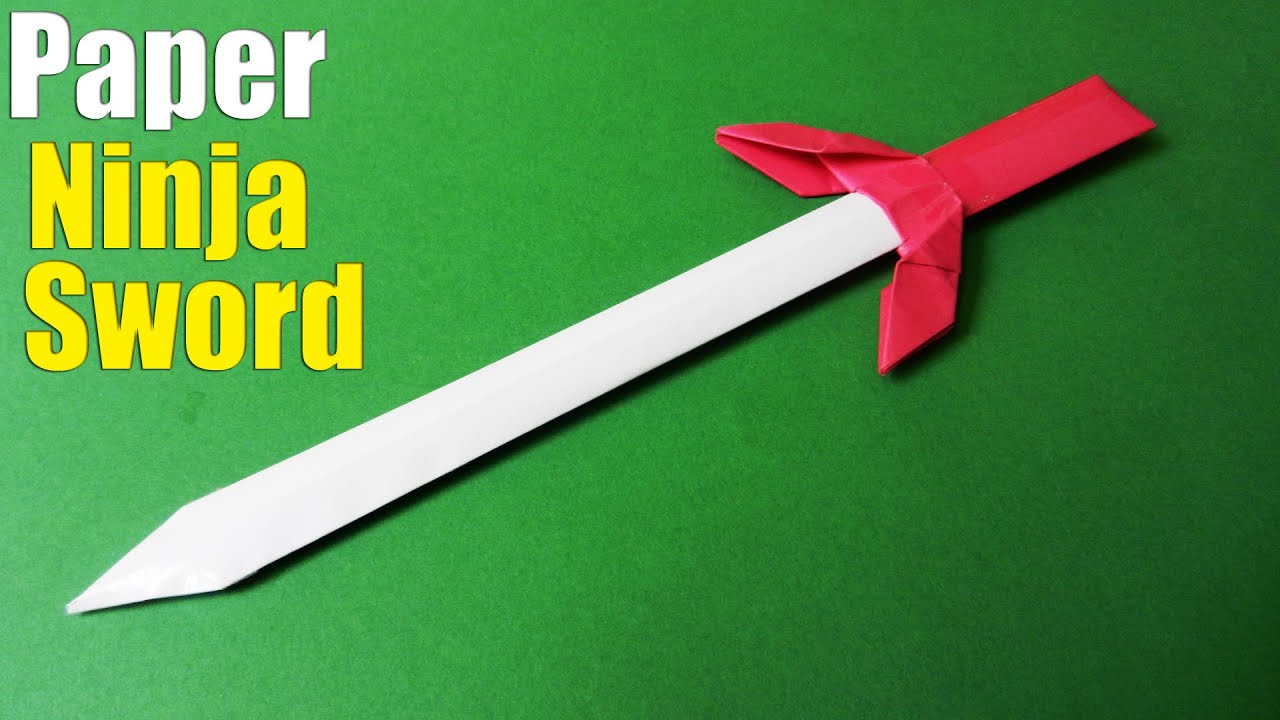
Steps to Create Your Paper Sword
- Design the Blade: Using a ruler and pencil, draw a long triangle shape on the cardstock, which will serve as the blade.
- Cut Out the Blade: Carefully cut along the pencil lines to create your sword blade.
- Create the Hilt: Cut a rectangular piece of paper, about 4 inches wide and 8 inches long. Fold it in half to reinforce it.
- Attach the Hilt: Use glue or tape to attach the hilt to the bottom of the blade.
- Decorate: Use markers or colored pencils to add designs, names, or patterns to your sword.
Safety Tips
Always ensure that you handle scissors carefully and supervise younger children during the creation process. While paper swords are mostly harmless, it’s important to maintain a safe and respectful atmosphere during play.
Creating a paper sword is a great way to engage creativity while enjoying a hands-on activity. With just a few materials and steps, you can craft a symbolic weapon worthy of any imaginative adventure!


