Have you ever come across a YouTube video with audio that you just couldn’t get out of your head? Whether it's a catchy song, an inspiring speech, or some epic sound effects, extracting audio from these videos can open up a world of creative possibilities. Whether you're looking to use the audio for a podcast, a video project, or simply for personal enjoyment, this guide will walk you through everything you need to know to extract audio effectively on your PC. So, let’s dive right in!
Tools You Need for Extracting Audio

When it comes to extracting audio from YouTube videos, having the right tools can make all the difference. Here’s a list of some popular methods and tools that you can use:
- Online Converters: Websites like YTMP3 and Convert2MP3 allow you to paste the YouTube video URL and convert it to audio format directly in your browser without needing to install anything.
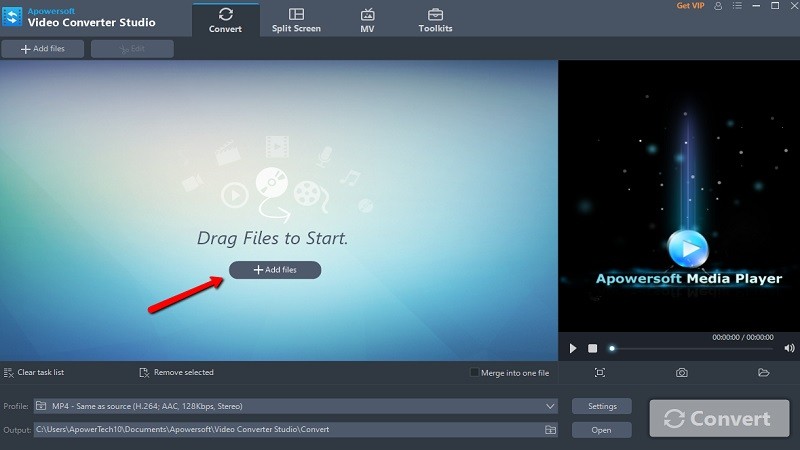
- Software Applications: Programs like 4K YouTube to MP3 and Freemake Video Converter provide user-friendly interfaces and more customization options. With these, you can download the audio in different formats such as MP3, M4A, or OGG.
- Browser Extensions: Extensions like YouTube MP3 Downloader for Chrome can streamline the process by allowing audio extraction right from the video page.
- FFmpeg: For the tech-savvy, using FFmpeg through command lines can give you extensive control over the audio extraction process. It supports nearly all audio formats and can even extract audio from video files saved on your PC.
Regardless of which tool you choose, the important thing is to find one that fits your needs and technical comfort level. Always remember to respect copyright laws when using any audio you extract!
Also Read This: How to Sell on Adobe Stock: A Step-by-Step Guide for Photographers
Step-by-Step Guide to Extract Audio

Extracting audio from a YouTube video might seem tricky, but with a clear guide, you can easily do it! Let’s break it down in a step-by-step manner for a smooth experience.
Step 1: Choose Your Tool
First, you’ll need a reliable audio extraction tool. There are many available, both online and as downloadable software. Popular options include:
- 4K Video Downloader
- YTD Video Downloader
- Any Video Converter
Pick one that suits your needs and install it on your PC if necessary.
Step 2: Find the Video URL
Next up, navigate to YouTube and find the video from which you want to extract audio. Simply copy the URL from your browser’s address bar.
Step 3: Paste the URL
Open your chosen audio extraction tool and paste the copied URL into the appropriate field. Most tools will have a 'Paste' button or a dedicated text box for this purpose.
Step 4: Choose Your Format
Before you proceed with the extraction, you’ll often have the option to select the audio format (more on formats in the next section!). Choose the one you prefer, such as MP3 or WAV, for best compatibility.
Step 5: Start the Extraction Process
Now it's time to hit the 'Download' or 'Extract' button. The tool will begin processing the audio from the video. Depending on the video length, this may take a few seconds to a couple of minutes.
Step 6: Save the Audio File
Once the extraction is complete, save the audio file to your desired location on your computer. You can now use it for your editing projects!
Also Read This: Save Video to MP4 with This Easy Streamable Download Method
Common Formats for Audio Extraction

When extracting audio from YouTube videos, you'll encounter several formats. Understanding these formats can help you choose the right one for your needs:
| Format | Best For | File Size | Compression |
|---|---|---|---|
| MP3 | General Use | Low | Lossy |
| WAV | High-Quality Projects | High | Lossless |
| OGG | Streaming | Medium | Lossy |
| FLAC | Archival | Medium | Lossless |
MP3 is probably the most widely used format because of its balance between file size and audio quality—perfect for casual listening. If you’re aiming for high-quality audio, WAV or FLAC (the latter being more efficient) are your best bets but come with larger file sizes.
On the other hand, if you're streaming, OGG is a great option, offering decent quality at a smaller size. Always think about your needs and the project you're working on when selecting a format!
Also Read This: how to fill a shape with an image in canva
5. Editing the Extracted Audio

Once you've successfully extracted audio from a YouTube video, the next step is editing it to fit your needs. Editing audio is essential whether you're preparing a podcast, creating a remix, or simply making a compilation.
To get started, you’ll need an audio editing software. Some popular options include:
- Audacity - A free, open-source tool that’s great for beginners.
- Adobe Audition - A professional-grade software that offers advanced features but comes with a cost.
- GarageBand - A fantastic option for Mac users, good for music and casual audio editing.
After choosing your audio editing software, import the extracted audio file. Here’s a basic guide on how to edit effectively:
- Trimming: Cut out any unnecessary silences or unwanted sections by selecting and deleting those parts.
- Volume Adjustment: Increase or decrease the volume to ensure that your audio is balanced. Watch out for clipping!
- Effects: Apply effects like equalization, reverb, or compression to enhance the sound quality.
- Noise Reduction: Use noise reduction tools to eliminate background sounds and improve clarity.
Finally, don’t forget to export your edited audio in the desired format (like MP3 or WAV) and ensure it’s saved in a location where you can easily find it later. Happy editing!
Also Read This: Best Practices for Uploading Your Projects on Behance
6. Best Practices for Audio Extraction
Extracting audio from YouTube videos is a straightforward process, but there are several best practices to keep in mind to ensure high-quality results and compliance with content guidelines.
- Use Trusted Tools: Always opt for reputable software or online services for extraction. This not only ensures quality but also protects your computer from malware.
- Check Video Quality: The quality of the audio extracted largely depends on the original video’s quality. Aim for videos with high audio fidelity.
- Respect Copyright: Before extracting, be aware of the copyright implications. Make sure you have permission to use the audio or that it's covered under fair use.
In addition, here’s a quick table to compare different audio formats commonly used:
| Format | Quality | File Size | Best Use |
|---|---|---|---|
| MP3 | Good | Small | Casual listening and sharing |
| WAV | Excellent | Large | Professional editing and archival |
By following these best practices, you can ensure that your audio extraction process is smooth, legal, and yields the best possible results!
Extract Audio from YouTube Video on PC for Editing Purposes
Extracting audio from YouTube videos can be a valuable process for various projects such as creating remixes, podcasts, or background music for your personal videos. This task can be accomplished easily on your PC using a variety of tools and software available today. Below are some effective methods to extract audio from YouTube videos.
Methods to Extract Audio
Here are some of the most popular methods:
- Online Audio Extractors:
- YTMP3 - Convert videos to MP3 format quickly.
- FLVTO - Supports multiple formats and allows direct downloads.
- Desktop Applications:
- 4K Video Downloader: Download both video and audio, with options for various quality levels.
- Freemake Video Converter: Convert videos to popular audio formats with easy-to-use interface.
- Browser Extensions:
- Video DownloadHelper: Capture audio while browsing YouTube without leaving your page.
- Easy Audio Extractor: Simple tool for extracting audio from various online sources.
Steps to Extract Audio Using 4K Video Downloader
- Download and install 4K Video Downloader.
- Copy the URL of the YouTube video.
- Open 4K Video Downloader and click on "Paste Link."
- Select "Extract Audio."
- Choose the desired audio format and quality.
- Click "Extract" to save the audio file on your PC.
Extracting audio from YouTube videos is a straightforward process, whether you opt for online services, desktop software, or browser extensions. With these methods, you can easily gather the audio you need for your editing projects.
 admin
admin


