When it comes to showcasing your creative work, visuals speak louder than words. Thumbnails serve as the first impression of your project on Behance, making it crucial to optimize them effectively. These small images are the gateway to your portfolio; they grab attention, spark interest, and can make or break a viewer's decision to explore your work further. In this section, we'll delve into what thumbnails are, why they matter in your Behance portfolio, and how you can make the most of this often-underestimated element.
Understanding Thumbnail Dimensions and Requirements
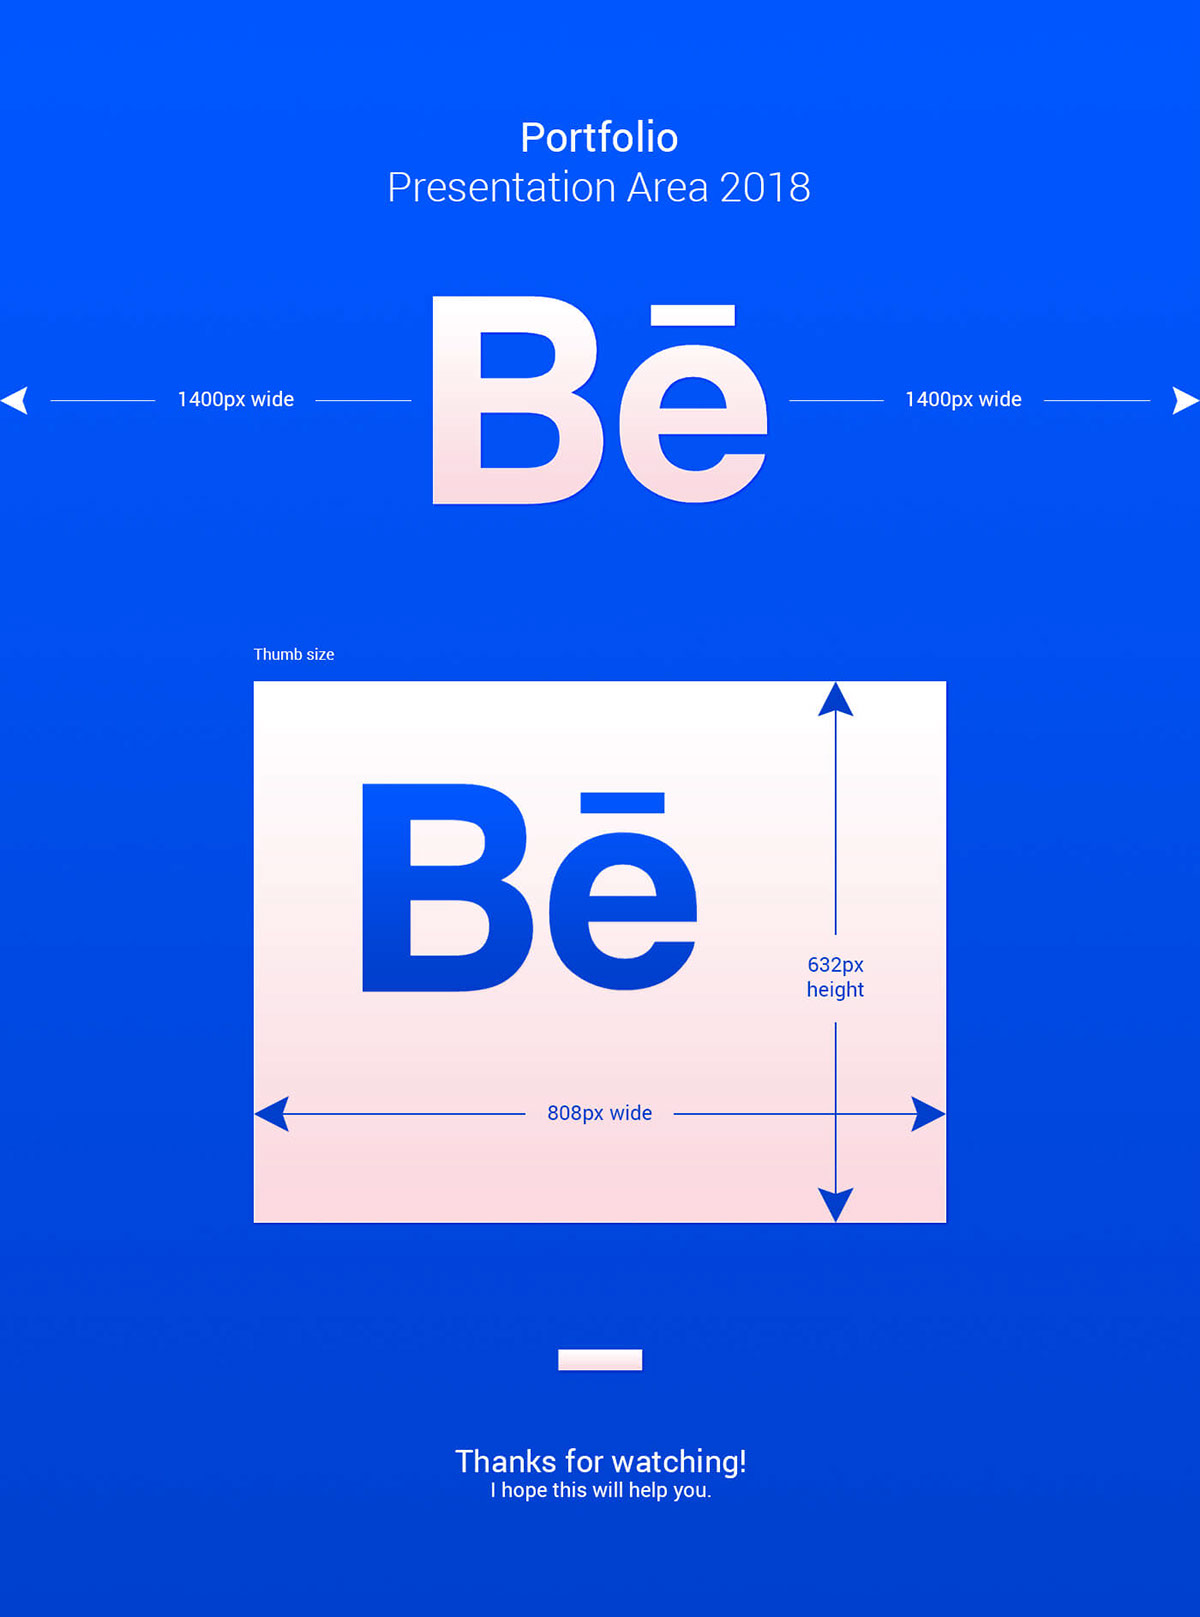
To ensure your thumbnails look captivating and professional, it’s essential to grasp the specific dimensions and requirements set by Behance. Here’s a comprehensive overview of what you need to know:
- Aspect Ratio: Behance recommends a 4:3 aspect ratio for best results. This means if your thumbnail is 400 pixels wide, it should be 300 pixels tall.
- Dimensions: The optimal size for thumbnails is typically 404 x 404 pixels, but you can also go with 800 x 600 pixels for projects that need more detailed visuals.
- File Formats: Behance supports various file formats, including JPEG and PNG. JPEG is preferred for photos, while PNG is great for graphics and logos.
- File Size: Keep your thumbnail files under 2MB. This helps with loading times and ensures a seamless user experience.
Another important aspect to remember is that thumbnails should be visually engaging. Consider using colors, contrast, and composition that align with your project’s theme while still being easy to grab a viewer's eye. Additionally, make sure your thumbnail represents the essence of the project; authenticity goes a long way in connecting with your audience.
Taking the time to create well-optimized thumbnails will not only enhance the visual appeal of your portfolio but also significantly improve your chances of being noticed in the crowded creative space of Behance.
Also Read This: How to Pixelate an Image in Krita
3. Step-by-Step Guide to Scaling Thumbnails

Scaling thumbnails in Behance is essential for making your portfolio visually appealing and ensuring your work stands out. Follow this step-by-step guide, and you'll have your thumbnails looking sharp in no time!
- Determine Optimal Thumbnail Size: Before you even start, find out the best dimensions for your thumbnails. Typically, a size of 404 x 404 pixels is recommended for Behance, as it maintains quality while keeping the file size manageable.
- Edit Your Images: Use an image editing tool like Adobe Photoshop or Canva to modify the size of your thumbnails. Don’t just resize them directly; instead, crop and adjust to keep the focus on your work.
- Maintain Aspect Ratio: When resizing, it’s crucial to maintain the aspect ratio. This ensures your images don’t appear stretched or squished. Most editing tools have an option to lock the aspect ratio while resizing.
- Save in High Quality: After you've resized your thumbnails, save them with the highest quality possible. Use formats like JPEG or PNG to balance quality and file size. Remember, high-quality images reflect professionalism!
- Upload to Behance: Once your images are ready, log into your Behance account and head to the project you wish to update. Upload your newly scaled thumbnails and arrange them in a way that showcases your work effectively.
- Preview and Adjust: Always preview how your thumbnails look in your portfolio. If something doesn’t feel right, go back and tweak until you achieve the perfect look.
By following these steps, you’ll not only scale your thumbnails efficiently but also make a significant impact on the aesthetics of your portfolio!
Also Read This: Explore How to Upload Videos to Shutterstock
4. Tools and Software for Thumbnail Optimization
When it comes to optimizing your thumbnails, the right tools can make all the difference. Below, I've compiled a list of some of the most popular software options available for thumbnail optimization:
| Tool/Software | Features | Best For |
|---|---|---|
| Adobe Photoshop | Advanced editing capabilities, layer management, and export options. | Professional photographers and designers. |
| Canva | User-friendly interface with templates and drag-and-drop features. | Beginners and anyone looking for quick designs. |
| GIMP | Free, open-source software with extensive design functionalities. | Those seeking a Photoshop alternative without the cost. |
| Pixlr | Free, browser-based editing with basic and advanced tools. | Online users who want quick edits without software installation. |
| Lightroom | Specialized for photo editing and enhancement, focusing on imagery. | Photographers looking to enhance their visuals before scaling. |
Each of these tools offers unique features, so the choice ultimately depends on your specific needs and skill level. Experiment with a few to see which suits you best, and get ready to create stunning thumbnails that enhance your Behance portfolio!
Also Read This: How to AI Generate Images of Yourself: A Beginner’s Guide
Best Practices for Creating Eye-Catching Thumbnails

Creating thumbnails that grab attention is an essential part of showcasing your portfolio on Behance. Here are some best practices to ensure your visuals stand out:
- Use Bold Colors: Bright and contrasting colors can make your thumbnail pop! Think about what colors represent your work and how they can entice viewers to click on your project.
- Incorporate Your Branding: If you have distinct branding (logo, color scheme, etc.), make sure it’s reflected in your thumbnail. This helps create a cohesive look and builds recognition across your projects.
- Highlight the Best Part of Your Work: Select a portion of your project that’s the most visually appealing. Whether it's a stunning piece of art, an intriguing prototype, or a captivating graphic, show people what they can expect inside.
- Keep It Simple: Too many elements can make a thumbnail confusing. Focus on one focal point and let it shine. Often, less is more!
- Test Your Thumbnails: A/B testing can be extremely beneficial. Try different thumbnails for the same project and see which one yields better engagement. Use insights to refine your approach.
Following these practices will not only draw viewers in but also convey the professionalism of your portfolio. Remember, a thumbnail is your first impression – make it count!
Also Read This: how to put images in shapes in canva
Common Mistakes to Avoid When Scaling Thumbnails
Even the most talented artists can make missteps when creating thumbnails for Behance. Here are some common mistakes you’ll want to steer clear of:
- Ignoring Aspect Ratios: Make sure to maintain the recommended aspect ratio for thumbnails. Skewed or distorted images can look unprofessional and off-putting.
- Overcomplicating the Design: As tempting as it might be to add numerous elements, cluttering your thumbnail will confuse potential viewers. Keep it clean and straightforward.
- Low-Quality Images: Using blurry or pixelated images is a big no-no. Make sure your images are high resolution to maintain a professional appearance.
- Lack of Consistency: If all your project thumbnails look drastically different, it can confuse your audience. Aim for a consistent style across your thumbnails for a cohesive look.
- Neglecting Mobile Users: Remember that many Behance users browse on their phones. Ensure your thumbnail looks great on smaller screens, adjusting elements as necessary.
Avoiding these common mistakes can set you on the path to having a remarkable portfolio that effectively showcases your unique style and creativity. Happy designing!
Conclusion and Final Tips for a Successful Behance Portfolio
Scaling thumbnails in Behance is essential for optimizing your portfolio's visuals and ensuring that your work stands out. Here are some key strategies to effectively scale your thumbnails:
- Maintain Aspect Ratio: Always maintain the correct aspect ratio for your thumbnails to ensure they display correctly. Behance typically recommends a size of 404x404 pixels.
- High-Quality Images: Use high-resolution images to avoid pixelation. Ensure that your thumbnails are vibrant and attractive.
- Consistent Style: Maintain a consistent aesthetic across all thumbnails. This may include using unified color schemes or filters that match your brand.
- Engaging Preview: Make sure that the primary elements of your projects are clearly visible in the thumbnail. Your thumbnail should invite viewers to click and explore more.
- Test Variation: Experiment with different thumbnail compositions to see what yields better engagement results. A/B testing can provide valuable insights.
Moreover, you can use tools like Photoshop or online platforms such as Canva to create your thumbnails. These tools allow for easy customization and provide templates for various dimensions.
Final Thoughts: Ensuring that your thumbnails are well-scaled and visually appealing not only enhances the overall presentation of your portfolio but also increases your chances of attracting potential clients and collaborators on Behance.
 admin
admin


