Behance is a vibrant online platform that connects creative professionals from all over the globe. Whether you’re a graphic designer, photographer, illustrator, or any type of creative talent, Behance allows you to showcase your work, gain visibility, and connect with other creatives or potential clients. It’s like having an online gallery where your best projects can shine and be discovered by people interested in creative work.
One of the coolest things about Behance is its community-driven approach. You can receive feedback on your projects, engage with fellow creatives, and even find collaborative opportunities. Plus, it integrates with Adobe products, making it easier for Adobe users to share their work directly from applications like Photoshop or Illustrator.
Beyond networking and showcasing, Behance also functions as a job board, featuring job postings specifically targeted at creative professionals. This means that not only can you display your portfolio, but you could also land your next gig or project right from the platform. So, whether you’re trying to build a personal brand, looking for jobs, or just want a place to show off your best work, Behance is definitely worth exploring!
Creating an Account on Behance

Getting started on Behance is super easy, and the best part? It’s completely free! Here’s how you can create your account in just a few simple steps:
- Visit the Behance website: Start by going to the Behance homepage.
- Sign up: Click on the “Sign Up” button, which is usually located at the top right corner of the page.
- Select a sign-up method: You can register using your Adobe ID, Facebook, Google or with an email address. If you choose an email, you’ll need to create a password as well.
- Fill in your details: Enter your full name, email, and any other required information. Make sure to pick a username that reflects your creative persona!
- Agree to the terms: Before clicking on “Sign Up”, read through their terms of service and privacy policy. It’s always a good idea to know what you’re signing up for!
- Verify your email: After signing up, check your email for a verification link and click on it to confirm your account.
- Complete your profile: Once verified, log in and take some time to complete your profile. Add a profile picture, a bio, and links to your other social media or websites to make your account more impressive!
And voila! You’re all set up to start uploading your projects and engaging with the creatively charged community on Behance. Don't forget to explore the platform and check out other artists for inspiration!
Also Read This: Account Closure: How Do I Close My Photobucket Account
Preparing Your Project Materials

Before diving into the upload process on Behance, it’s crucial to get your project materials organized and polished. This preparation phase is invaluable, as it helps ensure your project makes a dazzling first impression. Here’s what to consider:
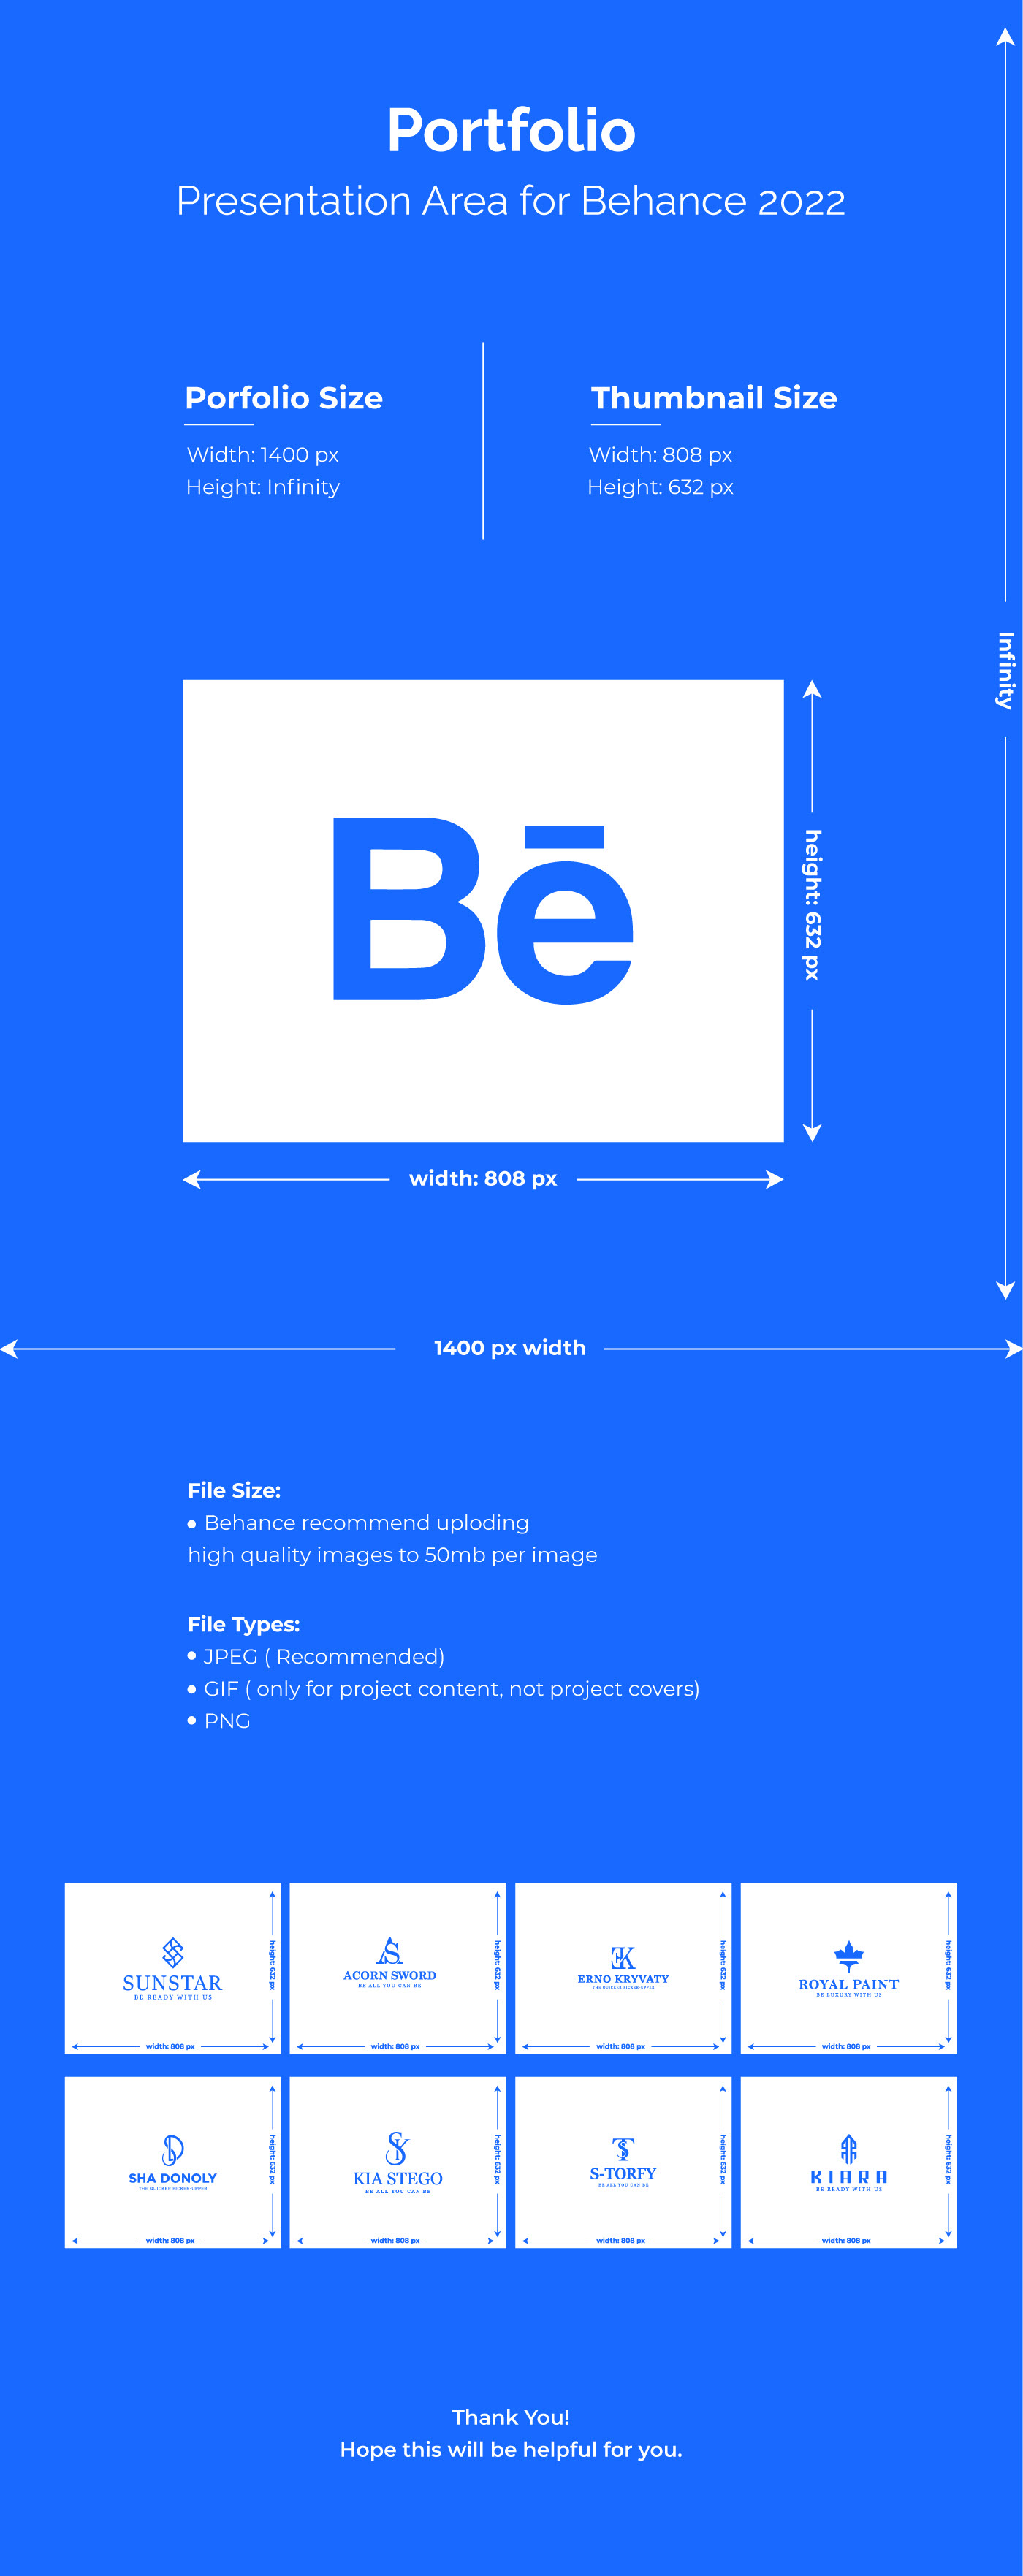
- High-Quality Images: Use high-resolution images that showcase your work. A pixelated or blurred image can really detract from your project. Aim for at least 1400px in width.
- Project Description: Write a clear and engaging description of your project. Explain the concept, your process, and what you accomplished. Think of it as telling a story that captivates your audience.
- Process Shots: Including behind-the-scenes images or process shots helps viewers grasp how you created your work. These can be sketches, drafts, or snapshots from your workspace.
- Videos and GIFs: If applicable, consider adding videos or animated GIFs. These can bring your project to life and engage viewers even more.
- Tags and Keywords: Prepare a list of relevant tags and keywords that describe your project. This will help others find your work when they search on Behance.
- Curated Collections: If you have multiple related pieces, think about how you want them to be presented. Consider creating a curated collection that tells a cohesive story.
Taking the time to prepare these materials can significantly enhance the overall appeal and clarity of your project!
Also Read This: How to Download Photos from Behance and Save Creative Photography
Step-by-Step Upload Process
Now that you’ve prepared everything, let’s jump into the step-by-step process for uploading your project on Behance. It’s straightforward, and I’m here to guide you through it!
- Create an Account or Log In: If you haven’t already, head over to Behance.net and create your free account. If you’re already a member, just log in.
- Navigate to Your Profile: Once logged in, click on your profile picture in the top right corner, and select “Create a Project” from the dropdown menu.
- Select Your Materials: Choose the images, videos, or other materials you’ve prepared. You can drag and drop files directly into the designated area or click to browse your device.
- Arrange Your Content: After uploading, you can easily rearrange the order of your images and videos. Simply click and drag to organize them to your liking.
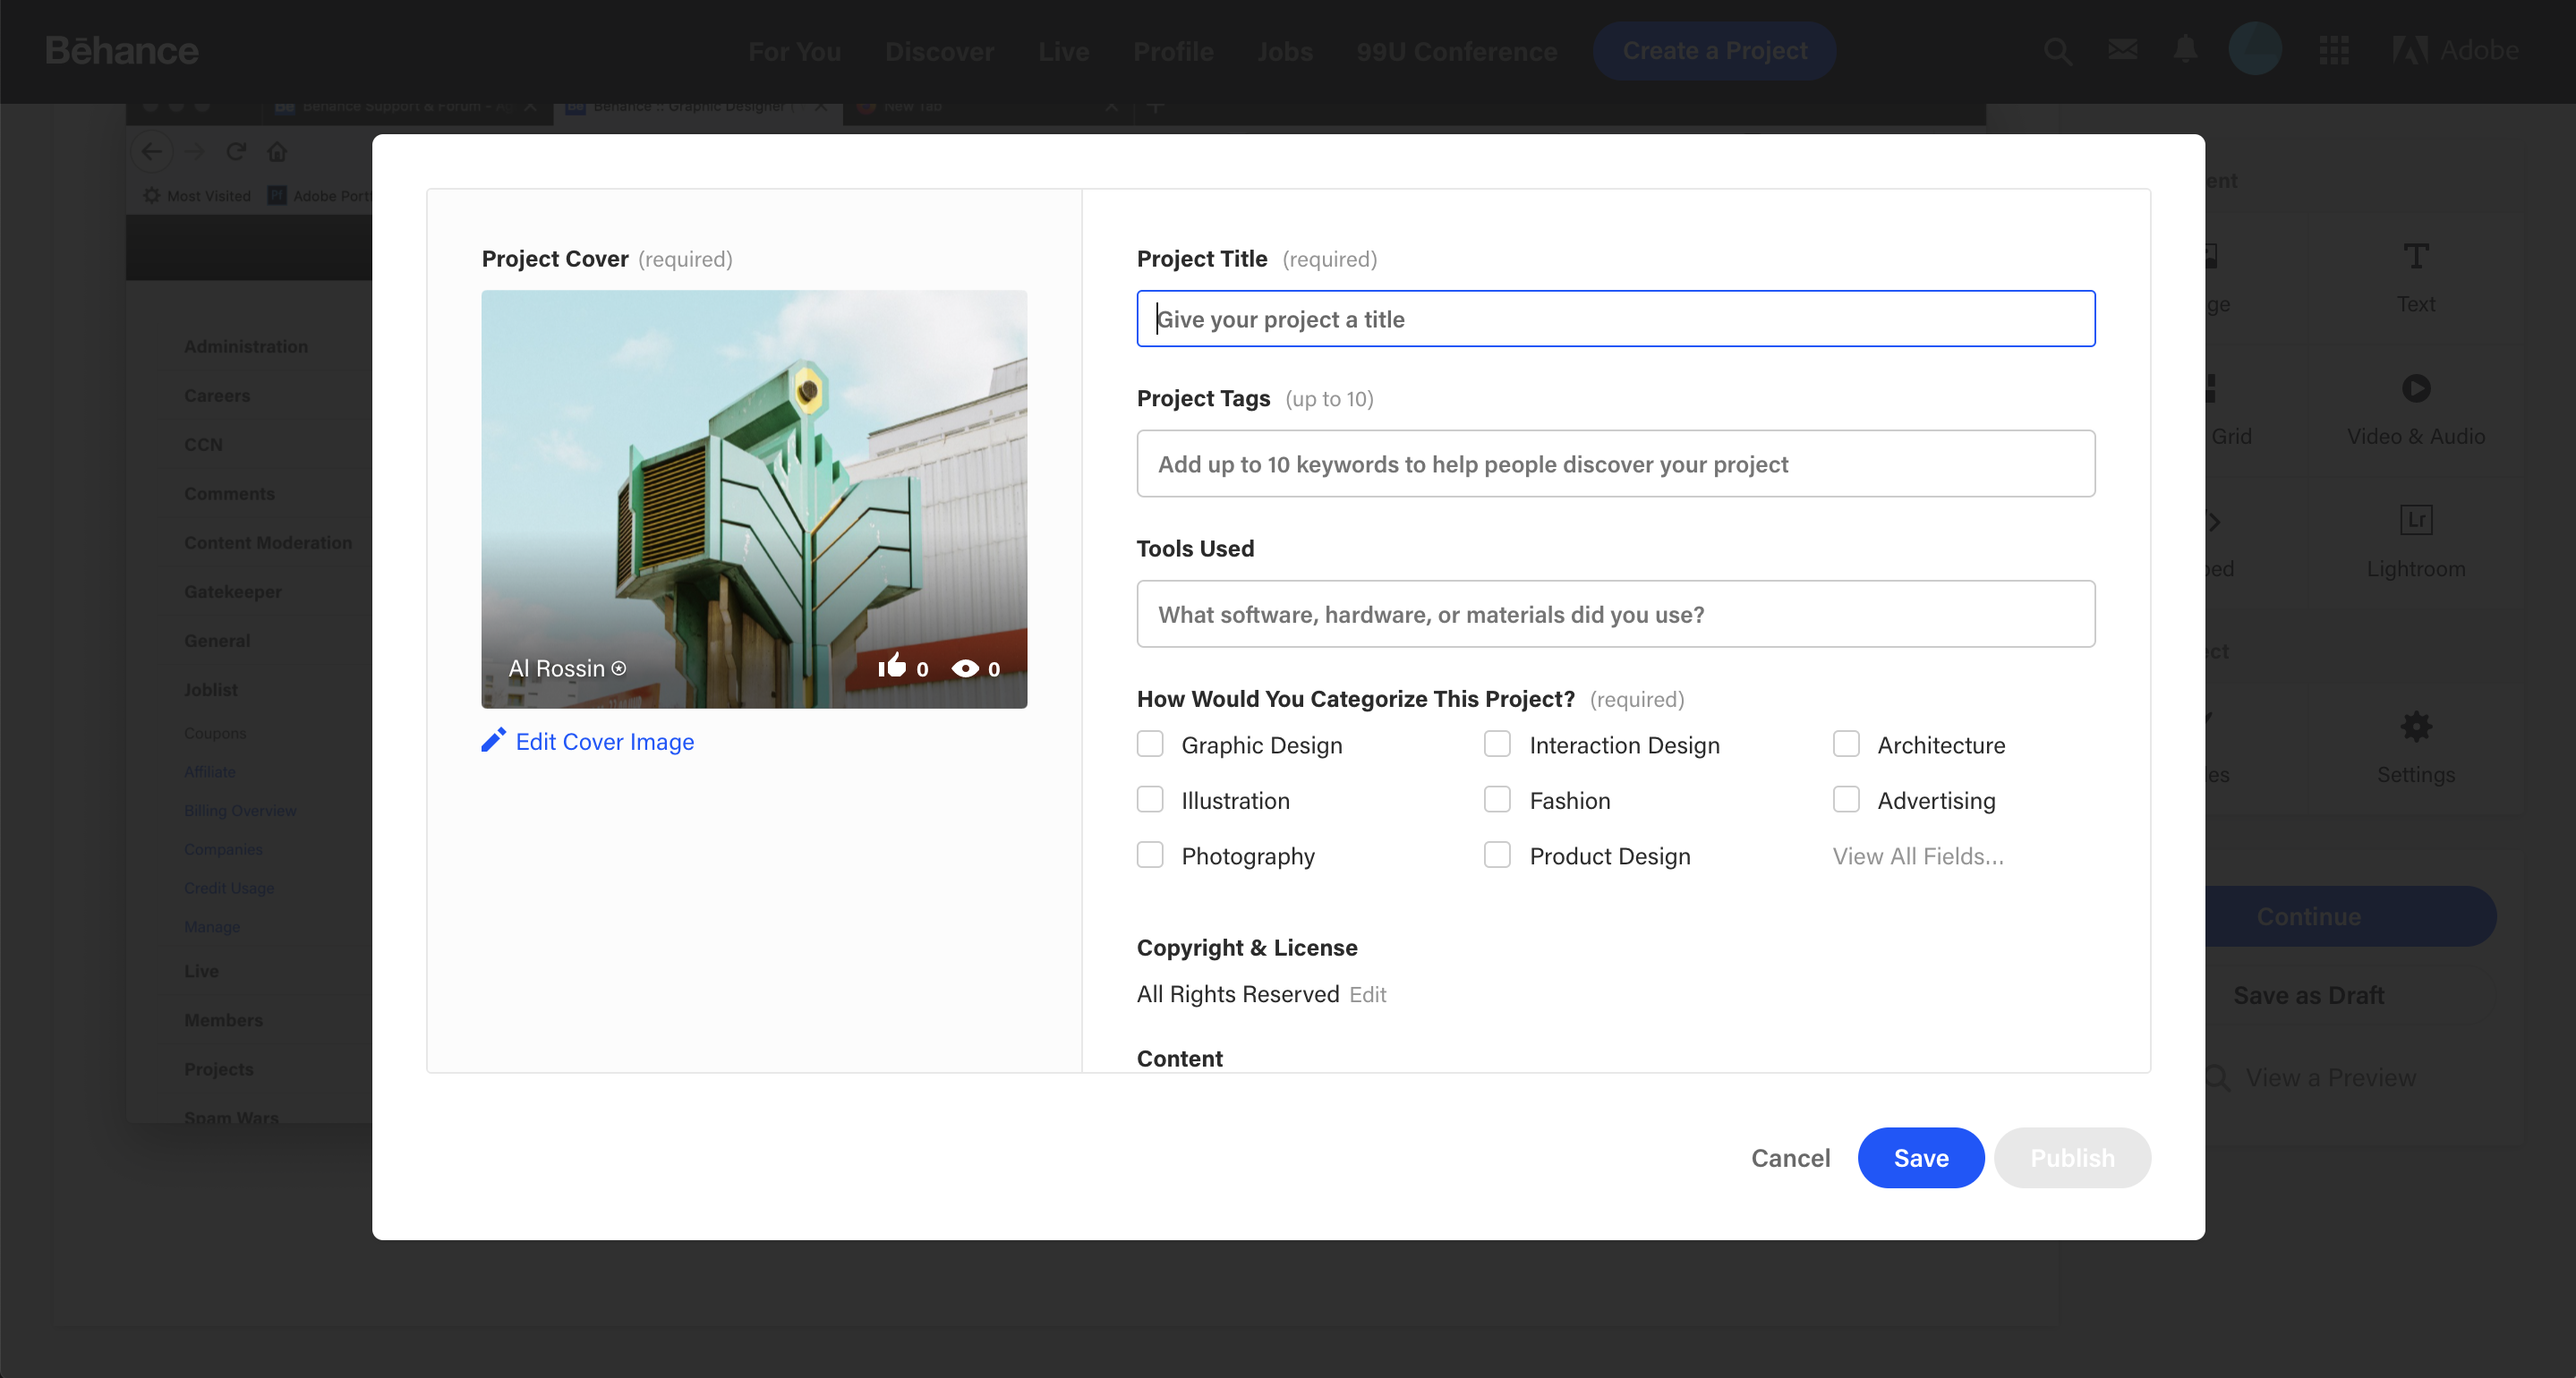
- Add Project Details: Fill in the project title, description, and tags you prepared earlier. Ensure your description is captivating and accurately reflects your work.
- Choose Privacy Settings: Decide if you want your project to be public or private. Public means anyone can see it, while private restricts visibility to only you.
- Publish Your Project: Once everything looks good, hit the “Publish” button! Your project is now live for the world to see!
And just like that, you’re a step closer to sharing your creativity with a vibrant community. Enjoy the process and engage with viewers who appreciate your work!
Also Read This: How to Change a Selfie Mirror Image in Samsung S23 Ultra for Correct Orientation
5. Enhancing Your Project Presentation
When it comes to showcasing your work on Behance, presentation is everything! A well-presented project can captivate your audience and draw them in. So, let's dive into some tips to elevate your project's visual appeal.
1. Use High-Quality Images: Always opt for high-resolution images that showcase your work in the best light. Blurry or pixelated images can turn potential admirers away.
2. Create a Consistent Layout: Consistency is key. Select a template or layout style that you’ll use throughout your project. This could mean sticking to specific colors or fonts that match your branding. A cohesive design helps your project flow better and makes it easier to follow.
3. Use Text Sparingly: While descriptions are important, too much text can overwhelm viewers. Use bullet points or concise paragraphs to convey your message clearly and effectively.
4. Tell a Story: Every project has a narrative. Use the project description to guide your audience through your design process, inspirations, challenges, and triumphs. Think of it as a journey they can embark on with you.
5. Add Interactive Elements: If applicable, include elements like videos, animations, or GIFs. These can provide a more immersive experience, allowing viewers to engage with your project on a deeper level.
By considering these points, you can create a visually stunning and engaging project that resonates with your audience and showcases your creative style!
Also Read This: Simple Ways to Find an Image ID
6. Finalizing and Publishing Your Project
You've put in the hard work, and now it's time to finalize and publish your project on Behance. This step is crucial to ensure everything is just right before you hit that publish button. Here are some tips to help you through this final stage:
1. Double-Check Your Work: Take a moment to review everything. Look for typos, broken links, or incorrect image placements. It helps to have fresh eyes on your project, so consider asking a friend or colleague for feedback.
2. Optimize Your Tags: Behance uses tags to categorize projects, making it essential for discoverability. Choose tags that accurately represent your project and are relevant to your audience. Aim for a mix of broad and niche tags to reach both wider and more specific audiences.
3. Write an Engaging Project Description: This is your chance to convince viewers why your project matters. Include key details about your creative process, the tools you used, and the concepts behind your work. Make it personal and relatable.
4. Preview Your Project: Before publishing, preview how everything looks. This will help you spot any layout issues and ensure your project flows well. Click through the images and read through your descriptions to check for coherence.
5. Choose the Right Project Visibility: Decide whether you want to publish your project to the public, or keep it private for a select audience. Make sure to adjust these settings to suit your needs.
Once you're satisfied with your project, hit the publish button! Don't forget to share your project on social media and within your network to drive more traffic and engagement. Congratulations on showcasing your incredible work on Behance!
Also Read This: How to Download Images from Adobe Behance: A Detailed Walkthrough
7. Promoting Your Project on Behance
Once you've uploaded your project on Behance, the next crucial step is promotion. Just like throwing a party, you want to invite as many people as possible! Let's explore some effective strategies to get your project noticed.
1. Use Social Media
Promoting your project on social media platforms like Instagram, Twitter, and Facebook can significantly increase its visibility. Share the link to your Behance project, incorporate eye-catching visuals, and engage with your audience by asking for their opinions or feedback.
2. Engage with the Community
Behance has a vibrant community of creatives. Take the time to connect with others by liking, commenting, and appreciating their work. This not only helps you build relationships but also encourages them to check out your profile and projects in return.
3. Tag Your Work Strategically
When you upload your project, you have the option to add tags. Make sure to use relevant keywords that accurately describe your work. This will help users searching for specific content to discover your project more easily.
4. Leverage Project Views
Keeping track of how many views your project receives can provide valuable insights. Take note of what types of posts or times get more traction and adjust your promotion strategy accordingly.
5. Collaborate with Other Creatives
Consider collaborating with other artists or designers on Behance. Joint projects can expose your work to their followers, enhancing your reach. Two (or more) heads are often better than one!
In conclusion, promoting your project on Behance is an ongoing process. Consistently engage, share, and explore new methods to extend your reach and showcase your talent effectively.
8. Conclusion
Uploading your project on Behance is just the beginning of an exciting journey in showcasing your creativity. By following the steps we've covered, you can present your work beautifully and ensure it resonates with your target audience.
Remember, the key to success on platforms like Behance lies in not just the quality of your work but also in how you engage with the community and promote it.
Some final thoughts for you:
- Consistency is crucial: Regularly update your portfolio to keep it fresh and relevant.
- Seek feedback: Don’t hesitate to ask your peers for constructive criticism to improve your work.
- Stay active: Participate in challenges or contests hosted by Behance to raise your profile.
As you nurture your presence on Behance, you’ll find opportunities to connect, collaborate, and grow as a creative professional. So, get started with your project, promote it passionately, and watch your creative community flourish!
 admin
admin


