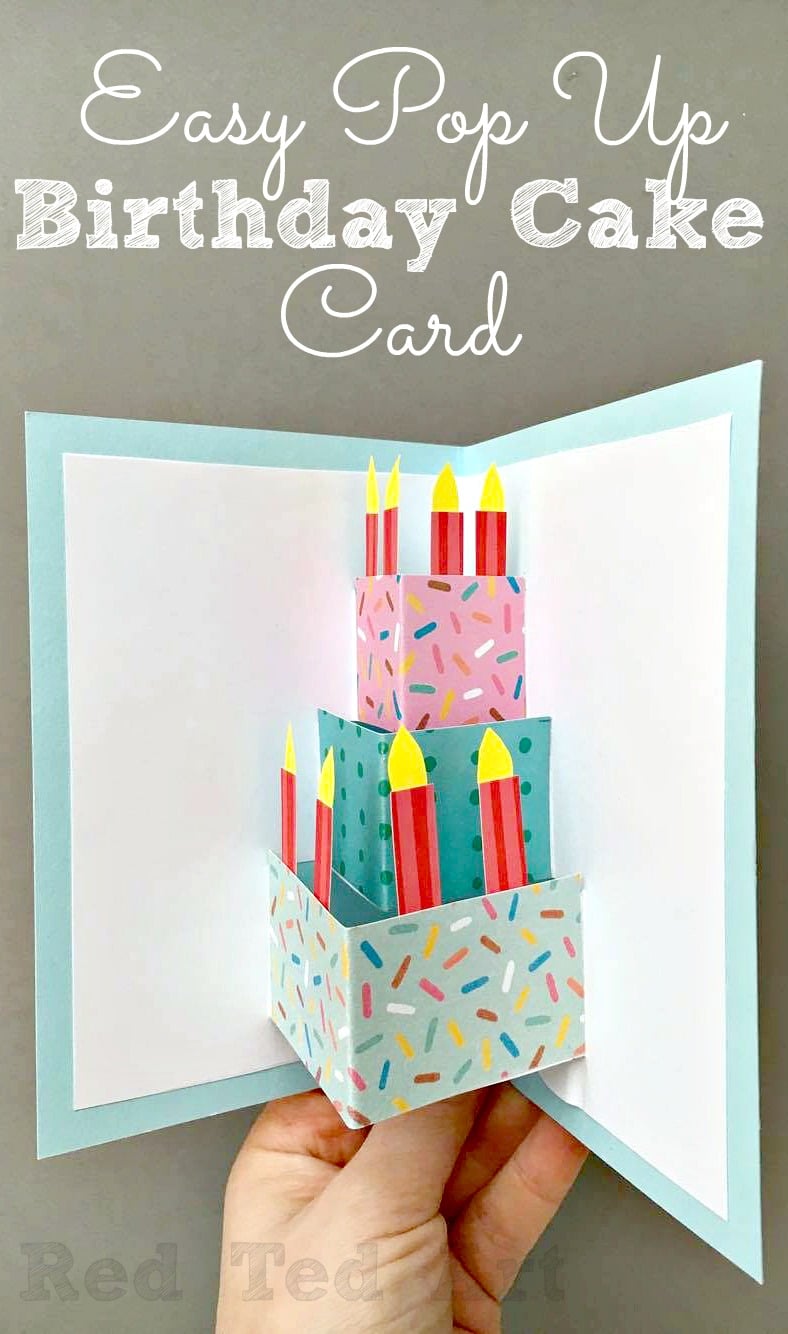
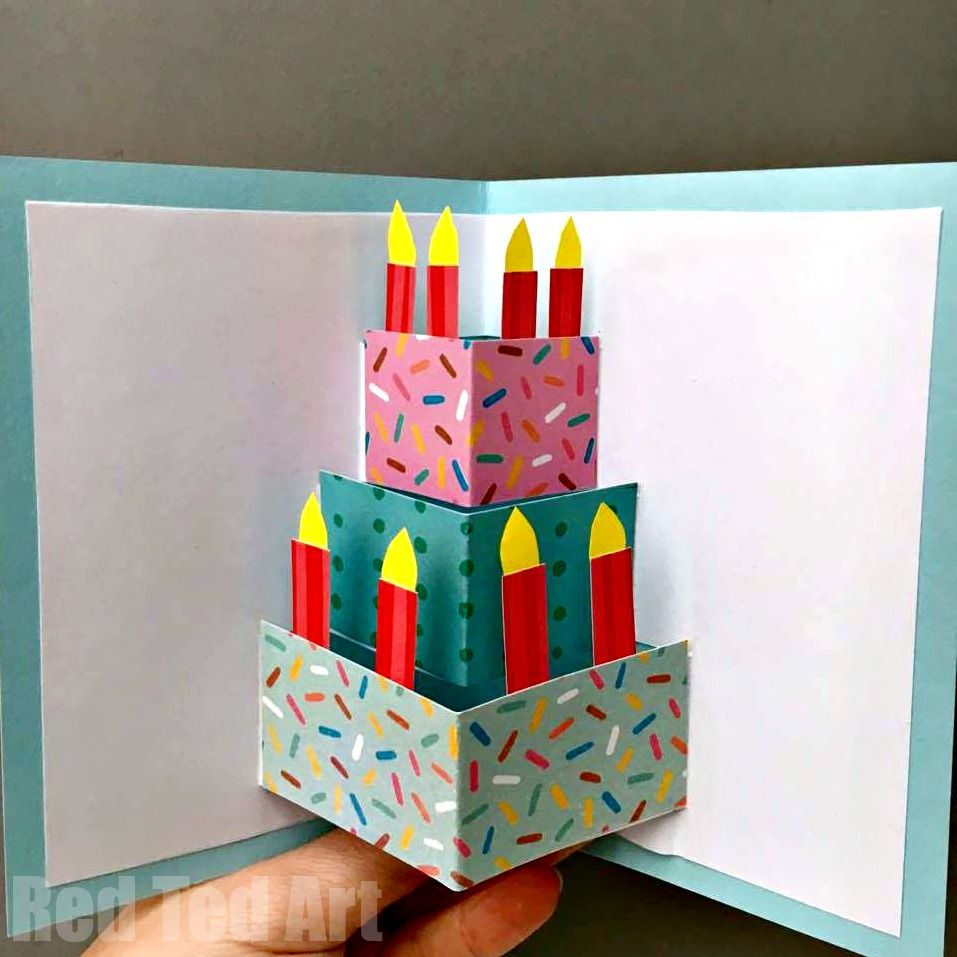
Creating a pop-up birthday card is a delightful way to show someone you care. Not only do these cards stand out with their 3D elements, but they also add a personal touch that store-bought cards often lack. Imagine the smile on your friend's face when they open an envelope to find a vibrant birthday cake or colorful balloons popping up! In this guide, we’ll walk you through the steps and materials needed to craft your very own pop-up birthday card, making that special moment even more memorable. Let's dive in!
Materials Needed

Before you start crafting your pop-up birthday card, it’s essential to gather all your materials. Here’s a handy list to ensure you have everything ready:
- Cardstock Paper: This is the primary material for your card. Choose a sturdy weight, ideally 80-110 lb (216-297 g/m²), for durability. You might also want colorful paper for added flair.
- Scissors: A good pair of scissors is crucial for cutting your card and any decorative elements.
- Glue Stick or Liquid Glue: Use a strong adhesive that dries clear to attach the pop-up elements securely.
- Craft Knife: If you're creating intricate designs, a craft knife can help with precise cuts. Just be cautious, as it can be sharper than regular scissors!
- Ruler and Pencil: For measuring and marking guidelines before cutting. Accuracy here will prevent any misalignments.
- Decorative Elements: Think stickers, washi tape, stamps, or glitter! These will add a personal touch to your card.
- Additional Paper: Consider using patterned or textured paper for your pop-up designs, like colorful birthday cakes, balloons, or gifts.
Having these materials ready will set you up for success in your card-making journey. Remember, you can always experiment with different designs and colors to make your card truly one-of-a-kind!
Also Read This: How to Cut Out an Image in Canva for Stunning Visuals
Designing Your Card

There’s something truly magical about creating a birthday card that opens up to reveal a delightful surprise. The design phase is where your imagination can really take the wheel! Start by thinking about the *theme of the birthday celebration. Is it a party for a child who adores dinosaurs, or is it for an adult who loves gardening? Pinpointing the theme will guide your design choices.
Next, pick your color palette. Select colors that evoke joy and fun; bright yellows, blues, and pinks work wonders! You can also consider the recipient’s favorite colors to make it even more personalized. Now, think about the components* that will pop up when the card is opened. This could be anything from a cake, balloons, flowers, or even a heartfelt message. Here are some design elements you might include:
- Images: Illustrations or photographs related to the theme.
- Textures: Consider using glitter, washi tape, or patterned paper for added depth.
- Fonts: Use playful fonts for your messages; just ensure they’re readable!
Lastly, sketch your design on paper first. This draft can help you visualize the layout before you commit to the actual materials. Remember, your card is a canvas for your creativity, so let your personality shine through!
Also Read This: Mastering Makeup Fixer Spray for All-Day Freshness
Step-by-Step Instructions
Now that you’ve settled on a design, it’s time to bring your vision to life! Here’s a straightforward guide to help you through the process of crafting your pop-up birthday card:
- Gather Your Materials:
- Cardstock (for the base of your card)
- Colored paper (for the pop-up elements)
- Scissors
- Glue or double-sided tape
- Markers or colored pencils
- Ruler and pencil (for precise measurements)
- Prepare the Card Base:
Cut a piece of cardstock to your desired card size (commonly 5”x7”). Fold it in half to create the card base.
- Create the Pop-Up Mechanism:
Using a separate piece of colored paper, cut out shapes for the pop-up elements (like balloons or a cake). Fold the base of each shape at a slight angle to create 'tabs'. This will help them stand up when the card opens.
- Attach the Pop-Up Shapes:
Glue the tabs to the inside fold of your card. Make sure they’re securely attached, and they can freely pop up when the card opens. You may need to test this a few times to get it just right!
- Personalize Your Card:
Use your markers or colored pencils to add a heartfelt message or decorative art around your pop-up elements. This is where you infuse your unique style!
- Finishing Touches:
Let everything dry, if necessary, and then write a lovely note on the back or inside of the card. Voilà! Your pop-up birthday card is ready to delight its recipient.
Crafting a pop-up birthday card is not only rewarding but also a heartfelt gesture that the birthday person will cherish forever!
Also Read This: Guide to Removing the Background of an Image in GIMP
5. Adding Personal Touches
When it comes to crafting a pop-up birthday card, adding personal touches is what truly makes your card stand out and resonate with the birthday celebrant. Personalization shows thoughtfulness and effort, making the card a cherished keepsake. Here are some ideas to sprinkle that magic!
- Handwritten Messages: Nothing beats the charm of a handwritten note. Write a heartfelt birthday message inside your card. You can share a cherished memory, a heartfelt wish, or even a silly inside joke that only you and the recipient understand.
- Favorite Colors: Incorporate the birthday person’s favorite colors into your card design. Use colored paper, markers, or decorative stickers that reflect their style. This small detail can make a big impact!
- Unique Elements: Add unique embellishments that relate to the birthday person's hobbies or interests. For example, if they love gardening, consider adding tiny paper flowers or gardening stickers. You can also use multiple layers of different papers to enhance the 3D effect.
- Photos: Incorporate a mini photo collage inside the card. Grab some photos that highlight special moments you've shared and attach them to your card. This nostalgic touch will surely bring a smile to their face.
Ultimately, the goal is to make the card feel like a reflection of the recipient. Think about what they love and let that inspire your creativity!
Also Read This: How to Change the Size of an Image
6. Final Touches
Once you've crafted your fabulous pop-up birthday card, it’s time to add those all-important final touches. These little details can elevate your design and truly make it shine. Let's explore some steps to ensure your card is perfect before it heads off to deliver joy!
- Check for Stability: Open and close the card a few times to ensure that all the pop-up elements are working smoothly. If elements are sticking or not popping up correctly, make adjustments to the cuts, folds, or glue.
- Add Decorative Accents: Consider adding glitter, sequins, or tiny embellishments to the card. These accents can add a lovely sparkle and enhance the overall visual appeal. Just remember to use them sparingly to avoid overwhelming the design!
- Envelope Decor: Don’t forget about the envelope! You can decorate the envelope to match the theme of your card. Simple touches like stickers, drawings, or even a custom label can increase anticipation for what’s inside.
- Final Inspections: Double-check for any mistakes or smudges. Make sure everything is clean and the card looks polished. You want to present your best work!
Once you've put on those final touches, it’s time to deliver your handmade creation. Whether you hand it over in person or send it through the mail, your thoughtful card is bound to bring joy to the celebrant’s special day!
Creative Guide to Crafting a Pop Up Birthday Card
Crafting a pop-up birthday card is a delightful way to express your creativity while making someone's special day even more memorable. With just a few supplies and some imagination, you can create a personalized card that truly stands out. Here’s a step-by-step guide to help you get started!
Materials Needed
- Cardstock paper (various colors)
- Scissors
- Glue or double-sided tape
- Ruler
- Pencil
- Decorative elements (stickers, stamps, markers)
Steps to Create Your Pop-Up Card
- Prepare the Base: Cut a piece of cardstock to create a folded card of your desired size. A standard size is 5x7 inches.
- Design the Pop-Up Mechanism: Cut a strip of paper that will serve as the pop-up. Fold it in a 'V' shape, with the bottom of the 'V' being glued to the back of the card.
- Create Your Pop-Up Design: This could be anything from a cake, balloons, to a simple message. Draw or attach these designs to the ends of the strip.
- Attach the Pop-Up: Position and glue the 'V' in such a way that it pops up when the card is opened.
- Add Personal Touches: Decorate the card with your choice of colors, patterns, and messages for the birthday celebrant.
Pop-Up Design Ideas
| Design | Description |
|---|---|
| Birthday Cake | A layered cake with candles on top for a festive feel. |
| Balloon Bouquet | Use colorful balloons popping up to add cheer. |
| Gift Boxes | Three-dimensional gift boxes that convey a surprise. |
Using these steps and ideas, you can create a unique pop-up birthday card that will surely bring joy to the recipient. Personalizing your card with special memories or designs relatable to the birthday person can enhance the emotional impact of your gift, making it a cherished keepsake.
 admin
admin


