When it comes to creating YouTube videos, audio quality is just as important as the visual elements. In this journey toward production excellence, Audacity emerges as a go-to tool for many content creators. It's a free, open-source audio recording and editing software that provides an impressive array of features, making it ideal for anyone looking to improve their audio game.
Whether you're a seasoned YouTuber or just starting out, using Audacity can elevate your audio experience, giving your viewers a polished listening experience. It offers functionalities such as multi-track editing, noise reduction, and audio effects, which are crucial for trimming out those pesky mistakes or background noise. So, if you're on the fence about which software to choose for your YouTube recording, Audacity is definitely worth considering!
Setting Up Audacity for Video Recording

Getting started with Audacity is a breeze, especially if you follow a few simple steps. Here’s how you can set it up for your YouTube recording needs:
- Download and Install Audacity: Begin by heading over to the official Audacity website and download the version for your operating system. Installation is straightforward—just follow the on-screen instructions.
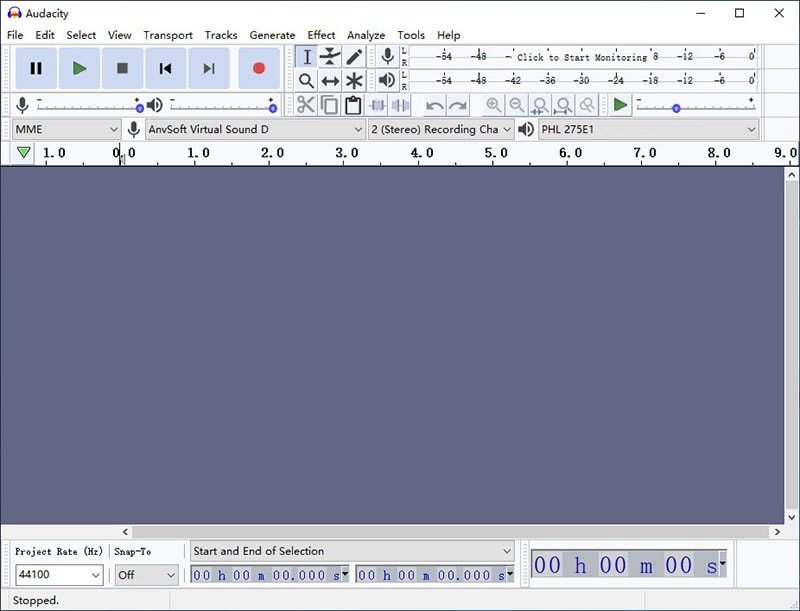
- Adjust Audio Settings: Once installed, open Audacity and head to Edit > Preferences. Here, you can choose your audio input device (like a microphone) and output device (your speakers or headphones). Ensure that your microphone is selected for the best recording quality.
- Check Recording Format: Go to the Quality tab in Preferences to set your default sample rate and bit depth. A sample rate of 44100 Hz (CD quality) works well for YouTube.
- Set Audio Levels: Before you start recording, it’s crucial to test your audio levels. Speak into the microphone and watch the meter to make sure your levels don’t peak into the red zone. Adjust your input volume as needed.
Once you've set everything up, you’re ready to record! Quality audio can make all the difference in your YouTube videos, so enjoy the process and have fun with your recordings!
Also Read This: How to Upload an MP3 File to YouTube
Choosing the Right Audio Sources

When recording your YouTube videos using Audacity software, selecting the appropriate audio source is crucial for achieving high-quality sound. Poor audio quality can detract from your content and ultimately affect viewer engagement. Let’s dive into some options you have!
First off, here are some common audio sources you can utilize:
- Built-in Microphone: Most laptops and webcams come with built-in microphones; however, they're often not the best choice. Background noise can interfere with your audio clarity.
- USB Microphones: A significant upgrade from built-in mics, USB microphones offer better sound quality and are typically easier to set up. Popular choices include the Blue Yeti and Audio-Technica AT2020.
- XLR Microphones: For those seeking professional quality, XLR mics are the way to go. They require an audio interface to connect to your computer but can deliver exceptional sound quality.
- Audio Interface: If you choose an XLR mic, don’t forget an audio interface like the Focusrite Scarlett 2i2. This device converts your mic's analog signal into a digital format that your computer can understand.
When choosing your audio source, consider factors like:
| Factor | Details |
|---|---|
| Budget | High-quality microphones come at various price points, so choose one that fits your needs. |
| Environment | Consider where you’ll be recording. A quieter space will enhance audio quality. |
| Purpose | Your content’s nature may dictate your choice. For voiceovers, a USB mic might suffice, but for music, you may want an XLR mic. |
Also Read This: Step-by-Step Guide to Posting an Image on Brightspace
Recording Your YouTube Video Audio

Now that you've chosen the perfect audio source, it's time to jump into the recording phase! With Audacity, you’ll find the process straightforward, even if you’re a beginner. Let’s go over the basic steps together:
- Set Up Audacity: Open Audacity and ensure your microphone is correctly connected. You can check this by going to 'Devices' under the 'Preferences' menu.
- Select Your Input Source: Make sure to select the microphone you wish to use from the dropdown menu. This ensures Audacity captures sound from your chosen audio source.
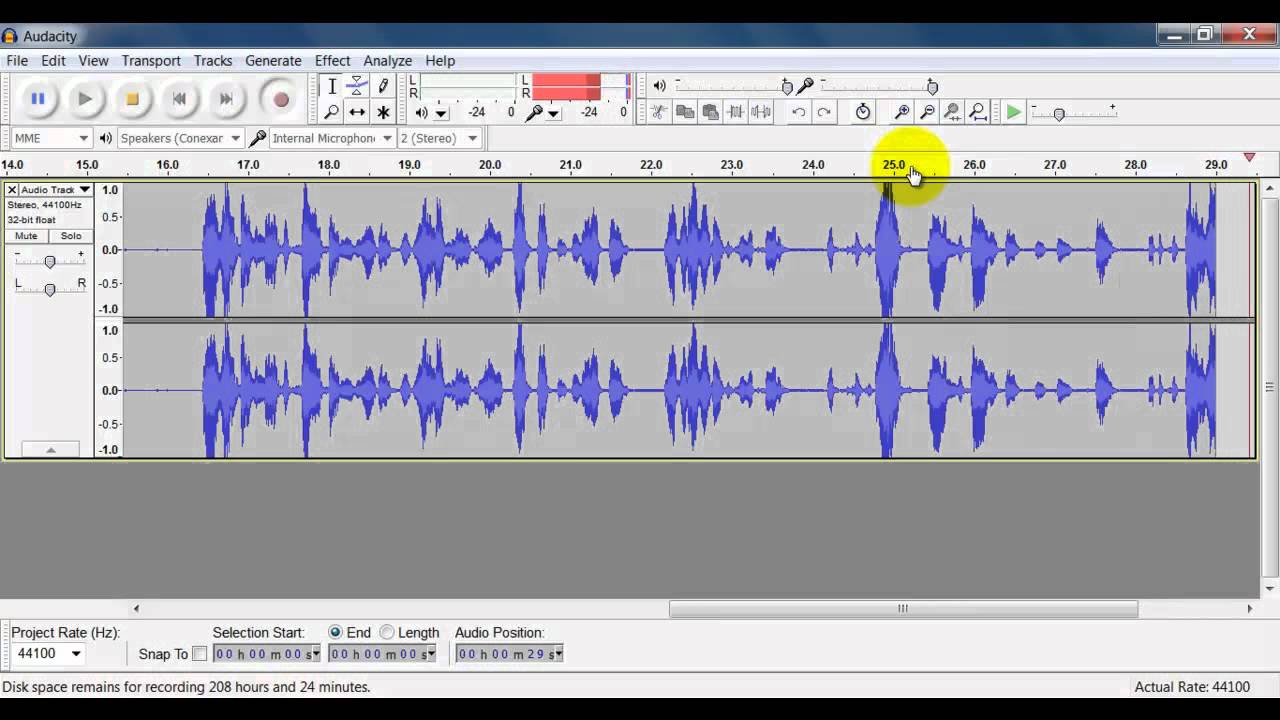
- Adjust Recording Levels: It’s essential to check your audio levels to avoid clipping. You can do this by speaking into your mic and watching the input levels in the Audacity interface.
- Hit the Record Button: When you’re ready, simply press the red circle to start recording. Keep your delivery engaging—the more passion you inject, the more your audience will enjoy it!
- Monitor the Quality: As you record, listen closely to ensure the audio is clear. If you hear any issues, consider stopping and re-adjusting your setup.
- Save Your Recording: Don’t forget to save your work! It's advisable to save in Audacity’s native format (.aup) for easy editing later, and export in .WAV or .MP3 for uploading.
By following these steps, you'll be well on your way to creating engaging YouTube content with impressive audio quality, all thanks to Audacity!
Also Read This: How to Get Photos from Getty Images Without Watermarks for Personal Use
5. Editing Your Recording in Audacity
Editing your recording in Audacity is where the magic happens! Once you've captured your audio, it's essential to spend some time tidying it up. After all, you want your YouTube video to sound as good as possible, right? Here’s how to make it happen efficiently:
- Import Your Recording: Start by importing your audio file into Audacity. Just click on File, then Open, and navigate to your recorded file.
- Trim Unwanted Sections: Use the Selection Tool to highlight parts of your recording that you want to remove. Hit the Delete key to trim away any awkward pauses or mistakes.
- Adjust Volume Levels: Did your voice get quieter in some parts? Use the Amplify effect to boost those sections. You can also normalize the audio to ensure consistent volume throughout.
- Add Effects: Consider adding a touch of reverb or noise reduction for a more professional sound. Experiment with different effects under the Effect menu to find what suits your style best.
- Listen and Fine-Tune: Always listen back to your edits. Play it through a couple of times to catch any issues you might have missed the first time around.
Getting comfortable with the editing tools in Audacity can significantly enhance your audio quality and make your YouTube videos shine!
Also Read This: Easy Methods to Download Content from Behance.net
6. Exporting Your Audio for YouTube
Once you're satisfied with your edits, it's time to export your audio. This step is crucial because the format and quality of your exported file affect how it sounds on YouTube! Here’s how to do it:
- Choose the Right Format: For YouTube, it's best to export your audio as a WAV or MP3 file. WAV files tend to retain higher quality, while MP3 files are more compressed and easier to upload.
- Go to Export: Click on File, then choose Export. From there, you can select the format you want to use.
- Settings Matter: If you choose MP3, opt for a bitrate of at least 192 kbps for decent quality. Higher bitrates mean better audio quality but larger file sizes.
- Name Your File: Make sure to name your file something memorable. This will help you keep track of multiple recordings!
- Save and Upload: After you’re done with your settings, hit Save. Then, it’s gear-up-time for your YouTube channel – upload your smoothly refined audio track!
By properly exporting your audio using these steps, you ensure that your video will sound great, making for a pleasant viewing experience. Happy recording!
Also Read This: Downloading Images from Candy AI: A Step-by-Step Guide
7. Tips for Improving Audio Quality
When it comes to recording YouTube videos, audio quality can make or break the viewer's experience. Let's dive into some practical tips that'll help you capture crystal-clear sound using Audacity software!
- Choose the Right Microphone: Investing in a good quality microphone is crucial. Consider USB microphones for beginners or XLR mics for advanced users. Brands like Blue Yeti and Audio-Technica are popular options.
- Set Up Your Recording Environment: Soundproof your recording space as much as possible. Use carpets, curtains, and soft furnishings to absorb sound and reduce echoes. If you can, record in a quiet room away from distractions.
- Adjust Input Levels: Before hitting record, check your audio levels in Audacity. Aim for levels between -6dB and -12dB to avoid clipping. You can adjust the gain on your microphone or within the software itself.
- Use a Pop Filter: A pop filter helps prevent plosive sounds (like “p” and “t” sounds) from distorting your audio. You can buy one or even make your own using a wire hanger and a pair of stockings!
- Monitor While Recording: Always wear headphones while recording. This allows you to catch any issues in real-time and ensures you’re achieving the sound quality you desire.
- Test and Experiment: Don’t be afraid to experiment with different settings in Audacity. Make test recordings to find the best mic positioning and settings that work for you.
- Edit Thoughtfully: After recording, use Audacity’s editing features to clean up your audio. Remove noise, cut out mistakes, and enhance the overall sound with effects like compression and EQ.
8. Conclusion
There you have it! Recording YouTube videos with Audacity can feel daunting at first, but it’s a skill worth mastering. With these tips, you can vastly improve your audio quality and make your videos stand out.
Remember, practice makes perfect. Don’t get discouraged if your first few recordings don’t turn out as expected. Keep experimenting with equipment, settings, and techniques, and you’ll soon find your unique sound.
Incorporating high-quality audio into your YouTube videos not only engages your audience but also helps build your brand credibility. So grab your microphone, fire up Audacity, and start creating content that sounds as good as it looks!
Happy recording!
 admin
admin


