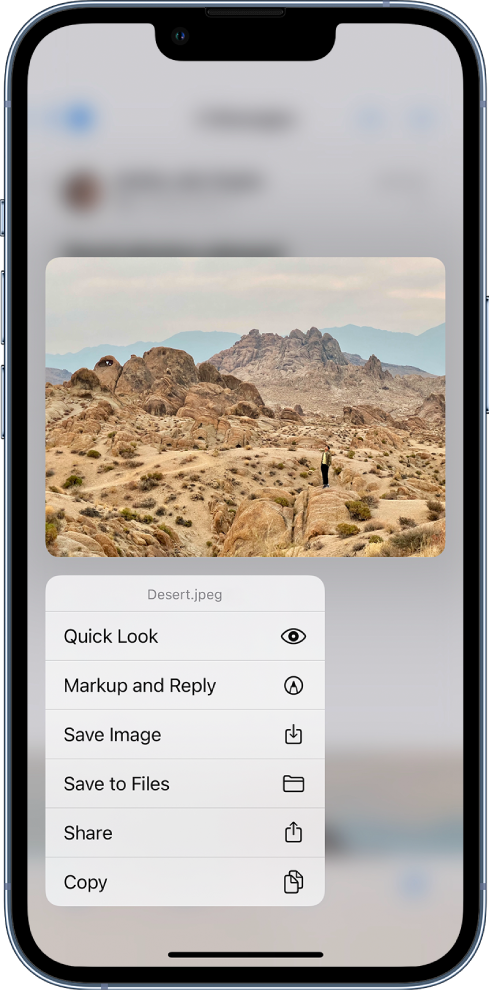
Saving images as PDF on your iPhone can be incredibly useful, whether for storing memories or sharing documents seamlessly. Fortunately, Apple has made this process super simple and accessible with built-in tools. In this guide, we’ll walk you through a couple of methods that will help you convert your favorite images into tidy PDF files directly from your iPhone. Let’s jump right in!
Method 1: Using the Files App

One of the easiest ways to save images as PDFs is by using the Files app on your iPhone. This method is handy as it requires no third-party applications. Here’s a step-by-step guide to do just that:
- Open the Files App: First, locate the Files app on your iPhone and open it. You can find it on your home screen or by swiping down on your screen and searching for "Files."
- Select Your Images: Navigate to the folder where your images are stored. Touch and hold on the image you want to convert, and a menu will pop up. Use the "Select" option to choose multiple images if needed.
- Tap on the Share Icon: Once your images are selected, tap on the share icon, which looks like a box with an arrow pointing upward. This will open a new menu with various sharing options.
- Choose the Print Option: Look through the options and select "Print." This might sound odd, but trust us; it’s how this trick works!
- Use the Print Preview: In the Printer Options menu, you’ll see a print preview of your selected images. Pinch outwards on the preview image to turn it into a full-page PDF.
- Save as PDF: After pinching outwards, tap on the "Share" icon again on the top right corner to save the PDF. Choose "Save to Files" to store it on your iPhone, or share it through email or other apps.
And that’s it! You’ve successfully converted your images into a PDF file using the Files app on your iPhone. With just a few simple taps, you can now keep your cherished images organized and easily share them with friends or family.
Also Read This: How to Project an Image from Your Phone onto Paper
Method 2: Using the Books App

If you’re looking for a seamless way to save images as PDFs on your iPhone, the Books app has got your back! This built-in application is not just for reading; it offers fantastic features for saving documents in PDF format. Here’s how you can do it:
- First, open the *Photos app on your iPhone.
- Select the images you’d like to convert. You can select multiple images by tapping on “Select” at the top right corner and then tapping on the images.
- After selecting your images, tap on the Share icon (the square with an upward arrow).
- From the sharing options, scroll down and choose Books. If you don’t see it immediately, tap on More to find it!
- The Books app will launch with your images displayed. Here, tap on “Create PDF.” This option is usually at the top right corner of the screen.
- Your PDF is now created. Once it’s ready, you can hit the Share icon again if you want to send it somewhere or simply save it within the Books app for future reference.
This method is fantastic for its ease and integration with iOS, making it a popular choice among users who prefer using default apps.
Also Read This: how to get free adobe stock videos
Method 3: Using Third-Party Apps

If you’re seeking more features or flexibility, third-party apps are a great option for saving images as PDFs on your iPhone! There are various apps available on the App Store that can help streamline this process. Some popular choices include:
- Adobe Scan: Great for scanning documents and images; it converts them to high-quality PDFs.
- PDF Expert: An all-in-one PDF solution that allows you to create, edit, and manage PDFs easily.
- CamScanner: This app is highly rated for scanning images and converting them into PDFs with OCR capabilities.
Here’s a step-by-step guide on how to use one of these apps, say, Adobe Scan:
- Download and install Adobe Scan from the App Store.
- Open the app and sign in or create an account if prompted.
- Tap on the camera icon to take pictures of the images you want to convert or select them from your library.
- After selecting your images, Adobe Scan will automatically enhance them for clarity and color.
- Once you’re satisfied with the preview, tap on Save PDF*.
- You can now share, print, or save your PDF document as you please!
Using third-party apps gives you much more control and additional features, making it worth exploring if you frequently convert images to PDFs.
Also Read This: adobe stock how to edit tag images
5. Tips for Managing PDF Files on iPhone
Managing PDF files on your iPhone doesn't have to be a daunting task! With just a few handy tips, you can keep your PDF documents organized, accessible, and easy to share.
1. Use the Files App
The Files app on iOS is your best friend when it comes to managing PDFs. You can create folders, move files around, and even tag them for quick access. To get started:
- Open the Files app.
- Tap “Browse” at the bottom to see locations like iCloud Drive, On My iPhone, or third-party storage.
- Create new folders to categorize your PDF documents according to project, date, or relevance.
2. Rename PDFs for Quick Reference
When you save a PDF, it often comes with a generic name. Renaming your PDFs makes it easier to locate them later:
- Open the Files app.
- Locate the PDF you want to rename, and tap and hold until a menu appears.
- Select “Rename” and type in your desired title.
3. Utilize Markup Features
Did you know you can annotate your PDFs? The Markup tool allows you to highlight, draw, and add notes directly on your documents:
- Open the PDF in the Files app or any PDF reader.
- Tap the Markup icon (a pen tip) to start editing.
4. Share PDFs Easily
Need to share a PDF? Use the share feature to send it via email, AirDrop, or messaging apps:
- Open the desired PDF.
- Tap the share icon and choose your preferred sharing method.
Following these tips can turn your iPhone into a powerful tool for managing PDF files. Happy organizing!
6. Conclusion
Saving images as PDF on your iPhone can be a simple yet powerful way to manage important visual files. Whether it's for sharing, printing, or simply keeping everything organized, knowing how to navigate this process can enhance your productivity. By following the steps outlined in this guide, you can convert your images to PDFs in no time.
But it doesn’t end with just creating PDFs! Effectively managing these files is just as crucial. With tools like the Files app, renaming features, and annotation capabilities, you can keep your documents organized and accessible. Remember, a good system of organization not only saves time but also reduces stress.
So there you have it, folks! Whether you're a student wanting to compile your study materials, a professional organizing work documents, or just someone who loves keeping things tidy, these tips and tricks are sure to come in handy. Don't be afraid to explore your iPhone's features, and soon you'll feel like a PDF pro!
Thanks for joining me on this journey to mastering image-to-PDF conversion on the iPhone. Happy saving!
 admin
admin


