Are you looking to enhance your image editing skills without diving into complex software? Look no further than Photoscape! This user-friendly program offers a suite of tools that can cater to both novice and experienced editors. Whether you're aiming to create stunning photos for social media or simply want to touch up personal pictures, Photoscape makes the process enjoyable and easy.
What sets Photoscape apart is its accessibility and versatility. You won’t need to spend hours learning the ins and outs of complicated tools. Instead, Photoscape presents a variety of features in an intuitive layout, empowering you to edit images effortlessly. From basic adjustments to creative edits, there's something for everyone!
Getting Started with Photoscape

Ready to dive into the world of Photoscape? Here’s how to get started:
1. Downloading and Installing:
- Visit the official Photoscape website.
- Choose the appropriate version for your operating system (Windows or Mac).
- Click on the download link and follow the installation instructions.
2. Navigating the Interface:
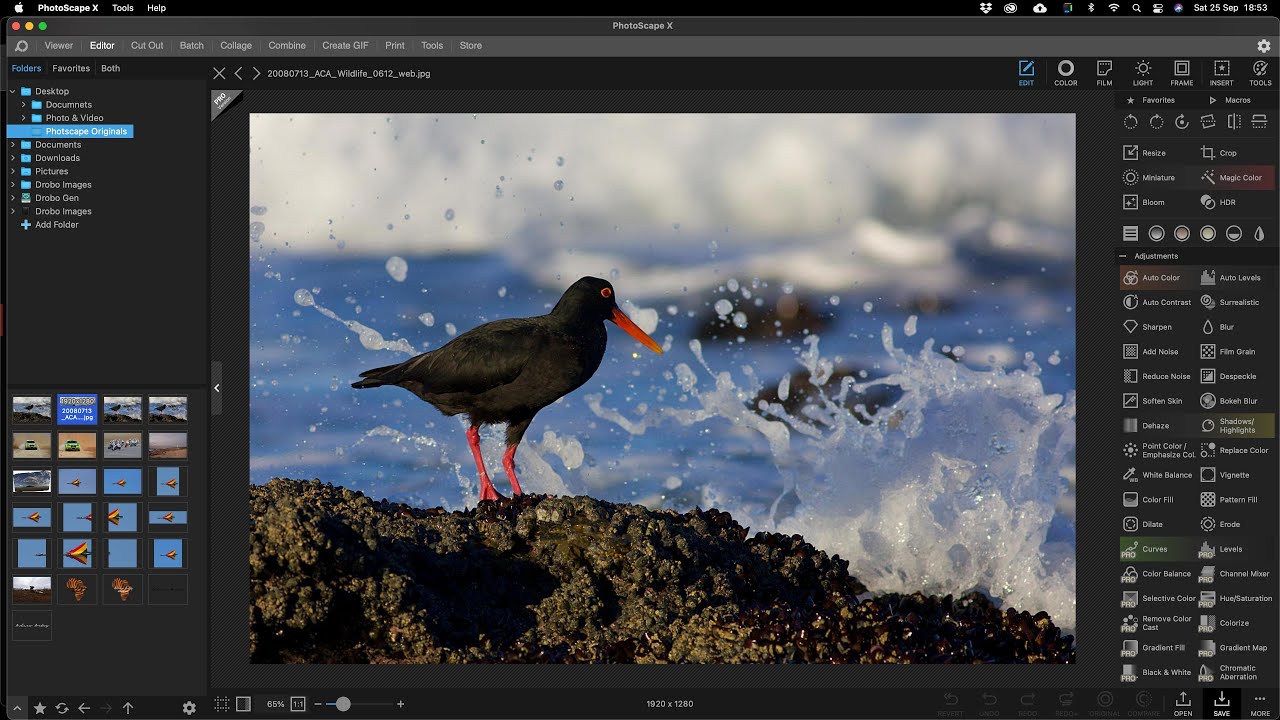
When you first open Photoscape, you'll notice its clean and welcoming layout. The main screen is divided into several sections:
| Feature | Description |
|---|---|
| Editor | Your primary workspace for editing images. |
| Viewer | Allows you to browse and view images on your computer. |
| Batch Editor | Edit multiple images at once—great for larger projects! |
| Animated GIF | Create animated GIFs with your images. |
| Options for printing photos or creating collages. |
3. Importing Photos:
To start editing, simply click on the "Editor" section. Here’s how you import your images:
- Click on the "Open" button to browse your files.
- Select the image you want to edit, and it will appear on your workspace.
With Photoscape, you’re all set for a seamless editing experience! Feel free to explore other features as you get more comfortable. Happy editing!
Also Read This: Making a Custom Ringtone From a YouTube Video
Exploring the User Interface

When you first launch Photoscape, you'll immediately notice its user-friendly interface designed to make image editing an enjoyable experience. Imagine walking into a room filled with all your favorite tools—everything is neatly organized and ready to use!
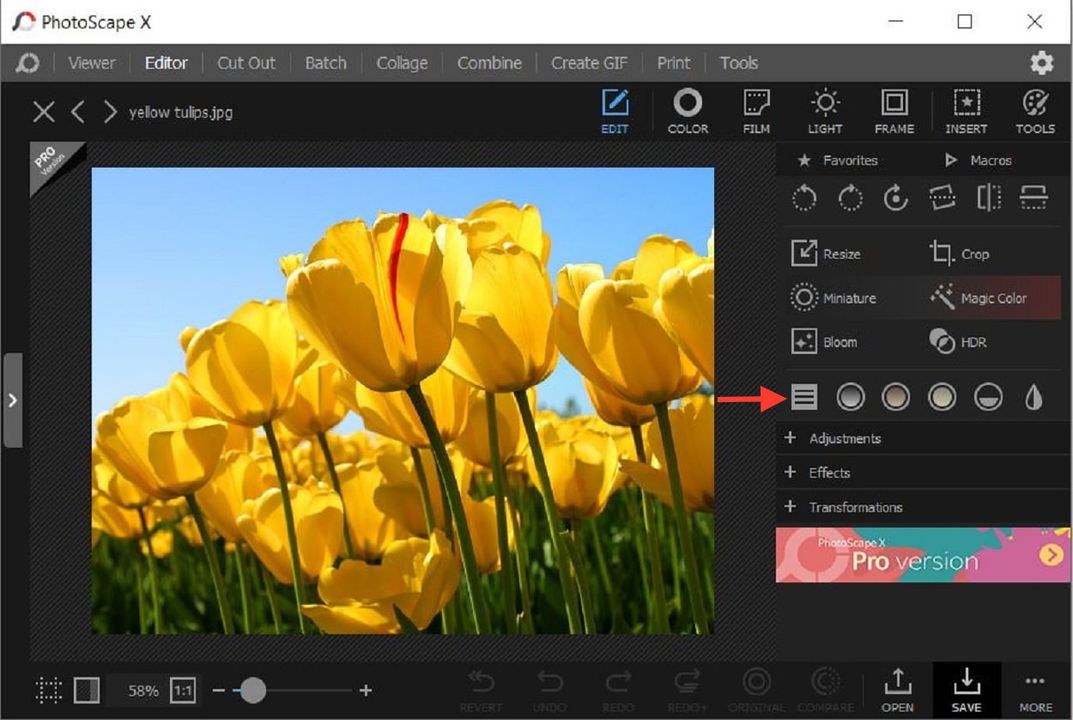
The main window is divided into several sections, each dedicated to specific functionalities:
- Menu Bar: Located at the top, the Menu Bar lets you access various options like File, Edit, and Help. It's your first stop for navigating through Photoscape’s many features.
- Toolbox: Just below the Menu Bar, the Toolbox is loaded with icons representing different editing tools. You’ll find options for adjusting brightness, contrast, and a variety of effects. Everything is just a click away!
- Image Preview Area: This large space in the center is where the magic happens! Drag and drop your images here, and you’ll see all your edits in real-time.
- Tabs for Different Functions: Photoscape divides its capabilities into several tabs, such as Editor, Viewer, Batch Editor, and Animated GIF. Switching between these tabs is as simple as clicking on them, allowing you to focus on one task at a time.
- Bottom Status Bar: Here, you can see helpful information like image dimensions and file name, ensuring you're always aware of what you’re working on.
With its intuitive design, navigating Photoscape feels like second nature, regardless of your editing experience. So take a moment to familiarize yourself with this layout—it'll make your editing process smoother and more efficient!
Also Read This: Supercharge Your Social Media Game With Pro Tips on Downloading Instagram Thumbnails
Basic Editing Tools Explained

Diving into the world of image editing might seem intimidating at first, but Photoscape makes it a breeze with its selection of basic editing tools. Think of these tools as your foundational brushes and colors for painting a stunning image!
Here are some basic tools you’ll encounter:
| Tool | Function |
|---|---|
| Crop | Eliminate unwanted areas of your image to focus on the main subject. |
| Resize | Change the dimensions of your image for various uses, from social media to printing. |
| Adjust Brightness/Contrast | Enhance your image's visibility; adjust these settings to reveal details hidden in shadows or glare. |
| Color Adjustment | Tweak the colors within your image for a particular mood or to correct color imbalances. |
| Filters | Add artistic flair with various filters, from vintage styles to modern enhancements, making your photos pop. |
To use these tools, simply select the relevant icon from the Toolbox, adjust the sliders or options as per your preference, and watch your image transform right before your eyes! Remember, experimentation is key—don’t hesitate to try out different settings to discover what looks best for your unique style.
Once you’ve mastered these basic tools, you’ll be on your way to editing images like a pro in no time!
Also Read This: How to Make Your YouTube Videos Longer and Increase Viewer Engagement
5. Advanced Features of Photoscape

When it comes to image editing software, Photoscape stands out not just for its simplicity but also for its powerful advanced features that can take your editing game to the next level. Once you’re comfortable with the basics, diving into these advanced tools can truly elevate your photo editing experience!
Here are some of the advanced features you can explore:
- Batch Editing: Save time by applying changes to multiple images at once. This feature is particularly useful for large photo collections, such as when you're preparing images for a blog or social media.
- GIF Animation: Create dynamic GIFs from a sequence of images. It’s a fun and engaging way to showcase your work, making it easy to share on platforms like Instagram and Tumblr.
- Raw Converter: This feature allows you to edit RAW files, an essential for photographers who want to maintain the highest quality in their images.
- Collage Maker: Combine multiple images into a beautifully designed collage. With various templates available, you can easily turn your photos into stunning visual stories!
- Screen Capture: Capture any part of your screen with ease. This tool is particularly handy for making tutorials or capturing images from online content.
With these advanced features, Photoscape transforms from a basic editing tool into a comprehensive suite designed for creative individuals seeking to differentiate their visual content.
Also Read This: Promoting Your 123RF Portfolio: Effective Strategies for Increasing Visibility and Sales
6. Using Filters and Effects
Filters and effects are where the magic happens in image editing! Photoscape offers a plethora of options that allow you to tweak the mood, tone, and overall aesthetic of your images. Experimenting with these tools is not just fun but can significantly enhance your photo outcomes.
Here’s how you can make the most of Photoscape’s filters and effects:
- Accessing Filters: To use filters, open your image and navigate to the "Editor" tab. You’ll find a variety of filters under the "Filter" section. Simply click on any filter to preview how it alters your image.
- Adjusting Intensity: After selecting a filter, you can adjust its intensity to find that perfect balance. Most filters allow you to slide an intensity bar, giving you full control over the effect.
- Stacking Effects: Don’t hesitate to combine multiple filters! Applying one filter after another can produce unique results that truly reflect your creative vision.
- Saving Your Favorites: If you find a specific filter or adjustment that you love, you can save it for future use. This can save you time in later projects!
- Applying Presets: Photoscape also offers a variety of preset styles that you can apply with one click. This is a great way to quickly give your images a professional touch.
Filters and effects are not just there to make your photos look different; they help convey emotions and themes. So go ahead, play around, and let your creativity shine!
Also Read This: Download Dexterity: How Can You Download Your Entire Photobucket
Creating Collages and GIFs
Creating collages and GIFs in Photoscape is an enjoyable and straightforward process. Whether you're looking to showcase your vacation photos or want to animate your favorite moments, Photoscape has you covered.
To create a collage, follow these simple steps:
- Open Photoscape: Launch the application and navigate to the “Collage” tab.
- Select Photos: Click on the “Add” button to import the images you wish to incorporate into your collage. You can select multiple files at once, making it quick and easy!
- Choose a Layout: Photoscape offers various pre-designed layouts. You can choose one that suits your style or create a custom layout by dragging and dropping your images where you want them.
- Adjust Sizes: You can click and drag the edges of each photo to resize them as needed. This flexibility allows you to create a personalized look.
- Add Backgrounds and Borders: Enhance your collage by adding a background color, texture, or frame using the options provided.
Once your collage looks perfect, you can save it, and you’re ready to share it with family and friends. Now, if you’re interested in creating a GIF, that’s just as simple!
In Photoscape:
- Go to the “GIF Animator” tab.
- Add images, adjusting the duration for each frame to control the speed of the animation.
- Preview the result and make any necessary adjustments before saving your animated GIF.
Both collages and GIFs add wonderful creative elements to your photo collections!
Also Read This: Discover How to Use Transparent Vector Files from Shutterstock
Exporting and Sharing Your Images
After you’ve created stunning images, it’s time to export and share them with the world. Photoscape makes this process seamless and user-friendly.
Here’s how to export your images:
- Finish Your Edits: Once you’re satisfied with your edits, navigate to the “Editor” or “Collage” sections where your work resides.
- Click Save: You’ll find a “Save” button on the top right corner. Click on it to start configuration options for your export.
- Select Format: Choose the file format you want to export to. Common options include JPEG and PNG. JPEG is great for photographs, while PNG supports transparency.
- Name Your File: Give your image a memorable name, especially if you’re organizing them for different projects!
- Define Quality Settings: Adjust the quality settings based on your needs; higher quality results in larger file sizes.
- Choose Destination: Select where on your computer you’d like to save the file. A well-organized folder system can help you find images easily later!
Now that your images are saved, sharing them is just a click away. Photoscape allows you to:
- Email directly: Send your edited images through email directly from the application.
- Share on Social Media: You can output the images to social media platforms like Facebook and Instagram via direct upload.
- Upload to Cloud Storage: Consider uploading your files to Google Drive, Dropbox, or any other cloud service for easy accessibility.
With these straightforward steps, sharing your creative work with family, friends, or your audience becomes a breeze!
Conclusion and Tips for Best Results
Mastering Photoscape can significantly enhance your image editing experience, allowing for creativity and efficiency. Here are some essential tips to help you achieve the best results:
- Familiarize Yourself with the Interface: Spend time navigating through the main features of Photoscape including the editor, batch editor, and GIF creator to understand where tools are located.
- Utilize Presets: Photoscape offers a variety of presets and filters that can be applied with one click. Experiment with these to quickly enhance your photos.
- Leverage Batch Editing: When editing multiple images, make use of the batch editing feature to save time and ensure consistency across your photos.
- Explore Creative Features: Try out unique features like the collage maker, animated GIF creator, and print options to add a personal touch to your work.
- Regularly Save Your Work: Ensure you frequently save your edited images to avoid losing your progress. Use different file formats based on your needs.
| Tip | Description |
|---|---|
| Take Breaks | Stepping away briefly can provide a fresh perspective on your edits. |
| Join Communities | Engaging with other Photoscape users for tips and feedback can enhance your skills. |
In conclusion, mastering Photoscape lies in practice and exploration. By applying the tips outlined above, you'll not only improve your editing skills but also enjoy the process of creating stunning images effortlessly. Happy editing!
 admin
admin


