Outlining an image in Illustrator is a fantastic way to convert a raster image into a clean, editable vector graphic. Whether you’re a designer looking to create logos, icons, or just want to transform your artwork into something scalable, outlining is a skill worth mastering. In Illustrator, this process involves turning pixel-based images (like JPEGs or PNGs) into smooth, scalable paths that retain their quality no matter how much you resize them.
In this guide, we’ll walk you through the steps of outlining an image using the right tools and settings, ensuring you get the best results. It’s easier than you might think, and once you get the hang of it, you’ll be able to outline images for various design projects quickly and efficiently.
What is Image Outlining in Illustrator

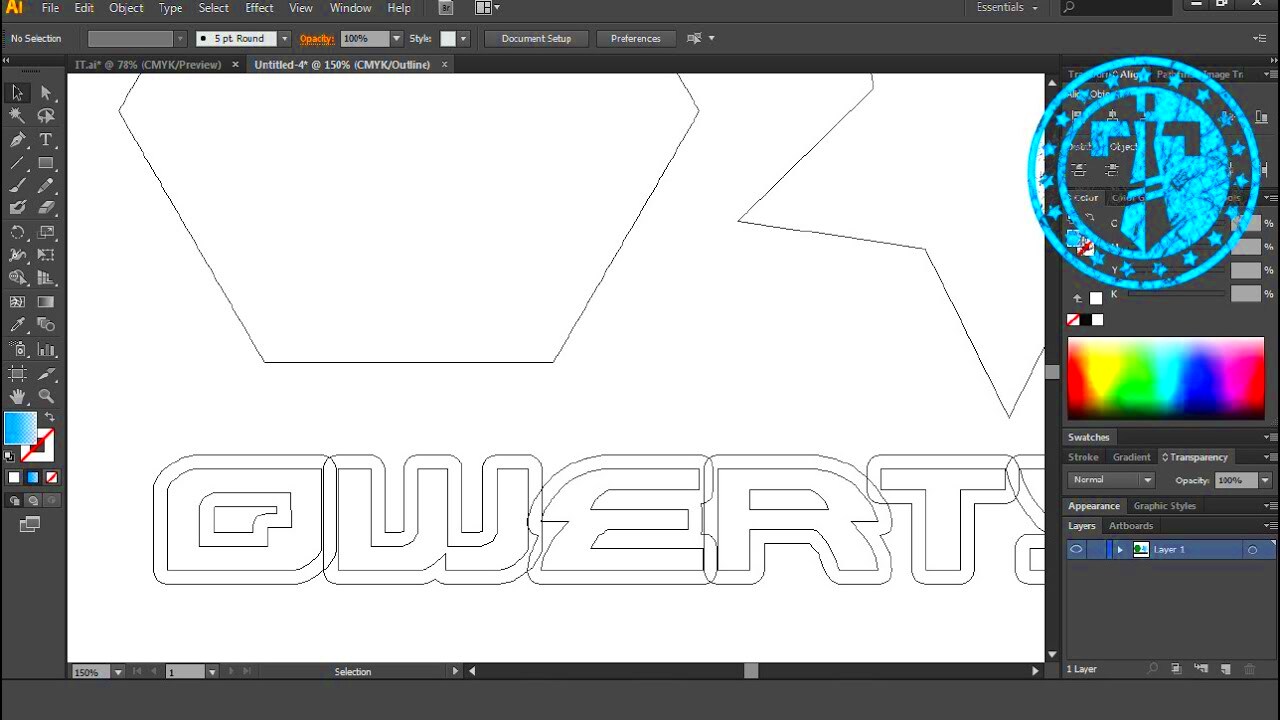
Image outlining, also known as vectorizing or tracing, is the process of converting a raster (bitmap) image into vector artwork in Adobe Illustrator. Raster images, such as photos or scanned drawings, are made up of pixels, which can lose clarity when resized. By outlining the
Illustrator uses a powerful tool called Image Trace to automate this process. Here’s what happens when you outline an image:
- Raster to Vector: Raster images (e.g., PNG, JPEG) become vector graphics made of paths, curves, and anchor points.
- Scalable Artwork: Vectors can be resized infinitely without losing sharpness or clarity.
- Editable Paths: You can modify the outlined image easily, adjusting lines, colors, and shapes to fit your needs.
Outlining helps in various scenarios, especially when you need to preserve details, make a logo, or create illustrations that need to be scalable for both print and digital use.
Also Read This: Tracing an Image in SolidWorks
Preparing Your Image for Outlining

Before you dive into the outlining process, it’s important to properly prepare your image. Having a high-quality, clean image will give you better results and make the tracing process smoother. Here are some key steps to follow:
- Choose a High-Quality Image: Start with a high-resolution image that’s clear and sharp. Images with good contrast between the subject and the background are ideal, as they will make the tracing more accurate.
- Remove Unnecessary Background Elements: If the background is cluttered, it can interfere with the tracing process. You can either crop or remove the background before proceeding.
- Adjust the Image in Illustrator: If necessary, adjust the image’s brightness, contrast, or sharpness in Illustrator before beginning the trace. Use the built-in editing tools to refine the image and make the outlines more distinct.
Additionally, consider the complexity of the image. Simple graphics with clear lines and shapes are easier to trace, while highly detailed or complex images may require more refinement after the tracing process. Start with an image that suits the style of vector art you want to create.
By preparing the image correctly, you’ll get more accurate tracing results, which means less work later on in the design process. Make sure to choose an image that has the right resolution and clarity before moving forward.
Also Read This: Editing Adobe Stock Templates in Illustrator
Using Image Trace Tool to Outline in Illustrator

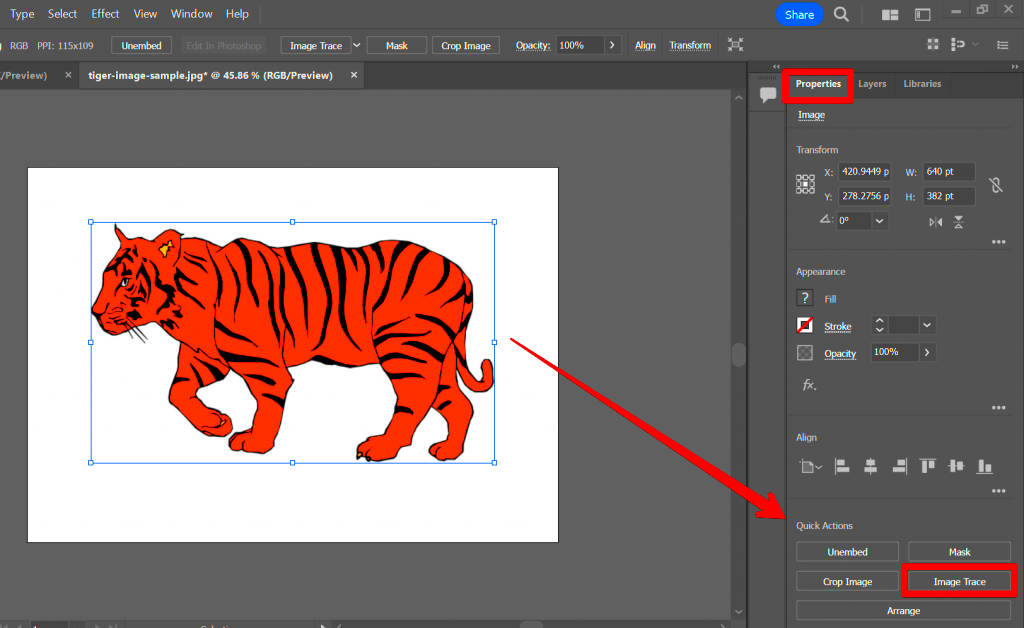
The Image Trace tool in Illustrator is your go-to solution for automatically converting raster images into vector graphics. It’s one of the most powerful features in Illustrator, offering a quick way to outline any image with just a few clicks. Once you have your image ready, this tool allows you to trace the image and turn it into a vector shape that’s easy to edit and resize without losing quality.
Here’s how you can use the Image Trace tool to outline your image:
- Open Your Image: Start by opening your raster image in Adobe Illustrator.
- Select the Image: Click on the image to select it. You’ll see a selection box around it.
- Open the Image Trace Panel: Go to the top menu, select Window > Image Trace to open the panel.
- Choose a Preset: In the Image Trace panel, you’ll see various presets like ‘High Fidelity Photo,’ ‘Low Fidelity Photo,’ or ‘6 Colors.’ These presets give you different levels of detail and color in the traced image. Pick the one that suits your image.
- Click Trace: Once you’ve chosen the preset, click on the Trace button. Illustrator will convert your raster image into paths and shapes.
After tracing, you’ll see a live preview of your vectorized image. You can adjust the settings for better accuracy, but this initial step is a great way to start turning your image into vector art quickly and easily. It’s a fast method that provides solid results, especially for images with clear lines and shapes.
Also Read This: Guide to Finding the Location of an Image Online
Adjusting Trace Settings for Better Results
While the Image Trace tool is powerful, you’ll often need to adjust its settings to get the best results. The default trace might not always be perfect, especially for complex images. By tweaking the trace settings, you can refine the outlines to match the level of detail you want. Illustrator offers several controls to adjust the tracing process, ensuring you get the most accurate vector image.
Here’s how you can adjust the settings:
- Mode: Choose between Black and White, Grayscale, or Color mode depending on how much detail you need. For simple black-and-white images, choose the Black and White mode to keep the process clean and sharp.
- Threshold: The Threshold setting controls the level of contrast. Increasing the threshold will make more parts of the image black, while decreasing it will reduce the areas traced in black. Adjust this to capture finer details or reduce noise in the image.
- Paths: The Paths slider controls how closely the trace follows the original image. A higher value gives more precise paths, but it might make the image more complex. Lower values can smooth out details.
- Corners: This slider adjusts how sharp the corners in your trace are. If your image has lots of sharp edges, increasing this will help maintain clean corners.
- Noise: Use the Noise slider to ignore small details that may not be important. Lower values capture more detail, while higher values simplify the image by removing smaller, irrelevant elements.
It’s all about balancing these settings to match the kind of look you want. Play around with the options, and you’ll soon find the right combination for your image.
Also Read This: The Critical Role of High-Quality Visuals in Creating a Successful Blog
Manually Adjusting the Outlined Image
After using the Image Trace tool to create your outlined image, it’s common to make manual adjustments to improve the result. The automatic tracing process won’t always be perfect, especially with complex or highly detailed images. That’s where your editing skills come into play. Manual adjustments help refine the paths and shapes, ensuring the image is clean and exactly how you want it.
Here’s how to make manual adjustments to your outlined image:
- Expand the Image: After tracing, click on the Expand button in the top toolbar. This will convert the traced object into individual paths that you can edit.
- Select the Path: Use the Direct Selection Tool (A) to select specific paths or anchor points in the outlined image. You can click on individual points or drag to select multiple points.
- Edit Paths: Once you’ve selected a path, you can adjust it by moving anchor points, dragging handles to change curves, or using the Pen tool to add new points. This is where you can clean up rough areas or add more detail.
- Remove Unwanted Paths: If there are stray or unnecessary paths, select them with the Selection Tool (V) and hit Delete to remove them.
- Refine the Colors: If you need to adjust the colors of your outlined image, select the colored areas with the Live Paint Bucket Tool (K) and choose new colors from the swatches or color panel.
Manual adjustments allow you to make the image cleaner and more precise. This step is especially important for images with small details or intricate designs, where automatic tracing might miss or distort certain elements.
With these adjustments, you can fine-tune the outlines and ensure that the final vector image is sharp, accurate, and ready for use in your projects.
Also Read This: Resolving Issues with the YouTube Comment Section
Saving and Exporting Your Outlined Image
Once you’ve outlined your image and made any necessary adjustments, the next step is saving and exporting it. How you save your outlined image depends on how you plan to use it. Illustrator offers a variety of file formats, each with different advantages. Choosing the right one ensures that your image retains its quality and works well in other software or platforms.
Here’s how to save and export your outlined image:
- Save as AI (Adobe Illustrator): If you plan to continue working on the image in Illustrator or need to preserve all editable layers and paths, save it as an AI file. This format keeps all the vector information intact.
- Save as EPS: The EPS format is ideal for sharing vector files with other professionals or applications. It’s widely supported in other design programs and print shops, so it’s a good choice for printing or collaboration.
- Export as SVG (Scalable Vector Graphics): If you need a web-friendly format, SVG is perfect. It’s great for responsive designs as it scales well on different screen sizes without losing quality.
- Export as PNG or JPEG: These raster formats are useful for web and social media, but be aware that resizing them might reduce quality. If you need a high-resolution image for online use, export it as a PNG with a transparent background for flexibility.
To export, go to File > Export > Export As and choose the desired format. Illustrator gives you options for resolution, color mode, and more, so make sure to adjust them based on how the image will be used.
Remember, the file format you choose depends on whether you need scalability, print-quality graphics, or web compatibility. Always choose wisely for the best results in your project!
Also Read This: Explanation of Adobe Stock’s Symbol
Common Mistakes to Avoid When Outlining an Image
Outlining an image can be a tricky process, and even experienced designers can make mistakes along the way. By being aware of common errors, you can avoid unnecessary frustration and ensure that your outlined images turn out as polished as possible. Here are some mistakes to watch out for when outlining an image in Illustrator:
- Choosing the Wrong Image: Not all images are suitable for outlining. Complex or low-quality images with lots of noise can result in messy or unclear vector paths. Always choose high-contrast images with clear edges for the best tracing results.
- Using Default Trace Settings: The default Image Trace settings may not always suit your image. A generic trace might produce undesirable results. It’s important to experiment with trace settings to achieve the best accuracy and detail.
- Skipping the Cleanup Process: After tracing, you may have rough edges or unnecessary paths. Don’t skip the cleanup process! Editing the paths manually to smooth out imperfections ensures a much cleaner, more professional look.
- Not Adjusting the Image Quality First: If the original image is low resolution or blurry, the trace will be blurry as well. Make sure your image is clear and sharp before starting the outlining process.
- Ignoring Anchor Points and Paths: Sometimes, the Image Trace tool can leave extra anchor points or stray paths that affect the design. Be sure to clean these up by manually adjusting them to avoid a cluttered vector image.
- Not Saving in the Right Format: Don’t forget to choose the right file format when saving your outlined image. If you plan to use your file across different platforms (web, print, etc.), make sure you export it in a compatible format that retains quality.
By avoiding these common mistakes, you can create more efficient and effective outlined images. Take your time to tweak the settings, manually adjust details, and always double-check the image before saving it. It’ll make all the difference in the final result!
Also Read This: MP4 Converter – Download Vimeo Videos with This Powerful Tool
FAQ
Q1: What type of images work best for outlining in Illustrator?
A1: Simple, high-contrast images with clear edges work best for outlining in Illustrator. Images with a lot of detail, subtle gradients, or blurry areas may require extra adjustments or may not outline cleanly.
Q2: Can I outline images with complex details?
A2: Yes, you can outline images with complex details, but they may require more time and fine-tuning. Illustrator’s Image Trace tool can handle intricate designs, but the more complex the image, the more manual adjustments you’ll likely need to make after tracing.
Q3: Will outlining an image always create a perfect vector?
A3: Not always. While the Image Trace tool is powerful, it’s not perfect. You may need to manually adjust the traced paths, clean up extra points, or simplify the image for the best results.
Q4: Can I use the outlined image for printing?
A4: Absolutely! Vector images are ideal for printing because they can be resized to any size without losing quality. Just be sure to save the file in a format suitable for printing, such as EPS or PDF.
Q5: How can I make the outlined image look smoother?
A5: To make the image smoother, increase the “Paths” setting in the Image Trace panel for more detail and smoother curves. Additionally, manually adjust the anchor points and handles using the Direct Selection Tool to refine the paths.
Conclusion
Outlining an image in Illustrator is a powerful technique that allows you to convert raster images into scalable, editable vector graphics. This process opens up many possibilities for designing logos, illustrations, and other graphics that need to retain their quality at any size. By using the Image Trace tool and adjusting the settings, you can create high-quality outlines that suit your design needs. Manual adjustments further refine the traced image, ensuring clean lines and accuracy. With careful preparation, correct file export options, and attention to detail, outlining images in Illustrator can be a straightforward and rewarding process for any designer. Remember, practice makes perfect, so don’t hesitate to experiment with different settings to achieve the best results for your project.


