Centering an image in Photoshop is a simple yet essential skill for anyone working with graphics, web design, or digital art. Whether you're creating a logo, editing a photo, or designing a website layout, knowing how to center an image can make a big difference in the final look of your project. In this guide, we'll walk you through the process of centering an
Understanding the Basics of Photoshop Workspace

Before you start centering images in Photoshop, it's crucial to understand the basic layout of the workspace. The Photoshop workspace consists of several key components, including the canvas, toolbars, and panels. The canvas is where you’ll be placing your images, and it can be resized depending on the project you’re working on.
Here are some important parts of the workspace to familiarize yourself with:
- Toolbar: Contains all the tools you need to manipulate your images, such as selection tools, crop tools, and alignment tools.
- Layers Panel: Allows you to manage the different elements of your design. Each image or graphic is usually placed on its own layer.
- Guides and Rulers: Help you align images precisely within the canvas. You can activate rulers (Ctrl+R) and drag out guides from the ruler area to assist with centering.
Understanding these basics will make it easier to navigate Photoshop and align your images more effectively. With these tools at your disposal, centering your image becomes a straightforward process.
Also Read This: How to Convert Raw Images to JPEG
Why Centering an Image is Important in Design

Centering an image plays a vital role in the overall aesthetics of a design. When images are placed in the center, they naturally draw the viewer's eye, providing a balanced and harmonious composition. Whether you're designing a website, creating a flyer, or working on a photo project, centering can enhance the visual impact of your design.
Here are a few reasons why centering is so important in design:
- Balance and Symmetry: Centering ensures that your image or design is visually balanced, making it look polished and professional.
- Focus: A centered image directs the viewer's attention to the subject, making it the focal point of the design.
- Alignment with Other Elements: When other elements are aligned with the centered image, the overall design feels organized and cohesive.
- Clarity: Centering an image often improves the readability and clarity of your design by eliminating distractions.
Whether you're designing for print or digital media, centering an image helps maintain a clean, organized look that keeps the viewer’s attention where it matters most.
Also Read This: Mastering Image Cropping with AI Tools
Step-by-Step Guide to Center an Image in Photoshop

Centering an image in Photoshop is a straightforward process once you understand the steps involved. Whether you are working with a single image or need to center multiple elements, following this guide will help you get the job done quickly. Here's how to do it:
- Open Your Image: First, open Photoshop and load the image you want to center by selecting File > Open, then choose your image file.
- Select the Image: Make sure the image is selected in the Layers panel. If you’re working with multiple layers, click on the image layer you want to center.
- Activate the Move Tool: Press V or select the Move Tool from the toolbar. This tool allows you to manipulate the positioning of your image.
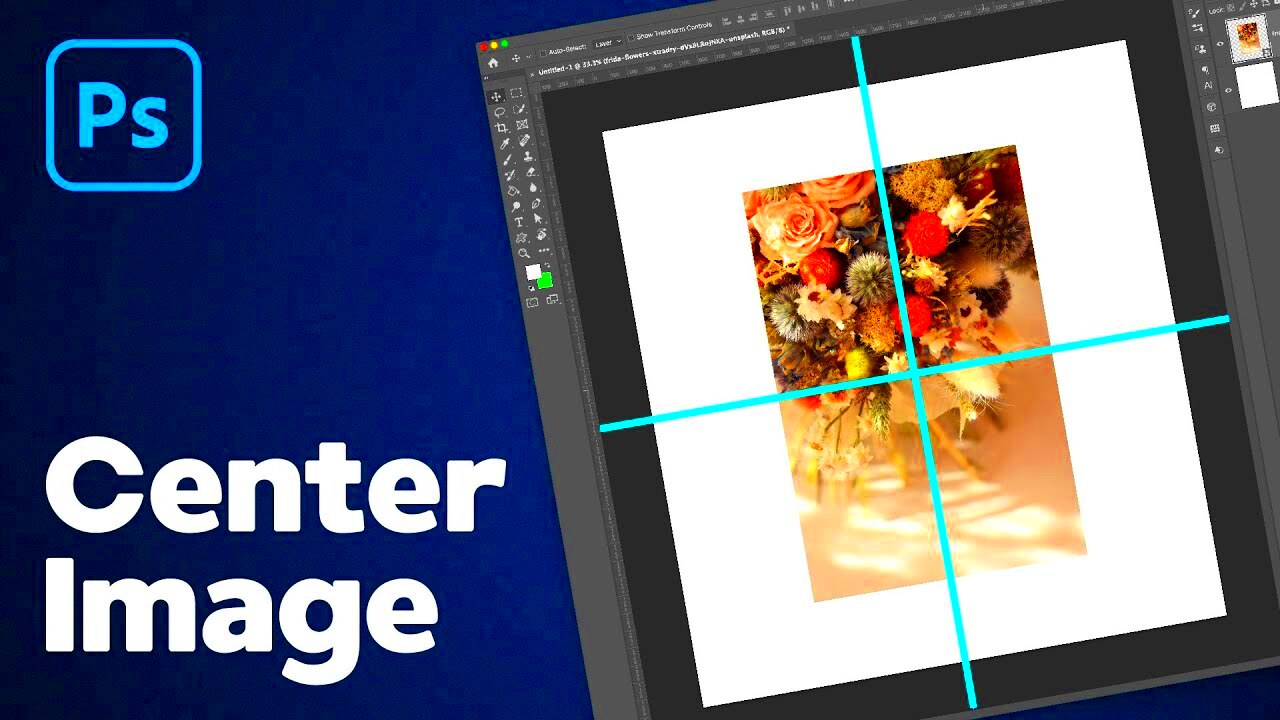
- Center Horizontally and Vertically: Hold down the Ctrl (Windows) or Cmd (Mac) key and press the A key to select the entire canvas. Then, in the top menu, click on the Align Horizontal Centers and Align Vertical Centers icons. These options automatically center the image within the canvas.
That's it! By following these simple steps, your image will be perfectly centered in Photoshop. You can now fine-tune any other elements of your design if needed.
Also Read This: Understanding Payment Requirements for Downloaded Videos on Storyblocks
Using the Align Tool to Center Your Image
Photoshop comes equipped with an alignment tool that makes centering images a breeze. The Align Tool works by helping you position layers relative to the entire canvas or other layers, ensuring precise placement of your image. Here's how to use it:
- Select the Layer: Click on the layer containing the image you want to center in the Layers panel.
- Activate the Move Tool: Use the V key or click on the Move Tool from the toolbar to enable alignment options.
- Show Alignment Options: At the top of the screen, you'll see a series of alignment icons in the options bar. These are used to align the image relative to the canvas or other layers.
- Center the Image: To center your image horizontally, click the Align Horizontal Centers icon. For vertical centering, click the Align Vertical Centers icon. These actions will immediately center the image within the workspace.
The Align Tool is especially helpful when you're working with multiple layers. It ensures that all the elements in your design are perfectly aligned, saving time and effort.
Also Read This: Fixing Image Quality in GIMP for a Professional Look
Adjusting the Canvas Size for Perfect Centering
Sometimes, you may want to adjust the size of your canvas to ensure your image is perfectly centered. Whether you're working with an image that’s too small or too large for your project, resizing the canvas can make centering much easier. Here's how to adjust the canvas size in Photoshop:
- Open the Canvas Size Dialog: Go to Image > Canvas Size from the top menu. This opens a dialog box where you can manually adjust the dimensions of your canvas.
- Change Canvas Size: In the Canvas Size dialog box, you can modify the width and height of the canvas. Ensure the anchor point in the middle is selected so that the canvas expands or contracts equally from all sides.
- Resize the Image (Optional): If you need to resize the image itself, go to Edit > Free Transform or press Ctrl + T (Windows) or Cmd + T (Mac). Hold the Shift key to maintain proportions while resizing.
- Center Your Image: After resizing the canvas or the image, use the Move Tool to manually position the image at the center or use the Align Tool as described earlier.
By adjusting the canvas size, you ensure your image fits perfectly within the new dimensions, and centering becomes much easier. This technique is particularly useful when working with compositions that require specific dimensions for printing or web design.
Also Read This: Exploring the Diverse User Base of Alamy
Common Mistakes to Avoid When Centering an Image
Centering an image in Photoshop might seem simple, but there are several common mistakes that can throw off the entire design. These mistakes can result in your image being misaligned, causing your project to look unprofessional. Here’s a list of errors to watch out for and how to avoid them:
- Forgetting to Select the Entire Canvas: If you don’t select the entire canvas before centering, the image may not align with the full workspace. Always make sure to press Ctrl+A (Windows) or Cmd+A (Mac) to select the whole canvas before aligning.
- Not Using the Right Alignment Tools: The Move Tool and alignment options are essential for precise placement. Using them incorrectly or skipping them can leave your image off-center. Always use the Align Horizontal and Align Vertical Center tools to position your image correctly.
- Ignoring Layer Positioning: If your image is placed on a non-background layer, make sure it’s selected before aligning. If you forget this step, your image may remain in its original position, even if the canvas is adjusted.
- Improper Use of Guides: Guides help with alignment but can be misleading if not used properly. Be sure to place guides exactly where you want them and avoid cluttering your workspace with unnecessary lines.
- Not Accounting for Image Margins: Sometimes, the image itself has invisible margins or padding. These can prevent your image from being perfectly centered, so make sure to check the content inside the image frame for any extra space.
By avoiding these common mistakes, you can ensure that your images are always perfectly centered, giving your projects a polished and professional look.
Also Read This: How to Change Visibility in Dailymotion
Tips for Fine-Tuning Image Alignment
Centering an image is just the beginning. Fine-tuning the alignment is crucial if you want everything to be perfectly balanced. These tips will help you achieve precision and ensure your design looks flawless:
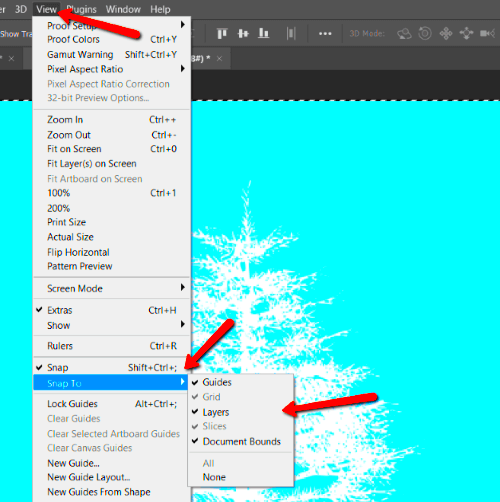
- Use Snap-to-Grid: Enable the Snap feature in Photoshop to align images to guides, grids, and other elements automatically. This will help you place your image with precision without having to rely solely on visual judgment.
- Zoom In for Accuracy: Sometimes, a close-up view of your workspace can reveal small misalignments that aren’t visible at a normal zoom level. Zoom in (Ctrl + or Cmd +) to ensure everything is perfectly aligned.
- Check Alignment with the Ruler: If you’re having trouble aligning your image exactly, use Photoshop’s rulers (Ctrl+R or Cmd+R) to create a more accurate measurement and guide your positioning.
- Align to the Background Layer: If you have a complex design with multiple layers, make sure to align your image to the background layer. This ensures everything else stays in place relative to the image.
- Work with Smart Guides: Photoshop offers smart guides that help when you drag your image close to another element on the canvas. They show up as colored lines, indicating when your image is perfectly aligned with other objects.
By applying these fine-tuning tips, you’ll be able to achieve perfect alignment every time, making your design work look more polished and professional.
Also Read This: Why Should You Use a Canva Template Downloader for Your Next Marketing Project?
FAQ: Common Questions About Centering Images in Photoshop
Many Photoshop users have questions when it comes to centering images. Whether you’re a beginner or an experienced user, it’s helpful to know the answers to some of the most frequently asked questions about this topic. Here’s a list of common questions and their answers:
- 1. Can I center multiple images at once?
- Yes, you can. Select all the layers containing the images you want to center, then use the Align options to center them horizontally and vertically on the canvas. This will align all selected layers simultaneously.
- 2. How do I center an image within a text box or shape?
- To center an image within a text box or shape, select both the image and the text/shape layer. Then, use the "Align Horizontal Centers" and "Align Vertical Centers" options to position the image inside the shape.
- 3. What if my image isn’t perfectly centered after using the Align tool?
- If your image isn’t perfectly centered, make sure you’ve selected the entire canvas and the correct layer before aligning. Also, check for any hidden margins or padding in the image that could affect its position.
- 4. Can I use keyboard shortcuts for centering?
- Yes, you can! After selecting the image and the canvas, press Ctrl+A (Windows) or Cmd+A (Mac) to select the entire canvas. Then use the alignment icons in the top toolbar or use the keyboard shortcuts for alignment: Ctrl+Shift+M for vertical and horizontal alignment.
- 5. How do I undo an alignment mistake?
- If you make a mistake, simply press Ctrl+Z (Windows) or Cmd+Z (Mac) to undo your last action. This will restore the image to its previous position before you attempted to center it.
These FAQs should help clarify any confusion you may have about centering images in Photoshop. If you still have questions, feel free to refer back to the step-by-step guide or explore more advanced techniques in Photoshop.
Conclusion: Mastering Image Centering in Photoshop
Mastering the art of centering an image in Photoshop is a valuable skill that can improve the overall quality and professionalism of your designs. Whether you're working with simple photos or complex compositions, understanding the tools and techniques for precise alignment is essential. From using the Move Tool and the Align options to adjusting canvas size and fine-tuning with guides, you now have all the necessary knowledge to center images like a pro.
By avoiding common mistakes such as not selecting the entire canvas or forgetting to align layers correctly, and applying helpful tips like snapping to grids or using smart guides, you can ensure your images always look balanced and polished. Remember, centering is not just about placement—it’s about enhancing the visual appeal and impact of your work. So, the next time you're editing an image or creating a new project, take the time to center your images carefully for the best result.
With practice and the right approach, centering will soon become second nature. Keep refining your technique, and your designs will always look more aligned and professional!


