When you're working with images, whether for a website or print project, you might come across the term "PPI" a lot. But what exactly does it mean, and why should you care? PPI stands for "Pixels Per Inch," and it measures the pixel density of an image, which plays a significant role in how sharp and clear your image looks. The higher the PPI, the crisper and more detailed the
What Does PPI Mean for Your Images?

PPI, or Pixels Per Inch, is a measure of how many pixels are packed into each inch of an image. The higher the number, the more detail an image can show. Think of it like a grid of tiny squares (pixels) that form an
Here's how PPI works in different scenarios:
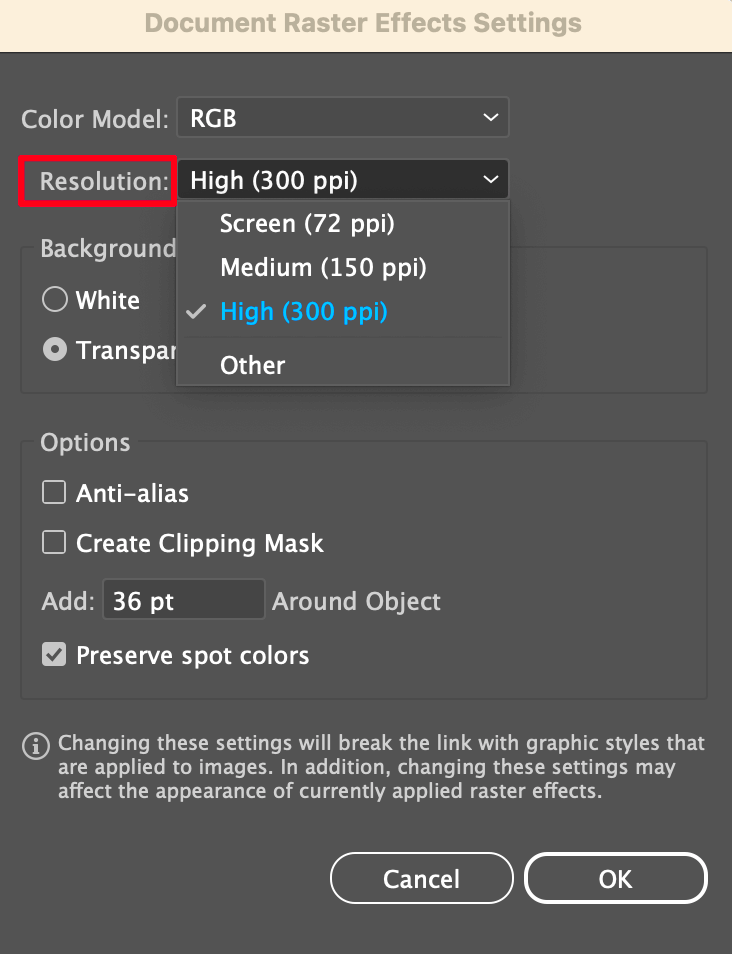
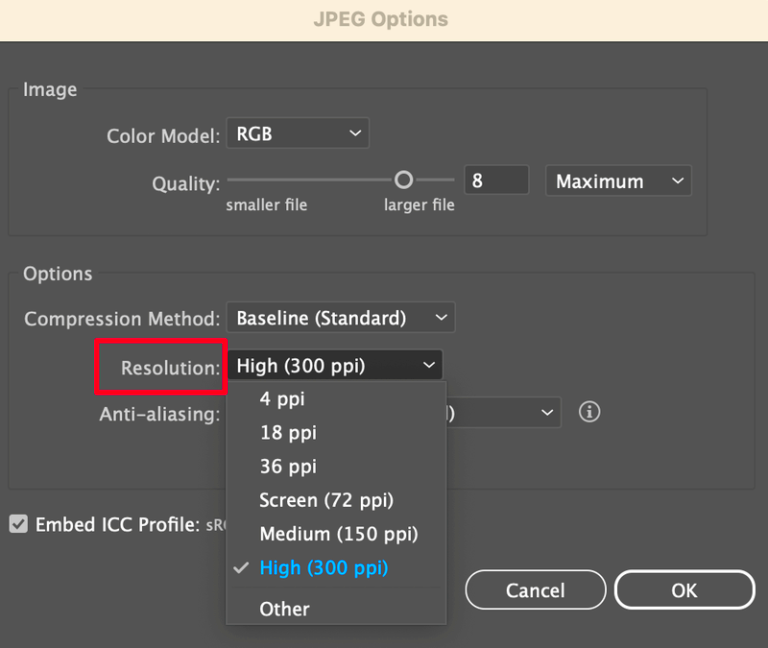
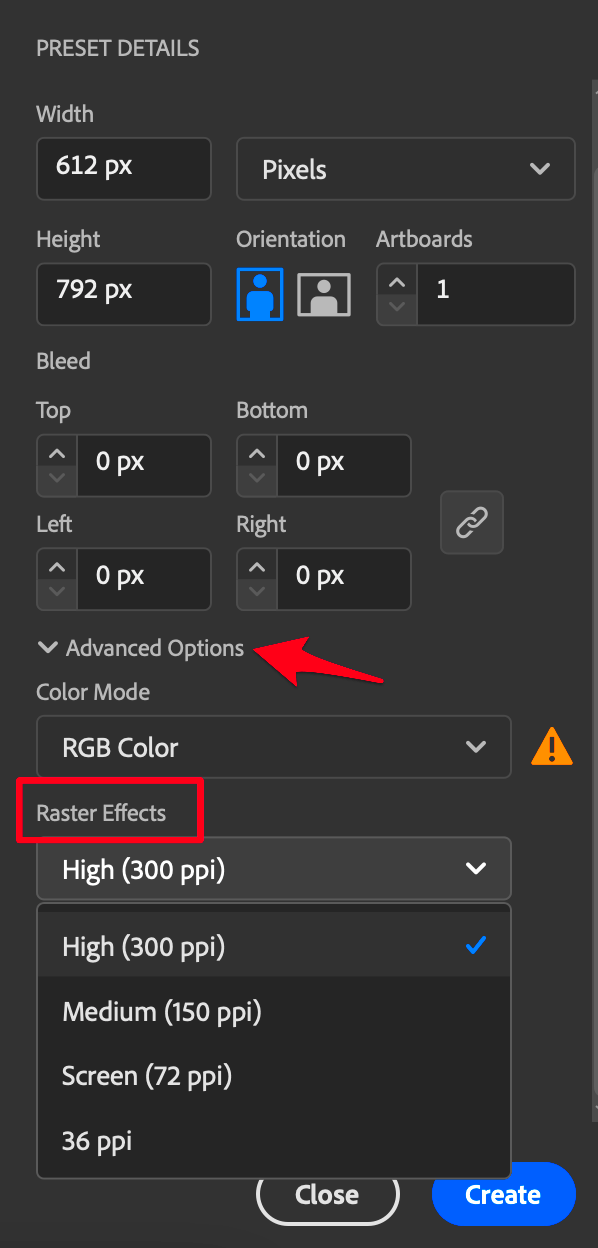
- High PPI: An image with a high PPI (e.g., 300 PPI) will appear very detailed and is perfect for print. This is the standard resolution for high-quality printing.
- Low PPI: An image with a low PPI (e.g., 72 PPI) might appear pixelated or blurry when printed, but it can look good on digital screens.
In essence, PPI tells you how much information is packed into the image, which makes it crucial for the final output. Whether you’re printing a photo or displaying it on a website, knowing the right PPI helps ensure the image looks sharp and professional.
Also Read This: Extract Audio from YouTube Video on PC for Editing Purposes
How PPI Affects Image Resolution

The resolution of an image is directly related to its PPI. The term "resolution" refers to the total amount of detail an image contains, and PPI is a key factor in determining that detail. The higher the PPI, the more pixels there are in each inch of the
Here’s how PPI affects different types of image use:
| Purpose | Recommended PPI | Impact |
|---|---|---|
| 300 PPI | Provides sharp, clear images with good detail when printed on paper. | |
| Web | 72 PPI | Low file size, ideal for fast loading but lower image detail compared to print. |
| Digital Displays | 150-300 PPI | Higher PPI for sharper display on high-resolution screens (e.g., smartphones, high-end monitors). |
When working with images for print, a higher PPI is essential for getting a crisp result. For digital uses, however, you can usually work with lower PPI because screens don’t require as much detail. But, if you increase the PPI, be prepared for larger file sizes, which can affect loading times or storage space.
To summarize, PPI directly impacts the resolution, and by adjusting it based on the final use (print vs. web), you can optimize both image quality and file size.
Also Read This: How to Find Free Templates on Behance for Creative Projects
Different Ways to Check PPI of an Image

Knowing how to check the PPI of an image is essential for ensuring that your visuals are up to the task—whether it’s for print, web design, or any other use. Thankfully, there are several ways to check the PPI of an image, and each method is fairly straightforward. Let’s dive into some of the most common ways to check PPI, from using editing software to online tools and even checking it directly on your computer.
Here are a few ways to check the PPI of an image:
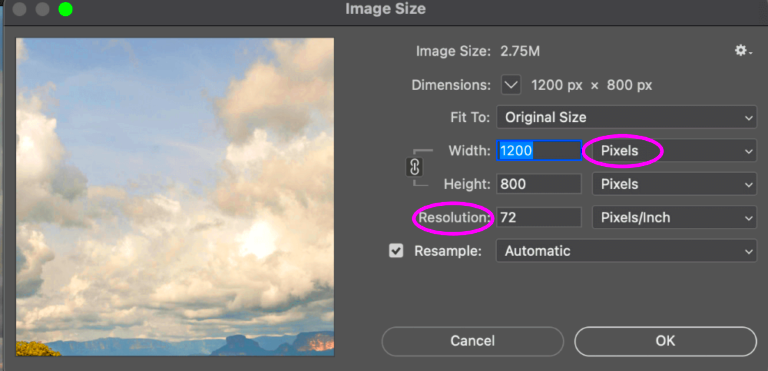
- Using Photo Editing Software: Programs like Adobe Photoshop make it easy to check the PPI. Just open your image, go to the 'Image' menu, and click on 'Image Size.' There, you’ll find the PPI listed as 'Resolution'.
- Through Your Computer's File Properties: On both Mac and Windows, you can right-click an image file, select 'Properties' or 'Get Info,' and look for the 'Details' or 'More Info' tab, which may show the PPI or pixel dimensions.
- Using Online Tools: There are several free online tools available where you can upload your image, and they will give you a quick reading of the PPI. These tools can be handy for checking PPI without needing to install any software.
- Using Image Viewers: Some image viewers (like IrfanView or Preview for Mac) also provide basic metadata, including PPI, when you open the image file.
Whether you’re using software, file properties, or online tools, checking the PPI is easy and will give you the confidence that your image is ready for its intended use—without surprises.
Also Read This: How to Contribute to Adobe Stock
Using Online Tools to Check PPI of an Image
If you don’t want to install software or if you’re looking for a quick way to check the PPI of an image, online tools are a fantastic option. These tools are user-friendly and allow you to upload an image, analyze it, and get the PPI in just a few clicks. Let’s explore how these tools work and why they’re so convenient.
Here are a few reasons why online tools are great for checking PPI:
- Easy to Use: Most online PPI checker tools have simple interfaces. You just upload your image, and the tool does the rest.
- No Installation Required: You don’t have to download or install anything. This is perfect for users who prefer lightweight, hassle-free solutions.
- Free: Many of these tools are free, making them accessible to anyone needing a quick PPI check.
Some popular online tools include:
- FreeRange Stock Image Downloader: This tool not only helps with downloading images but can also give you basic metadata, including PPI.
- Image Size Tool: Websites like ImageMagick or Online Image Editor allow you to upload an image and get detailed information, including PPI.
These tools are perfect for quick checks, especially when you’re in a pinch or working on the go. Just be aware that online tools might not offer as detailed metadata as professional software, but they are great for general use.
Also Read This: How to Create GIFs for Behance to Enhance Your Portfolio
What is the Ideal PPI for Print and Web?
When it comes to PPI, there's no one-size-fits-all answer. The ideal PPI depends on the medium you’re working with—whether it’s for print, digital use, or web publishing. Knowing the right PPI for your specific project ensures your images look their best and avoids wasting resources on unnecessary file size or poor-quality output. Let’s break it down:
Here’s a look at the ideal PPI for different scenarios:
| Purpose | Recommended PPI | Why This PPI Works |
|---|---|---|
| Print (High Quality) | 300 PPI | This is the gold standard for high-quality print images. A 300 PPI image ensures crisp, clear prints, especially for photos and detailed graphics. |
| Print (Basic Quality) | 150-200 PPI | For prints that don’t require the highest detail (e.g., flyers, posters), 150 to 200 PPI is often sufficient. |
| Web | 72 PPI | For digital images on websites or social media, 72 PPI is standard. It provides decent clarity while keeping file sizes small for quick loading times. |
| Digital Displays | 150-200 PPI | For images on modern screens (e.g., smartphones, tablets, high-definition monitors), aim for 150 to 200 PPI for a balance of quality and file size. |
In short, the ideal PPI is all about balancing quality and file size based on your end goal. For prints, always aim for 300 PPI to ensure high-quality output. For digital use, you can often get away with 72 PPI for web use, but higher PPI will improve image sharpness on modern displays. Always check the PPI before starting your project to avoid any unwanted surprises!
Also Read This: Steps to Add an Image in Custom Liquid for Shopify
How to Adjust PPI of an Image
Adjusting the PPI of an image might sound complicated, but it's actually a pretty simple process. Whether you’re preparing an image for print or optimizing it for the web, changing the PPI can help ensure your image looks its best. The key is understanding the relationship between PPI, image dimensions, and file size. You can adjust the PPI of an image without affecting its pixel dimensions, or you can change the dimensions to adjust both quality and size. Let’s walk through the steps for adjusting PPI in different software and online tools.
Here’s how you can adjust the PPI of an image:
- Using Photoshop: Open the image in Photoshop, go to the 'Image' menu, and select 'Image Size.' You can then change the PPI by unchecking the 'Resample' box, which ensures you don't alter the image dimensions. Adjust the PPI and click 'OK.'
- Using GIMP: Open the image in GIMP, go to 'Image' and select 'Scale Image.' Under the 'X and Y resolution,' you can change the PPI. Make sure to uncheck the 'Lock' if you want to set the PPI independently from the dimensions.
- Using Online Tools: There are several free online tools, like Image Resize, where you can upload your image and change its PPI easily. These tools allow you to adjust PPI without needing to install software.
- Using Preview (Mac): Open the image in Preview, go to 'Tools,' and select 'Adjust Size.' In the dialog box, change the PPI under 'Resolution.' This will let you adjust the PPI without resizing the image.
Remember, when adjusting PPI, keep in mind how it affects both the quality and file size. If you decrease the PPI too much, the image might look pixelated when printed. Conversely, increasing the PPI will raise the file size but may improve clarity for print. Find the right balance based on your needs.
Also Read This: how to cancel adobe stock images
FAQ
What does PPI stand for?
PPI stands for "Pixels Per Inch." It is a measure of the pixel density of an image, and it tells you how much detail is packed into each inch of the image.
What is the difference between PPI and DPI?
PPI refers to how many pixels are displayed per inch of an image, whereas DPI (Dots Per Inch) measures how many dots a printer can print per inch. The two are closely related but used in different contexts—PPI is for digital images, and DPI is for print quality.
How do I check the PPI of an image?
You can check the PPI of an image by using software like Photoshop, online tools, or even your computer’s file properties. Simply open the image and check the metadata or image size settings.
What PPI should I use for printing?
The ideal PPI for high-quality print images is 300 PPI. For lower quality prints, such as posters or banners, you can use 150-200 PPI.
Does changing the PPI affect the image size?
Yes, changing the PPI can affect both the image quality and the file size. Lowering the PPI reduces the file size but may result in a loss of detail, while increasing the PPI makes the file larger and improves quality for printing.
Conclusion: Understanding and Managing PPI
Understanding PPI is crucial for managing your images effectively. Whether you're preparing an image for web use or print, knowing how to adjust and check the PPI can make a big difference in the final output. As we've seen, the right PPI can ensure your image looks sharp and professional, whether it’s displayed on a screen or printed on paper. Remember to choose the appropriate PPI based on your project’s needs—300 PPI for print, 72 PPI for the web, and somewhere in between for high-resolution displays.
When adjusting PPI, it's important to strike a balance between quality and file size. Too low of a PPI can result in a blurry or pixelated image, while unnecessarily high PPI can lead to oversized files that slow down your website or storage. With the right tools and knowledge, managing PPI becomes a straightforward process, allowing you to create the best images for any platform.
Ultimately, knowing how to check and adjust PPI will help you produce images that meet both your quality and size requirements, ensuring your visuals look great every time, whether on screen or in print.


