If you're looking to print an image in high quality, one of the key factors to consider is its DPI (dots per inch). While Photoshop is a popular tool for image editing, you don't need it to change your
Why 300 DPI is Important for High-Quality Printing

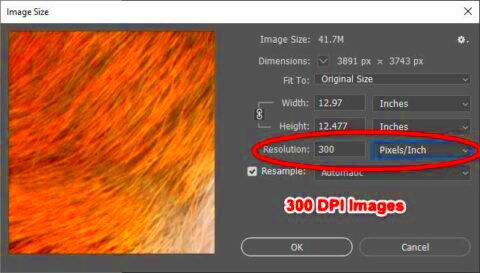
When preparing images for print, resolution is everything. DPI is a measurement that defines the sharpness of your image when printed. The higher the DPI, the more detail your print will show. For high-quality prints, such as brochures, posters, or fine art photography, 300 DPI is the standard. This ensures that the image appears crisp and clear, with no pixelation or blurriness.
Here’s why 300 DPI is essential:
- Sharpness: Higher DPI means sharper, more defined images.
- Print Quality: Prints at 300 DPI look professional and are suitable for high-end printing processes.
- Large Format Printing: When printing large images, 300 DPI ensures the image doesn't lose its quality when resized.
If you plan to print your images on physical media, ensure they are at 300 DPI to avoid any quality issues. Anything lower than that, especially 72 DPI (commonly used for web images), can result in poor print quality.
Also Read This: How Editorial Stock Photography Redefines Visual Storytelling Today
Methods for Converting an Image to 300 DPI Without Photoshop

There are several ways to convert your image to 300 DPI without Photoshop. Whether you're using a free online tool or another image editor, the process is straightforward and doesn’t require advanced skills. Let’s explore some of the easiest methods:
- Using Free Online DPI Converters: Websites like BeFunky and ILoveIMG offer free tools to change your image DPI with just a few clicks. You can upload your image, set the desired DPI (300), and download the updated version without losing quality.
- Using Microsoft Paint: Surprisingly, Microsoft Paint can be used to adjust the DPI of an image. Simply open the image in Paint, resize the image using the "Resize" option, and enter the new dimensions. Then, save the file and adjust its DPI using another tool like GIMP.
- Using GIMP (Free Software): GIMP is a free alternative to Photoshop. To change the DPI in GIMP, open the image, go to "Image" > "Print Size," and adjust the DPI setting to 300. GIMP allows you to rescale the image without reducing its quality.
- Using Preview on Mac: If you're using a Mac, the built-in Preview app can help you adjust the DPI. Open the image, click "Tools" > "Adjust Size," and change the resolution to 300 DPI.
All these methods allow you to convert your image to 300 DPI without the need for Photoshop, making it accessible and easy for anyone, even without extensive photo-editing experience.
Also Read This: How to Update YouTube Without the Play Store
Using Free Online Tools to Change Image DPI

If you're not keen on downloading software or spending money on programs, free online tools are your best bet for changing an image's DPI. These tools are easy to use, fast, and completely free. Most of them work similarly: you upload your image, choose the DPI you want, and then download the updated
- ILoveIMG: A popular online tool that allows you to change the DPI of your image with just a few clicks. It supports multiple image formats and can handle bulk image conversions.
- Befunky: Befunky is an online photo editor with a built-in DPI adjustment tool. You can easily resize images and change the DPI to 300 for high-quality prints.
- ResizeImage.net: This tool lets you change your image’s DPI without needing an account or subscription. Just upload your image, select the new DPI, and download the result.
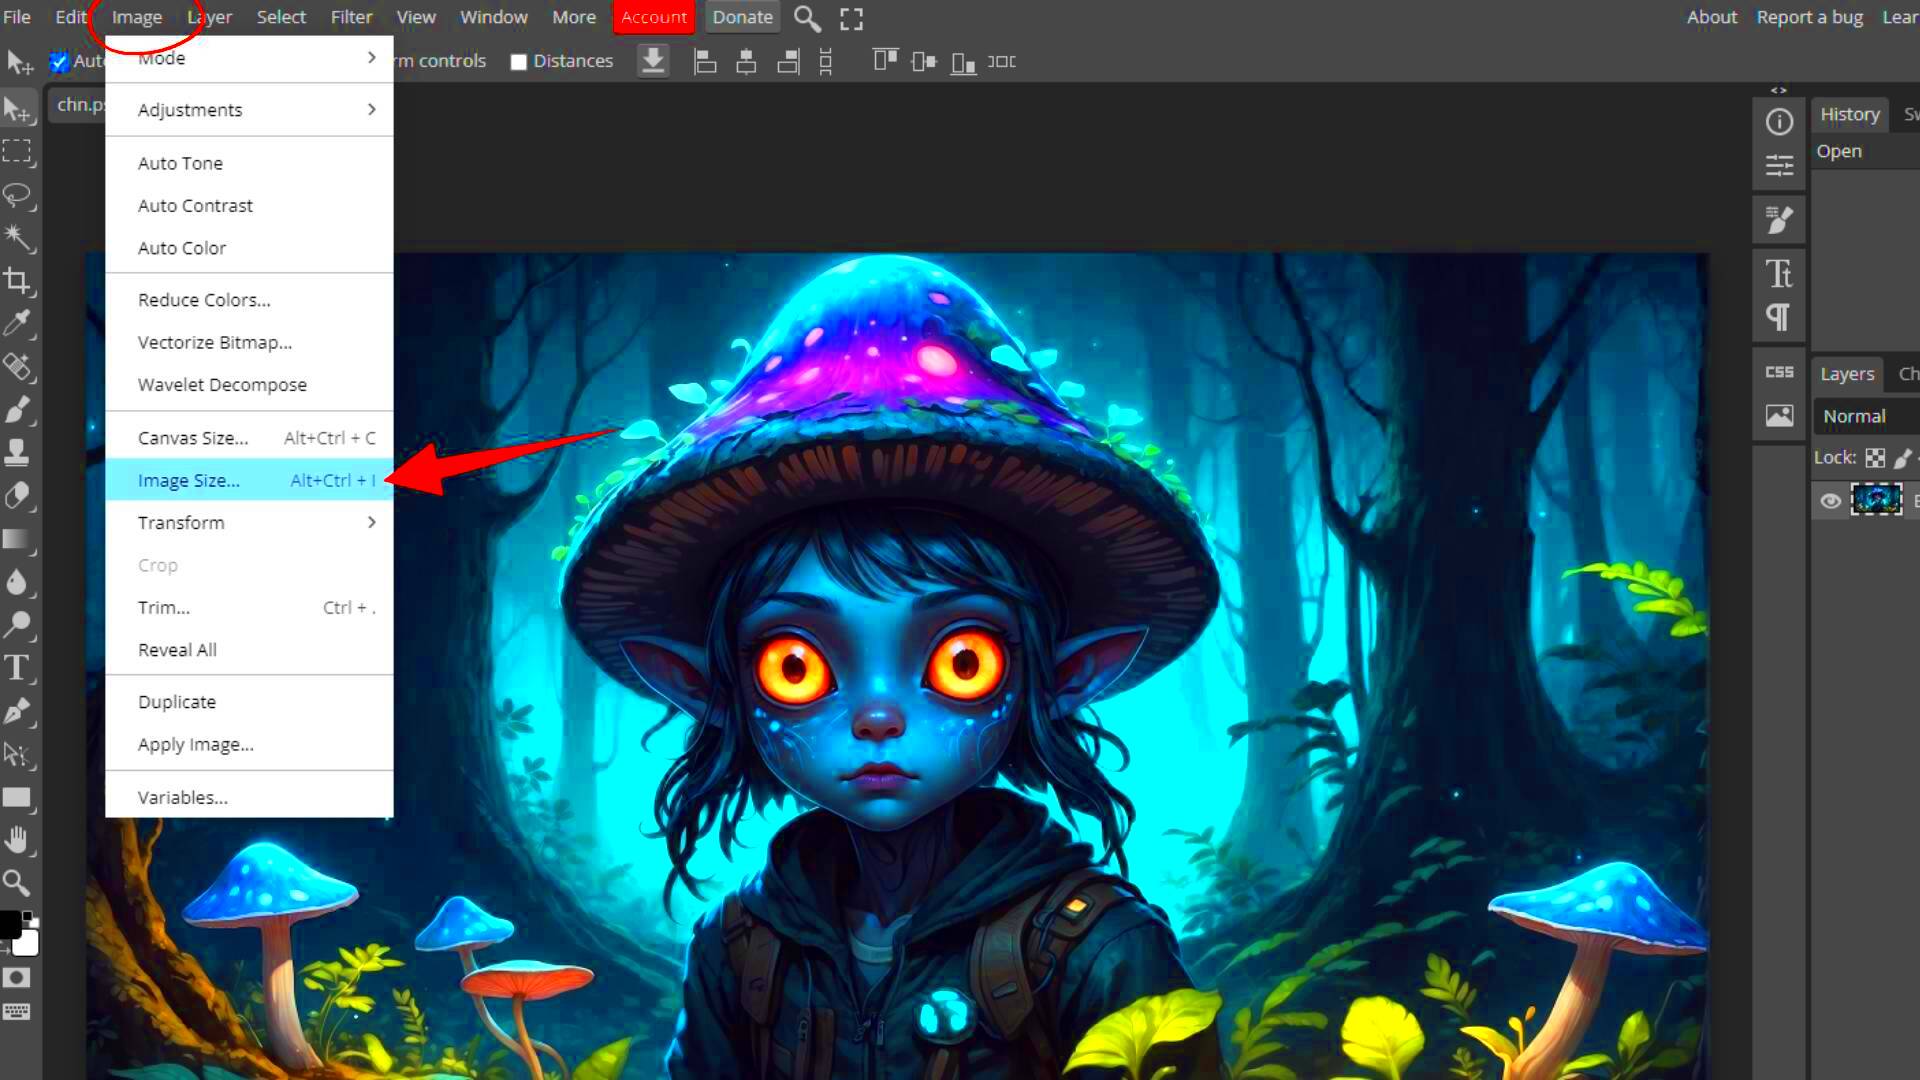
- Photopea: Photopea is an advanced, Photoshop-like tool available for free in your browser. It lets you adjust DPI settings and offers more image editing features if needed.
While these tools are easy to use, it’s important to note that the quality of the image can sometimes be affected, especially if the original file is low resolution. Therefore, it’s always a good idea to start with the highest resolution possible to ensure the best final result.
Also Read This: Storing YouTube Videos on Your iPad for Offline Access
Steps to Convert DPI Using Image Editing Software Other Than Photoshop
If you don’t have Photoshop but still want to adjust the DPI of your image, you can use several free or affordable alternatives that offer similar features. Let’s walk through how you can convert DPI using tools like GIMP, Paint.NET, or even Microsoft Paint.
Here’s how you can convert DPI using GIMP, one of the best free image editing programs:
- Download and install GIMP: If you don’t already have it, download GIMP from the official website and install it on your computer.
- Open your image: Launch GIMP and open the image file you want to change the DPI for.
- Adjust DPI settings: Go to "Image" > "Print Size," and in the "Resolution" section, change the DPI to 300.
- Save the image: After adjusting the DPI, save your image in your preferred format (JPEG, PNG, etc.).
If you prefer a simpler tool, Microsoft Paint also offers a basic method, though it may not always give you the finest results. Here’s how to adjust DPI in Paint:
- Open the image: Open your image in Paint.
- Resize the image: Click on "Resize" and select "Percentage" or "Pixels" to adjust the image’s dimensions.
- Use a DPI-adjusting tool: Paint doesn’t allow you to directly adjust DPI, but you can use an external DPI converter tool after resizing the image in Paint.
While GIMP offers a more professional approach, tools like Paint.NET also provide a simple way to change DPI settings without requiring Photoshop.
Also Read This: Is Being a YouTuber a Good Career Choice
How to Use a Free Image Converter for 300 DPI Conversion
If you need a quick solution to convert your image to 300 DPI without manually adjusting settings, a free image converter is the way to go. These tools are specifically designed to simplify the conversion process, allowing you to focus on your project without worrying about complex software or settings.
Here’s a step-by-step guide on how to use a free image converter to change your image to 300 DPI:
- Choose an Image Converter: Websites like ILoveIMG and BeFunky provide free online converters that are user-friendly and effective for changing DPI.
- Upload Your Image: Visit the image converter website, select the "Change DPI" option, and upload your image file.
- Select 300 DPI: Most converters will offer preset DPI options. Choose 300 DPI to prepare your image for high-quality print.
- Download the Converted Image: Once the tool finishes processing, download the updated image file to your device.
Free converters like these are ideal for people who need quick conversions without having to spend time learning complex software. However, keep in mind that depending on the tool, the output quality might slightly vary. Always check the image after conversion to ensure it meets your standards.
Also Read This: How to Post a YouTube Video on Instagram in Simple Steps for Sharing
Tips for Ensuring Your Image Maintains Quality After DPI Change
When converting your image to 300 DPI, maintaining its quality is essential, especially for printing. A DPI conversion can sometimes result in image degradation, like pixelation or blurriness, especially if the original file isn't high-resolution. Here are some tips to help you ensure your image stays sharp and clear after the DPI change:
- Start with a High-Resolution Image: Always begin with a high-quality image to prevent any issues during DPI conversion. Low-resolution images cannot be magically improved by simply changing the DPI.
- Resize the Image Gradually: If you’re increasing the image size, do so gradually instead of a large jump. Resizing in increments will help retain more detail and prevent pixelation.
- Use a High-Quality Converter: Choose a reliable and professional converter tool, whether it's an online tool or software. Some free online tools can produce better results than others, so test different ones if needed.
- Avoid Over-Compression: When saving your image, use a format like PNG or TIFF for higher quality. JPEG files often lose quality due to compression, which can result in visible artifacts.
- Check Image Sharpness After Conversion: After converting your image, always review it at full resolution to check for any quality loss. If the image looks blurry, you might need to reduce its size or find a higher resolution version to work with.
By following these tips, you’ll ensure that your images maintain their sharpness and quality after converting to 300 DPI—perfect for high-quality prints.
Also Read This: How to Add Subtitles to YouTube Shorts and Make Your Videos Accessible
Common Mistakes to Avoid While Converting DPI
- Converting Low-Resolution Images: Trying to increase the DPI of a low-resolution image doesn’t improve its quality. Instead, it often makes the image blurry or pixelated. Start with the highest resolution available to avoid this.
- Not Considering Image Dimensions: Changing the DPI without adjusting the image's dimensions can cause it to lose clarity when printed. Always consider both the resolution and the physical size of the image.
- Overlooking Image Compression: Saving images in formats that overly compress data (like JPEG) can significantly degrade quality. Opt for formats like PNG or TIFF for higher fidelity, especially when preserving fine details is important.
- Using Inaccurate Tools: Not all online DPI converters or software give you the same level of control. Choose trusted tools and double-check that your final image meets the required resolution for printing.
- Ignoring the Aspect Ratio: Changing the DPI of an image without keeping the aspect ratio intact can distort the image. Always lock the aspect ratio when resizing or adjusting your image to prevent unwanted stretching.
- Assuming DPI and Image Size are the Same: Some people confuse DPI with image size. While DPI affects the print quality, the actual dimensions (in inches or cm) of your image also play a crucial role in determining how it looks on paper.
By avoiding these common mistakes, you’ll be able to convert your images to 300 DPI without compromising on their quality or print accuracy.
Also Read This: Sending Storyblocks Images to Photoshop for Editing
Frequently Asked Questions (FAQ)
If you're new to converting image DPI, you might have some questions. Below are answers to some of the most frequently asked questions about DPI conversion:
- What is DPI and why is it important? DPI stands for Dots Per Inch. It measures the resolution of an image when printed. The higher the DPI, the more detail is printed. For high-quality prints, 300 DPI is typically the standard.
- Can I increase DPI without losing quality? Increasing DPI can affect image quality, especially if the original resolution is low. However, starting with a high-resolution image gives you the best chance of maintaining quality after conversion.
- How do I know if my image is 300 DPI? You can check the DPI of an image using software like GIMP, Paint.NET, or online DPI checkers. This will give you the current DPI, and you can adjust it as needed.
- What happens if I use a DPI lower than 300 for printing? Images with a DPI lower than 300 (such as 72 DPI, often used for web images) will appear pixelated or blurry when printed. A 300 DPI setting ensures that the image maintains high quality.
- Can I use online tools to convert DPI? Yes, there are several reliable online tools available for changing DPI, such as ILoveIMG, BeFunky, and ResizeImage.net. These tools are user-friendly and don’t require any software installation.
- What is the best file format for high-quality images? For high-quality prints, file formats like TIFF, PNG, or even high-resolution JPEGs are recommended, as they preserve image quality better than other formats.
- How can I prevent quality loss when changing DPI? Always use a high-resolution image, choose the right DPI settings, avoid over-compressing your file, and ensure you are using a trusted tool for the conversion process.
If you still have questions, feel free to ask! Understanding DPI conversion can take a bit of practice, but once you get the hang of it, the process is easy and efficient.
Conclusion
Converting an image to 300 DPI without Photoshop is easier than you might think, thanks to a variety of free tools and software options available today. Whether you’re using online converters, free image editing programs like GIMP, or even simpler tools like Microsoft Paint, you can achieve high-quality prints without the need for expensive software. The key to a successful DPI conversion is starting with a high-resolution image, choosing the right tools, and ensuring you adjust both the DPI and image size properly. By following the tips and avoiding common mistakes, you can ensure your images stay crisp and clear for any print project.


