Annotating images in Google Docs is a simple yet powerful way to add context, highlight important features, or clarify information within an image. Whether you’re collaborating on a project or creating educational content, adding annotations helps make your images more meaningful and accessible. Google Docs offers a variety of tools to add text, arrows, shapes, and even comments to your images. This feature makes it easy to communicate your ideas more clearly, without needing complicated design software or technical skills.
In the following sections, we’ll walk you through the process of adding annotations to images, from simple text labels to more advanced markings like arrows and highlights. So, let’s dive into how you can start annotating images in Google Docs!
Steps to Annotate an Image in Google Docs
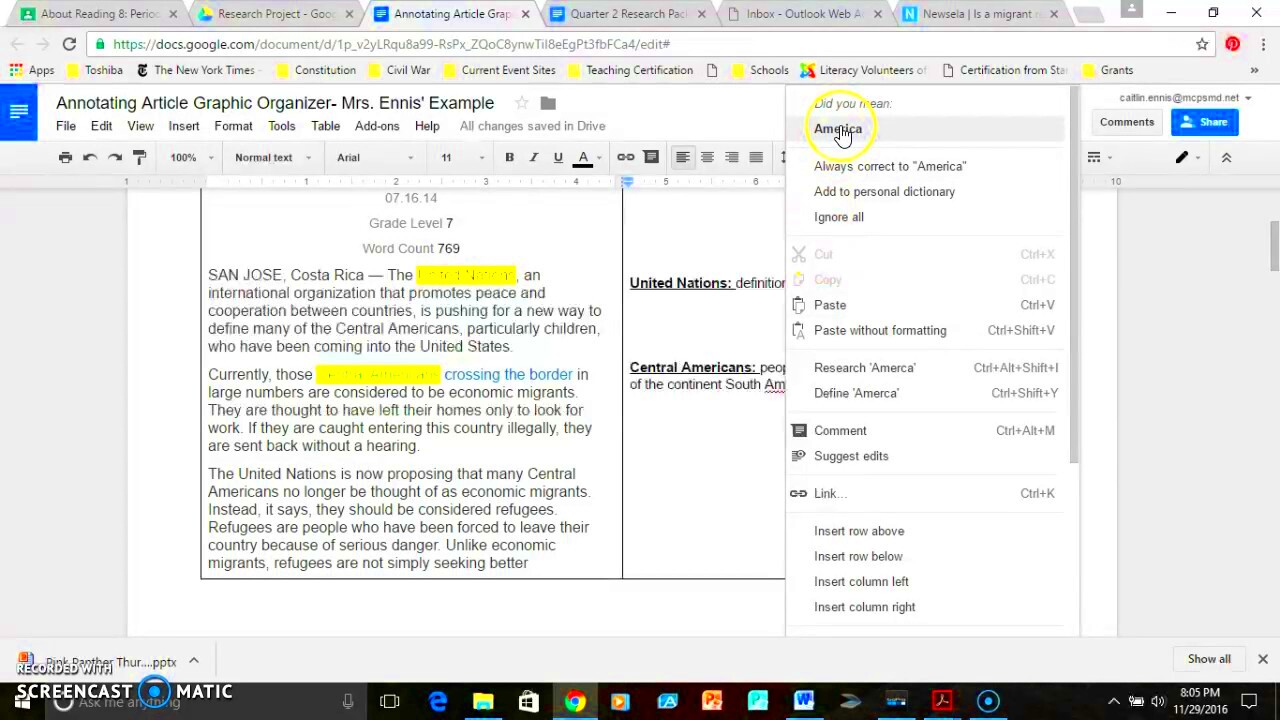
Annotating an image in Google Docs is a straightforward process. Here’s a step-by-step guide to help you get started:
- Insert the Image: First, open your Google Docs document. Click on Insert in the top menu, select Image, and choose whether you want to upload an image from your computer, Google Drive, or search the web.
- Access Drawing Tool: Once the image is in your document, click on the image to select it. Then, click on the Image Options menu and select Drawing from the dropdown. This will open the drawing tool where you can annotate your image.
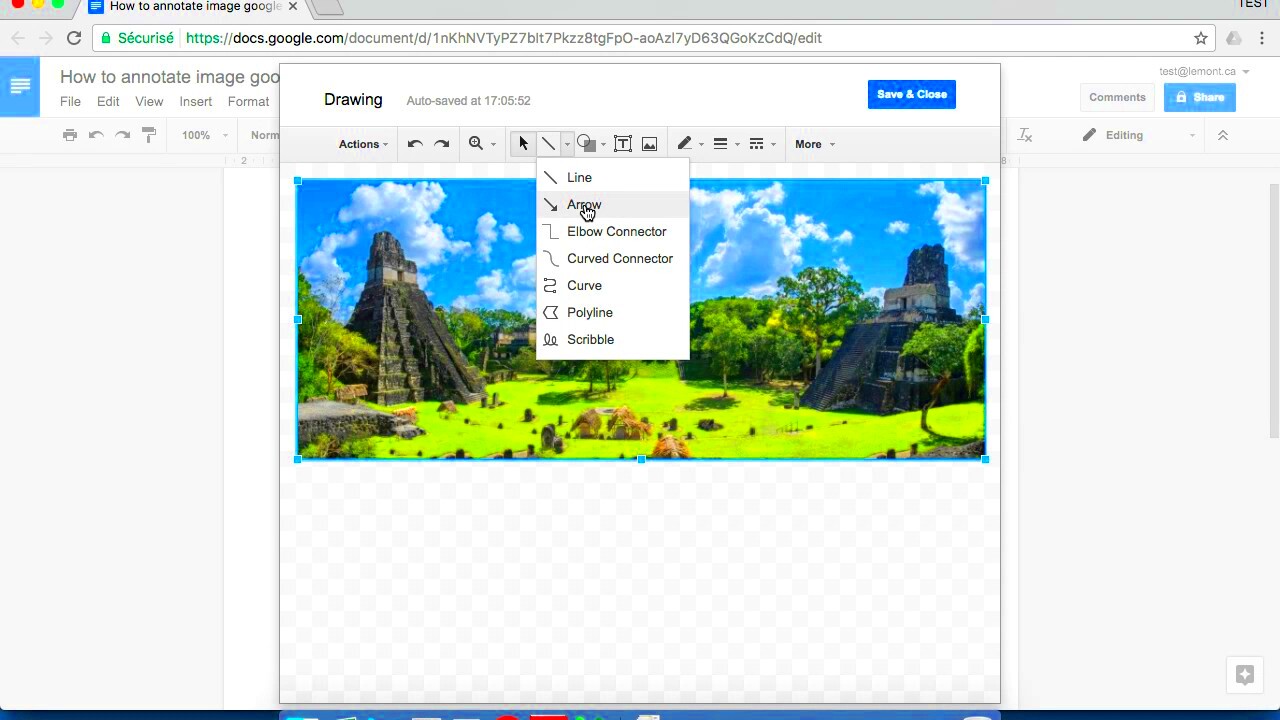
- Start Adding Annotations: In the drawing tool, you can add text, shapes, and lines to annotate your image. Use the toolbar to select different tools, such as the text box for adding comments or arrows for pointing out specific areas of the image.
- Save and Exit: After you’ve finished annotating, click Save and Close to return to your Google Docs document. Your annotated image will now appear in the document, ready for sharing or further editing.
That’s all it takes! With just a few simple steps, you can enhance your images with helpful annotations in Google Docs.
Also Read This: Steps to Export Background Images from Figma
Using Drawing Tool for Image Annotation
The Drawing tool in Google Docs is an excellent way to annotate your images with precision. It gives you the ability to add shapes, text, and lines directly over the image, making it easier to highlight key information. Here’s how you can use the Drawing tool for effective image annotation:
- Access the Drawing Tool: After inserting your image, click on it to select it. Then, click on the Image Options button and choose Drawing from the menu. This opens the drawing canvas where you can start editing the image.
- Add Text Boxes: The text box tool lets you add comments or descriptions directly to the image. Click on the Text box icon from the toolbar and click anywhere on the canvas to start typing. You can resize, reposition, and change the font style as needed.
- Use Shapes and Arrows: To highlight specific parts of the image, use the Shape tool to draw circles, rectangles, or other shapes. You can change the color and thickness of the shape to make it stand out. For pointing out specific areas, the Arrow tool is very effective.
- Draw Freehand: If you need more flexibility, use the Line or Scribble tool to draw freehand annotations. This is great for sketching out quick ideas or marking areas that require attention.
- Save and Insert: Once you’re happy with your annotations, click Save and Close to insert the annotated image into your document. You can continue editing it later if needed by clicking on the image again and selecting Edit Drawing.
By using the Drawing tool, you can add a wide range of annotations, from simple notes to detailed instructions, all directly within Google Docs. This tool gives you the flexibility to make your images more informative and engaging for your audience.
Also Read This: Can You Be Banned From YouTube? Reasons and Preventive Tips
Adding Text Comments on Images
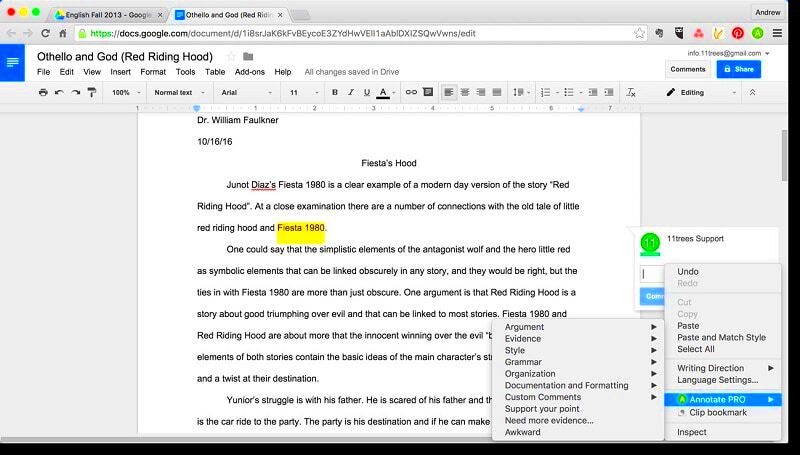
Adding text comments on images in Google Docs is a simple yet powerful way to provide context, explanations, or instructions directly on the image. Whether you're creating educational content, giving feedback, or collaborating with others, adding text comments makes your images more informative. Google Docs allows you to add text directly over or beside your images, making it easier for others to understand the key points you’re trying to convey.
Here’s how you can add text comments to an image:
- Insert the Image: Start by inserting the image into your Google Docs document. You can do this by going to Insert in the top menu, then choosing Image, and selecting the image from your computer, Google Drive, or the web.
- Access Drawing Tool: Once your image is in the document, click on it to select it. Then, click on Image Options and choose Drawing from the menu. This will open the drawing tool, where you can begin adding text comments to your image.
- Add Text Box: In the drawing tool, click on the Text box icon from the toolbar. Draw a box around the area where you want to add the comment. Then, type your comment in the text box. You can resize and reposition the text box as needed.
- Format the Text: You can adjust the font, size, color, and style of your text to make your comment stand out. Use bold or italics for emphasis, or change the text color to match your document’s theme.
- Save and Insert: After you’ve finished adding your text comments, click Save and Close. Your image with the added text comments will appear in the document.
Adding text comments not only makes your images more informative but also improves communication by allowing others to understand your thoughts and ideas more clearly.
Also Read This: Creating a Comprehensive LinkedIn Article Publishing Guide
Highlighting Parts of the Image
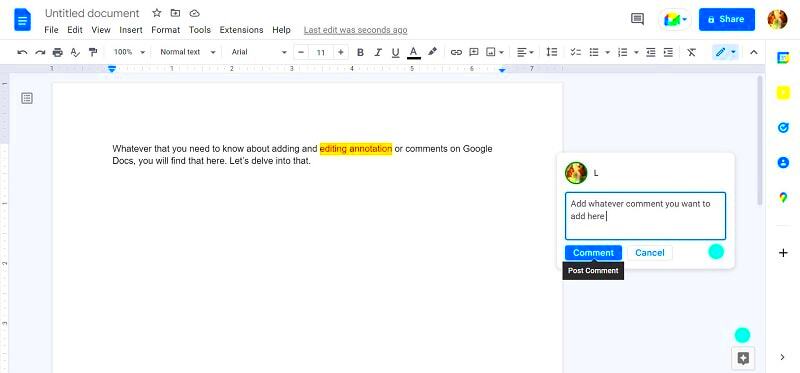
Highlighting specific parts of an image is an effective way to draw attention to important details. Whether you're pointing out a key feature, emphasizing an area of focus, or illustrating a change, highlighting makes your images much easier to understand. Google Docs offers several tools that can help you highlight areas of an image with precision and clarity.
Here’s how you can highlight parts of your image:
- Insert the Image: Start by adding the image to your document through the Insert menu. Once the image is in place, click on it to select it.
- Open the Drawing Tool: With the image selected, click on Image Options and choose Drawing from the menu. This opens the drawing canvas where you can begin highlighting areas of your image.
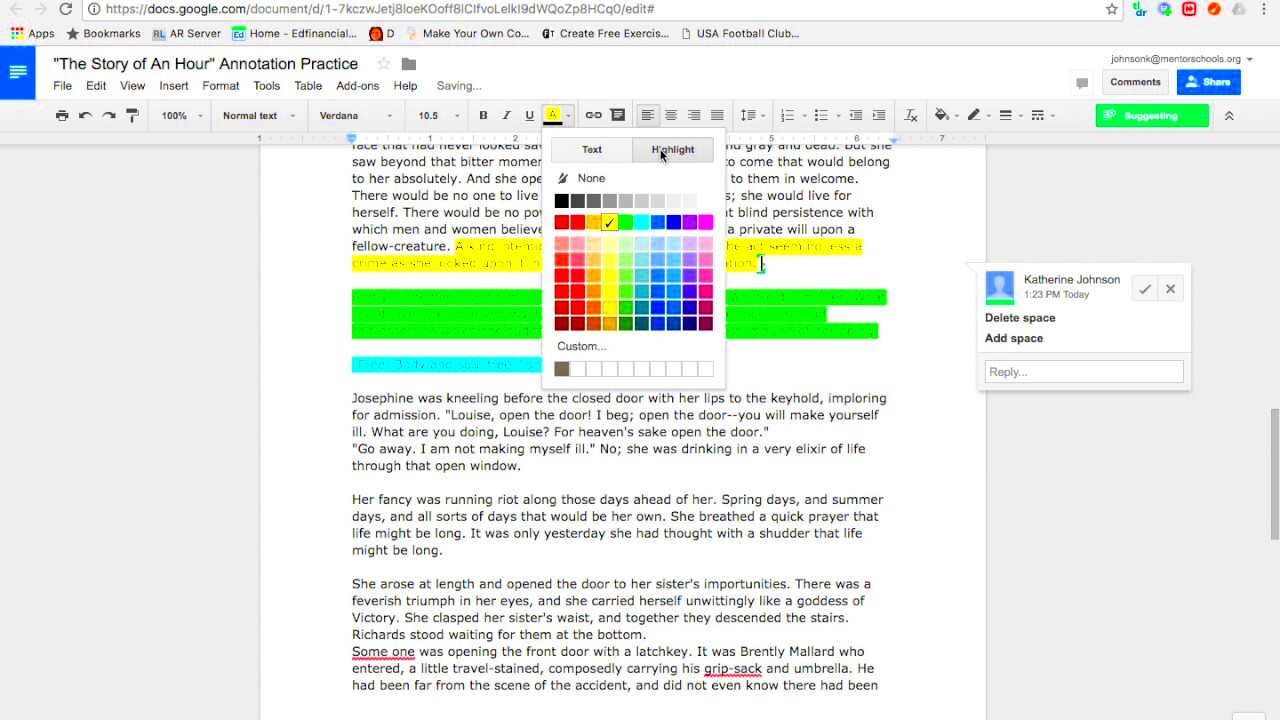
- Select the Shape Tool: To highlight an area, use the Shape tool. Choose a circle, rectangle, or other shape that will help you focus attention on the part of the image you want to emphasize. You can adjust the transparency of the shape to make the image underneath still visible.
- Adjust the Shape: Resize and position the shape over the area you want to highlight. You can also change the border color and thickness to make it stand out more.
- Use Highlighter Colors: Google Docs allows you to use different colors to highlight parts of the image. Consider using bright or contrasting colors that will catch the viewer’s attention while maintaining a clean and professional look.
- Save and Insert: Once you’ve finished highlighting the parts of the image, click Save and Close to return to your document with the highlighted image in place.
Highlighting parts of an image makes it easier for your audience to understand what’s important, providing clear visual cues that guide their attention to specific details. This is especially useful in educational materials or when presenting complex concepts.
Also Read This: How to Find the Image URL for ESPN Fantasy Football Profile Pictures
Working with Arrows and Lines in Google Docs
Arrows and lines are great tools for pointing out specific areas or connecting different parts of an image. Whether you need to illustrate a flow, highlight a feature, or simply draw attention to a particular detail, Google Docs offers simple but effective tools to add arrows and lines to your images. These tools help create a visual path that directs your viewer’s focus exactly where you want it to go.
Here’s how to use arrows and lines for annotating your images:
- Insert the Image: First, insert the image you want to annotate by clicking on Insert and selecting Image from your preferred source.
- Open the Drawing Tool: Once your image is inserted into the document, click on it to select it, and then choose Drawing from the Image Options menu. This will open the drawing tool where you can add arrows and lines to your image.
- Choose the Line Tool: In the drawing tool, select the Line icon to start drawing a line. You can adjust the thickness and color of the line to match your document’s style or make it stand out for emphasis.
- Draw Arrows: If you want to point to a specific area of the image, select the Arrow tool from the toolbar. Click and drag to draw the arrow in the direction you want. You can change the arrow’s thickness, color, and style for better visibility.
- Position and Format Lines and Arrows: After drawing your lines or arrows, click and drag them to position them where you need them on the image. Resize or rotate them if necessary, and adjust the color to make them stand out against the image.
- Save and Insert: Once you're done with the arrows and lines, click Save and Close to insert the annotated image into your Google Docs document.
Using arrows and lines in your images can make complex ideas easier to understand by visually guiding your viewers’ attention. It’s a helpful tool for making instructions, explanations, or data clearer and more engaging.
Also Read This: How to Make Money on Rumble in 2024 and Grow Your Channel Revenue
Saving and Sharing Annotated Images
After you've spent time annotating your image in Google Docs, the next step is saving and sharing it with others. Whether you’re working on a team project, preparing educational content, or simply sharing your work with friends or colleagues, it’s essential to know how to save and share your annotated images. Google Docs makes this process seamless, allowing you to preserve your changes and share your annotated documents with ease.
Here's how to save and share your annotated images in Google Docs:
- Save Your Work: Once you've completed your annotations, simply click Save and Close in the drawing tool. This will insert the annotated image back into your document, and all your annotations will be saved automatically. Google Docs saves your work in real-time, so you don't need to worry about losing any changes.
- Download Your Document: If you want to save the annotated image separately or share it with others outside Google Docs, you can download the entire document or just the image. To download the document, click on File in the top menu, then select Download, and choose a format such as PDF or Microsoft Word.
- Share the Document: To share your annotated document, click on the Share button in the top-right corner of Google Docs. You can share the document by email or generate a shareable link. You can also adjust the sharing permissions, allowing others to view, comment, or edit the document.
- Export Images Directly: If you only need to share the annotated image, consider saving the document as a PDF or taking a screenshot of the image. Alternatively, you can use the drawing tool to save the image separately by clicking File > Download and choosing an image format like PNG or JPEG.
With these simple steps, you can easily save and share your annotated images in Google Docs, ensuring that your work is accessible to others no matter where they are.
Also Read This: Pixelating Images for Privacy and Style
Conclusion: Best Practices for Annotating Images in Google Docs
Annotating images in Google Docs is a powerful way to enhance your documents and make your images more informative. By following a few simple steps, you can effectively add text, shapes, arrows, and highlights to guide your audience's attention to key details. To make the most out of this feature, it's essential to follow best practices that ensure your annotations are clear, professional, and easy to understand.
Here are some best practices for annotating images in Google Docs:
- Keep it Simple: Avoid cluttering the image with too many annotations. Stick to the most important points and use clear, concise text to explain them.
- Use Clear Labels: Make sure your text annotations are easy to read. Use a simple font and choose contrasting colors to make the text stand out against the image background.
- Be Consistent: If you're using shapes, arrows, or colors to annotate different parts of the image, be consistent throughout the document. This helps create a cohesive and easy-to-follow presentation.
- Focus on Key Details: Use highlighting and arrows to emphasize the most important aspects of the image. Don’t overdo it—too many annotations can distract from the main message.
- Review and Edit: Before finalizing your document, review your annotations to ensure they are accurate and enhance the image. Consider asking someone else to look over your work for clarity.
By following these tips, you can ensure that your image annotations are not only useful but also professional and easy for your audience to understand. Annotating images in Google Docs can elevate the way you communicate complex ideas, making your content more engaging and informative.
FAQ
1. Can I annotate PDF images in Google Docs?
Unfortunately, Google Docs does not support direct annotation of PDF images. However, you can convert a PDF to an image format (such as PNG or JPEG) and then annotate it using the steps described above.
2. How do I undo an annotation in Google Docs?
To undo an annotation, simply click on the Undo button in the toolbar or press Ctrl + Z (Windows) or Cmd + Z (Mac). This will remove the last change you made, including any annotation.
3. Can others edit the annotations I made on the image?
Yes, if you share the document with editing permissions, others can modify your annotations. If you prefer others to view but not edit the annotations, you can set the permissions to "View Only."
4. Can I use Google Drawings for more complex annotations?
Yes, Google Drawings is a more advanced tool that allows for detailed image editing and annotations. You can create a drawing in Google Drawings, save it, and then insert it into Google Docs as an image.
5. How do I align my annotations with the image?
You can use the alignment tools in the drawing tool to position your annotations precisely. Google Docs also allows you to resize, rotate, and move annotations to ensure they align with the image in the desired way.
