When it comes to improving your images, editing pixels plays a huge role. Pixels are the tiny building blocks of an image, and modifying them can drastically change how a picture looks. Whether you're looking to sharpen a blurry image, change its size, or adjust its resolution, understanding how to edit pixels is key. This guide will walk you through the basics, so you can get the most out of your images without the need for complicated tools. Ready to dive in? Let’s explore the world of pixels and how they impact your design process!
Understanding Image Pixels and Their Importance

Images are made up of thousands or even millions of tiny dots known as pixels. Each pixel carries information about the color and brightness of that part of the image. When you zoom in on an image, you can start to see these individual pixels, which are usually arranged in grids.
Here’s why pixels are important:
- Resolution: The number of pixels in an image determines its resolution. More pixels mean a higher resolution and sharper images.
- Image Quality: The quality of an image is directly linked to the pixel count. A low pixel count can make images appear blurry or pixelated when enlarged.
- Editing Flexibility: The higher the pixel density, the more flexibility you have in editing without losing quality.
In essence, the more pixels an image has, the clearer and more detailed it will appear, especially when zoomed in or printed. When you edit an image, you are often changing how the pixels are arranged, which can affect both the
Also Read This: How to Find Free Templates on Behance for Creative Projects
Tools You Can Use to Edit Image Pixels

Editing image pixels requires the right tools. Thankfully, there are plenty of options available for every skill level, from beginners to advanced designers. Here's a rundown of some of the most popular tools you can use:
- Canva: A user-friendly design tool that offers simple pixel editing options like resizing and adjusting resolution. Great for beginners.
- Adobe Photoshop: A professional-grade tool with advanced features for pixel editing, including detailed resizing, sharpening, and retouching options.
- GIMP: A free, open-source alternative to Photoshop, offering a wide range of pixel editing features.
- Pixlr: A browser-based tool with easy-to-use features for adjusting pixels, especially useful for quick fixes and edits.
- Paint.NET: A free editing software for Windows that allows users to modify image pixels with a straightforward interface.
These tools all have their strengths, so it’s important to choose one that fits your needs. For example, if you're just starting out and need something simple, Canva is a great option. However, if you need more control over pixel-level adjustments, you might prefer Photoshop or GIMP.
Also Read This: Sending Storyblocks Images to Photoshop for Editing
Steps to Edit Image Pixels in Canva
Canva is a fantastic tool for beginners and those who want a simple way to edit their images. When it comes to editing image pixels, Canva provides an easy interface for resizing, adjusting image resolution, and more. Here's how you can get started with pixel editing in Canva:
- Upload Your Image: Start by uploading the image you want to edit. Simply drag and drop your image into Canva’s editor or use the upload button to select an image from your device.
- Resize the Image: To change the size of your image, click on the image and drag the corners. You can also manually adjust the dimensions by entering the values for height and width in the toolbar at the top.
- Adjust Resolution: While Canva doesn’t offer a direct “resolution” setting, resizing an image can affect its pixel count and resolution. A larger size typically results in lower resolution, and vice versa.
- Download Your Edited Image: Once you're happy with your adjustments, click the “Download” button in the top-right corner. You can choose the format (PNG, JPG, PDF) and the quality (Standard or High) before saving your image.
Canva’s simple, intuitive platform makes editing image pixels straightforward. However, keep in mind that Canva's pixel editing capabilities are more basic compared to professional software like Photoshop. But for most everyday design needs, it works like a charm!
Also Read This: Evaluating the Safety of Adobe Stock
Changing Image Resolution to Improve Quality
Changing the resolution of an image is one of the easiest ways to improve its quality, especially if you're working on a high-resolution project or need to print your image. Resolution refers to the number of pixels per inch (PPI) or dots per inch (DPI) in an image. Here's how you can adjust the resolution to improve quality:
- Higher Resolution for Better Detail: If you want a sharper image, increase the resolution. This means more pixels are packed into the same space, resulting in more detail.
- Lower Resolution for Faster Loading: Reducing the resolution can make the file size smaller, which is useful for web images that need to load quickly, but this may reduce the quality.
Keep in mind that increasing the resolution of an image after it has been created can only improve quality to a certain extent. If the image started with low resolution, simply increasing the resolution might not give you the crispness you expect. However, if you’re working with a high-quality image and need to prepare it for printing or use on high-resolution screens, adjusting the resolution can make a noticeable difference.
Also Read This: Top 10 Trending Photography Themes on Imago Images That Everyone Is Talking About
Resizing Images Without Losing Quality
Resizing images is often necessary, whether you're preparing them for a website, social media, or print. However, resizing can lead to a loss of quality, especially if you make the image larger than it originally was. Here’s how to resize images without sacrificing quality:
- Use a Higher-Resolution Image: The higher the resolution of the original image, the better it will look when resized. Start with a large image to ensure quality doesn’t degrade too much during resizing.
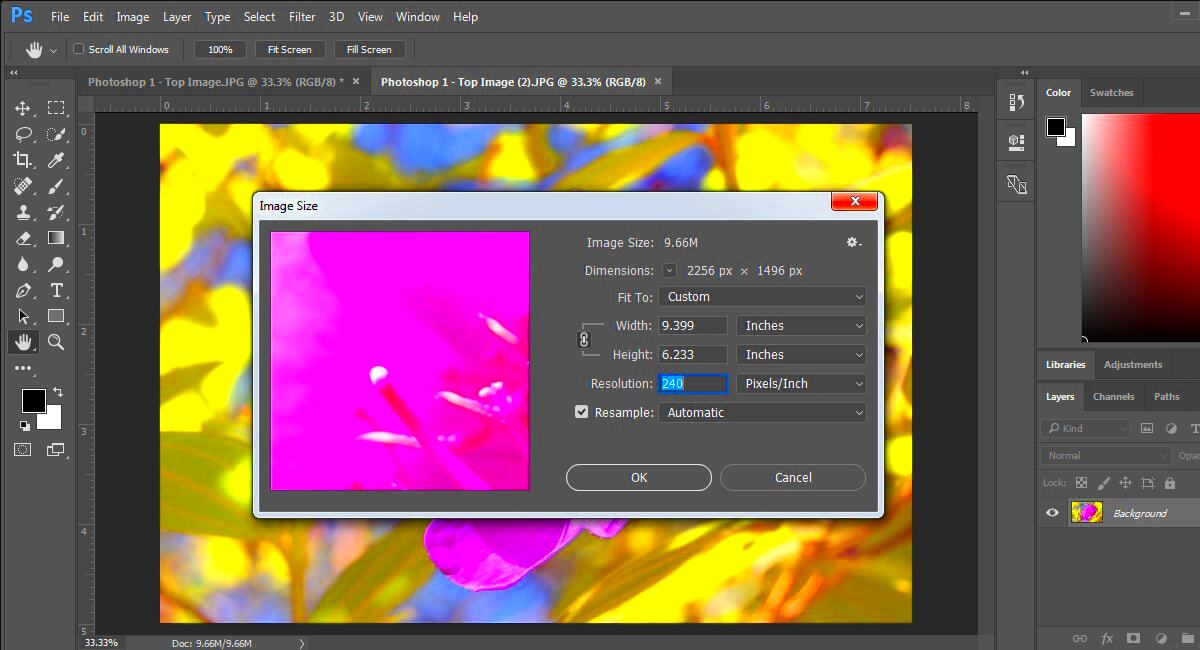
- Resample Images Carefully: When enlarging an image, be mindful of resampling. Some software tools, like Photoshop, have advanced resampling algorithms that maintain sharpness and detail when resizing.
- Resize Proportionally: To prevent distortion, always keep the aspect ratio locked when resizing. This ensures that the image’s width and height change at the same rate, maintaining the original proportions.
- Avoid Enlarging Too Much: Try not to enlarge an image more than 2x its original size. Enlarging an image too much will stretch the pixels, leading to blurriness or pixelation.
By following these tips, you can resize your images for various uses without compromising on quality. Tools like Canva, Photoshop, and even some online platforms have built-in options to help you resize your images with minimal quality loss.
Also Read This: Experience This Tool to Download TED Talk Intro Video
Common Mistakes When Editing Image Pixels
Editing image pixels can be tricky, especially if you're new to the process. While it’s easy to make changes, there are some common mistakes that can affect your image’s quality and end result. Avoid these pitfalls to ensure your images look their best:
- Resizing Without Maintaining Aspect Ratio: One of the biggest mistakes is resizing an image without keeping the correct aspect ratio. This can distort your image, stretching it vertically or horizontally. Always lock the aspect ratio to ensure the image doesn’t look skewed.
- Enlarging Images Too Much: If you enlarge an image too much, it can become pixelated and blurry. This happens because you’re stretching the pixels beyond their original size, causing the image to lose sharpness. Avoid enlarging images more than twice their original size.
- Overusing Filters or Effects: While filters can enhance an image, overuse can ruin its quality. Using too many filters may lead to loss of detail, unnatural colors, and pixelation, especially when the image is resized or enlarged.
- Not Saving in the Right Format: When saving your edited images, always choose the correct file format based on how you intend to use the image. Saving an image in the wrong format can reduce quality or make it unsuitable for certain platforms.
- Ignoring Resolution for Print Projects: If you’re editing images for print, ensure the resolution is at least 300 DPI. A lower resolution might look fine on screens, but it can appear blurry or pixelated in print.
By avoiding these common mistakes, you’ll be able to make the most of your pixel editing skills and create high-quality images that suit your needs.
Also Read This: How to Upload Pictures on Google Using Dailymotion Interface
How to Save Your Edited Images
Once you’ve spent time editing and perfecting your image, saving it correctly is just as important as the editing process itself. The right settings ensure your image retains its quality and is ready for use across different platforms. Here’s how to save your edited images properly:
- Choose the Right File Format: Depending on how you intend to use your image, you’ll need to select the right format. Common formats include:
- JPG: Best for photographs and web use with good compression.
- PNG: Ideal for images with transparency or sharper details.
- GIF: Used for simple graphics or animations.
- SVG: Perfect for vector-based designs.
- Select the Right Quality: Most design tools allow you to choose between different quality settings (e.g., high, medium, low). If you're saving for print, always choose high quality. For web use, medium or low quality can help reduce file size while maintaining a good visual appearance.
- Check the Resolution: Ensure your image has the correct resolution before saving. For web use, 72 DPI is typically sufficient, but for print projects, you should save at 300 DPI to ensure clarity.
- Consider File Size: If you’re uploading your image online, be mindful of the file size. A large image can take longer to load, which can be frustrating for users. Some tools allow you to compress the image without sacrificing too much quality.
By following these tips, you can ensure that your edited images look great and are ready for whatever project you're working on, whether it’s for web, print, or social media.
Also Read This: How to Put Two Images Side by Side
FAQ About Editing Image Pixels
If you're new to editing image pixels, you might have some questions. Here are answers to some of the most common questions:
- What are image pixels?
Pixels are the tiny dots that make up an image. Each pixel contains information about the color and brightness at a specific point in the image. When these pixels are combined, they form the image you see.
- Can I increase the resolution of an image without losing quality?
Increasing the resolution can improve clarity, but if the original image is low resolution, simply increasing the resolution will not create more detail. It’s best to start with a high-resolution image to maintain quality when editing.
- How do I avoid pixelation when resizing images?
The best way to avoid pixelation when resizing images is to avoid enlarging them too much. Always keep the aspect ratio locked and resize the image proportionally. Additionally, use higher-resolution images for better results when enlarging.
- Is it possible to resize images without changing their resolution?
Yes, resizing an image doesn’t always change its resolution. However, if you resize the image to a larger size, the resolution will decrease. To keep the resolution high, you must also maintain the image's pixel density when resizing.
- What is the best file format for saving images?
The best format depends on the use case. JPG is great for photos, PNG is ideal for images with transparency, and SVG is perfect for vector-based designs. Always choose the format that best suits the final output, whether it's for digital or print use.
These FAQs should help clarify some of the basics of editing image pixels. Don’t hesitate to experiment with different techniques to see what works best for your projects!
Conclusion
Editing image pixels is an essential skill for anyone working with digital visuals. Whether you're a beginner or a seasoned designer, understanding how to adjust image resolution, resize images without losing quality, and avoid common mistakes will help you create polished and professional results. By choosing the right tools, following best practices, and paying attention to key details like file formats and resolution, you can enhance the quality of your images and meet the specific needs of any project, from web graphics to high-quality prints. With the tips and steps shared here, you're well-equipped to take your image editing skills to the next level!


