When it comes to printing images from your iPhone, adjusting the print size is an important step to ensure your photos look great on paper. Whether you're printing a picture for a frame, a project, or a presentation, making sure the size is just right can save you time, effort, and ink. Luckily, it's easy to resize images on your iPhone before printing, giving you control over how your photos appear in print.
In this guide, we'll walk you through the process of changing the print size on your iPhone, including how to use the built-in Photos app, third-party apps, and even printer settings to customize your printouts. So let's dive in and learn how to make your images print-ready in just a few simple steps.
Steps to Change the Print Size on Your iPhone

Changing the print size of an image on your iPhone involves just a few straightforward steps. Whether you’re working with an iPhone photo or an image saved from the web, you can resize it before sending it to your printer. Here’s how:
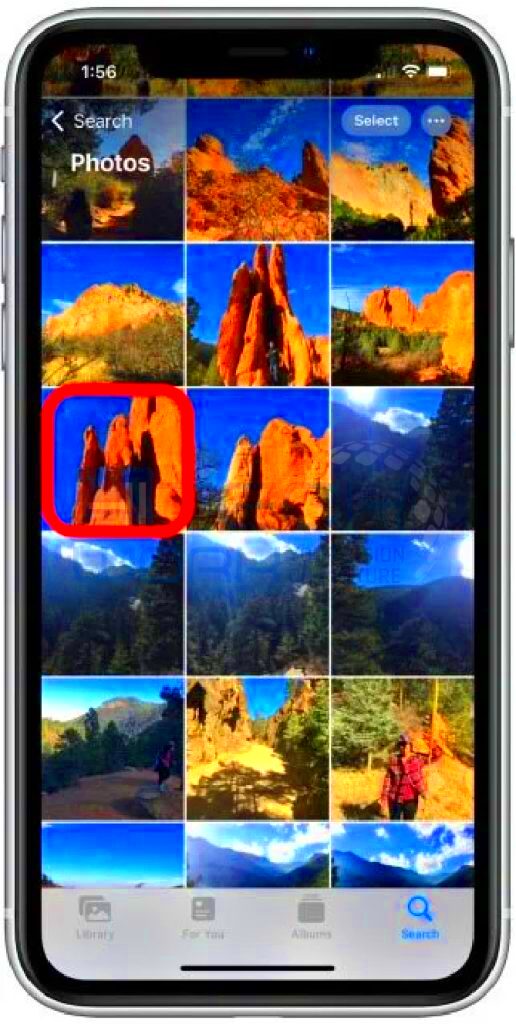
- Open the Image: Start by opening the image you want to print in the Photos app or any other photo viewer on your iPhone.
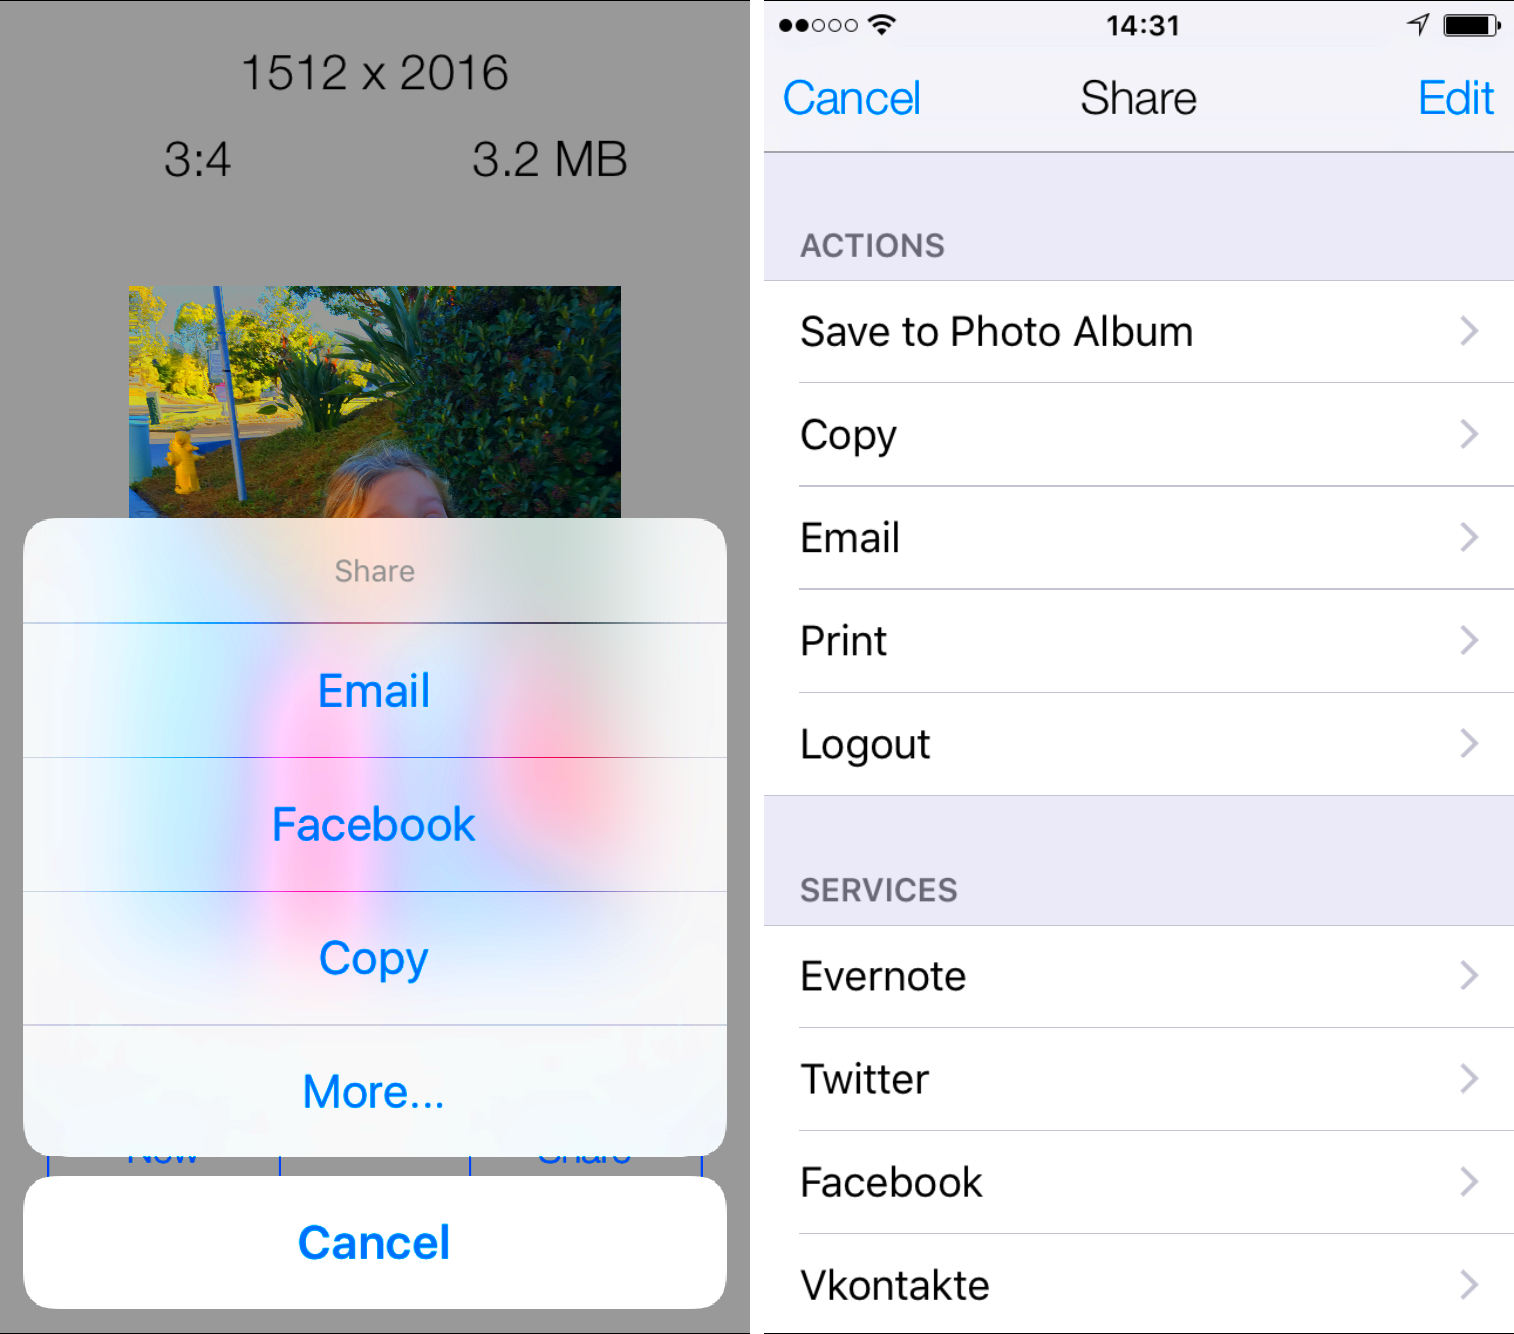
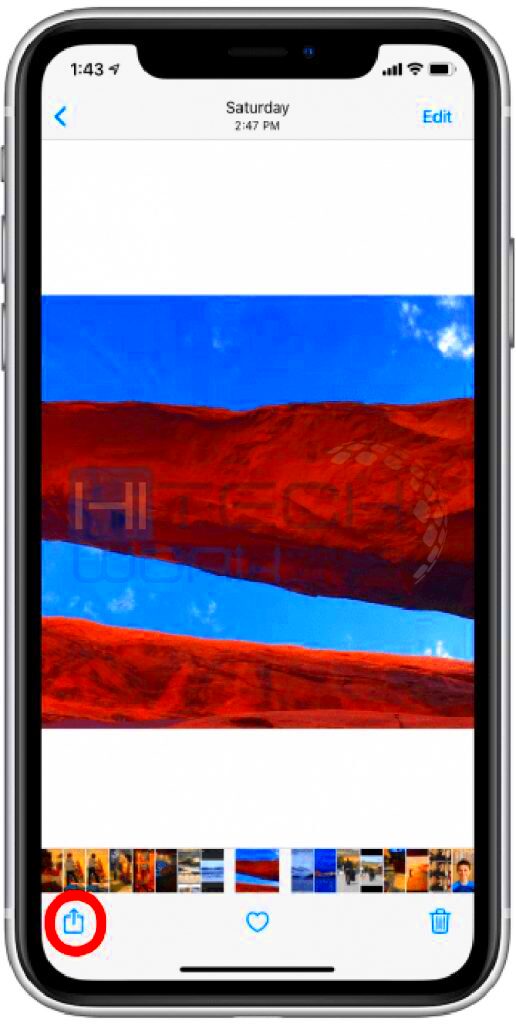
- Tap Share: Tap the share button (the box with an arrow pointing up), usually located at the bottom of the screen.
- Select Print: Scroll through the options and tap "Print" to open the printer settings.
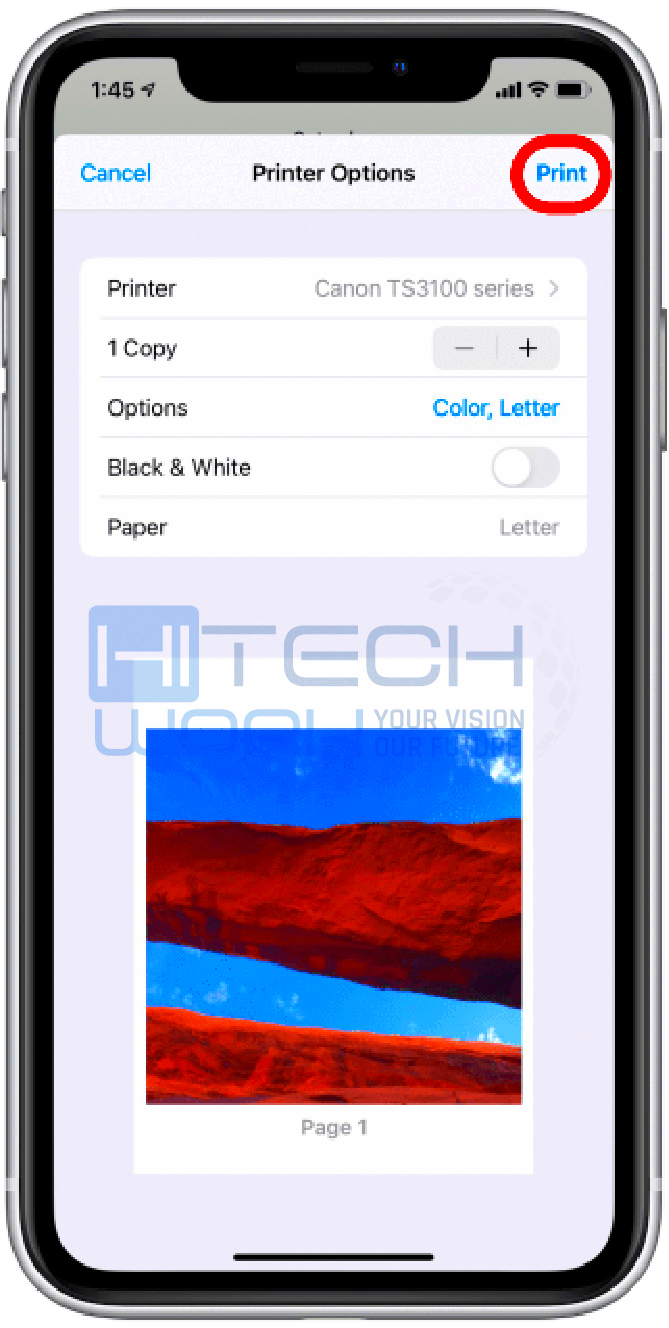
- Choose Printer: Make sure your printer is connected, and select it from the list of available printers.
- Adjust Print Size: Tap on the image preview to bring up more options. You can zoom in or out to adjust the size manually or select other print size options (such as A4, letter, or custom sizes) depending on the app you use.
- Print: Once you're happy with the size, hit the "Print" button to send the image to your printer.
That's it! With these simple steps, you can easily resize your images for printing on your iPhone.
Also Read This: Quick Guide to Cropping Images in MS Paint
Using the Photos App for Printing

The Photos app on your iPhone is a convenient tool for managing and printing images. While it doesn't provide advanced resizing tools, it does allow you to make basic adjustments for printing purposes. Here’s how you can use the Photos app to change the print size:
1. Open the Image: Go to your Photos app and open the image you want to print.
2. Tap Share: Tap the share icon at the bottom of the screen.
3. Select Print: Scroll down and tap “Print.” You’ll be directed to the print settings screen.
4. Adjust Paper Size and Orientation: You can choose the paper size (like A4, letter, etc.) and the orientation (portrait or landscape) for your printout. If you're printing a photo, these options can help adjust the size slightly.
5. Zoom for Custom Size: Tap the image preview to zoom in or out to adjust the photo’s size manually. This can help fit the photo into the page in the best way possible.
6. Confirm and Print: Once you've adjusted the size to your liking, press “Print” to start the process.
While the Photos app isn't a full-featured editing tool, these options give you just enough flexibility to adjust your print size easily.
If you need more control over your image’s dimensions or want to create a custom print size, you may want to explore third-party apps or printer settings, which we’ll cover later in the post.
Also Read This: Rustic Towns Across the USA Captured in Photos
Third-Party Apps to Resize Images on iPhone

While the built-in Photos app offers basic resizing options, third-party apps provide much more control over your images, including precise size adjustments and advanced editing features. These apps can help you resize images with more flexibility, especially if you need custom dimensions or want to scale photos without losing quality. Let's look at some popular apps that can help you resize images for printing:
- Canva: Canva is a versatile app used for designing and editing images. It allows you to resize images and even change the aspect ratio to fit various print sizes.
- Pic Collage: This app is great for resizing images and creating collages. You can easily adjust the size and layout to fit your printing needs.
- Resize Image: A straightforward app that lets you resize images by setting custom dimensions. It’s simple and ideal for anyone looking for quick results without complicated features.
- Photoshop Express: Photoshop Express offers powerful editing tools, including resizing and cropping. It’s perfect if you want professional-level quality for your prints.
- Image Size: A dedicated app focused purely on resizing images. It lets you specify exact pixel dimensions, which is ideal for controlling print size down to the smallest detail.
Using third-party apps provides you with precise control over image resizing, allowing you to achieve the perfect print size. Once you’ve resized your image using one of these apps, you can send it straight to your printer or export it to other programs for further editing. The apps listed above are available on the App Store, and many offer free versions with optional premium features.
Also Read This: Adding Background Audio to Your YouTube Shorts
Adjusting Image Size Through Printer Settings
If you want more control over the print size of your images, the printer settings can be a useful option. When you send your image to print, many printers allow you to adjust settings that can affect how the image is resized. Here’s how you can use printer settings to change the print size:
1. Open Printer Settings: After selecting “Print” on your iPhone, you’ll be directed to the printer settings screen. Depending on your printer model, you may see options for paper size, quality, and scaling.
2. Select Paper Size: Choose the paper size you want to print on (e.g., A4, Letter, Legal). Some printers allow you to customize the dimensions, which helps when working with different print sizes.
3. Adjust Scaling Options: Some printers have a “Scale to Fit” or “Fit to Page” option. This automatically adjusts the image to fit the page, but be careful—it may distort the image if the aspect ratio doesn’t match your paper size.
4. Custom Scaling: If your printer supports custom scaling, you can set a percentage to increase or decrease the image size. This is helpful when you need precise control over how the image prints.
5. Check Image Orientation: You can choose between portrait and landscape orientations, which affects the layout of your image on the paper. Make sure to adjust this to avoid cropping your image unintentionally.
6. Preview Before Printing: Many printers allow you to preview the image before finalizing the print. Use this feature to double-check the size and layout of the image before you print it out.
By adjusting the printer settings, you can make sure your image is printed at the correct size, without any unwanted cropping or stretching. This method works especially well if you're printing images from various apps or sources directly from your iPhone.
Also Read This: Understanding YouTube’s Viral Video Criteria
Understanding Image Resolution for Print
When it comes to printing images, resolution plays a key role in ensuring that your prints are sharp and clear. Resolution refers to the level of detail an image holds, measured in pixels per inch (PPI). The higher the PPI, the more detail the image has, and the better the print quality will be. Here’s how to understand and optimize image resolution for printing:
1. What is Resolution? Image resolution is the amount of detail an image holds. For printing purposes, the resolution is typically measured in PPI (pixels per inch). Higher resolution images contain more pixels, resulting in sharper prints.
2. Recommended Resolution for Print: For high-quality prints, your image should have a resolution of at least 300 PPI. Images with lower resolutions (e.g., 72 PPI) might appear blurry or pixelated when printed. Here's a quick guide:
| Print Size | Minimum Resolution (PPI) |
|---|---|
| 4 x 6 inches | 1200 x 1800 pixels |
| 8 x 10 inches | 2400 x 3000 pixels |
| 11 x 14 inches | 3300 x 4200 pixels |
3. How to Check Resolution: To check an image’s resolution on your iPhone, you’ll need a third-party app or photo editing software. Apps like Adobe Lightroom or Photoshop Express can show you the image’s resolution in pixels, helping you assess whether it’s suitable for print.
4. Optimizing Resolution: If your image has a low resolution, you can increase the resolution using apps like Photoshop Express or Resizr. However, enlarging an image with a low resolution can result in a loss of quality, so it's best to start with a high-resolution image if possible.
5. Avoid Stretching Images: If you stretch an image beyond its original resolution, the print will lose clarity. It’s important to maintain the aspect ratio or resize the image proportionally to ensure a sharp, clear print.
Understanding image resolution is crucial when preparing images for printing. By ensuring your image has a high enough resolution, you can achieve prints that are crisp, detailed, and visually appealing.
Also Read This: How to Save an Image from a Google Slide
Tips for Better Print Quality on iPhone
When printing images from your iPhone, it’s important to ensure the final print looks as good as possible. Factors like image resolution, proper sizing, and correct printer settings all play a role in the print quality. Here are some tips to help you achieve the best print quality when printing photos from your iPhone:
- Use High-Resolution Images: Always start with a high-resolution image for better print quality. Aim for images with at least 300 PPI (pixels per inch) for sharp prints.
- Check the Image’s Aspect Ratio: Make sure the aspect ratio of your image matches the paper size. Stretching or cropping the image can lead to poor print quality or unwanted distortions.
- Adjust the Image in Editing Apps: Use apps like Adobe Lightroom or Photoshop Express to enhance the image before printing. You can adjust brightness, contrast, and sharpness to ensure it prints clearly.
- Set Correct Printer Settings: Always double-check the printer settings before printing. Select the correct paper size, orientation, and scaling options to prevent the image from getting stretched or cut off.
- Avoid Over-Zooming: When resizing the image, avoid zooming in too much. Over-zooming can reduce the resolution and make the print appear pixelated or blurry.
- Use the Right Paper: The type of paper you use also affects print quality. Use high-quality photo paper for the best results, especially for prints that you plan to frame or display.
By following these tips, you can ensure that the images you print from your iPhone look clear, vibrant, and professional. Whether it’s for a photo album, project, or wall art, proper preparation leads to a polished print result.
Also Read This: Instagram Monetization Made Simple: A Guide to Meeting the Requirements
FAQ
Here are answers to some common questions about printing images from your iPhone and adjusting the print size:
- How do I know if my image is high resolution? You can check the resolution of your image using apps like Adobe Lightroom or Photoshop Express. A resolution of at least 300 PPI is ideal for printing.
- Can I resize my image for printing without losing quality? Yes, but only if the image has a high resolution to begin with. Enlarging a low-resolution image can result in a blurry print. Resize cautiously, and always start with the highest quality image you have.
- What’s the best way to print photos from my iPhone? The best way is to first adjust the image size and resolution as needed, then select the correct printer settings. Always use high-quality paper for the best results.
- How can I prevent image distortion when resizing? To avoid distortion, keep the aspect ratio consistent when resizing. You can lock the ratio in many photo editing apps to prevent the image from stretching out of proportion.
- Can I use any printer to print photos from my iPhone? Most modern printers support wireless printing from iPhones via AirPrint or other apps. Ensure your printer is compatible with your device for a smooth printing process.
Conclusion
Printing images from your iPhone can be a simple process if you take the time to adjust settings, resize images properly, and choose the right tools. From using the built-in Photos app to exploring third-party apps and printer settings, you have several options to make sure your prints turn out looking sharp and professional. Always aim for high-resolution images, use proper paper, and adjust your printer settings to match the image size and orientation. With these tips, you’ll be able to print beautiful photos straight from your iPhone, whether it’s for a personal project, gift, or home decor.
Remember, a little attention to detail can go a long way when it comes to print quality. Take your time to adjust the print size, and you'll be able to enjoy stunning results every time you print an image from your iPhone.


