Blurring part of an image is a simple yet effective technique that can enhance privacy or highlight specific areas in your photos. Whether you want to obscure sensitive information, protect someone’s identity, or simply draw attention to a particular part of the image, blurring is a useful tool. In this guide, we'll show you how to blur part of an
Why You Might Need to Blur an Image

There are many reasons why you might want to blur part of an image. Here are a few common ones:
- Protect Privacy: Blurring faces, license plates, or other identifying details can help maintain privacy, especially in photos shared online.
- Hide Sensitive Information: If your image contains confidential data, like addresses or personal details, blurring those sections ensures they’re not visible to others.
- Draw Focus to a Specific Area: Blurring the background or surrounding areas can help direct the viewer’s attention to the main subject of the image, improving its overall composition.
- Improve Aesthetics: Sometimes, a blur effect can give an image a soft, artistic touch, making it appear more visually appealing or professional.
Whether you’re creating content for social media, business presentations, or simply editing personal photos, knowing how to blur part of an image can be a handy skill to have.
Steps to Blur Part of an Image in Paint
Follow these simple steps to blur part of an image using Microsoft Paint:
- Open Your Image: Launch Microsoft Paint and open the image you want to edit by clicking on “File” and then “Open” to select your file.
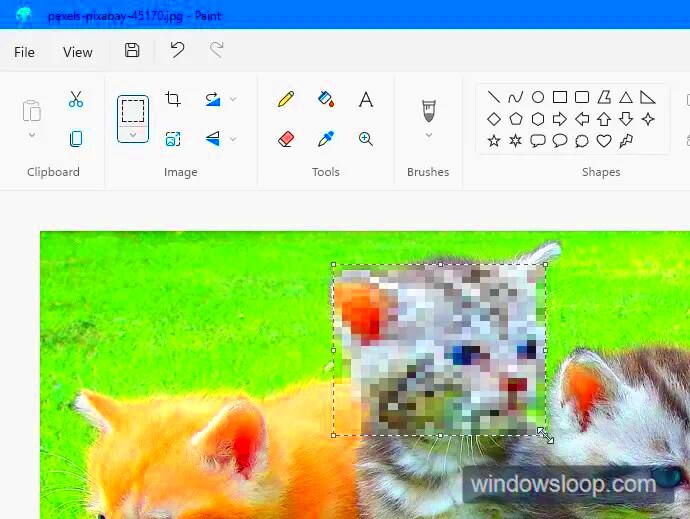
- Select the Area to Blur: Use the "Select" tool from the toolbar to highlight the portion of the image you want to blur. You can select a rectangular or freeform area, depending on what works best for your image.
- Copy and Paste the Selected Area: Once you’ve selected the area, press “Ctrl + C” to copy it, then “Ctrl + V” to paste it back into the image as a new layer.
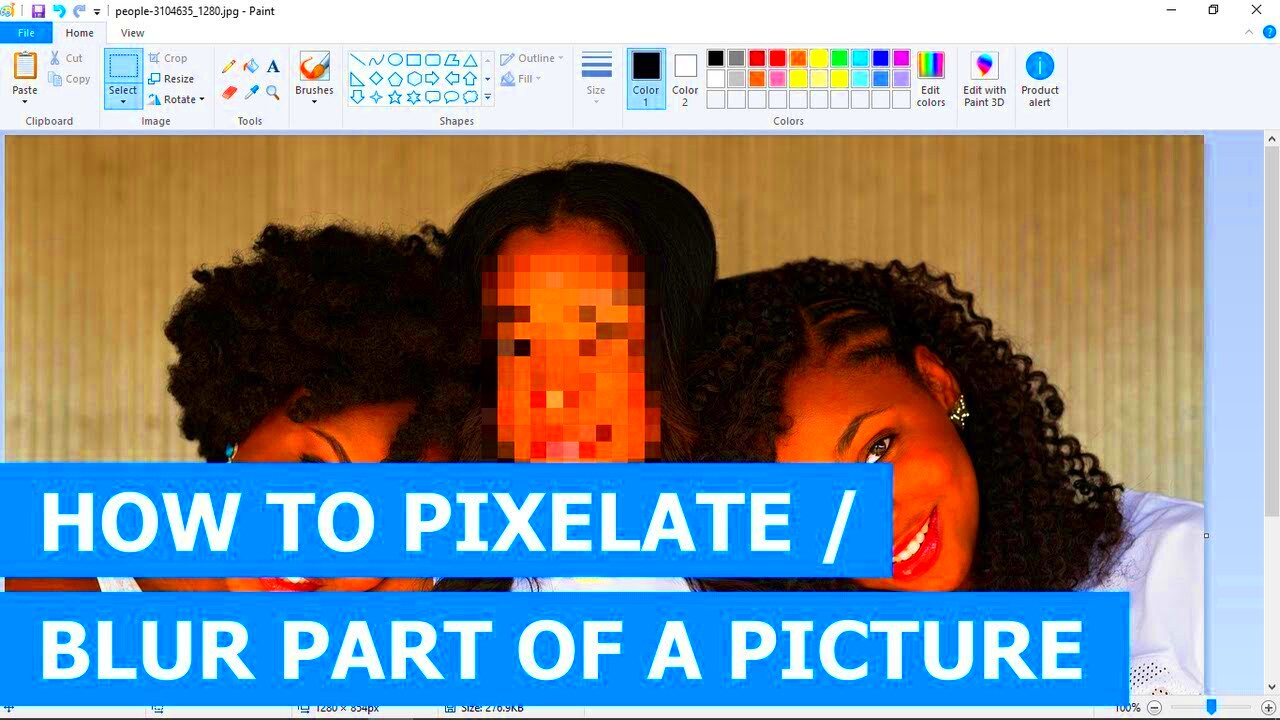
- Apply the Blur: Microsoft Paint doesn’t have a dedicated blur tool, but you can mimic the effect by using the "Pixelate" option or by manually creating a blur with tools like the "Eraser" in low opacity. For more advanced blurring, consider using a different program like GIMP or Photoshop.
- Save the Image: After applying the blur, save your image by clicking “File” then “Save As.” Choose your preferred file format and location to store the image.
While Paint isn’t as powerful as professional image editing software, it’s still a great choice for quick edits, and the steps above should help you get a satisfying result.
Using the Select Tool to Choose the Area to Blur
The first step to blurring part of an image in Paint is selecting the area you want to blur. Microsoft Paint makes this simple with its "Select" tool. Here's how to use it effectively:
- Open your image: Start by opening your image in Paint, as we discussed earlier.
- Choose the Select Tool: In the toolbar at the top, click on the "Select" button. You'll see a dropdown menu with different selection options.
- Pick a Selection Shape: You can select the area you want to blur using either a rectangular selection or a freeform selection. If you’re working with a specific object, the freeform option is great for outlining irregular shapes.
- Select the Area: Click and drag to highlight the part of the image you want to blur. For precision, take your time to adjust the selection, especially if you’re working around details you want to keep intact.
Once you've selected the area, the next step is to apply the blur effect. The selection tool allows you to isolate the part of the image that needs editing without affecting the rest of your photo. This gives you better control over your final result.
Applying the Blur Effect with Paint Tools
Now that you’ve selected the area to blur, let’s talk about applying the blur effect. While Paint doesn’t have a direct "blur" tool, you can still achieve a blur-like effect using a few simple techniques.
- Using the Pixelate Option: One of the easiest ways to blur in Paint is by using the pixelate effect. After selecting your area, copy and paste it to a new layer, then use the eraser tool with a low opacity to soften the details. This will create a pixelated effect that mimics blurring.
- Using the Eraser Tool: Another method is to carefully erase parts of the selected area, using a soft and low-opacity eraser brush. This technique can help reduce clarity in the chosen area, though it’s not as precise as a professional blur tool.
- Manual Pixelation: If you want a more controlled effect, you can manually adjust the image pixel by pixel, but this can be time-consuming. It's best for small areas where you want to create a slight blur effect.
Although these methods are basic, they can still be effective for simple image edits. For a smoother blur effect, you may need to use more advanced software, but Paint can still serve its purpose for quick edits.
Other Tools and Features in Paint for Image Editing
Aside from blurring, Microsoft Paint offers a few other basic tools and features that can help with your image editing needs. While it’s not as powerful as professional software, it’s a handy option for simple tasks. Let’s take a look at some of the other tools you can use:
- Brush Tool: Paint has a variety of brushes for different effects. Whether you want to add color or create texture, the Brush tool is versatile for various editing purposes.
- Shapes Tool: If you want to highlight a specific part of an image, use the Shapes tool to add circles, rectangles, or lines. You can use this to create boxes around sections or even add arrows to point to important areas.
- Text Tool: Adding text is simple with the Text tool. Whether you’re labeling an image or adding captions, Paint allows you to choose font style, size, and color to customize your text.
- Fill Tool: The Fill tool is great for coloring a large area with a single color. It’s useful when you want to fill selected spaces without manually coloring them in.
- Crop Tool: If you want to cut out a section of your image, the Crop tool allows you to easily trim unwanted areas and focus on the part of the image that matters most.
While Microsoft Paint may not have the same features as more advanced photo editing software, it’s still a great choice for quick, basic image editing tasks. These tools can help you make minor adjustments, add creative elements, and enhance your images with ease.
Tips for Better Image Blurring Results
While blurring part of an image in Paint is straightforward, there are a few tips that can help you achieve a cleaner and more professional-looking result. Here are some techniques to improve your blurring effect:
- Use Multiple Layers: If possible, copy the selected area to a new layer before applying the blur. This allows you to make adjustments without affecting the rest of the image.
- Control the Intensity of the Blur: Experiment with the eraser tool or pixelation method to adjust how much you blur the image. Sometimes, a subtle blur is all you need, and overdoing it can make the result look unnatural.
- Fine-Tune the Edges: When blurring, be mindful of the edges of the blurred area. Hard, uneven edges can look awkward, so try to make the transition between the blurred and sharp parts of the image as smooth as possible.
- Zoom In for Precision: Zoom in on the area you're working on for more control over the selection and blur effect. This makes it easier to apply a subtle blur and ensures the result looks neat and well-blended.
- Experiment with Other Editing Software: If you find that Paint's tools aren’t giving you the exact blur effect you want, consider using free editing software like GIMP or Paint.NET. These programs offer more advanced blurring tools.
These tips will help you make the most of Paint's basic editing features and create better blur effects, whether you're editing personal photos or preparing images for sharing online.
FAQ
Here are answers to some common questions about blurring images in Paint:
- Can I use Paint to blur an entire image? Paint doesn’t offer a full-image blur tool. However, you can blur specific areas by selecting and editing them individually.
- Why doesn’t Paint have a blur tool? Paint is a basic editing tool designed for simple tasks. More advanced software like Photoshop or GIMP provides dedicated blur effects.
- Can I make the blur effect stronger in Paint? While Paint doesn’t allow you to adjust blur strength directly, you can apply multiple layers of pixelation or eraser tool adjustments to make the blur effect more intense.
- How do I undo a mistake when blurring? You can always undo a step in Paint by pressing “Ctrl + Z” on your keyboard. This will reverse the last action you performed.
- Is there any other software better than Paint for blurring? Yes, free programs like GIMP or Paint.NET offer more advanced blurring tools, allowing for smoother and more professional results.
Conclusion and Final Thoughts
Blurring part of an image is a helpful skill for enhancing privacy, drawing focus, or creating artistic effects. While Microsoft Paint is a basic tool, it can still be used to blur specific areas of your image with a few simple techniques. By using the Select tool to isolate areas and applying manual pixelation or eraser techniques, you can achieve a decent blur effect without needing advanced software.
If you find Paint's capabilities limiting, there are plenty of free alternatives like GIMP or Paint.NET that offer more control over blurring and other editing features. Ultimately, the key is to experiment with different methods and find what works best for your needs. Whether you’re editing photos for social media, presentations, or just for fun, blurring is a simple yet powerful tool to enhance your images.
Remember, practice makes perfect, so don’t be afraid to try out new techniques and refine your skills. Happy editing!


