When it comes to image quality, one of the most important aspects to consider is the pixel size. Understanding the pixel size of an image is essential for ensuring that it appears sharp and clear on all platforms, from websites to print. This post will guide you through how to check the pixel size of an
Understanding the Importance of Pixel Size for Image Quality

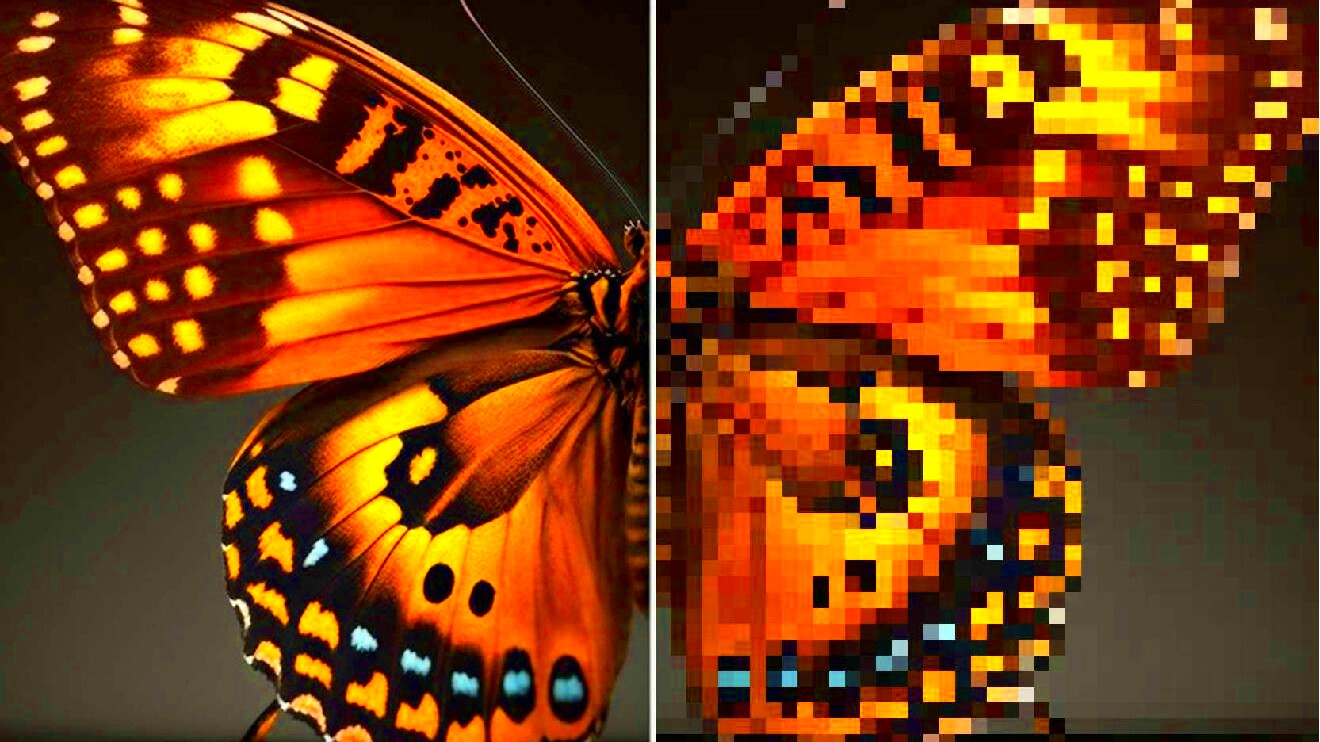
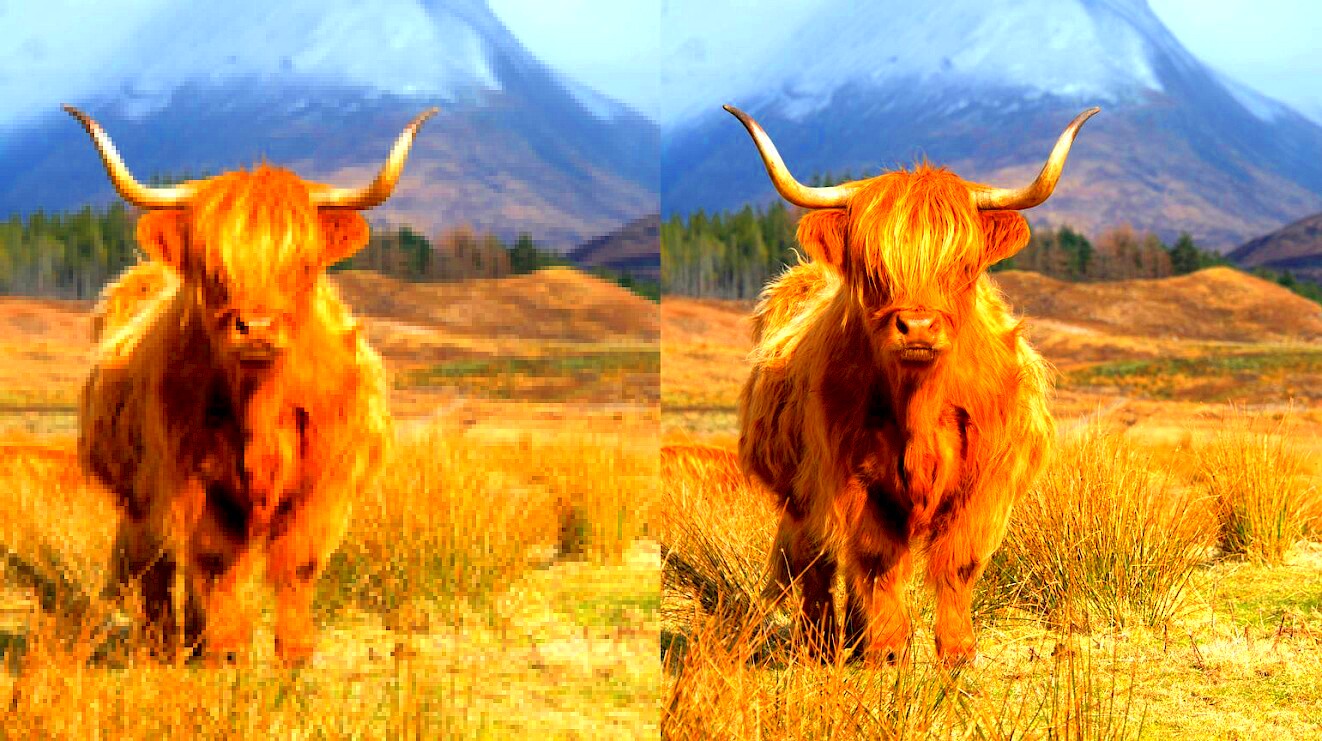
Pixel size plays a huge role in the overall quality of an image. In simple terms, pixel size refers to the resolution of an image, or how many individual pixels make up the picture. The higher the pixel count, the sharper and more detailed the
- Clarity: Larger images with more pixels provide more detail and sharper visuals, making them perfect for high-quality prints or digital displays.
- File Size: High pixel sizes usually mean larger file sizes, which may affect website load times or the ease of sharing files.
- Compatibility: Some platforms, like websites or social media, require specific pixel sizes for optimal display, so checking the pixel size ensures your images are correctly formatted.
In short, knowing how to check and adjust the pixel size helps you balance quality with usability, ensuring that your images look great across all media.
Also Read This: How to Export Lightroom Photos to Behance and Showcase Your Photography Work
How to Check Pixel Size in Canva

Canva makes it easy to create and design stunning images. If you're using Canva for your design work, checking the pixel size of your images is crucial to ensure they meet quality standards. Here's how you can check the pixel size in Canva:
- Step 1: Open your design in Canva.
- Step 2: Click on the image you want to check.
- Step 3: Click the “Download” button in the top right corner.
- Step 4: Before downloading, look at the size details displayed in the download options.
Canva shows the pixel dimensions for the design, such as 800x600 pixels, which indicates the width and height in pixels. You can also check the dimensions of an image before adding it to your design by simply uploading the image and clicking on it. Understanding these dimensions will help you determine whether the
Also Read This: Downloading from Behance Made Easy
Using Image Editing Tools to Measure Pixel Size
If you're not using Canva, or if you want to get more detailed insights into an image's pixel size, several image editing tools can help you measure and adjust pixel sizes effectively. These tools are commonly used by graphic designers, photographers, and digital artists to ensure that their images meet specific quality standards. Here’s how you can use some popular
- Adobe Photoshop: Open your image in Photoshop, and go to the “Image” menu. Select “Image Size,” and a window will pop up displaying the image’s pixel dimensions (width x height). You can also adjust the resolution here if needed.
- GIMP: GIMP is a free, open-source alternative to Photoshop. After opening your image, go to the “Image” menu and select “Scale Image.” The window will show you the pixel dimensions.
- Preview (Mac): On Mac devices, you can open the image in Preview. From the toolbar, select “Tools” and then “Show Inspector.” The inspector window will display the pixel dimensions under the “General Info” tab.
- Paint (Windows): In Paint, open the image and click on the "Resize" option. A dialog box will appear showing the pixel dimensions, and you can make adjustments here as well.
Using these tools allows you to get a precise look at an image’s pixel size, ensuring that it meets the required standards for your project. Whether you are working on a digital design or preparing an image for print, understanding and adjusting pixel size is crucial for optimal results.
Also Read This: Make Small Eyes Look Bigger with These Makeup Tips
How Pixel Size Affects Image Quality
The pixel size of an image directly influences its quality. Larger pixel sizes (higher resolution) generally result in sharper, more detailed images. On the other hand, smaller pixel sizes can lead to pixelation, especially when the image is enlarged. Here's how pixel size impacts various aspects of image quality:
- Sharpness and Detail: Higher pixel counts (more pixels per inch) provide more detail, which is essential for clear, sharp images. This is especially important for print materials, such as posters, brochures, or business cards.
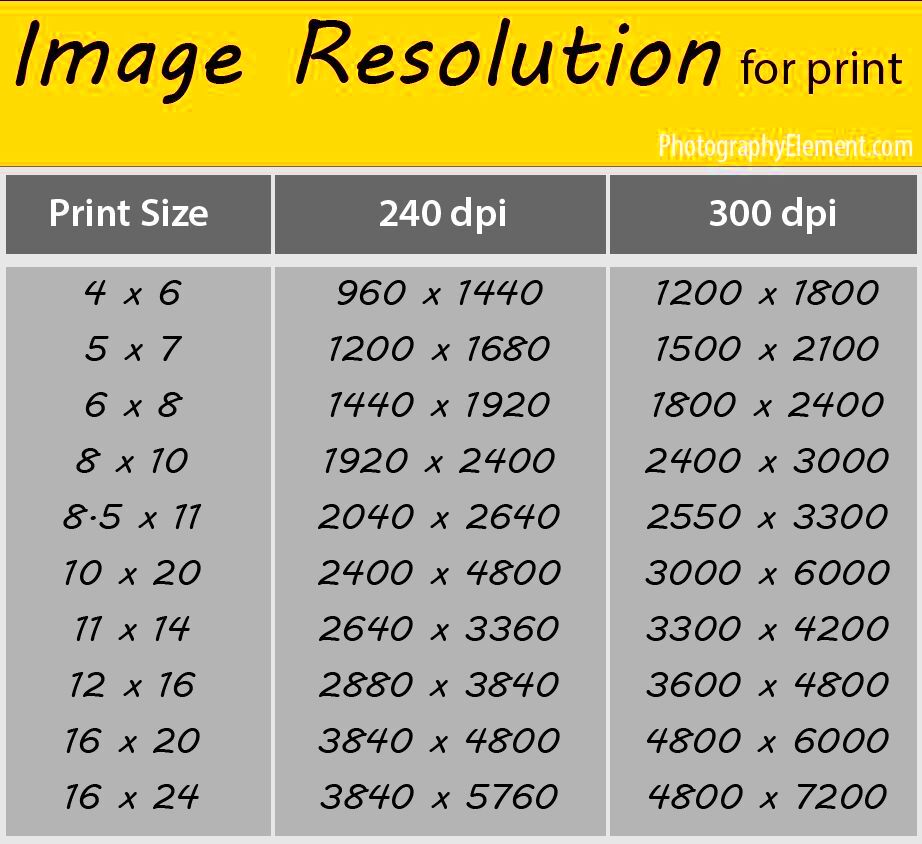
- Print Quality: For print, pixel density (measured in PPI or DPI) plays a major role. The higher the PPI (pixels per inch), the clearer and more detailed the print will be. Low-resolution images may look blurry or pixelated when printed.
- Web and Digital Display: On websites or social media, images with higher pixel sizes may appear crisper on higher-resolution screens. However, for faster loading times and better performance, images with a balanced resolution are recommended.
In summary, pixel size affects the overall clarity and usability of an image, whether you're displaying it digitally or printing it. It's important to balance pixel size with the intended medium to ensure the best quality without compromising performance.
Also Read This: How to Paste an Image onto Another Image on Android
Common Issues with Pixel Size and Quality
While pixel size is crucial for image quality, there are several common issues that can arise when pixel size isn’t managed correctly. Understanding these issues can help you avoid mistakes and improve your image quality. Here are some common problems:
- Pixelation: When an image is enlarged beyond its native resolution, it can become pixelated, meaning individual pixels become visible, making the image look blurry and rough.
- File Size Issues: High-resolution images with large pixel sizes can result in very large file sizes. These large files can slow down website loading times, affect user experience, and be difficult to share via email or social media.
- Low Resolution for Print: If an image is designed for the web but has too low of a resolution, it may appear blurry when printed. Always ensure the pixel dimensions are high enough (at least 300 PPI for print) for good print quality.
- Incorrect Aspect Ratio: If the aspect ratio (the proportional relationship between width and height) isn’t maintained, images may become distorted when resized, affecting their appearance and overall quality.
These issues can be easily avoided by regularly checking and adjusting pixel size before using images for your projects. Whether you're designing for the web or preparing images for print, taking the time to verify the pixel size can prevent common mistakes and ensure high-quality results.
Also Read This: How to Fix Common Image Issues in GIMP: A Troubleshooting Guide
Tips for Optimizing Image Quality Based on Pixel Size
Optimizing image quality based on pixel size is essential for achieving the best results in your projects, whether they are for web use, social media, or print. By adjusting your pixel size appropriately, you can ensure that your images are both clear and efficient in terms of file size. Here are some tips to help you optimize your images:
- Choose the Right Resolution: For web use, images should typically have a resolution of 72 PPI (pixels per inch). For print, go for a resolution of 300 PPI to ensure crisp and clear prints.
- Resize Images for Specific Platforms: Different platforms and devices require different image sizes. Always check the required pixel dimensions for each platform. For example, social media sites like Instagram and Facebook have specific image size guidelines to maintain quality.
- Use Image Compression: To reduce file size without sacrificing too much quality, use image compression tools. These tools can shrink the file size by removing unnecessary data while preserving visual quality.
- Maintain Aspect Ratio: When resizing images, make sure to keep the aspect ratio (width to height ratio) intact to prevent distortion. Most image editing tools allow you to lock the aspect ratio while adjusting size.
- Test Before Use: Always check how your images look on different screens or in print before finalizing them. Viewing them at actual size will help you catch issues related to pixelation or blurriness.
By following these tips, you can balance image quality with file size and make sure your images are perfect for your intended use, whether online or offline.
Also Read This: Cropping Images in Inkscape: An Easy Guide
Frequently Asked Questions About Pixel Size and Image Quality
If you’re new to working with pixel sizes, you might have a few questions. Here are some frequently asked questions (FAQs) to help clarify the most common concerns about pixel size and its effect on image quality:
- What is pixel size? Pixel size refers to the resolution of an image, specifically the number of pixels in width and height. A higher pixel count means more detail and clarity.
- How does pixel size affect image quality? Larger pixel sizes typically lead to sharper, more detailed images. Smaller pixel sizes may result in blurry or pixelated images, especially when enlarged.
- What is the ideal pixel size for web images? For most web images, a resolution of 72 PPI is sufficient. However, images should be resized to fit the specific dimensions required for the platform (e.g., social media posts or website banners).
- Can I increase pixel size to improve image quality? You cannot add detail by simply increasing the pixel size. Increasing pixel dimensions without sufficient original detail may result in a blurry or pixelated image.
- Why do images become pixelated? Images become pixelated when they are enlarged beyond their native resolution. The pixels become visible, creating a rough or blurry appearance.
These FAQs address some of the most common concerns related to pixel size and image quality. If you have more specific questions, don't hesitate to consult professional resources or experiment with different tools to get the best results for your images.
Conclusion on Checking Pixel Size for Quality Assurance
Checking the pixel size of an image is a crucial step in ensuring high-quality results for both digital and print projects. By understanding how pixel size affects clarity, file size, and overall image quality, you can make better decisions when working with images. Whether you're designing for the web, preparing materials for print, or just uploading images for social media, always keep pixel size in mind.
Remember to use the right tools to check pixel size, such as Canva, Photoshop, or other image editing software. It's important to test your images and ensure they meet the required standards for your specific needs. By following best practices and optimizing your images for the right pixel size, you’ll be able to create clear, professional-looking visuals without any issues related to resolution or quality.
Taking the time to check and adjust pixel size is an easy yet effective way to ensure your images look great, no matter where they are used.


