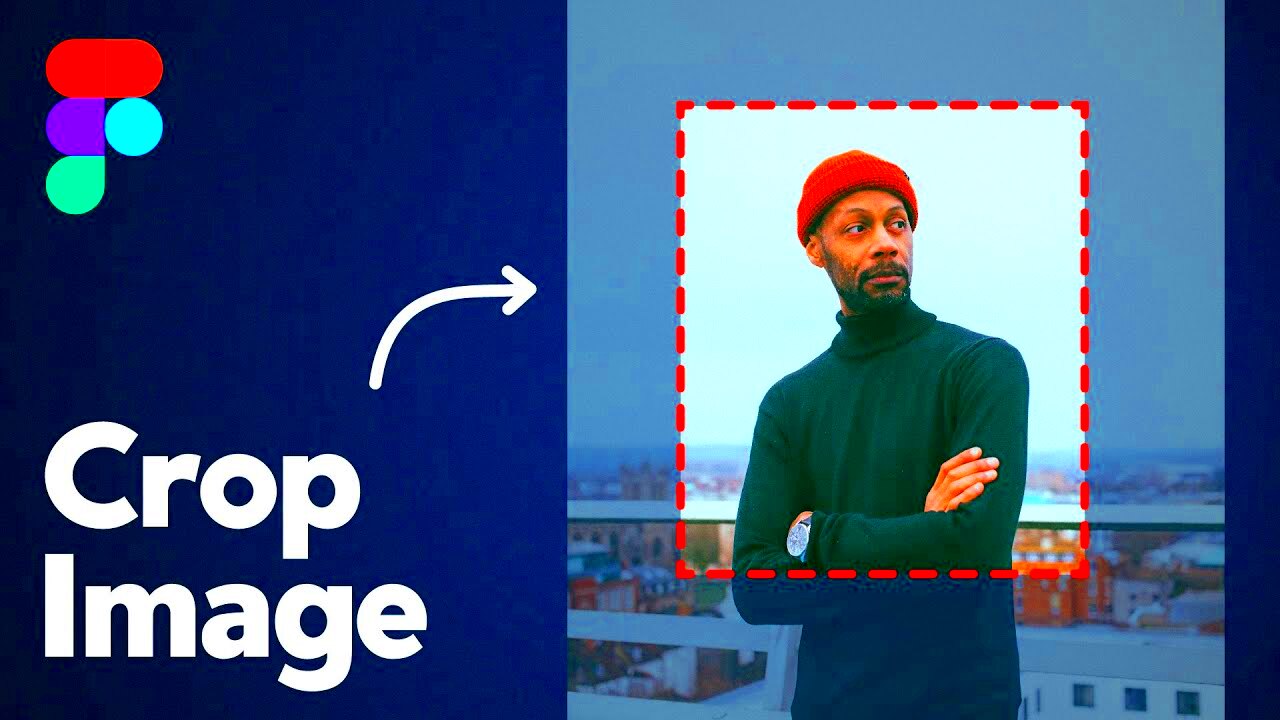
In the world of digital design, cropping images is an essential skill that helps designers focus on the most important elements of a picture. Whether you're working on a website, a mobile app, or a social media graphic, cropping allows you to tailor your images to fit your layout perfectly. Figma, one of the most popular design tools, makes this process simple and intuitive. By mastering cropping in Figma, you can make your designs look cleaner, more polished, and more professional.
In this post, we'll guide you through the process of cropping images in Figma, explaining why it's important and how to do it step by step. Whether you're a beginner or an experienced designer, you'll find these tips useful in your design workflow.
Why Cropping is Important in Professional Design

Cropping images is a critical part of the design process. It allows designers to control how much of an image is visible, ensuring that only the most relevant parts of the image are shown. Here’s why cropping is so important in professional design:
- Focus on Key Elements: Cropping helps eliminate distractions, allowing you to focus on the main subject of your image.
- Improved Composition: By adjusting the image’s frame, you can create a balanced, visually appealing layout.
- Consistent Design Aesthetic: Cropping ensures that all your images align with the overall look and feel of your design.
- Better Layout Fit: Cropped images fit better in your design grid, making them more suitable for different screen sizes or platforms.
- Enhanced Visual Impact: A well-cropped image can create a stronger emotional connection with your audience.
For example, if you’re working on a website, cropping an image allows you to focus on the key product or message, helping to drive the point home without any visual clutter. In social media designs, cropping can make your posts more engaging and eye-catching.
Also Read This: How to Upload a Carousel on LinkedIn
Steps to Crop an Image in Figma

Now that you know why cropping is important, let’s walk through the simple steps to crop an image in Figma. Whether you’re new to Figma or just need a refresher, these steps will guide you to crop images quickly and easily.
- Upload Your Image: First, make sure your image is uploaded into your Figma workspace. You can either drag and drop the image or use the “Place Image” option under the File menu.
- Select the Image: Once your image is in Figma, click on it to select it. You'll see a bounding box around the image with handles on the sides and corners.
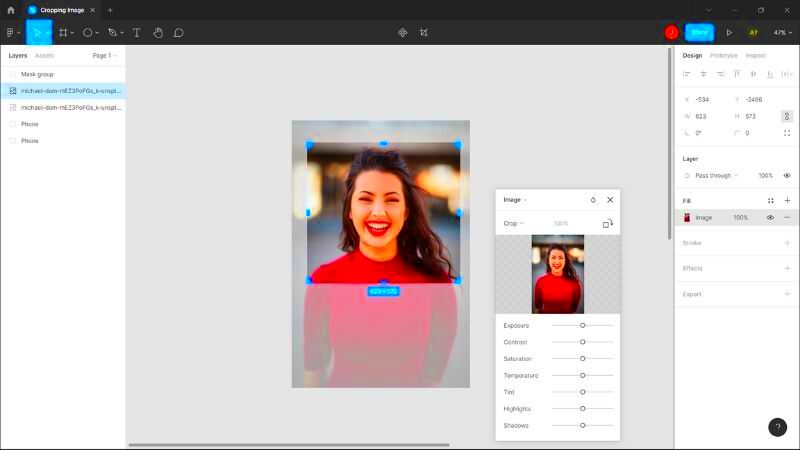
- Enter Crop Mode: To crop the image, click the “Crop” button in the top menu (represented by a crop icon). This will activate the crop mode, where you can adjust the visible area of your image.
- Adjust the Crop Area: You can now drag the handles of the bounding box to adjust the area of the image you want to keep. You can move the box around and resize it to focus on the parts of the image you want.
- Finalize the Crop: Once you’re happy with the crop, click the “Done” button in the top menu to finalize the crop and exit crop mode. Your image will now be cropped, and the changes will be applied immediately.
After cropping, you can further adjust the image by resizing, repositioning, or applying additional effects like shadows or borders to make it fit perfectly within your design.
By following these easy steps, you’ll be able to crop your images efficiently and make them work seamlessly in any design project you’re working on.
Also Read This: How to Resize PDF Images
Using Figma's Crop Tool Effectively

Figma’s crop tool is a powerful feature that lets you quickly adjust the size and focus of your images. With just a few clicks, you can crop an image to fit your design perfectly, whether you’re working on a web page, mobile app, or social media post. The key to using the crop tool effectively is understanding its functionality and how to integrate it into your workflow.
Here’s how you can make the most of Figma’s crop tool:
- Activate the Crop Tool: Select the image, then click on the “Crop” button in the top toolbar. This puts the image into crop mode, showing a rectangular frame around the image with handles on each corner and side.
- Adjust the Crop Area: Drag the handles to resize the crop area. You can make the crop area smaller or larger depending on which part of the image you want to keep. Move the image around within the frame to find the perfect focus.
- Maintain Proportions: If you want to crop the image proportionally (without distorting the aspect ratio), hold the Shift key while adjusting the crop frame. This keeps your image balanced and visually appealing.
- Use Smart Guides: Figma’s smart guides help you align the crop frame to the edges of other objects or the canvas, ensuring your image stays perfectly aligned within the design.
- Undo and Refine: If you’re not happy with your crop, simply press Ctrl+Z (or Cmd+Z on Mac) to undo the change. You can also enter the crop tool again to make further adjustments until you're satisfied with the result.
By mastering these tips, you can use Figma’s crop tool with precision, enhancing the overall quality of your designs and speeding up your workflow.
Also Read This: How to Layer Images for Stunning Designs
How to Adjust and Fine-tune Your Cropped Images
Once you’ve cropped your image in Figma, it’s important to fine-tune it to ensure it fits perfectly into your design. Figma offers a range of tools that allow you to make subtle adjustments, ensuring that your image complements the overall aesthetic of your project.
Here’s how to adjust and fine-tune your cropped images:
- Resizing: After cropping, you may want to resize your image to fit a specific area or layout. You can do this by selecting the image and dragging the corners to scale it up or down while maintaining the cropped area.
- Repositioning: If your image is cropped but not quite in the right position, you can click and drag the image within the crop area to reposition it. This allows you to focus on different parts of the image without affecting the crop itself.
- Alignment: Use Figma’s alignment tools to ensure your cropped image fits perfectly within your design. You can align it relative to other elements, such as text, buttons, or other images, using the alignment tools in the top bar.
- Adjusting Opacity: Sometimes, reducing the opacity of a cropped image can help it blend better into the background. To adjust the opacity, select the image, and then use the opacity slider in the right-hand panel.
- Applying Effects: After cropping, you can further adjust the image by applying shadows, borders, or blur effects to make it stand out or integrate seamlessly with other elements in your design.
These fine-tuning steps allow you to create polished, professional images that look great in any design. By taking the time to make small adjustments, you can ensure that your images are perfectly aligned with the rest of your project.
Also Read This: Downloading Carousel Posts from LinkedIn Made Easy
Common Mistakes to Avoid When Cropping Images in Figma
While cropping images in Figma is straightforward, there are a few common mistakes that can affect the quality of your design. Avoiding these pitfalls can save you time and help ensure that your images look professional and well-integrated into your design.
Here are some mistakes to watch out for when cropping images in Figma:
- Not Maintaining Aspect Ratio: One of the biggest mistakes is cropping images without maintaining the aspect ratio, which can lead to stretched or distorted images. To avoid this, hold the Shift key while resizing to keep the proportions intact.
- Over-Cropping: Cropping too much of the image can remove important details, leading to a less effective composition. Always make sure that you’re not cutting out crucial elements that convey the message of your design.
- Misaligned Images: When cropping, it's easy to lose track of the overall alignment with other elements. This can result in an image that looks out of place. Use Figma’s smart guides and alignment tools to ensure everything lines up properly.
- Not Considering the Final Output: Sometimes, designers crop images without thinking about how they’ll be used in the final design. For example, images might look great on a desktop view but not fit well on mobile. Always consider how the cropped image will look across different devices and screen sizes.
- Ignoring Image Quality: When cropping, be mindful of the image resolution. Cropping too aggressively on a low-resolution image can result in pixelation. Always use high-quality images to avoid this issue.
- Not Using the Masking Feature: If you want more control over your cropped images, don’t forget about Figma’s masking feature. This allows you to crop the image non-destructively, giving you the flexibility to adjust it later without losing any parts of the image.
By keeping these common mistakes in mind, you can ensure that your cropped images enhance your design rather than detract from it. Avoiding these errors will help you create more professional, polished designs with Figma.
Also Read This: How to Effectively Invite Friends to Like Your Facebook Page
Using Figma's Masking Feature with Cropped Images
Figma’s masking feature is a powerful tool that allows you to crop images in a more flexible, non-destructive way. Unlike traditional cropping, where the image is permanently altered, masking lets you create a "mask" that hides portions of the image without losing any data. This makes it easy to experiment with different crops, adjustments, and layouts while retaining the original image intact.
Here’s how you can use Figma’s masking feature with cropped images:
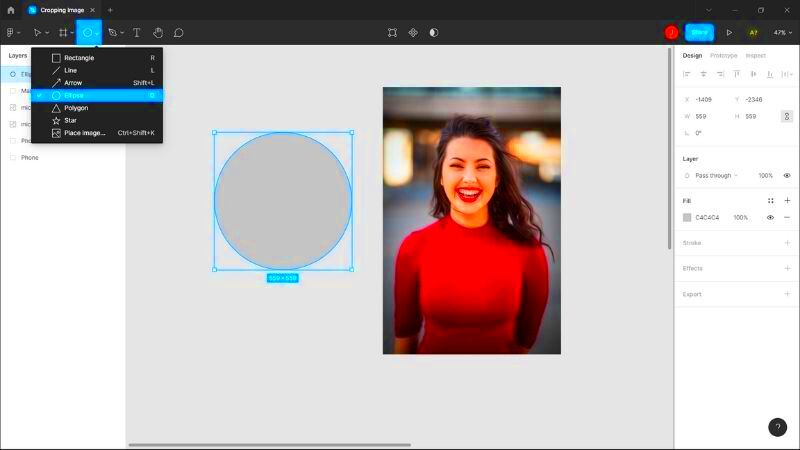
- Create a Shape: Start by creating a shape (such as a rectangle, circle, or custom shape) that you want to use as a mask. This shape will define the area of the image that remains visible.
- Place the Image and Shape Together: Position the image and shape on the canvas, ensuring the image covers the shape completely. The shape should be placed above the image layer in the layers panel.
- Apply the Mask: Select both the image and the shape, then right-click and choose the “Use as Mask” option. This will apply the shape as a mask, hiding any part of the image outside the mask’s boundaries.
- Edit the Mask: You can still adjust the mask at any time by selecting the mask layer and resizing or repositioning it. If you need to reposition the image inside the mask, simply select the image and move it around without affecting the mask itself.
- Refining the Mask: Figma also lets you use multiple layers and complex shapes to create intricate masks, giving you even more control over how the image is displayed. Experiment with different shapes, angles, and combinations to create unique effects.
Using masks with cropped images allows for more creative freedom and flexibility in your design. It’s especially useful when working with complex compositions, like those found in promotional graphics or web layouts, where you need to adjust the crop dynamically.
Also Read This: Steps to Remove Color from an Image for a Clean Look
Best Practices for Cropping Images for Different Design Types
Cropping images isn’t just about making them fit a design; it’s about ensuring that the image complements the overall layout and user experience. Different design types require different approaches to cropping. Understanding the best practices for each type of design will help you use images effectively and make your designs look professional.
Here are some best practices for cropping images for various design types:
- Web Design: For websites, focus on cropping images to highlight key elements like products, people, or call-to-action buttons. Crop images to fit specific sections, like headers or feature blocks, ensuring they align properly with text and other content. Keep in mind the different screen sizes and resolutions to ensure the image works well across devices.
- Mobile App Design: Images in mobile apps often need to be cropped to fit smaller screens. When cropping for mobile, make sure to focus on the most important part of the image. Also, keep in mind that the image will be viewed on a smaller, often vertical screen, so it’s best to crop images with the subject centered and adjust them for a portrait layout.
- Social Media Graphics: Social media images often have specific size and aspect ratio requirements. For example, Instagram prefers square images, while Facebook and Twitter work best with landscape images. Be sure to crop images to fit these requirements while keeping the most important part of the image in focus. Use cropping to create engaging thumbnails or highlight key visual elements in the image.
- Print Design: When cropping for print, it’s important to keep the image resolution high to avoid pixelation. Always consider the final print size and crop the image so that it fits perfectly within the layout. Be mindful of safe zones, ensuring that important parts of the image aren’t cut off when printed.
- Presentations: In presentation designs, cropping can help make images stand out in slides. You may need to crop images to fit within specific slide layouts or highlight certain parts of the image. Always check that the image maintains good visual balance with the text and other elements on the slide.
By understanding how to crop images for different design types, you can ensure your images enhance the overall visual experience, whether it’s for a website, app, social media post, or print material. Keep the context and final use of the image in mind as you crop to achieve the best results.
Also Read This: How to Shape Your Nails Perfectly with Dailymotion Tutorials
FAQ
Here are some frequently asked questions about cropping images in Figma:
- Can I crop an image in Figma without affecting the original file?
Yes! When you crop an image in Figma, it’s a non-destructive action, meaning the original image remains intact. You can always revert back to the full image or adjust the crop as needed. - How do I maintain the aspect ratio while cropping an image?
To maintain the aspect ratio, simply hold the Shift key while resizing the crop frame. This ensures that the image doesn't get stretched or distorted. - Can I crop multiple images at once?
Currently, Figma doesn’t support cropping multiple images simultaneously. Each image needs to be cropped individually. - What if I want to change the crop after I’ve applied it?
Figma allows you to adjust the crop at any time by entering the crop tool again. Simply select the image, click the crop icon, and resize the crop area as needed. - How do I remove a crop from an image?
If you want to remove a crop, just select the image and click on the “Reset Crop” button in the top toolbar. This will return the image to its original, uncropped state. - Can I use Figma's crop tool with vector images?
Yes, the crop tool can be used with vector images in Figma, just as it can with raster images. Cropping works similarly for both types of images, giving you control over which parts are visible.
Conclusion
Mastering image cropping in Figma is a fundamental skill for any designer. Whether you’re creating a website, mobile app, social media graphic, or print material, understanding how to crop images effectively can make a huge difference in the final quality of your design. From using Figma’s crop tool and masking features to learning best practices for different design types, these techniques help you create polished, professional results. Avoiding common cropping mistakes and fine-tuning your images will ensure that your designs are both visually appealing and aligned with your overall creative vision. With these tips and tools at your disposal, you’ll be able to handle any cropping challenge that comes your way, enhancing your designs and improving your workflow in Figma.


