Printing images with accurate dimensions is crucial for achieving high-quality results, whether you're creating posters, photos, or other print materials. If your image is not printed at the correct size or resolution, it can appear blurry, pixelated, or distorted. In this guide, we’ll walk you through the essential steps to ensure your images are printed exactly how you want them, without any surprises.
When preparing images for printing, there are several factors to consider. These include the image resolution, the size of the image, and the type of printer you're using. By understanding these elements, you can confidently print images with precise dimensions for your project.
Understanding Image Resolution and Print Size

Before printing your image, it's essential to understand the relationship between image resolution and print size. These two factors play a significant role in determining the quality of your print. Let’s break it down:
- Resolution: The resolution of an image is measured in DPI (dots per inch) and refers to how many pixels are in the image per inch when printed. Higher DPI values result in sharper and more detailed prints.
- Print Size: Print size refers to how large the image will appear when printed. If your image resolution is too low for the desired print size, the result can be pixelated or blurry.
Here’s how to calculate the print size based on resolution:
| Print Size (in inches) | Resolution (in DPI) | Maximum Image Dimensions |
|---|---|---|
| 8x10 | 300 DPI | 2400 x 3000 pixels |
| 16x20 | 150 DPI | 2400 x 3000 pixels |
To ensure high-quality prints, aim for a resolution of at least 300 DPI for smaller prints and around 150 DPI for larger prints. If the resolution is too low, your print quality will suffer.
Also Read This: Using Lossless Scaling to Improve YouTube Video Quality
Choosing the Right Printer for Printing Images

The printer you choose can greatly impact the quality of your printed image. Different printers are designed for different purposes, so selecting the right one for your needs is essential. Let’s explore the types of printers available and their capabilities:
- Inkjet Printers: These are the most common type of printers for photo printing. They produce high-quality prints with rich color accuracy and fine details. Inkjet printers are ideal for printing images on photo paper, art prints, and documents requiring detailed resolution.
- Laser Printers: While laser printers are faster and more cost-efficient for text printing, they generally don’t provide the same level of color accuracy and detail as inkjet printers. They may not be the best choice for high-quality photo prints but are useful for simple graphics and documents.
- Professional Photo Printers: If you're looking for top-tier print quality, professional photo printers are designed specifically for high-resolution photo printing. These printers use multiple inks to produce a wider range of colors and finer details.
When selecting a printer, consider the following factors:
- Print Size: Make sure the printer supports the print size you want.
- Resolution: Check if the printer supports a high DPI, ideally 2400 x 1200 DPI or higher for detailed images.
- Ink Quality: Choose a printer that uses high-quality inks to avoid color fading and ensure long-lasting prints.
Investing in the right printer ensures your images are printed with the accuracy and quality you expect. Research and reviews can help you select a printer that fits your needs, whether you're printing for personal use or professional projects.
Also Read This: Convert OK.RU Videos to MP4 with This Easy Method
Setting Image Dimensions in Canva Before Printing
Before printing your image, it's crucial to ensure the dimensions are set correctly. Canva is an excellent tool for designing and preparing images for print, allowing you to customize your images with ease. In this section, we’ll guide you through setting the right dimensions in Canva for your print project.
First, let’s talk about how you can set up your image dimensions in Canva:
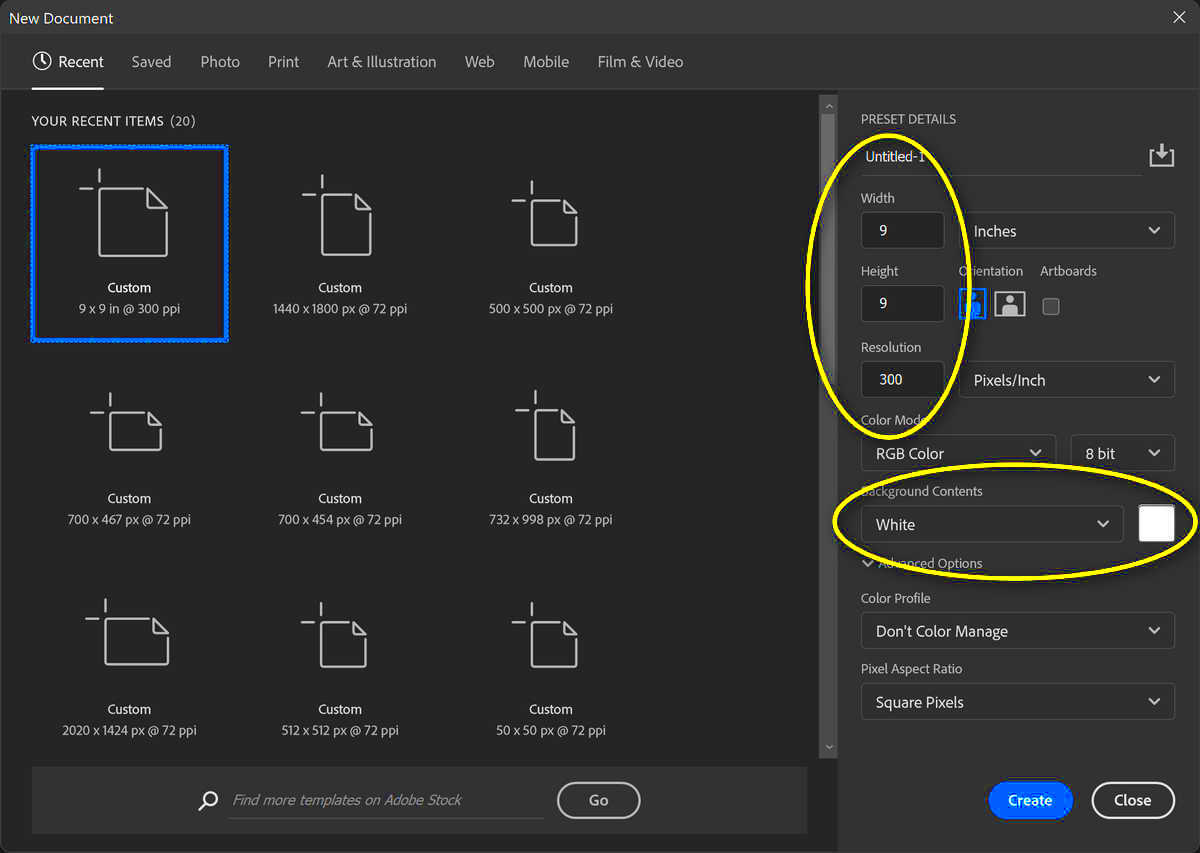
- Create a Custom Design: When you open Canva, choose the “Custom Dimensions” option. This allows you to input the exact dimensions you need for your print project, whether it’s a poster, flyer, or photo.
- Specify Units: You can enter dimensions in inches, millimeters, or pixels. If you’re preparing for print, inches or millimeters are typically the best choice.
- Resize Option: If you already have an image created and want to adjust its size, Canva offers a “Resize” tool, which can automatically scale the image while keeping the proportions intact.
It’s important to set your design to the correct size right from the start. This ensures you’re not stretching or shrinking the image later, which can lead to a loss in quality.
Here’s a quick example for a standard photo print:
| Print Size | Dimensions (in inches) | Recommended Pixels |
|---|---|---|
| 4x6 | 4 x 6 | 1200 x 1800 |
| 8x10 | 8 x 10 | 2400 x 3000 |
By ensuring your image is the right size in Canva, you can prevent issues when it’s time to print, guaranteeing a high-quality result.
Also Read This: How to Download Dailymotion Videos on Chrome Without Hassle
How to Adjust Image DPI for Print Accuracy
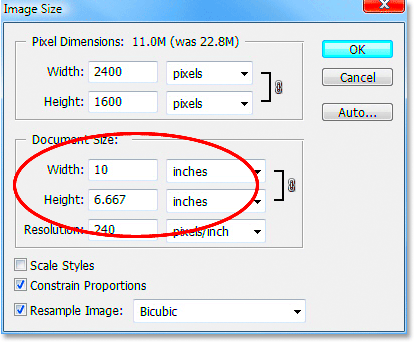
One of the most important factors in print quality is the DPI (dots per inch) of the image. DPI measures the resolution of your image when printed. Higher DPI means more detail and sharper prints. If the DPI is too low, your printed image will appear pixelated and blurry. Let's look at how you can adjust the DPI to ensure accuracy and print quality.
Here’s how you can manage the DPI for print accuracy:
- Start with a High-Resolution Image: Ensure your image starts with a high resolution, ideally 300 DPI for standard photo prints. You can check the DPI of an image in most image editing software, or by using online tools.
- Use Canva’s Export Settings: Canva allows you to download your image at different resolutions. When you’re ready to download, select the “PDF Print” option and check the box for “Crop marks and bleed” to get the highest possible quality.
- Resize and Adjust DPI: If your image was initially created at a lower DPI, you can adjust the dimensions in your editing software (like Photoshop or GIMP) to increase the DPI while maintaining the same print size.
For example, a standard 8x10 print requires an image of 2400 x 3000 pixels at 300 DPI. If your image is smaller or at a lower DPI, it might need resizing or adjusting before printing to prevent quality loss.
In general, aim for 300 DPI for prints to ensure the highest quality and sharpness. For larger prints, you can go lower, like 150 DPI, but for smaller images, don’t go below 300 DPI.
Also Read This: Is LinkedIn Learning Free for Students
Using Canva Templates for Easy Print Preparation
One of the easiest ways to prepare images for print is by using Canva’s templates. Canva offers a wide range of templates tailored for various print sizes, making the design process smooth and simple. Let’s explore how using templates in Canva can help ensure your image fits perfectly and is ready for print.
Here’s why Canva templates are so useful:
- Pre-Set Dimensions: Canva templates come with pre-set dimensions based on common print sizes like A4, 8x10, and 5x7. This takes the guesswork out of designing and ensures you don’t accidentally design an image that’s too large or small.
- Guidelines and Grids: Many templates also include guidelines or grids that help you position your design elements accurately, making sure everything aligns correctly and looks professional.
- Customizable Designs: While the templates provide a foundation, they are also fully customizable. You can easily add text, images, and other elements, adjusting them to match your needs while staying within the correct dimensions.
Here’s how to use a template for easy print preparation:
- Choose Your Template: Open Canva and select a template that suits your project. You can choose from a wide range of print sizes like business cards, flyers, posters, and more.
- Adjust for Your Needs: Customize the template by changing colors, fonts, and images, ensuring your design is unique while keeping the correct dimensions.
- Download Your Design: Once you’re happy with your design, download it in the best format for print, like PDF, ensuring you select the highest quality settings for printing.
By using Canva’s templates, you can save time, avoid mistakes, and guarantee that your design will print exactly as you intended. Whether you're creating a poster for an event or a professional business card, templates make print preparation easy and efficient.
Also Read This: Lowering Volume on YouTube Shorts for Improved Sound Control
Common Mistakes to Avoid When Printing Images
Printing images might seem like a straightforward task, but there are several common mistakes that can ruin your print quality. From incorrect image dimensions to poor printer settings, these issues can result in blurry or pixelated prints. Let’s go over some of the most frequent printing mistakes and how to avoid them.
Here are some mistakes to watch out for:
- Using Low-Resolution Images: One of the biggest mistakes is printing an image with low resolution. If the image is under 300 DPI, it will likely appear blurry when printed, especially for larger sizes. Always ensure your image resolution is high enough for the print size you need.
- Incorrect Print Size Settings: Printing an image at the wrong size is another common mistake. If you don’t set the correct dimensions in your design software, your print may be stretched or cropped. Double-check your print size before sending your file to the printer.
- Choosing the Wrong Paper Type: The type of paper you use can affect your print’s quality. Using standard printer paper for high-quality prints can result in dull colors and poor detail. Make sure you use photo paper or the appropriate paper type for your specific project.
- Neglecting Printer Settings: Not adjusting your printer’s settings for high-quality prints can lead to subpar results. Ensure your printer is set to print at the highest DPI available, and make sure the ink cartridges are full and in good condition.
- Not Checking for Bleed or Margins: If your design includes elements that go all the way to the edge, you need to set up a bleed. Failing to do so can result in white borders around your print.
By avoiding these mistakes and double-checking your work, you’ll ensure your prints come out as high-quality as possible.
Also Read This: how do i outline an image in illustrator
How to Ensure Print Quality and Accurate Dimensions
Ensuring that your print quality and dimensions are accurate involves more than just selecting the right file. It requires attention to detail in both your design and printer settings. Here’s how you can ensure the best results for your prints.
Here are the key steps to take:
- Use the Right Image Resolution: Always start with a high-resolution image. A resolution of 300 DPI is ideal for most print projects, as it ensures the print will be sharp and clear. For larger prints, 150 DPI may be acceptable, but for smaller prints, 300 DPI is crucial.
- Set Proper Dimensions in Your Design Software: Before printing, make sure your image dimensions are set to the exact size you want. This prevents distortion during printing. Use design tools like Canva to input precise measurements for your print project.
- Choose the Right Printer: The printer you use should be capable of handling the print size and resolution required. Inkjet printers typically produce higher-quality prints for images, while laser printers are better for text-heavy prints.
- Use Quality Paper: Don’t skimp on paper quality. Use photo paper or specialized print paper to get the best results. The right paper ensures that your colors pop and your details are sharp.
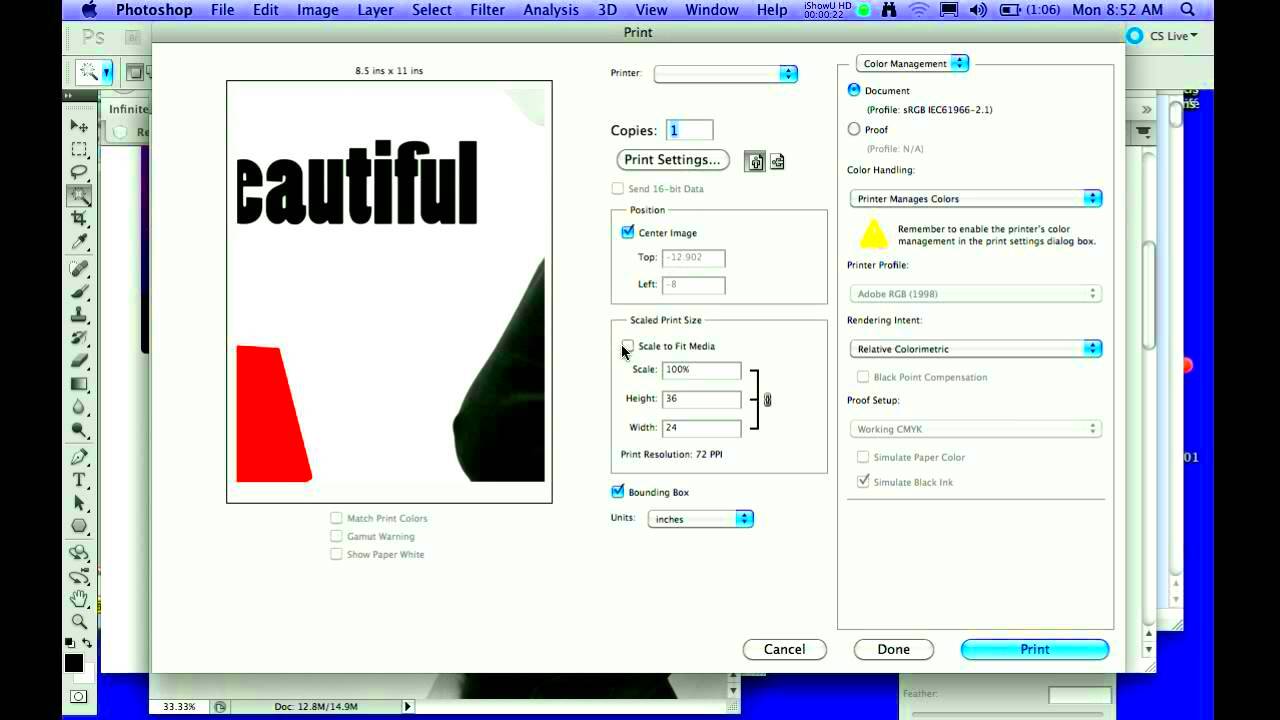
- Check Printer Settings: Adjust your printer settings for the highest quality output. Ensure that your printer is set to the right DPI and that you're using the correct paper type. If your printer has a "photo" setting, select it to ensure the best quality print.
- Review Before Printing: Finally, always review your design one last time before printing. Double-check the dimensions, resolution, and any text or graphics for clarity. This step can save you time and prevent costly reprints.
By following these steps, you can ensure your prints are sharp, vibrant, and true to size. Taking the time to prepare your image and settings properly will result in high-quality prints every time.
Also Read This: Effortless Ways to Find Tiktok Video Downloaders That Work for Free
FAQ
Here are some frequently asked questions about printing images and ensuring accurate dimensions:
- What DPI is best for printing images?
For high-quality prints, 300 DPI is recommended. For larger prints, 150 DPI may be acceptable, but for smaller items like business cards or photos, 300 DPI ensures sharpness and clarity. - Can I print an image directly from Canva?
Yes, you can print an image directly from Canva. Just make sure to download the image in the appropriate format (PDF Print or PNG) and check the print settings for quality before sending it to your printer. - Why is my image blurry when printed?
The most common reason for a blurry print is a low-resolution image. Ensure your image has a high DPI (300 DPI is ideal) and is properly sized for the print dimensions. - What should I do if the print size doesn’t match the image size?
Check your image dimensions and adjust them in your design software. Most tools, like Canva, allow you to resize images without affecting quality. Make sure the printer settings match the print size as well. - Do I need special paper for photo prints?
Yes, for the best results, use photo paper or other specialized print materials designed for high-quality prints. Regular printer paper can result in dull colors and poor image quality. - Can I adjust the DPI of an image?
Yes, you can adjust the DPI of an image using photo editing software like Photoshop. However, increasing DPI on an already low-resolution image won’t improve its quality — it’s best to start with a high-resolution file.
Conclusion
In conclusion, printing images with accurate dimensions is a critical step for ensuring that your final output meets your expectations. By understanding key factors such as image resolution, DPI settings, and the use of proper templates, you can confidently create high-quality prints that are sharp, clear, and true to size. Avoiding common mistakes, selecting the right printer, and using tools like Canva can simplify the process and yield the best results for your print projects. With careful preparation and attention to detail, you can produce prints that look professional and polished every time.


