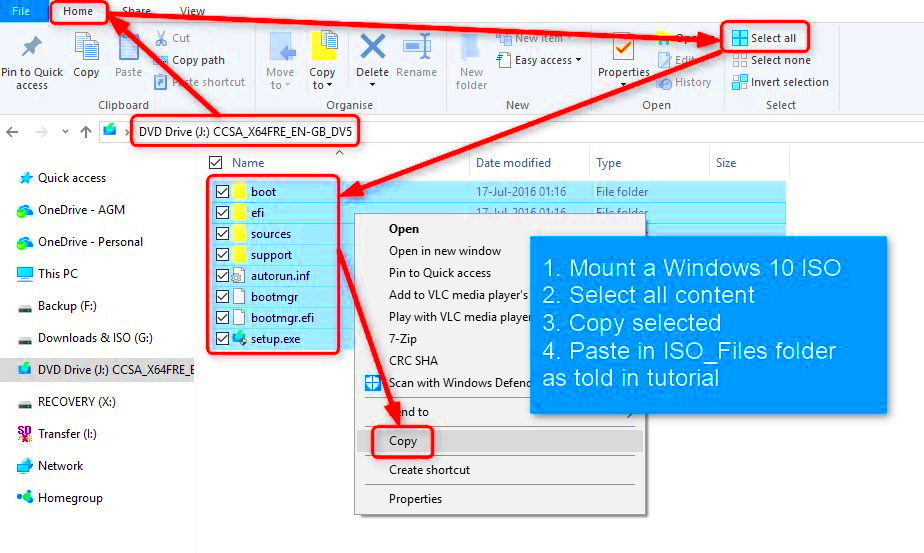
An ISO image is a digital copy of an entire CD, DVD, or other disc, stored in a single file. For Windows installation, the ISO file contains all the necessary setup files to install the operating system. Think of it as a virtual disc that you can use without needing physical media.
ISO images are important because they provide a compact and reliable way to store and transfer operating system files. You can easily download them, create bootable devices, or mount them directly on your computer. This makes installing Windows more convenient, especially for modern devices without disc drives.
Why is it essential for Windows installation?
- ISO files ensure all installation files are in one place, reducing the risk of missing components.
- They allow you to create bootable USB drives for faster installation.
- You can store ISO files for future use, saving time when re-installing Windows.
Preparing Your Computer for Installation

Before installing Windows using an ISO image, it’s essential to prepare your computer. Proper preparation helps ensure a smooth installation process and minimizes errors.
Steps to prepare your computer:
- Back up your data: Save important files to an external drive or cloud storage.
- Check system requirements: Verify your computer meets the minimum hardware specifications for the Windows version you want to install.
- Free up space: Ensure your hard drive has enough room for the new installation.
- Update firmware: Check for BIOS/UEFI updates to ensure compatibility.
- Prepare a bootable device: Have a USB drive ready for creating a bootable installer.
Taking these steps will make the installation process quicker and more efficient, avoiding unnecessary interruptions.
How to Download a Windows ISO Image Safely

Downloading a Windows ISO image safely is crucial to avoid corrupted files or malware. Microsoft offers an official and secure way to get the ISO files.
Steps to download a Windows ISO safely:
- Visit the Microsoft Software Download page.
- Select the version of Windows you need (e.g., Windows 10 or Windows 11).
- Choose your language and edition, then click the download button.
- Follow the instructions to download the ISO file.
Tips for safe downloading:
- Only download from trusted sources like Microsoft’s official website.
- Use a reliable internet connection to prevent file corruption.
- Verify the file checksum (if provided) to ensure the download is complete and unaltered.
Once downloaded, store the ISO file in a secure location for later use in the installation process.
Creating a Bootable USB Drive with the ISO Image
Creating a bootable USB drive is an essential step for installing Windows using an ISO image. A bootable USB allows you to start the installation process directly from your USB drive, without needing a DVD or disc drive. This method is faster and more reliable for modern computers.
Here’s how to create a bootable USB drive:
- Get a USB drive: You’ll need a USB drive with at least 8GB of space. Make sure it’s empty or back up any important files.
- Download the Windows Media Creation Tool: Visit the Microsoft Software Download page and download the Media Creation Tool.
- Run the tool: Open the Media Creation Tool and select the option to create installation media for another PC. Choose your language and Windows edition.
- Select USB drive: Choose “USB flash drive” when prompted. The tool will automatically detect available drives.
- Start the process: The tool will now download the Windows ISO and transfer it to your USB drive, making it bootable.
Tips:
- Ensure that your USB drive is formatted properly before starting the process.
- During the process, avoid interrupting the tool as it’s transferring files.
Once done, you’ll have a bootable USB drive ready for installing Windows on your computer.
Step-by-Step Process for Installing Windows Using the ISO Image
Now that you’ve created a bootable USB drive, it’s time to install Windows on your computer using the ISO image. The process is straightforward but requires a few key steps to ensure everything runs smoothly.
Follow these steps to install Windows:
- Insert the bootable USB: Plug the USB drive into your computer.
- Access BIOS/UEFI: Restart your computer and press the BIOS/UEFI key (usually F2, F12, Esc, or Del) during bootup to enter the settings.
- Set the USB drive as the primary boot device: In the boot menu, change the boot order so that your USB drive is first.
- Restart your computer: Save the settings and restart. Your computer will boot from the USB drive.
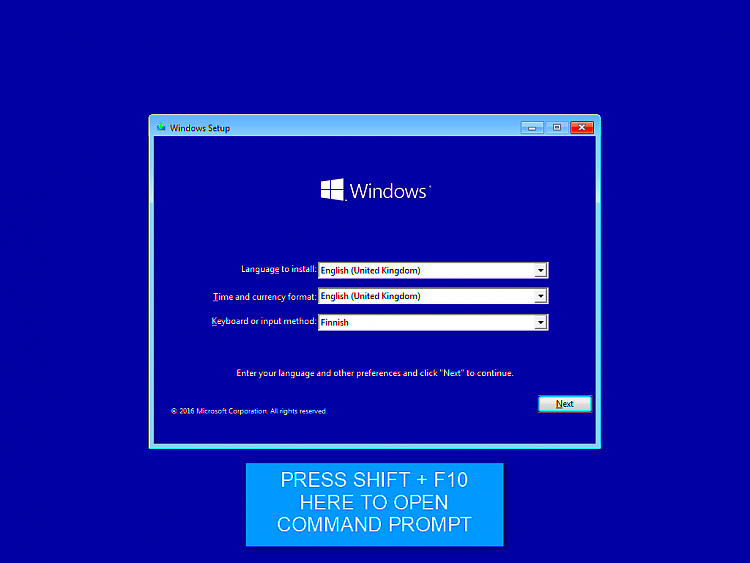
- Start the installation: The Windows setup screen will appear. Select your language, time zone, and keyboard preferences.
- Install Windows: Choose the drive where you want to install Windows. If necessary, format the drive to remove old files and partitions.
- Follow the on-screen instructions: The installation will take some time. Your computer will restart several times during the process.
After installation: Once Windows is installed, follow the initial setup to customize your preferences and sign in to your Microsoft account. Your system will be ready for use!
Common Issues During Installation and How to Fix Them
While installing Windows from an ISO image is generally smooth, there are a few common issues that can arise. Knowing how to troubleshoot these problems can save you time and frustration.
Here are some common problems and solutions:
- Boot Error: "No bootable device found"
This error happens when your computer cannot detect the USB drive as a bootable device. To fix it, check the boot order in the BIOS/UEFI settings and make sure the USB drive is set to boot first.
- Installation Stuck at a Certain Percentage
If the installation seems to be stuck, ensure your internet connection is stable if it’s downloading additional files. Also, check for any hardware issues that could be causing delays.
- Partition Issues: "Windows cannot be installed on this drive"
This error typically occurs when the drive is not properly formatted. In the Windows setup process, you can delete existing partitions and create a new one for the installation.
- Missing or Corrupt Files
If installation fails due to missing or corrupt files, it could be a problem with the ISO image. Download the ISO file again and create a new bootable USB drive.
Additional Tips:
- Ensure your system meets the minimum hardware requirements for the version of Windows you are installing.
- Try using a different USB drive if your current one is not working correctly.
By addressing these common issues, you can ensure a smoother and more successful installation process.
FAQs About Installing Windows from an ISO Image
Installing Windows from an ISO image can raise several questions, especially if it’s your first time doing it. Here are some of the most frequently asked questions to help guide you through the process.
1. What is an ISO image?
An ISO image is a file that contains the complete contents of a CD, DVD, or USB drive. It is a replica of the installation media required to install Windows, making it easier to create bootable devices for the installation process.
2. Can I use any USB drive to create a bootable USB?
You need a USB drive with at least 8GB of free space. It’s important to use a USB drive that is not too old or corrupted for the best performance and reliability during the installation process.
3. Do I need to format my USB drive before creating a bootable drive?
Yes, your USB drive must be formatted to ensure it’s clean and ready for use. This process removes any existing data, so be sure to back up your files before proceeding.
4. How long does the installation process take?
The installation time can vary depending on your computer’s performance and the version of Windows you’re installing. Typically, it can take anywhere from 20 minutes to an hour.
5. Can I use the same USB drive for multiple installations?
Yes, you can reuse the same USB drive as long as it remains functional. However, you’ll need to reformat it and create a new bootable installation each time you use it.
6. Will my files be deleted during the installation?
If you choose to perform a clean installation of Windows, your files will be deleted from the installation drive. Always back up important files before starting the process.
Final Thoughts on Installing Windows from an ISO Image
Installing Windows from an ISO image is an efficient and convenient method, especially for modern computers without optical drives. By following the steps outlined in this guide, you can easily create a bootable USB drive, set up your system, and troubleshoot common issues. With a bit of preparation and care, you can have a clean and updated version of Windows running on your computer in no time. Just make sure to back up your important data and double-check that your system meets the installation requirements for a smooth experience.


