In today's digital world, images aren't just about visual appeal—they can also tell a story with sound. Adding audio to an image turns it into a dynamic multimedia experience that can capture attention in new ways. Whether it's for social media, presentations, or personal projects, combining audio with images enhances their impact and can make your content stand out. With the right tools, anyone can easily add music, narration, or sound effects to their images, creating a more immersive and engaging experience.
Why Add Audio to Images

There are many reasons why adding audio to images is a good idea. Here are some of the key benefits:
- Enhanced Engagement: Adding audio makes your content more engaging, keeping viewers interested for longer.
- Emotional Impact: The right sound can evoke emotions, helping convey the message of the image more effectively.
- Multimedia Appeal: Combining audio and visuals makes your content more dynamic and appealing to different senses, creating a stronger impression.
- Increased Accessibility: Audio can help people with visual impairments by adding an auditory layer to the image's content.
- Better Storytelling: Audio helps tell a more complete story. Whether it’s music to set the tone or a voiceover to explain the image, it makes the content more informative.
In short, adding audio to images can boost your content's effectiveness, whether you're creating something for fun or for professional purposes. The added dimension of sound helps to capture attention, evoke emotions, and improve understanding.
Also Read This: how to fill text with an image in canva
Tools You Can Use to Add Audio to Images

There are many tools available for adding audio to images, ranging from simple apps to more advanced software. Depending on your needs and skill level, you can find the right tool for your project. Here's a look at some of the most popular options:
| Tool | Description | Best For |
|---|---|---|
| Canva | A user-friendly design platform that lets you add audio to images easily. | Beginners and casual users |
| Adobe Spark | Offers a powerful set of tools for adding both audio and animation to your images. | Professionals and advanced users |
| Kapwing | Simple, online video editor that allows easy image and audio integration. | Those looking for a quick and easy solution |
| iMovie | A video editing software with capabilities for adding sound to still images. | Mac users who need more control |
| InShot | A mobile app for editing videos and images, perfect for adding audio on the go. | Mobile users and social media creators |
Each of these tools offers something different, from basic editing options to more advanced features, so you can choose the one that best fits your needs. Whether you're creating content for social media or a professional project, these tools can help you bring your images to life with sound.
Also Read This: Transferring Adobe Stock License to Your Client
Step-by-Step Guide to Adding Audio to an Image

Adding audio to an image might sound complicated, but it's easier than you think! Here’s a simple step-by-step guide to help you create your multimedia masterpiece:
- Step 1: Choose Your Image - Start by selecting the image you want to work with. It could be anything, from a photo to an illustration, depending on your project.
- Step 2: Select Your Audio - Pick a song, sound effect, or voiceover that fits the image. Make sure the audio matches the mood or message you want to convey.
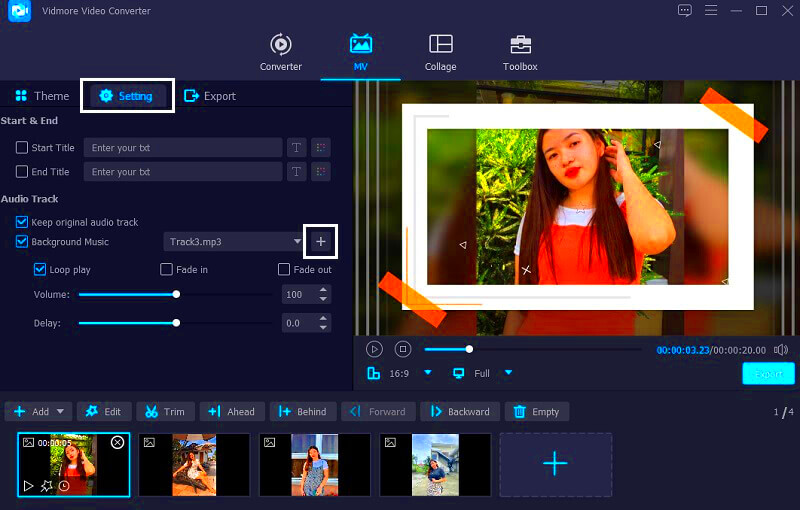
- Step 3: Open Your Editing Tool - Use a tool like Canva, Adobe Spark, or Kapwing. Upload your image and the audio file to the platform.
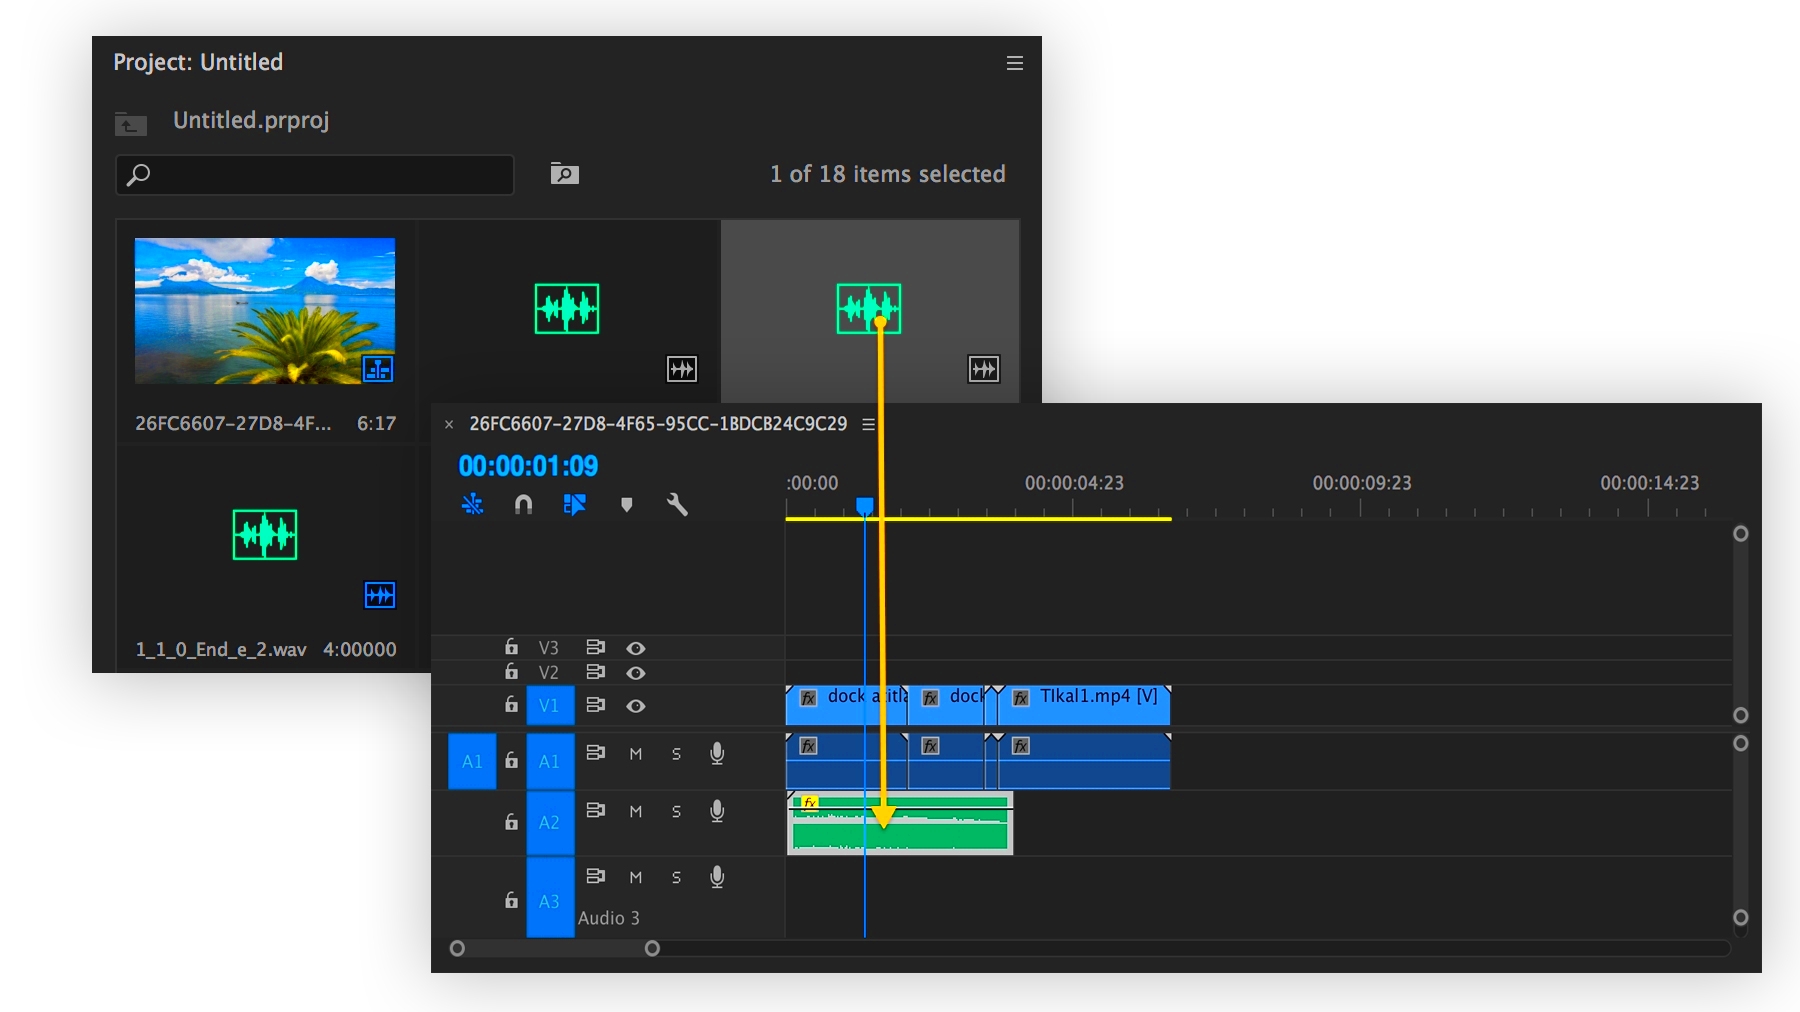
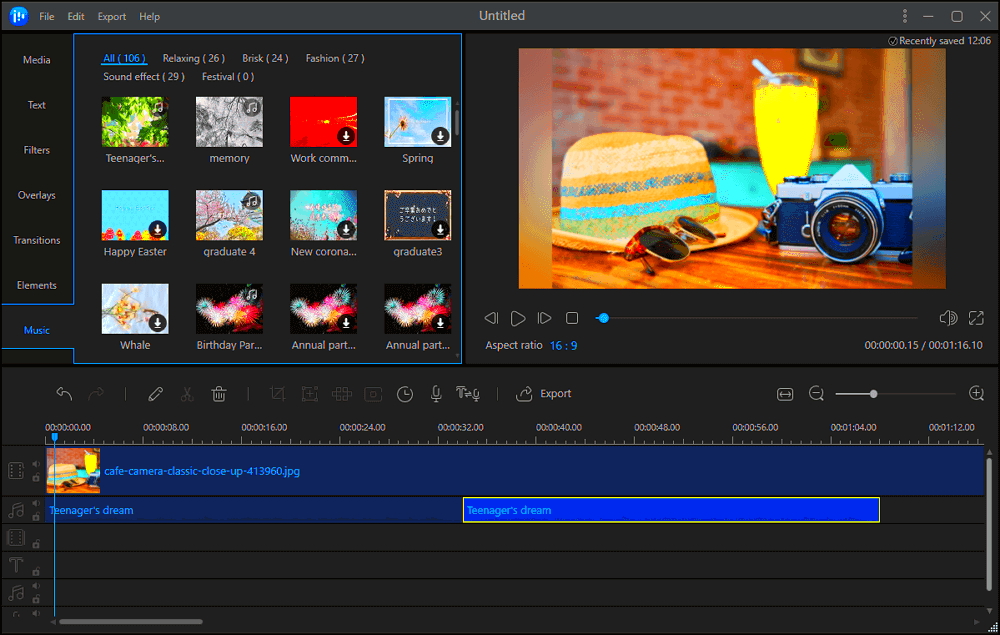
- Step 4: Add the Audio - Drag and drop your audio file onto the image. You may be able to adjust the timing, so the audio plays at the right moment or loop for continuous sound.
- Step 5: Fine-Tune Your Image - Some platforms allow you to add animations or effects to your image. Play around with these features to make the experience more dynamic.
- Step 6: Preview and Edit - Once everything looks and sounds good, preview your creation. Make any necessary adjustments to the audio volume or image position.
- Step 7: Save and Export - Once you're happy with your creation, save your project in the desired format (usually MP4 or GIF) and export it.
And that’s it! With these simple steps, you’ll have an image with audio ready to share or use in your next project.
Also Read This: Best Practices for Uploading Your Projects on Behance
Choosing the Right Audio for Your Image

The right audio can make all the difference when adding sound to an image. It’s not just about picking any music or sound effect, but one that enhances the image and helps convey the intended message. Here are some tips for choosing the best audio:
- Consider the Mood: Think about the emotion you want to evoke. For example, a peaceful nature image might pair well with calm instrumental music, while an energetic sports photo could use upbeat, fast-paced music.
- Match the Message: If the image tells a story, choose audio that complements it. For instance, a photo of a sunset might go well with a soft, reflective tune, while a photo of a cityscape might suit a more vibrant, modern track.
- Be Mindful of Length: The audio should match the length of the image display. Avoid long tracks if your image will only be shown briefly. You may need to loop shorter clips for longer presentations.
- Avoid Clashing Sounds: If your image contains text or voiceovers, make sure the background audio doesn’t overpower the message. Choose quieter, subtler music or adjust the volume as needed.
- Use Royalty-Free Audio: If you're sharing your creation online, ensure that the audio is royalty-free to avoid copyright issues. There are plenty of platforms offering free and licensed music for commercial and personal use.
By choosing the right audio, you can create a more immersive experience that perfectly complements your image. So take some time to pick the audio that enhances your visual content, rather than distracts from it!
Also Read This: adobe stock how much can i make
How to Export and Share Your Image with Audio
Once you've added audio to your image, you’ll want to share it with your audience. Here’s how to export and share your creation across different platforms:
- Step 1: Save Your Project - First, save your project in the format best suited for your needs. Most platforms allow you to export as MP4, GIF, or video formats. Choose MP4 for higher-quality audio and image playback.
- Step 2: Adjust Export Settings - Before exporting, you might have the option to tweak settings such as image size, audio volume, or video resolution. Adjust these according to where you plan to share your image.
- Step 3: Export the File - After fine-tuning your settings, click the export button. Your tool will process the project and generate a downloadable file.
- Step 4: Share on Social Media - You can now upload your multimedia image to platforms like Instagram, Facebook, or Twitter. For video platforms like YouTube or Vimeo, simply upload the video file and add a description.
- Step 5: Share via Email or Website - If you want to share your creation with friends, clients, or your audience, consider embedding the video in an email or on your website for easy access.
Once you’ve exported your file, sharing your multimedia image is easy. Whether you’re posting on social media or sending it via email, adding audio makes your images more engaging and shareable!
Also Read This: How to Sell Photos on Getty Images and Make Money from Your Photography
Common Issues When Adding Audio to Images and How to Fix Them
While adding audio to images is relatively simple, there are some common issues you might encounter. Don't worry, though—most of these can be easily fixed. Here’s a look at some of the problems you might face and how to resolve them:
- Audio Not Syncing Properly: This is one of the most common issues. Sometimes, the audio may not sync well with the image. The solution? Check the timing settings in your editing tool, and adjust the audio length or loop settings to match the duration of the image display.
- Low Audio Quality: If your audio sounds muffled or distorted, it might be a low-quality file. To fix this, make sure you're using a high-quality audio file, and avoid overly compressed formats like MP3s that can degrade sound quality.
- Audio Too Loud or Too Quiet: Balancing audio levels can be tricky. If the sound is too loud, it may overpower the image, while too quiet audio won't have much impact. Use your editing software’s volume controls to find the right balance between your image and the audio.
- File Format Compatibility Issues: Sometimes, the image and audio file formats don’t work together. If you're having trouble, ensure both your image and audio files are in compatible formats (such as MP4 for video or WAV for audio). Most platforms will support common formats, but it’s good to double-check.
- Exporting Errors: If you're having trouble exporting your project, it could be due to software bugs or incorrect settings. Try restarting your tool or checking your export settings to make sure they are correct before you export your file again.
By being aware of these common issues, you can troubleshoot and fix them quickly, ensuring your multimedia image project goes smoothly.
Also Read This: How to Add Motion Templates in Adobe Stock
Best Practices for Creating Multimedia Images
Creating multimedia images that combine audio and visuals can be incredibly powerful. To ensure your creations are effective and engaging, follow these best practices:
- Keep It Simple: Don’t overload your image with too much sound or too many effects. A clean, simple design with a subtle audio layer often works best.
- Match the Audio with the Message: Make sure the audio complements the mood and message of the image. If your image is meant to be calm and peaceful, avoid loud or fast-paced music that might distract from the visual.
- Focus on Audio Quality: High-quality audio makes a huge difference in the overall experience. Invest time in choosing or recording crisp, clear sound to pair with your image.
- Consider Accessibility: Make sure your content is accessible to all audiences. If possible, provide subtitles or transcripts for voiceovers, and make sure the audio can be adjusted or muted.
- Test Across Devices: Not all devices will play your image and audio in the same way. Test your multimedia image on different screens and devices to ensure it looks and sounds great everywhere.
- Optimize for Sharing: When preparing your multimedia image for sharing, make sure the file size is manageable without sacrificing quality. This will help ensure your content loads quickly and smoothly on various platforms.
By following these best practices, you can create multimedia images that are visually appealing, engaging, and professional. The goal is to enhance the user experience, not overwhelm it, so always strive for balance between your image and audio elements.
Also Read This: Learn If Shutterstock Is Exclusive
FAQ
Here are some common questions and answers about adding audio to images:
- Can I add music to any image? Yes, you can add music or audio to any image as long as the editing tool you are using supports audio integration. Most popular image editing tools have this feature.
- Do I need professional software to add audio to an image? Not necessarily. There are plenty of easy-to-use tools like Canva, Kapwing, and Adobe Spark that allow you to add audio to images without professional skills or software.
- What file format should I use for audio? The best file formats for audio are WAV, MP3, or AAC. These formats are compatible with most image editing software.
- How long should the audio be? The length of the audio depends on the duration of the image. If the image is displayed for a few seconds, a short sound effect or snippet of a song works best. For longer images, you can use a longer piece of music or a looping effect.
- Can I use copyrighted music with my images? It's important to use music that you have permission to use, whether it’s royalty-free music or music that you’ve created yourself. Copyrighted music can result in your content being removed or flagged online.
If you have any more questions or need help with adding audio to images, feel free to reach out or check out more tutorials on the topic!
Conclusion
Adding audio to an image is a great way to enhance your content, making it more engaging and impactful. By following the right steps, choosing appropriate audio, and using the right tools, you can create multimedia images that captivate your audience. Whether you're aiming to tell a story, evoke emotions, or simply make your images stand out, audio adds an extra dimension that visuals alone can't achieve. With a little practice and creativity, you'll be able to create multimedia content that is professional and effective. So, go ahead and experiment with audio and images to bring your creations to life!


