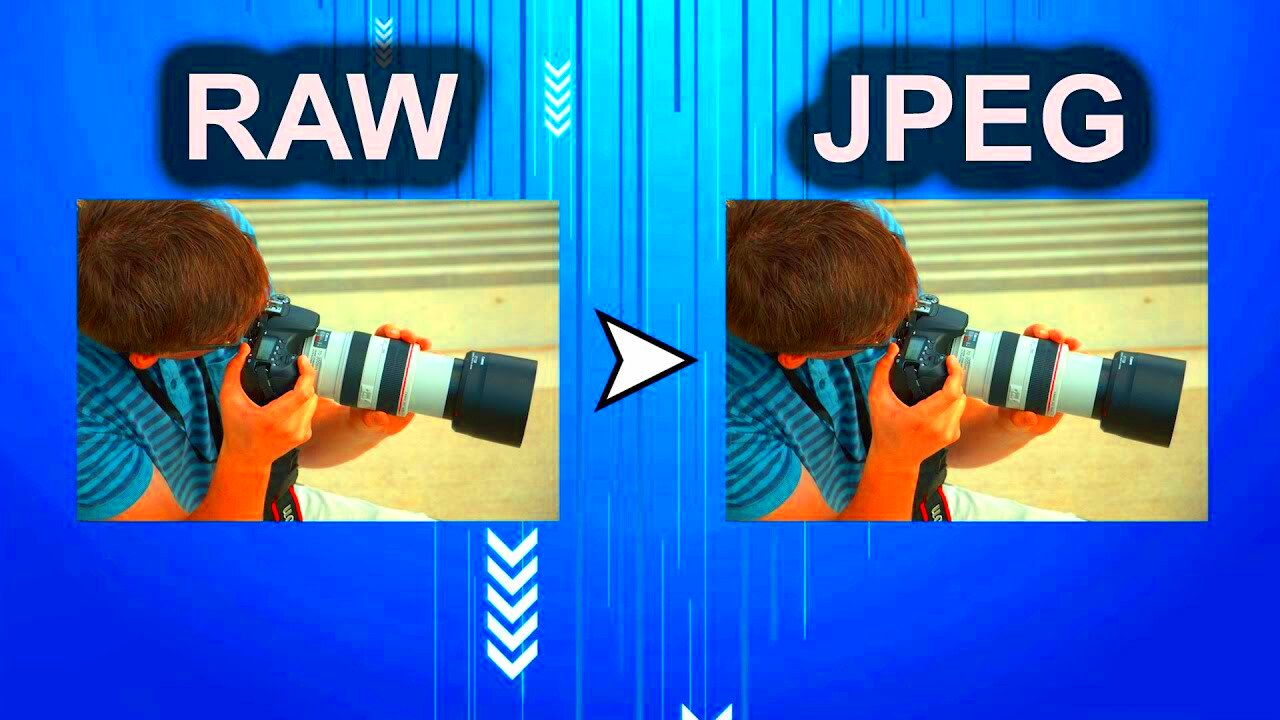
If you're new to photography or image editing, you may have heard of RAW and JPEG file formats. These are two of the most common formats used for storing images, but they serve different purposes and have distinct characteristics. Understanding the difference between them is essential if you're planning to edit your photos or share them online. In this section, we'll take a look at what RAW and JPEG are, and why they matter to both photographers and casual users alike.
RAW files are unprocessed images straight from the camera sensor, capturing more detail and information, allowing for extensive editing later. On the other hand, JPEG files are compressed images, making them smaller and more convenient for sharing but losing some of the original image data in the process. Knowing when and why to use each format can make a big difference in how you handle and share your photos.
Why Convert RAW Images to JPEG

RAW images are ideal for professional photographers and anyone who wants complete control over their image editing. However, RAW files are large and often impractical for everyday use. This is where converting RAW images to JPEG comes in. Here's why you might want to make the switch:
- Smaller File Sizes: JPEG files are significantly smaller than RAW files, which makes them easier to store, share, and upload online.
- Faster Loading and Sharing: Due to their smaller size, JPEG images load faster and are easier to share on social media, websites, or via email.
- Standard Compatibility: JPEG is widely supported across all devices, platforms, and software, so you won't run into compatibility issues.
- Convenience: JPEG images are ready to use right away without the need for further editing or processing, making them ideal for quick sharing or printing.
By converting RAW images to JPEG, you're essentially making your photos more accessible and easier to manage, while still maintaining decent quality. While you lose some flexibility in editing, for most purposes, JPEG is a great choice.
Also Read This: How Long to Grow a Successful YouTube Channel
How RAW Images Differ from JPEG

RAW and JPEG are fundamentally different in how they store image data, which affects their quality, file size, and editing flexibility. Here's a breakdown of the key differences between these two formats:
| Aspect | RAW | JPEG |
|---|---|---|
| File Size | Large, as they contain unprocessed image data | Smaller due to compression |
| Image Quality | High quality with more detail and color depth | Lower quality, some detail is lost due to compression |
| Editing Flexibility | Allows for extensive post-processing without losing quality | Less flexibility, as compression reduces the ability to adjust details |
| Compatibility | Requires specialized software to open and edit | Universal, can be opened on nearly all devices and software |
| Purpose | Used for professional photography and advanced editing | Used for everyday photos, quick sharing, and online use |
In summary, RAW files offer superior image quality and greater editing flexibility but come at the cost of larger file sizes and the need for specialized software. JPEG files, on the other hand, are smaller, easier to share, and widely compatible but lose some of the raw image data during compression.
Also Read This: how to sell photos on adobe stock
Step-by-Step Process to Convert RAW Images to JPEG
Converting RAW images to JPEG is a straightforward process, but it helps to know the right steps to ensure you get the best quality output. Whether you’re using software like Adobe Photoshop or online tools, the general process remains quite similar. Here's a simple, step-by-step guide to converting RAW files to JPEG.
- Step 1: Open Your RAW Image in an Editing Program. Most photo editing software will allow you to import RAW images directly. Ensure you use software that supports the RAW format (like Photoshop, Lightroom, or free programs like GIMP).
- Step 2: Edit the Image (Optional). Before converting, you can adjust brightness, contrast, white balance, and other settings to make the image look just right. Since RAW files contain all the data from your camera, you have more flexibility with editing.
- Step 3: Save the Image as a JPEG. Once you're happy with your edits, go to the "File" menu, choose "Save As," and select JPEG as the file format. You may need to choose the quality level for the JPEG. Higher quality means a larger file size, but better detail.
- Step 4: Adjust JPEG Settings. Many programs let you adjust compression and quality. If you want to balance file size with image quality, aim for about 80-90% quality.
- Step 5: Save and Export. After finalizing your settings, click save. Your image is now converted from RAW to JPEG and ready to use.
Following these steps will help you maintain the best possible quality while converting your RAW images into a more manageable format for sharing or printing.
Also Read This: How to Edit a JPEG Image for Quality Enhancements
Using Adobe Photoshop to Convert RAW to JPEG
Adobe Photoshop is one of the most popular tools for image editing, and it offers a simple process for converting RAW files to JPEG. Here's how you can use Photoshop to convert your images:
- Step 1: Open the RAW Image in Photoshop. When you open a RAW file, Photoshop will automatically launch the Adobe Camera Raw (ACR) dialog, where you can adjust basic settings like exposure, contrast, and sharpness.
- Step 2: Adjust Your Image. Use the sliders in ACR to adjust your image as needed. Since RAW files contain more data, you can make significant changes without losing image quality. You can also make adjustments to the white balance, noise reduction, and more.
- Step 3: Click "Open" in Photoshop. Once you're happy with the adjustments, click the "Open" button to load the image into Photoshop’s main workspace for further editing.
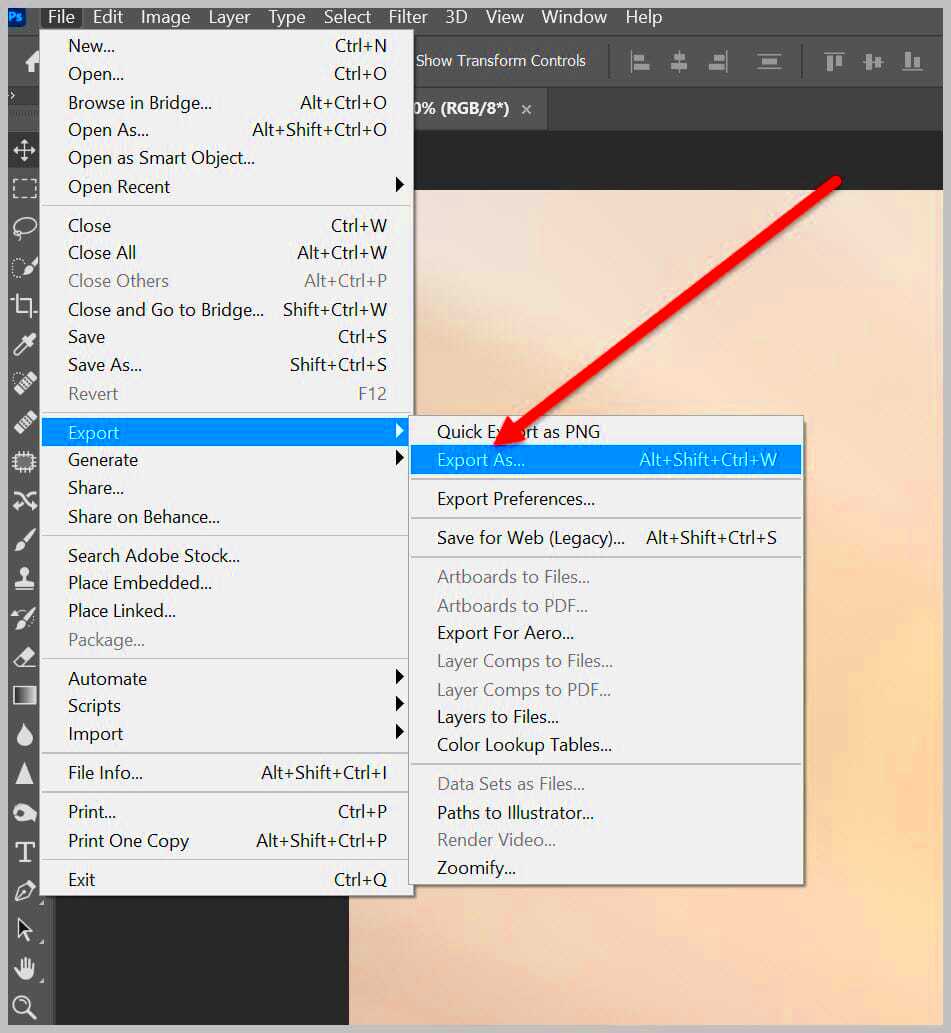
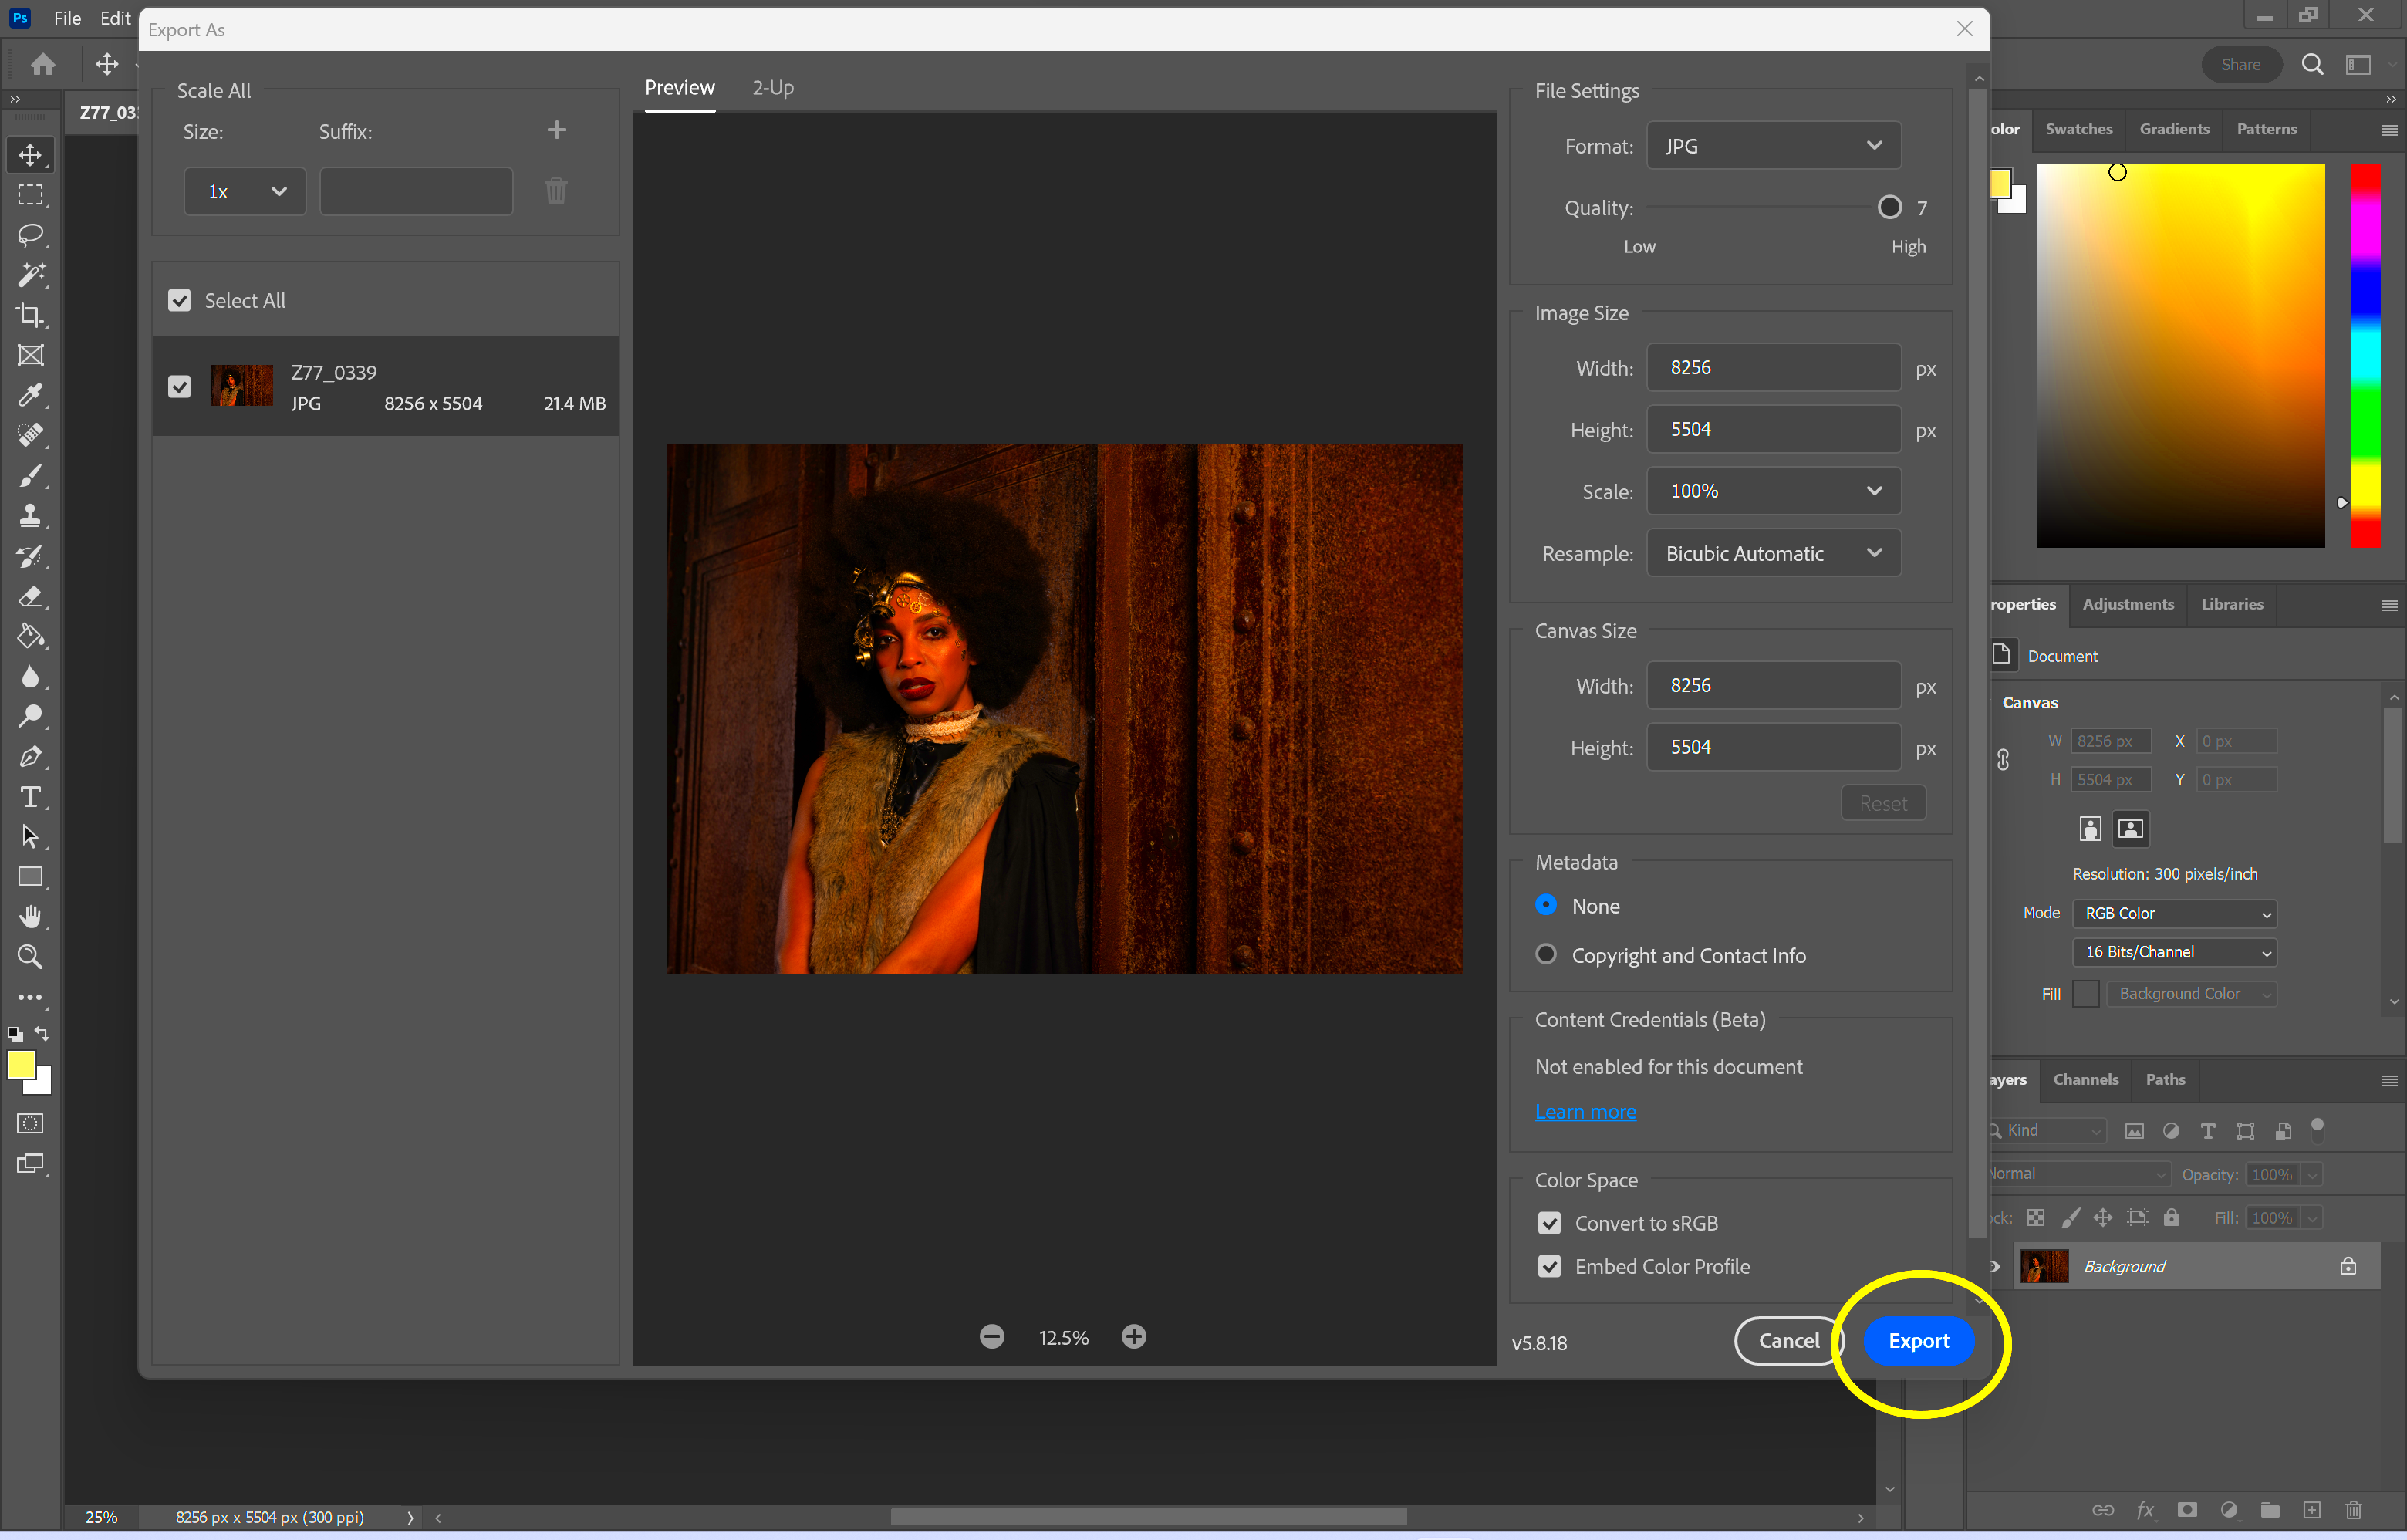
- Step 4: Save as JPEG. After finishing any edits in Photoshop, go to "File," then "Save As." Choose JPEG from the file format options. You'll be prompted to choose a quality setting for your JPEG file.
- Step 5: Select JPEG Quality and Save. Choose a quality level between 0 and 12. A quality of 8-10 is a good balance between file size and image quality. Then click "Save," and your RAW image will be converted to JPEG.
Photoshop gives you full control over the image quality, and you can make specific adjustments before finalizing your JPEG export. This is ideal for those who want high-quality results with precise editing.
Also Read This: Understanding XXL Size on iStock Photos and Image Dimensions
Converting RAW to JPEG with Online Tools
If you prefer a quick and easy way to convert RAW images to JPEG without installing software, online tools are a great option. These web-based tools are simple to use and can process images in just a few clicks. Here's how to use online converters:
- Step 1: Choose an Online Conversion Tool. There are many free online RAW to JPEG converters available. Some popular ones include Raw.pics.io, Convertio, and Zamzar. Make sure the tool supports the RAW file format you're working with.
- Step 2: Upload Your RAW File. On the website, locate the upload button and select your RAW file from your device. The tool may support various RAW formats, including .CR2, .NEF, or .ARW.
- Step 3: Select JPEG as the Output Format. Once the file is uploaded, choose JPEG as the desired output format. Some tools allow you to adjust the quality of the JPEG, so you can select a higher quality for better results.
- Step 4: Convert the Image. Click on the "Convert" button to begin the conversion process. The tool will process the RAW file and turn it into a JPEG format.
- Step 5: Download the JPEG Image. After the conversion is complete, you'll be given a download link to save the JPEG file to your device. In some cases, the tool will automatically download the file for you.
Online tools are a convenient and fast way to convert RAW images to JPEG, especially if you don't want to deal with complex software. However, keep in mind that some tools may have limitations on file size or the number of images you can convert at once.
Also Read This: Getty Images vs Unsplash: Comparing Two Platforms for Free and Premium Stock Images
Tips for Optimizing JPEG Quality After Conversion
Once you've converted a RAW image to JPEG, it’s important to ensure that the resulting image maintains high quality. JPEG compression can sometimes degrade the quality of your photo, especially if you use a high compression setting. Here are a few tips to help you optimize your JPEG quality after conversion:
- Choose the Right Compression Level: When saving your JPEG, most programs allow you to select a compression level. Avoid using too high a compression, as this reduces the quality of your image. Aim for a compression setting between 80% and 90%, which strikes a good balance between quality and file size.
- Resize Your Image Carefully: If you're resizing your JPEG, make sure to maintain the aspect ratio. Avoid making drastic reductions in size, as it can cause pixelation and loss of detail.
- Use Sharpening: After converting, applying a bit of sharpening can help bring back some of the detail that might have been lost during compression. Most editing tools, including Photoshop, have a "sharpen" option that can make your image look crisper.
- Avoid Multiple Saves: Each time you save a JPEG file, it undergoes additional compression, which can degrade the image. Try to save your image as a final version only once, to avoid unnecessary quality loss.
- Use Advanced Editing Software: If you're serious about preserving quality, consider using editing software that offers more control over the conversion process, like Adobe Photoshop. These tools allow you to adjust various parameters, such as sharpness, noise reduction, and color accuracy, for the best results.
By following these tips, you can ensure that your JPEG images maintain as much of the original quality as possible, despite the compression process.
Also Read This: How to Use YouTube for Karaoke by Turning Your Channel into a Karaoke Hub
Common Issues When Converting RAW to JPEG
While converting RAW images to JPEG is generally a straightforward process, there are a few common issues you might encounter. Understanding these problems will help you address them effectively. Let’s look at some of the most frequent challenges:
- Loss of Image Detail: Since JPEG is a compressed format, it discards some image data to reduce file size. This means that fine details, especially in shadows and highlights, can get lost during conversion. To minimize this, be mindful of the quality settings when converting.
- Color Shifts: JPEG images might show slight changes in color after conversion due to compression. This is especially noticeable in highly saturated images. To avoid this, use the highest quality conversion settings and ensure your color profile is set correctly.
- File Size Issues: While JPEG files are generally smaller than RAW files, they can still become quite large depending on the quality setting used. If you need to share or store your images, try adjusting the quality level to get a balance between image quality and file size.
- Compression Artifacts: When you compress an image too much, you may notice visible artifacts like blurring or blocky patterns in areas with lots of fine detail. To prevent this, avoid over-compressing the image during conversion, and consider using a software that offers better compression algorithms.
- Software Compatibility: Not all photo editing software handles RAW files the same way. Some may not preserve as much detail during the conversion, leading to a loss of image quality. If you're working with critical images, ensure that the software you use supports high-quality conversion.
Knowing about these common issues will help you take the necessary precautions and ensure that your images look their best after conversion.
Also Read This: Cropping Images in Blender: A Tutorial
FAQ
Here are some frequently asked questions about converting RAW images to JPEG, which may help clear up any doubts or concerns:
- What is the difference between RAW and JPEG? RAW files contain unprocessed image data directly from your camera's sensor, providing more detail and flexibility for editing. JPEG files are compressed versions of images, making them smaller and easier to share, but they lose some image quality in the process.
- Do I lose quality when converting RAW to JPEG? Yes, JPEG compression reduces the amount of image data, which can result in a loss of detail and some image quality. However, with proper settings, this loss can be minimal and may not be noticeable in everyday use.
- Can I convert RAW to JPEG without losing quality? While some quality loss is inevitable when converting to JPEG, you can minimize it by choosing a lower compression setting and making adjustments in an editing program before conversion.
- How do I avoid JPEG artifacts? To avoid artifacts, don’t compress your JPEG images too much. Use the highest quality setting that still provides a reasonable file size. You can also experiment with other file formats, such as PNG or TIFF, if you need higher quality for printing or professional use.
- Can I convert RAW files to JPEG in bulk? Yes, many software programs like Lightroom or online converters allow you to batch process RAW files, converting them to JPEG in a single operation. This is especially useful when you have many images to process at once.
- What is the best software for converting RAW to JPEG? Adobe Photoshop and Lightroom are two of the most popular tools for converting RAW images to JPEG, offering high-quality conversion options. Other free programs, like GIMP and RawTherapee, are also good alternatives.
Conclusion
Converting RAW images to JPEG is a simple yet important process for photographers and casual users alike. RAW files provide high-quality images with extensive editing potential, but they are often too large and cumbersome for everyday use. JPEG, on the other hand, offers a more accessible, compressed format that is perfect for sharing, printing, and uploading online.
By following the right steps, using tools like Adobe Photoshop or online converters, and optimizing your images after conversion, you can maintain high image quality while benefiting from the smaller file size of JPEG. Whether you are a professional photographer looking to streamline your workflow or a beginner wanting to share photos easily, understanding the differences between these formats and how to convert them effectively will enhance your overall image management experience.
In the end, the decision to convert RAW to JPEG depends on your specific needs—whether it's for convenience, storage, or compatibility. With the right approach, you can convert your RAW images to JPEG without sacrificing too much quality, making them easier to work with and share across different platforms.


