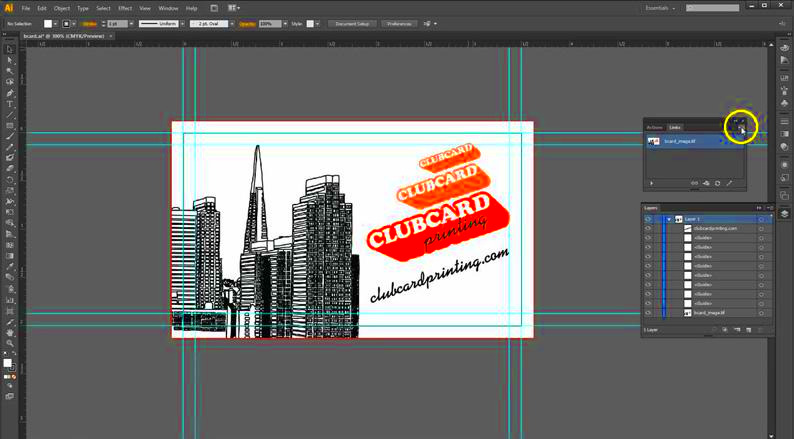
Adobe Illustrator is a powerful tool used by designers to create professional graphics, illustrations, and artwork. When working on projects, you often need to incorporate images from external sources. While Illustrator allows you to either link or embed images, embedding is often the preferred method. Embedding images means that the image data becomes a permanent part of your Illustrator file, eliminating the need for external links. This ensures that your designs remain intact, no matter where they are accessed or shared. In this guide, we’ll explore why and how embedding images in Illustrator is crucial for smooth design integration.
Why Embedding Images is Important in Adobe Illustrator
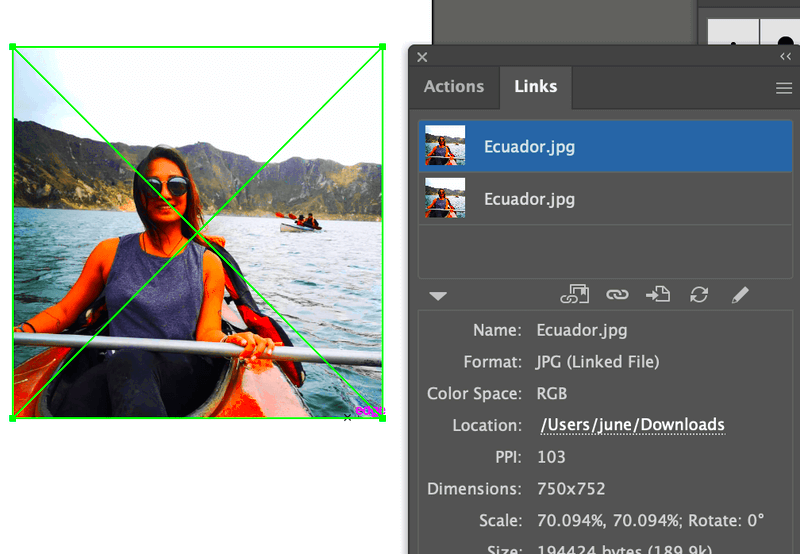
Embedding images in Adobe Illustrator provides several key advantages that make it an essential technique for designers. When you embed an image, it becomes a part of the Illustrator file, and you no longer need to worry about missing or broken links. Here are a few reasons why embedding is important:
- Better File Management: When you embed an image, you don’t have to manage separate image files. This makes organizing your projects much easier.
- Increased Compatibility: Embedded images are always available, even if the Illustrator file is opened on a different device or by someone else.
- Prevent Missing Files: If an image is linked rather than embedded, there’s a risk of the image not displaying if the link is broken or the file is misplaced.
- Ensured Quality: Embedding prevents potential issues with image resolution and quality when sharing your project.
In short, embedding images enhances the stability and portability of your design files, making your workflow much more reliable and efficient.
Also Read This: Fast Track: Unlocking the Secrets to Fast Shipping on AliExpress
Step-by-Step Guide to Embed Images into Adobe Illustrator
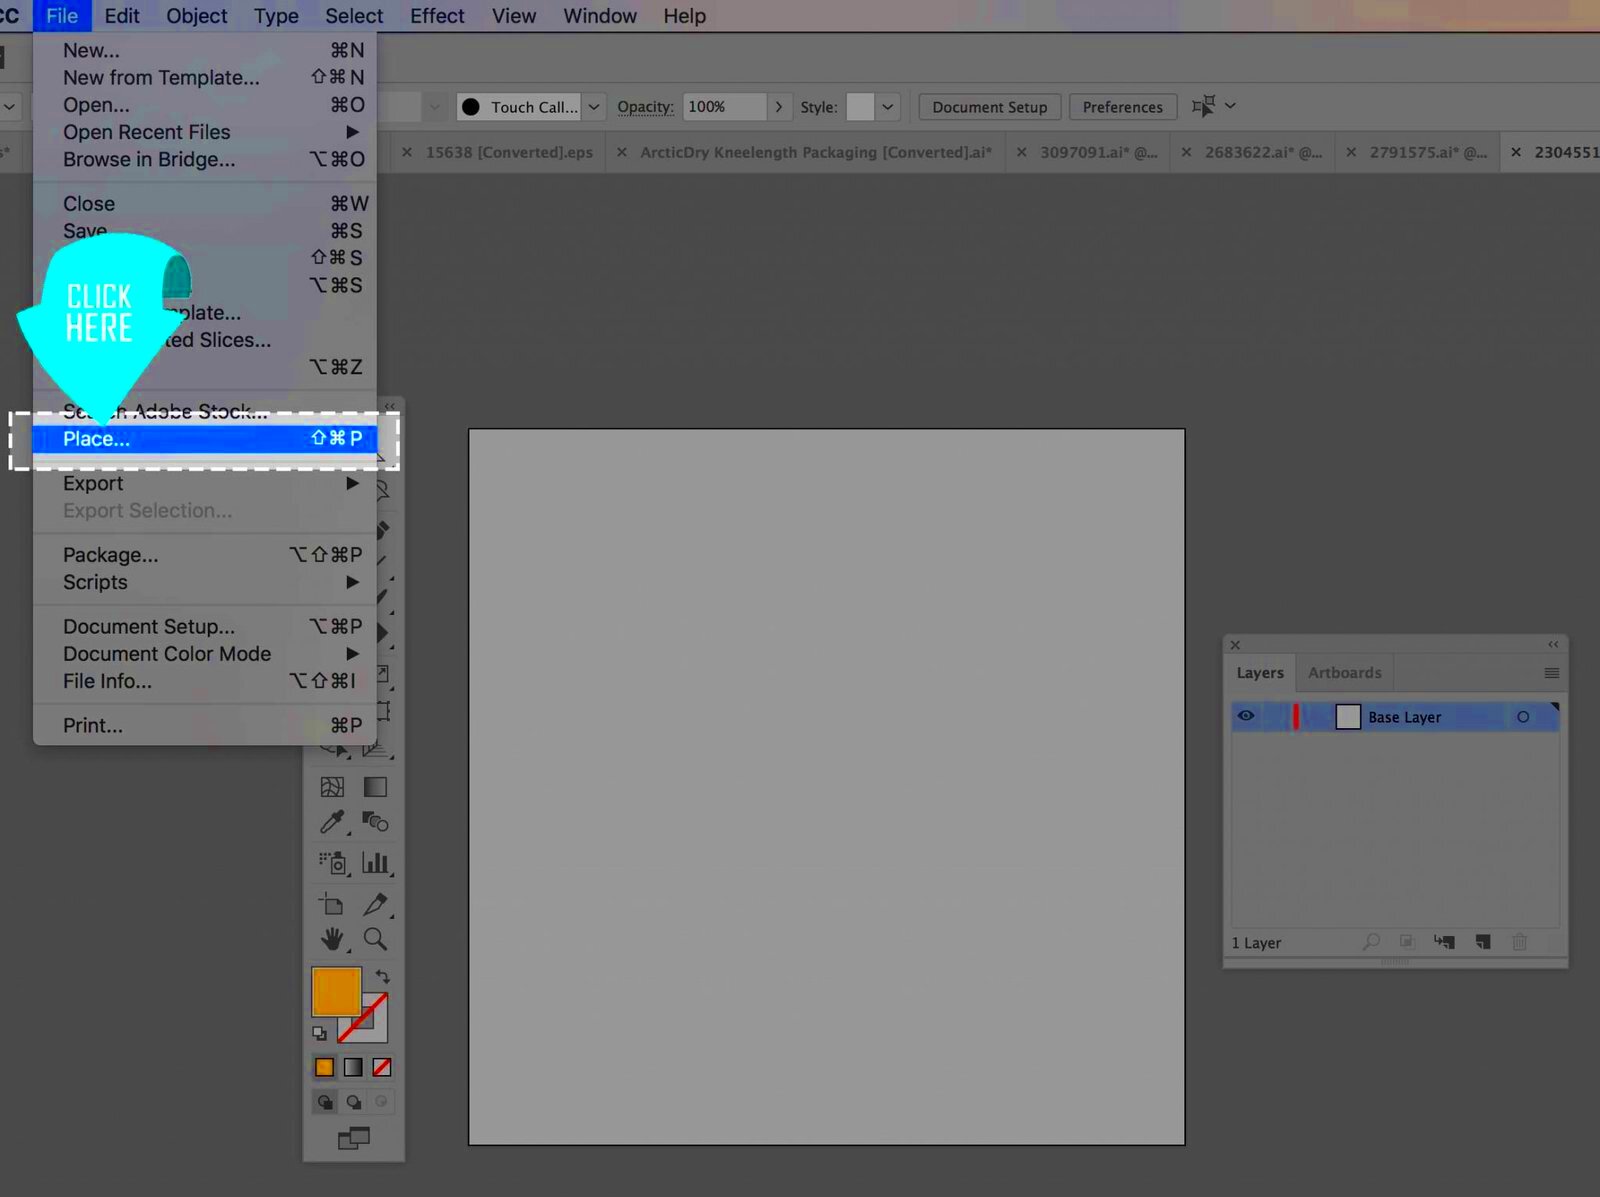
Embedding images into your Adobe Illustrator project is a straightforward process. Here’s a simple, step-by-step guide to help you embed images correctly:
- Open Your Illustrator Document: Start by opening the project where you want to embed the image.
- Place the Image: Go to the "File" menu, select "Place", and choose the image file you want to embed.
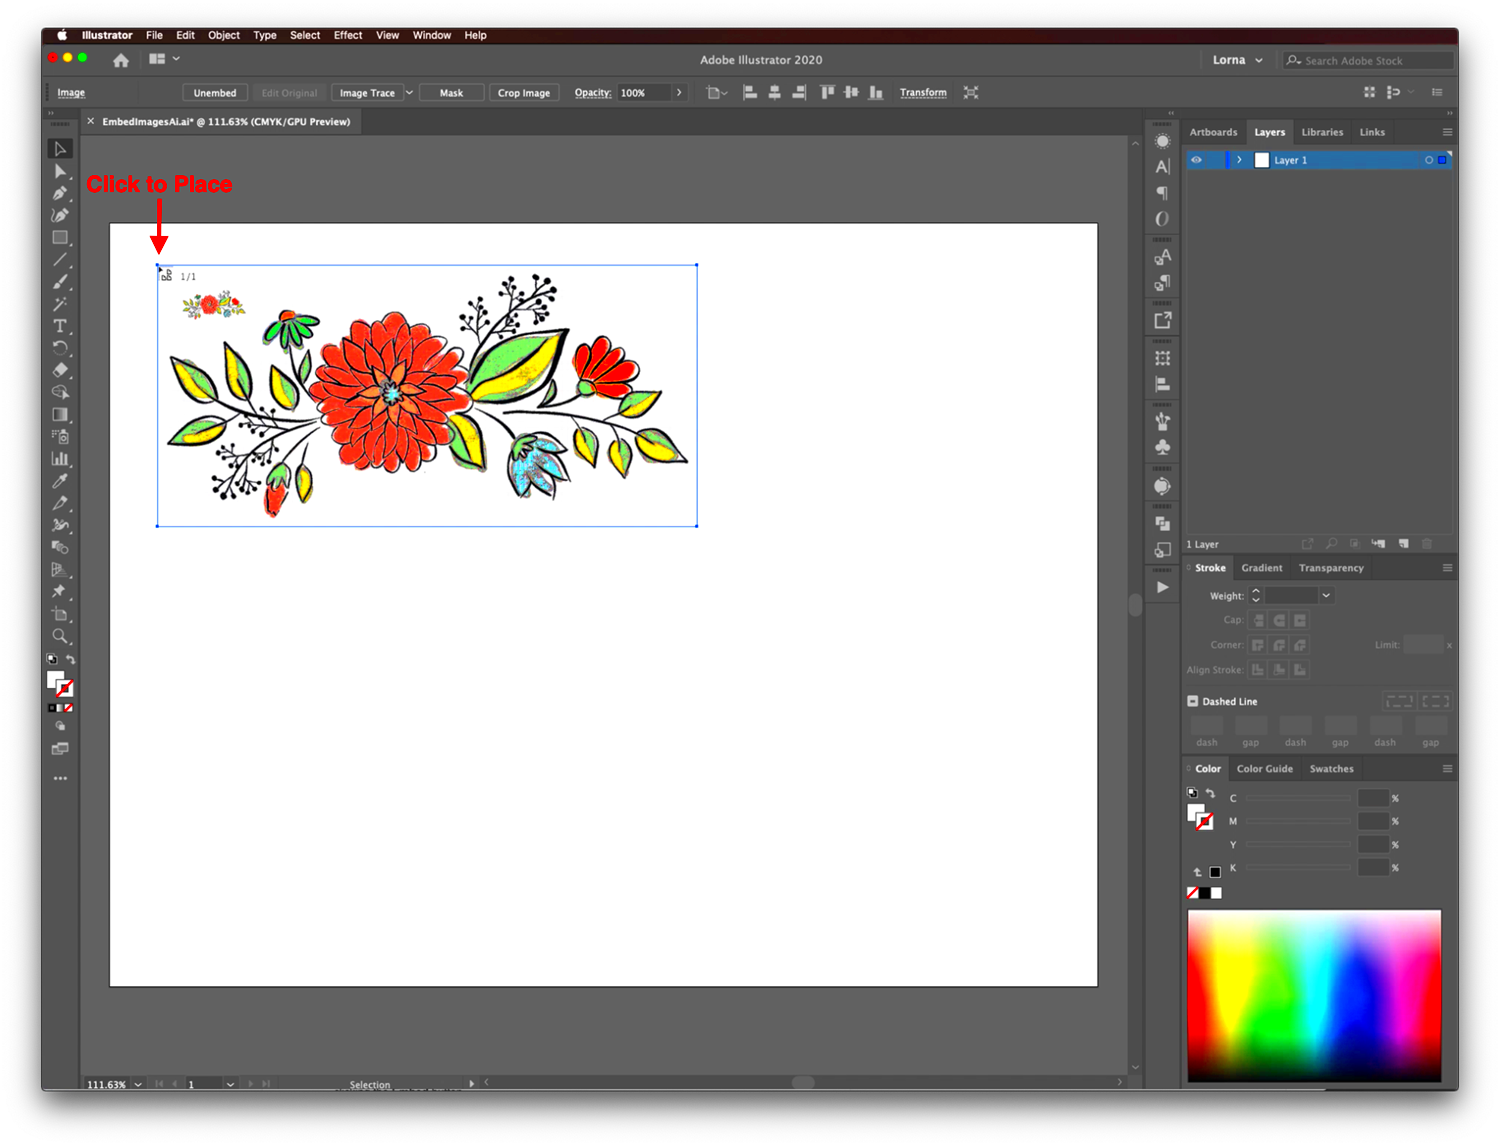
- Choose to Embed the Image: Once the image is placed, a dialog box will appear. Make sure to check the "Embed" option before clicking OK.
- Resize and Position the Image: Once the image is embedded, you can resize and position it as needed within your design.
- Save Your File: Finally, save your Illustrator document. The image is now part of your file and will be accessible whenever you open it, regardless of where the image was originally stored.
That's it! By following these simple steps, you can quickly embed any image into your Adobe Illustrator document, ensuring that your design is self-contained and easy to share or print.
Also Read This: How to Export Only the Background Image Without Text in Figma
Choosing the Right Image Formats for Embedding
When embedding images into Adobe Illustrator, it’s important to choose the right file format. The image format determines how well the image will integrate into your design, the quality of the final output, and even the size of your file. Illustrator supports a variety of
- PNG (Portable Network Graphics): PNG is a popular format for web design, especially when you need transparent backgrounds. It’s great for logos, icons, and images with sharp edges. The format supports lossless compression, meaning no image quality is lost.
- JPEG (Joint Photographic Experts Group): JPEG is ideal for photographs and images with complex color gradients. It uses lossy compression, which reduces file size but can lower image quality, especially at higher compression levels.
- TIFF (Tagged Image File Format): TIFF is a high-quality format often used in print design. It supports both lossless compression and high bit depth, making it perfect for images that require excellent detail and color accuracy.
- SVG (Scalable Vector Graphics): SVG is a vector format that allows you to scale the image without losing quality. While not often used for photographs, it’s excellent for logos, icons, and other vector-based designs.
Each format has its own strengths and is suited for different types of projects. Consider the needs of your design—whether you require high resolution, transparency, or smaller file sizes—and choose the image format that best meets those requirements.
Also Read This: Building a Successful Portfolio on Getty Images: Tips for Capturing Market Demand
How to Link vs Embed Images in Adobe Illustrator
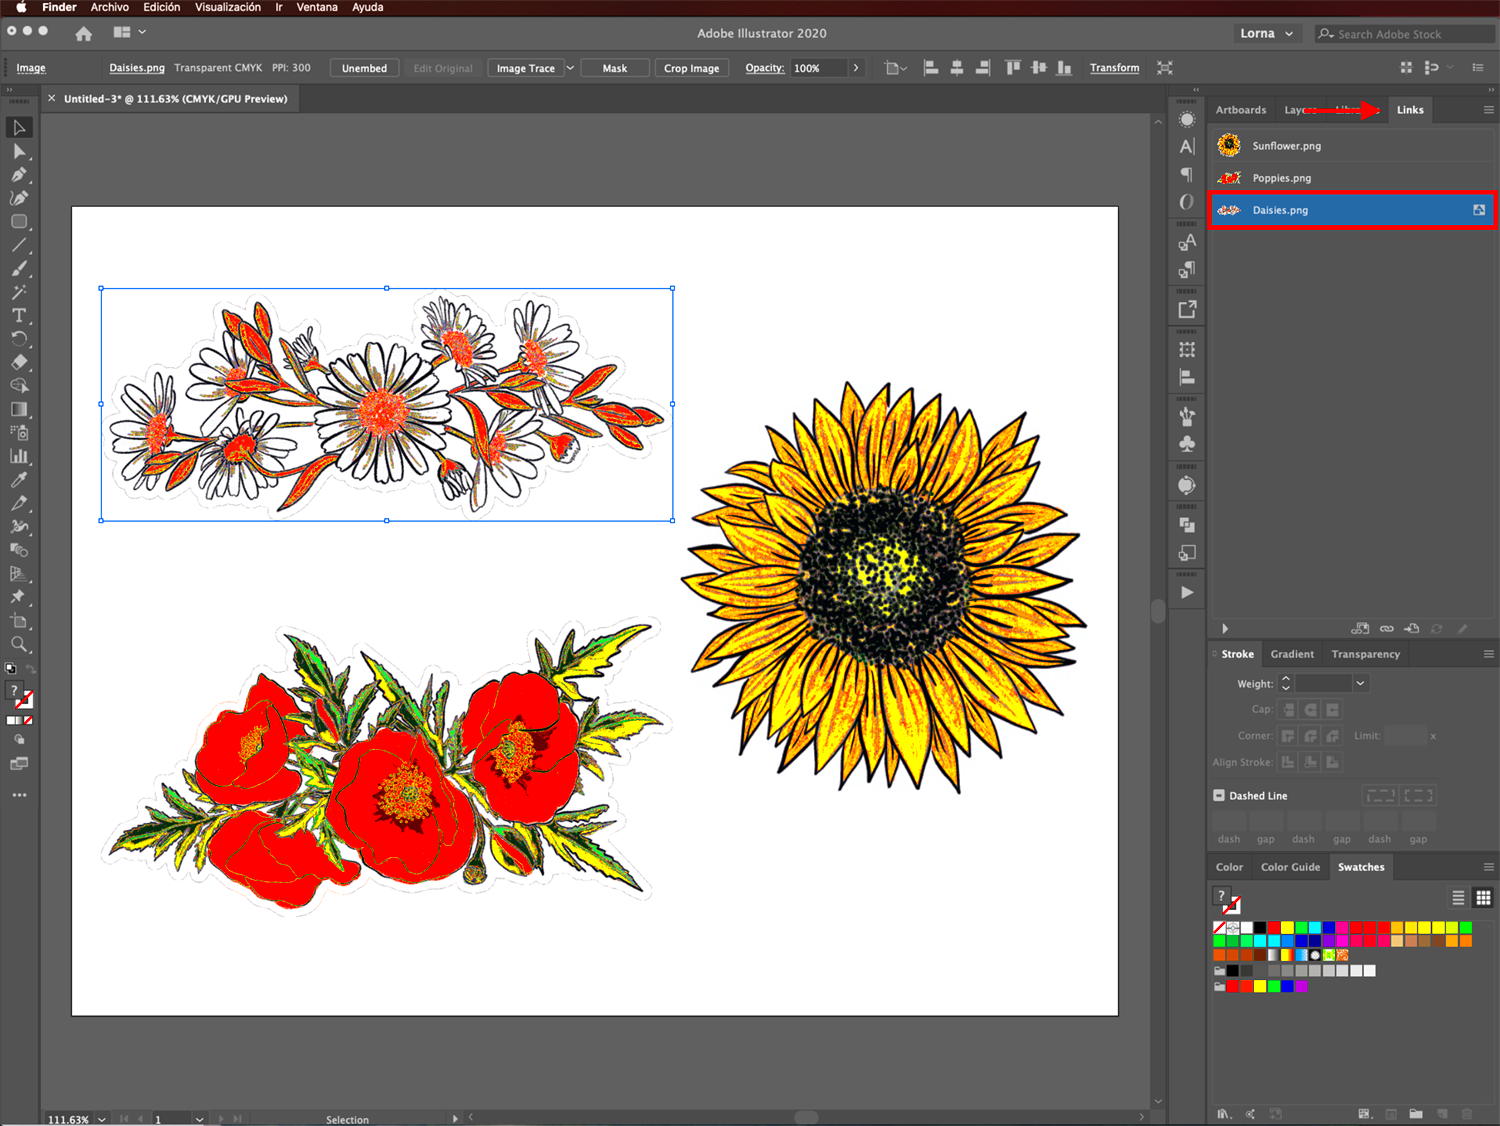
In Adobe Illustrator, you can either link or embed images. While both methods allow you to include external images in your design, they differ in how the images are stored and managed. Let’s take a closer look at the differences between linking and embedding, and when you should use each method:
| Method | Linking | Embedding |
|---|---|---|
| File Size | Smaller file size since the image remains external. | Larger file size because the image is included within the file. |
| Portability | If the linked image is missing, it won’t display in the design. | Always accessible regardless of where the file is opened. |
| File Management | You must manage external image files separately. | No need to manage external files; everything is contained in one Illustrator file. |
| Image Quality | Quality remains intact as long as the link is valid. | Quality can be affected by image resolution and compression when embedding. |
When to use linking: If you are working with large images or if you need to keep the Illustrator file size smaller, linking is a better option. However, ensure that the linked files are always accessible, especially when sharing your project.
When to use embedding: Embedding is ideal when you need to ensure that the image is always available, no matter where the file is opened. It’s perfect for finalizing designs for print or when sharing your work with others.
Also Read This: How to Change Image Aspect Ratio
Troubleshooting Common Issues When Embedding Images
While embedding images into Adobe Illustrator is generally a straightforward process, you may run into a few issues along the way. These problems can affect the quality, size, and usability of your embedded images. Let’s explore some common problems and how to troubleshoot them:
- Image Resolution Issues: Sometimes, when you embed an image, its resolution might not be high enough for print-quality projects. To avoid this, always check the image resolution before embedding. A resolution of 300 DPI (dots per inch) is recommended for print, while 72 DPI is sufficient for web designs.
- File Size Too Large: Embedding high-resolution images can lead to large file sizes, which may slow down Illustrator or make sharing difficult. To fix this, you can reduce the resolution of the image or choose a different format, like PNG or JPEG, which can reduce the size without compromising quality too much.
- Transparency Not Showing: If you embed an image with a transparent background (such as a PNG) and the transparency isn’t displaying correctly, check your layer settings in Illustrator. Ensure that the layer is set to be visible and that the transparency grid is activated for clarity.
- Missing Images after Opening File: If the image appears missing after opening a file that has embedded images, make sure that the embed process was completed successfully. Sometimes, embedded images can be accidentally omitted, especially in older versions of Illustrator.
By knowing how to troubleshoot these common issues, you can keep your design process smooth and avoid frustration. Always double-check your images before embedding them, and ensure that everything looks perfect in your final file.
Also Read This: Step-by-Step Guide to Posting an Image on Brightspace
Best Practices for Organizing Embedded Images in Illustrator
When working with embedded images in Adobe Illustrator, organizing them efficiently is essential for maintaining a smooth workflow. Proper organization not only saves you time but also helps prevent mistakes, especially when you’re dealing with multiple images or complex designs. Here are some best practices to help you stay organized:
- Use Layers to Group Images: Place each image on its own layer or group related images together. This makes it easier to select and manipulate images without accidentally moving other elements in your design.
- Label Your Layers: Name your layers and image groups based on the content or purpose of the images. For example, if you have product images, name the layers "Product 1," "Product 2," and so on. This simple practice helps avoid confusion.
- Embed Images as You Work: Avoid leaving images unembedded as you work on your design. Embed images as soon as you place them to prevent missing files and maintain the integrity of your design.
- Organize Your Files with Folders: Keep your images and project files organized in well-labeled folders. This ensures you can easily locate and access any images you might need in the future, especially for revisions or additional projects.
- Check Image Resolution: Ensure that all images you embed are of appropriate resolution for your project. If you’re working on a print design, make sure your images have at least 300 DPI to avoid pixelation.
By following these best practices, you can improve the efficiency of your design process and keep your Illustrator projects organized, making it easier to manage and edit your work in the long run.
Also Read This: Enhancing Image Transparency in Google Slides
How to Manage Large Files with Embedded Images
Embedding high-resolution images into Adobe Illustrator can lead to large file sizes, which may slow down your computer or cause performance issues. To maintain a smooth workflow while still using high-quality images, it’s essential to know how to manage large files effectively. Here are some tips:
- Optimize Image Size Before Embedding: Before embedding an image, make sure it’s the correct size for your project. Resize large images in a photo editing software to avoid unnecessary large file sizes in Illustrator.
- Use Image Compression: When saving images in formats like JPEG or PNG, use compression to reduce file size. Just make sure the compression doesn’t negatively affect image quality, especially if you’re working on a print design.
- Break Your Design into Multiple Files: If your project becomes too large to handle, consider breaking it into smaller, manageable Illustrator files. Work on individual sections or elements of your design separately and later combine them.
- Use Linked Images for Large Files: If the file becomes too large, you may opt to link certain images rather than embedding them. This keeps the file size smaller while still allowing you to incorporate high-quality visuals.
- Clean Up Your Files Regularly: Use Illustrator’s "Save As" function to create a fresh copy of your project. This removes unnecessary data and helps reduce the overall file size.
By following these strategies, you can manage large Illustrator files more effectively, ensuring your system runs smoothly and your projects remain easy to handle.
Also Read This: How to Determine if an Image Is Copyrighted for Legal Use
FAQ
Here are answers to some frequently asked questions about embedding images into Adobe Illustrator:
- What happens if I embed an image with a low resolution? If you embed an image with low resolution, it may look pixelated or blurry, especially when printed. Always ensure your image resolution is at least 300 DPI for print projects and 72 DPI for web designs.
- Can I edit an embedded image directly in Illustrator? No, once an image is embedded, it becomes part of the Illustrator file and cannot be edited directly in Illustrator. To make changes, you would need to edit the original image in a photo editing software and re-embed it.
- How can I reduce the file size of a project with embedded images? You can reduce the file size by compressing your images before embedding them, optimizing image resolutions, or breaking your project into smaller Illustrator files. You can also use the "Save As" function to remove unused data.
- Can I embed vector images? Yes, vector images such as SVG files can be embedded into Illustrator. However, since vectors are scalable without losing quality, embedding them isn’t necessary for resizing or quality purposes.
- What’s the difference between linking and embedding an image? Linking an image keeps the file separate from your Illustrator project, meaning if the link is broken, the image won’t appear. Embedding incorporates the image into the Illustrator file itself, ensuring it stays intact regardless of where the file is opened.
If you have any more questions about embedding images in Illustrator, feel free to reach out. Understanding how to properly manage embedded images will improve your workflow and help you create better designs with ease.
Conclusion
Embedding images in Adobe Illustrator is a crucial technique for ensuring that your design files are self-contained and portable. Whether you are working on digital artwork, print designs, or any other graphic project, embedding images allows you to manage your assets more effectively and prevents issues related to missing files. By following best practices like organizing your images, choosing the right file formats, and optimizing image size, you can maintain a smooth workflow even with large or complex projects. Ultimately, embedding images provides reliability and consistency in your designs, making it easier to share, edit, and finalize your work without worrying about broken links or lost files.
