Adding a link to an image in Microsoft Word is a simple but powerful way to make your documents more interactive. This feature allows you to turn any image into a clickable element, directing your readers to a website or another part of the document. Whether you're creating reports, presentations, or newsletters, using links in images can improve navigation and enhance the overall user experience. In this section, we’ll explain why and how you should add links to images in your Word documents.
Steps to Add a Link to an Image in Word

Adding a link to an image in Word is easy and takes just a few steps. Here’s how you can do it:
- Select the image you want to add a link to. Click on the image to select it.
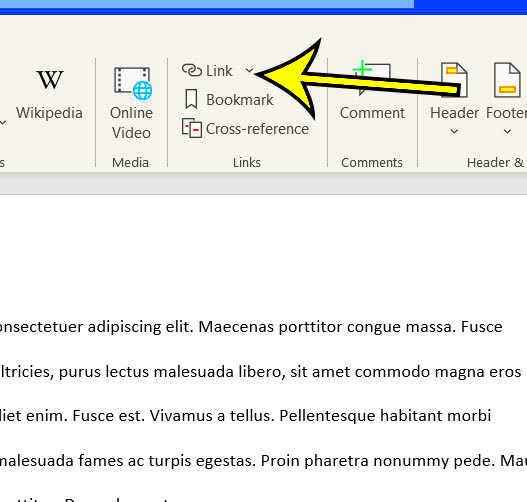
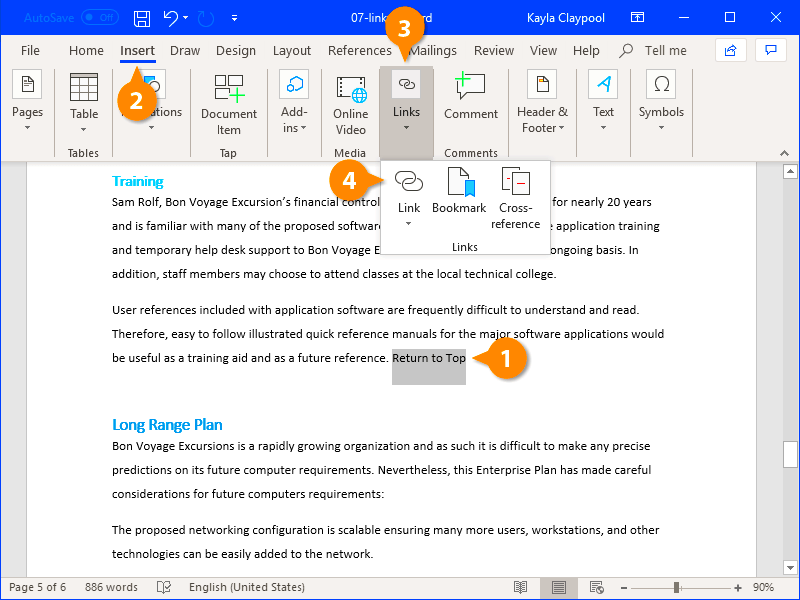
- Open the Hyperlink dialog. Right-click on the image and choose the “Link” option from the menu or press Ctrl + K (Windows) or Cmd + K (Mac).
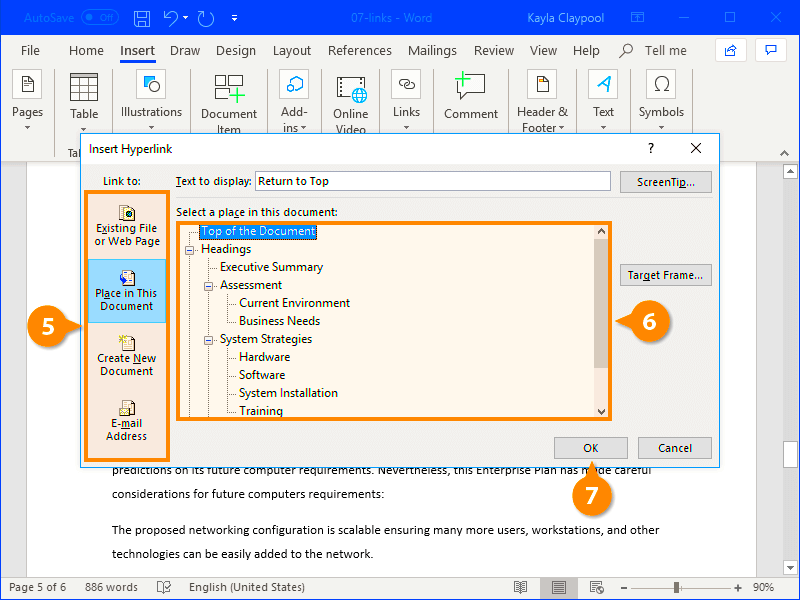
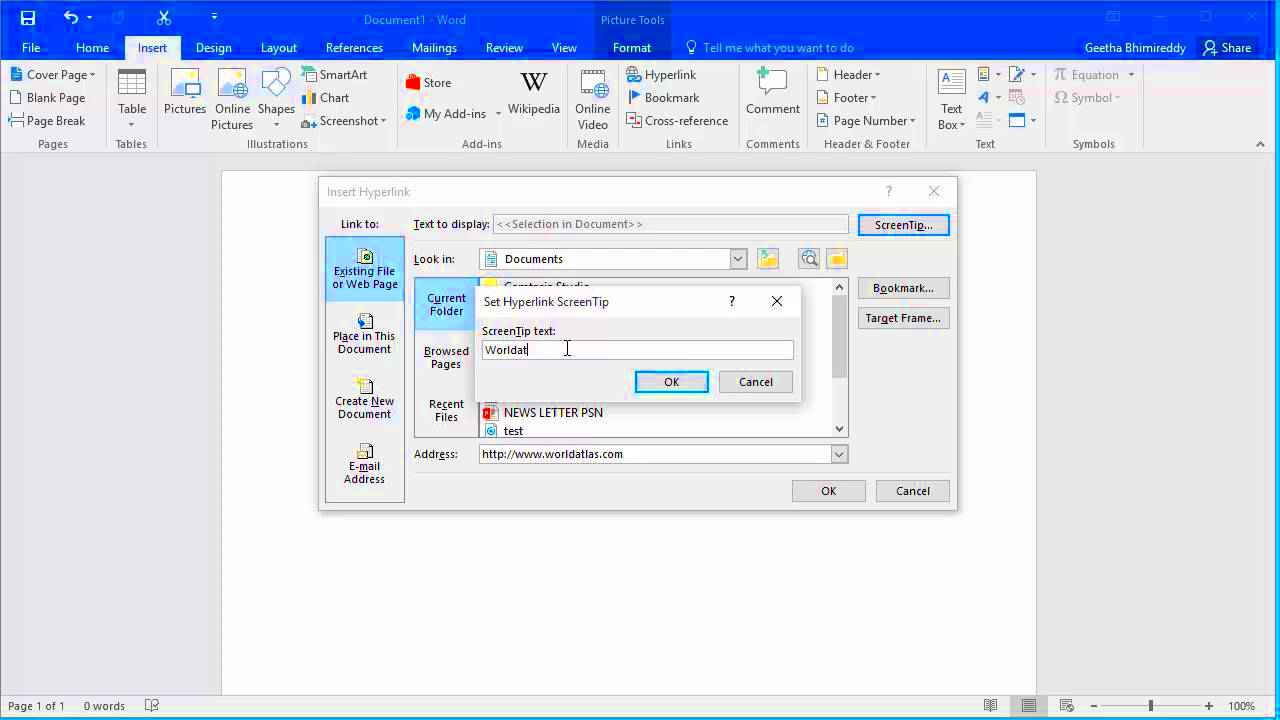
- Insert the link. In the dialog box, you’ll see a field for the URL. Enter the URL you want to link to. You can link to a webpage, an email address, or another document.
- Click OK. Once you’ve entered the URL, click the “OK” button to apply the link to the image.
That’s it! Now, your image has a clickable link attached to it. When someone clicks on the image, they’ll be directed to the URL you set.
Also Read This: Here Is Your Ultimate Guide to Download Facebook Reel Video
Why You Should Add Links to Images in Word

Adding links to images in Word is not just a technical feature; it can greatly improve your document’s functionality and make it more engaging. Here are a few reasons why you should consider using links with images:
- Improved Navigation: Links can guide the reader to additional information, making your document more interactive and easier to navigate.
- Enhanced User Experience: When your document includes clickable images, it gives the reader a more dynamic experience. This is especially useful in presentations or reports where you want to guide your audience to more resources.
- Increased Engagement: Instead of just viewing a static image, users can click on it to explore more details or visit an external website, making your content more engaging.
- Easy Access to External Resources: Links within images are a great way to reference websites, resources, or other documents without overwhelming the reader with text.
- Organization: If you have long documents, links can help organize content. You can use images with links to break up sections or lead readers to specific points in the document.
By adding links to images, you enhance your document’s usability, making it a more valuable tool for both you and your readers.
Also Read This: Chromebook Convenience: Selecting Multiple Songs on Spotify – Chromebook Edition
Common Mistakes to Avoid When Adding Links to Images

While adding links to images in Word is a straightforward process, there are a few common mistakes that can trip you up. Avoiding these mistakes will help ensure that your links function correctly and your document looks professional.
- Using incorrect or broken URLs: One of the most common mistakes is entering a URL that is incorrect or no longer works. Always double-check the link to make sure it directs to the right place.
- Forgetting to test the link: After adding the link, it’s easy to forget to test it. Be sure to click on the linked image to confirm it redirects to the correct location.
- Overloading the document with too many links: While links can be helpful, adding too many links to images can overwhelm the reader. Use them sparingly and only when they add value to the document.
- Linking to inappropriate content: Be cautious of what you link to. Avoid linking to unrelated or unreliable sources, as it can reduce your document’s credibility.
- Not providing context for the link: When linking an image, it’s helpful to provide context in the surrounding text, so readers know what the link leads to. Without this, the link can confuse the reader.
By avoiding these common mistakes, you ensure your Word document remains functional and easy to navigate for your readers.
Also Read This: How to Remove a Post from LinkedIn
How to Make Links in Word Work Properly
To ensure that links in your Word document work properly, there are a few key practices to follow. This ensures that your document remains professional, and users can navigate it with ease.
- Ensure the link is correct: Double-check that the URL is entered accurately. Mistyped URLs will lead to broken links, which frustrate readers.
- Use descriptive text for links: Instead of using vague or generic text like “Click here,” provide a description of where the link will take the reader. For example, “Visit our website for more details” is clearer and more informative.
- Check if the link is active: After inserting the link, click on the image and verify it takes you to the right destination. This will avoid any embarrassing errors.
- Use the right hyperlink format: Ensure you are using the correct format for web addresses (e.g., “http://” or “https://”). Links without these formats will not work in Word.
- Test links after converting to PDF: If you plan to save the document as a PDF, always test the links in the final PDF version to ensure they still work.
By following these tips, you can ensure that the links you add to your images in Word are functional, user-friendly, and effective at guiding readers to the right resources.
Also Read This: Transferring Images to Metal: A DIY Tutorial
How to Edit or Remove Links from Images in Word
Sometimes you might need to make changes to the links you’ve added to images, or even remove them entirely. Luckily, it’s easy to do in Word. Here’s how you can edit or remove links from images:
- Editing a link:
- Right-click on the image with the link you want to edit.
- From the context menu, select “Edit Hyperlink.”
- In the dialog box that appears, update the URL in the “Address” field to the new link you want.
- Click “OK” to save the changes.
- Removing a link:
- Right-click on the image that has the link you want to remove.
- Choose “Remove Hyperlink” from the context menu.
- The link will be removed, but the image will remain intact.
It’s important to regularly check and update your links, especially if you’ve linked to external sources that might change. By editing or removing outdated links, you keep your Word document clean and functional.
Also Read This: Anime AI Generator: Exploring the Possibilities
Tips for Using Links with Images in Word Documents
Using links with images in your Word documents can make your content much more engaging and interactive. However, it’s important to follow a few best practices to ensure your links are both effective and user-friendly. Here are some tips to get the most out of this feature:
- Use Relevant Images: Ensure the images you link to are relevant to the content and make sense with the link destination. For example, if you're linking to a product page, use an image of the product. This adds context and keeps the document focused.
- Keep it Simple: Avoid linking every image in your document. Choose only the most relevant images to avoid overwhelming the reader. Too many links can make the document feel cluttered.
- Consider Accessibility: For accessibility reasons, provide alternative text for images with links. This ensures that screen readers can properly describe the image and its link to visually impaired readers.
- Test Your Links Regularly: Before finalizing your document, always test the links to ensure they work as expected. A broken link can frustrate readers and lead to a poor user experience.
- Track Link Performance: If you're linking to external sites, consider using a URL shortening tool that offers link tracking. This allows you to monitor how often the links are clicked and measure user engagement.
- Linking to Internal Content: You can also link images to sections within the same document. This is especially useful for long documents with multiple sections, helping readers navigate more easily.
By following these tips, you can ensure that the links you add to your images not only enhance your document but also improve navigation and reader interaction.
Also Read This: Explore How to Post on 9GAG from iPhone with This Simple Method
Frequently Asked Questions
When adding links to images in Word, users often have questions. Here are some of the most common queries and their answers:
- Can I link an image to another page in the same Word document? Yes! You can link an image to any part of the document by selecting “Place in This Document” when inserting the link. This is perfect for creating a table of contents or guiding readers to related sections.
- Can I make an image open a file or email address? Absolutely. You can link an image to any file on your computer or an email address. To link to a file, choose “Existing File or Web Page” in the hyperlink dialog box. To link to an email, use “mailto:” followed by the email address.
- What happens if the image is resized after the link is added? The link will remain attached to the image, even if it is resized. However, make sure the link remains visually accessible, especially if the image gets too small.
- Can I add multiple links to one image? No, Word only allows you to add one hyperlink per image. If you want to link to multiple destinations, you’ll need to use separate images or other methods of navigation.
- What if the link destination changes? You can always edit the link. Just right-click on the image, select "Edit Hyperlink," and update the destination URL. This helps keep your document accurate and up-to-date.
Conclusion
Adding links to images in Word is a simple yet powerful way to make your documents more engaging and easier to navigate. By following the steps and tips we’ve discussed, you can create interactive content that enhances the user experience. Whether you’re linking to other parts of the document, external websites, or files, the process is straightforward and flexible. Just be mindful of best practices, such as testing your links and avoiding overwhelming your readers with too many links. Ultimately, using links with images can turn your basic Word document into a dynamic tool that improves accessibility, engagement, and usability for your audience.


