When you upload an image online, especially for professional platforms like LinkedIn, it’s crucial to ensure the image looks sharp and clear. One of the main factors affecting this quality is the
Understanding the Importance of Image Resolution

Image resolution refers to the number of pixels that make up an image. It’s essentially the detail an
Here’s why image resolution matters:
- Professional Appearance: High-resolution images help create a professional and polished image on your LinkedIn profile or posts.
- Compatibility Across Devices: A higher resolution ensures your image looks good on a variety of screen sizes, from mobile phones to large desktop monitors.
- Better User Engagement: Sharp and clear images grab attention and can increase engagement with your content.
For LinkedIn, it's essential to use images with the right resolution, ensuring they don’t appear pixelated or stretched when viewed by potential connections or employers.
Also Read This: Get to Know How Many Images Shutterstock Has
What is Image Pixel Density and Why Does It Matter?

Image pixel density refers to how many pixels are packed into a given area of the image, usually measured in pixels per inch (PPI). Higher pixel density means more pixels in the same amount of space, which results in better
Why does pixel density matter?
- Sharper Details: Images with higher pixel density are crisper and have finer details, making them more appealing, especially in professional settings.
- Better Scaling: When resized or zoomed in, images with high pixel density maintain their sharpness and clarity.
- Device-Specific Optimization: Devices like smartphones with high-resolution displays (Retina screens) require images with higher pixel density to display correctly without looking blurry.
In the context of LinkedIn, adjusting pixel density ensures that your images are displayed at their best across all devices, contributing to a strong professional image.
Also Read This: Crediting Images Correctly to Respect Copyright
Steps to Adjust Image Pixels for Optimal Quality
Adjusting image pixels to achieve optimal quality can seem daunting, but with the right approach, it’s simple. Here’s a step-by-step guide to help you adjust the pixels and resolution of your image, ensuring it looks great on platforms like LinkedIn.
Follow these steps to get started:
- Select the Right Image: Choose a high-quality image as your base. Starting with a good image ensures you don’t lose too much detail when adjusting the pixels.
- Open the Image in an Editing Tool: Use an image editing software or online tool that supports resolution and pixel adjustments, such as Photoshop, GIMP, or online pixel adjusters.
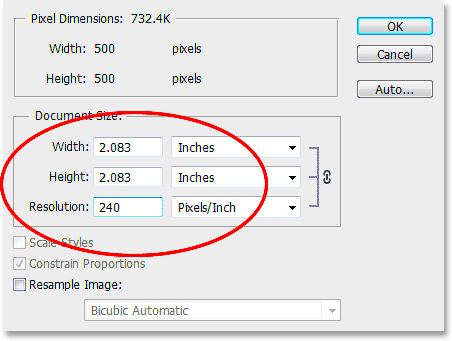
- Check the Current Resolution: Before making any changes, check the current resolution of your image. This gives you a baseline for any adjustments.
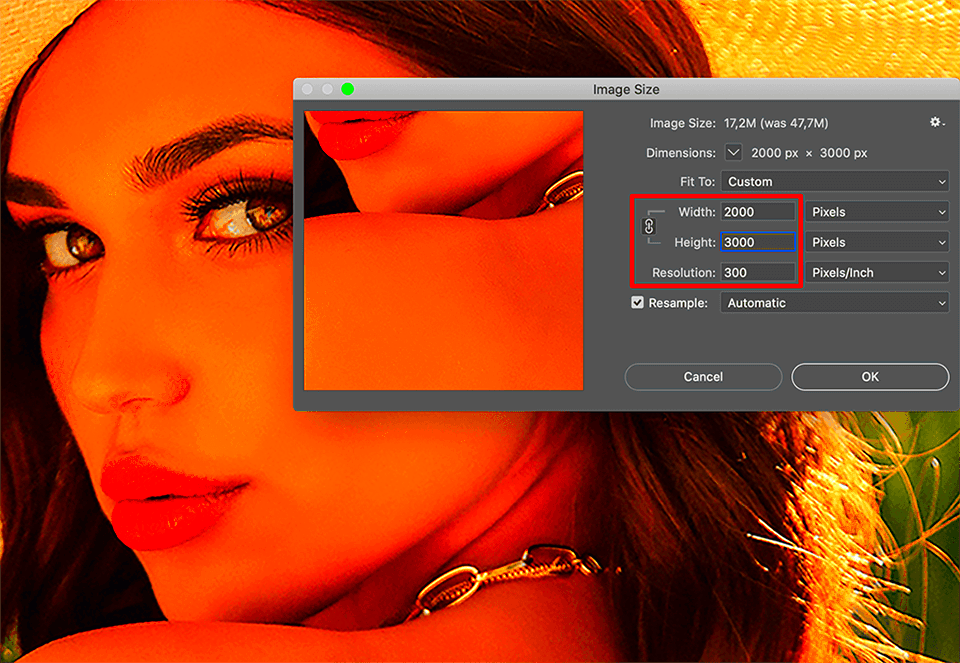
- Resize or Adjust Pixels: Use the software’s tools to resize the image or adjust the pixel count. If you need to increase the resolution, make sure the image has enough detail to prevent it from becoming blurry.
- Maintain Aspect Ratio: Ensure that you keep the image’s aspect ratio locked to prevent stretching or distorting the image.
- Save the Image in the Correct Format: Once you’ve adjusted the image, save it in the correct format (e.g., JPEG, PNG) and with the right file size. This will ensure it loads quickly on websites like LinkedIn.
By following these steps, you can easily adjust the pixels of your image to improve its quality for online use. Just remember, balance is key: you want enough resolution for clarity but not too many pixels that the image becomes unnecessarily large.
Also Read This: how to blur text in image in paint
Best Tools to Adjust Pixels and Image Resolution
There are various tools available to adjust the pixels and resolution of your image, whether you’re a beginner or an experienced user. These tools help you resize, change resolution, and improve the overall quality of your image for professional platforms like LinkedIn.
Here are some of the best tools you can use:
| Tool | Key Features |
|---|---|
| Adobe Photoshop | Industry-leading tool with advanced pixel editing, resizing, and resolution adjustment features. |
| GIMP | A free and open-source alternative to Photoshop, with similar pixel manipulation and resolution enhancement tools. |
| Canva | Easy-to-use online tool with basic pixel resizing and image optimization features, great for beginners. |
| Pixlr | Free online tool with powerful features for resizing images and adjusting pixels, suitable for quick edits. |
| Fotor | Another online tool that allows for easy image resizing, pixel adjustments, and format conversion. |
These tools are excellent for adjusting pixels and resolution to improve your image quality. Depending on your needs, you can choose a more advanced tool like Photoshop or a simpler option like Canva or Pixlr.
Also Read This: How to Convert Dailymotion Videos to MP4 Easily
Common Mistakes to Avoid When Adjusting Image Pixels
While adjusting the pixels of your image can enhance its quality, it’s easy to make mistakes that can harm the final result. Here are some common mistakes you should avoid to ensure your images look their best.
- Overstretching the Image: Resizing an image to a much larger size than its original resolution can cause pixelation and blur. Always try to maintain the original aspect ratio.
- Increasing Pixels Without Enough Detail: Increasing pixel count without having enough detail in the original image can make the image appear blurry or distorted. Ensure your original image is of high quality.
- Ignoring Aspect Ratio: When resizing an image, failing to lock the aspect ratio can stretch or squash the image, making it look unnatural. Always keep the ratio intact.
- Using Low-Resolution Images: Using a low-resolution image as the base for pixel adjustments is a bad idea. The final result will never be as sharp as needed for professional use.
- Not Compressing the Image: After adjusting the resolution, the file size can grow significantly. Make sure to compress the image to avoid slow loading times on websites and social media platforms.
By avoiding these common mistakes, you can ensure that your image adjustments enhance its quality and appearance without compromising clarity or professionalism.
Also Read This: Creating a LinkedIn Profile When You Have No Experience
How to Check the Quality of Your Image After Adjusting Pixels
After adjusting the pixels of your image, it’s crucial to evaluate its quality to ensure that the changes you made didn’t negatively affect the visual appeal. A few simple checks can help you confirm that your image is ready for use on platforms like LinkedIn, where high-quality images matter.
Here’s how you can check the quality of your image:
- Zoom In and Out: Zoom in on the image to see if it becomes blurry or pixelated. If the image looks clear even when zoomed in, it’s a good sign.
- Check for Distortion: Ensure that the image hasn’t been stretched or distorted. If the aspect ratio was locked, this shouldn’t be an issue, but it’s always worth double-checking.
- Compare with Original: Compare the adjusted image with the original to see if there is any loss in detail or sharpness. If the quality is similar or improved, you’ve done a good job.
- Test on Different Devices: Images can look different on various screens. Check your image on multiple devices (smartphone, tablet, desktop) to ensure it maintains its quality across different resolutions.
- Use Online Tools: You can use online tools like ImageOptim or TinyPNG to check the file size and optimize the image without compromising quality.
By following these steps, you can confidently assess the quality of your image after adjusting its pixels, ensuring it’s sharp and clear for LinkedIn or any other platform.
Also Read This: Do Short Anime Motivation Videos Perform Well on YouTube
Benefits of Proper Pixel Adjustment for LinkedIn Images
LinkedIn is a professional networking platform, and the images you upload are often the first thing people notice. Proper pixel adjustment plays a crucial role in ensuring that your profile and posts look polished and professional. Let’s explore the benefits of adjusting pixels correctly for LinkedIn images.
- Improved Professional Image: High-quality images help create a strong, professional first impression. Whether it’s your profile picture, cover photo, or post, clear and sharp images make you look more credible.
- Better Engagement: Well-adjusted images grab attention and encourage more interaction with your content. A crisp image stands out in a crowded feed and can attract more views and comments.
- Optimized for All Devices: Images with the right pixel density and resolution will look good across different devices. Whether someone views your profile on a mobile phone or desktop, your images will maintain their clarity.
- Faster Loading Times: Properly adjusted and compressed images load faster, which is important for user experience. Slow-loading images can discourage people from engaging with your posts.
- Brand Consistency: For businesses or individuals using LinkedIn for branding, pixel-perfect images contribute to a consistent visual identity. High-quality images help reinforce your brand's professionalism and attention to detail.
In short, taking the time to adjust the pixels of your images for LinkedIn can improve the way you present yourself and increase the overall impact of your content. Whether it’s a job application or a networking post, your image quality matters.
Also Read This: Ultimate Guide to Downloading Images from Imago Images Platform
FAQ
Q: What is the ideal resolution for LinkedIn profile pictures?
A: LinkedIn recommends using a profile picture with a resolution of 400 x 400 pixels. This size ensures that your photo appears sharp and clear across different devices.
Q: Can I resize my image without losing quality?
A: Yes, but it depends on the image’s original resolution. If you’re increasing the size significantly, some quality may be lost. It’s best to start with a high-resolution image and adjust it carefully.
Q: Why is pixel density important for LinkedIn images?
A: Pixel density (measured in PPI) is important because higher pixel density results in sharper and clearer images. LinkedIn users often view images on various devices, so images with higher pixel density look better across all screens.
Q: How do I know if my image is too large for LinkedIn?
A: LinkedIn recommends profile images of 8MB or smaller. If your image exceeds this size, consider compressing it without sacrificing quality. You can use online tools to reduce the file size if necessary.
Q: Can I adjust the pixels of an image for LinkedIn using free tools?
A: Yes, many free tools like Canva, Pixlr, and GIMP allow you to resize and adjust the pixels of your images without any cost. These tools are user-friendly and perfect for simple image edits.
Conclusion
Adjusting the pixels of your images is essential for ensuring they look their best on platforms like LinkedIn. By following the right steps to resize and enhance your images, you can maintain clarity, improve engagement, and create a professional online presence. Whether you’re adjusting the resolution for a profile picture or a post, ensuring the correct pixel density and resolution is key to achieving optimal quality.
Taking the time to use the right tools, avoid common mistakes, and check the quality after adjustments will go a long way in presenting yourself or your brand effectively. Remember, high-quality images are a reflection of your professionalism and attention to detail, so always aim for the best results when adjusting your pixels for LinkedIn or any other platform.

 admin
admin


