When creating a PowerPoint presentation, images play a crucial role in making your slides visually appealing and engaging. However, it’s essential to remember that using images requires proper attribution. Giving credit to the original creators of the images not only shows respect for their work but also helps you avoid any copyright issues. In this post, we will explore why image attribution is important and how you can correctly give credit to images in your PowerPoint presentations.
Why Giving Credit to Images is Important

Giving credit to images is important for several reasons, both legal and ethical. Here are some of the key reasons:
- Legal Protection: Copyright laws protect images, and using them without permission can result in legal consequences. Attribution helps you stay on the right side of the law.
- Respecting the Creator’s Work: Creators invest time and effort into producing images, and acknowledging their work is a way to show appreciation.
- Building Trust: Proper image credit helps maintain transparency with your audience and builds trust. When you attribute images correctly, it shows professionalism and credibility.
- Avoiding Plagiarism: Giving credit ensures that you are not passing off someone else’s work as your own, which is crucial for maintaining academic or professional integrity.
By giving credit to images, you not only comply with legal requirements but also show a strong sense of responsibility and respect for the original creators.
Also Read This: How to View Metadata of an Image for Detailed Information
Understanding Image Attribution in PowerPoint

Attribution in PowerPoint is the process of properly acknowledging the source of an image you use in your slides. It involves providing information about the creator, where the image came from, and the licensing terms associated with it. The details of
- Creator’s Name: This is the name of the person or organization who created the image.
- Source: Where you found the image. This could be a website, a photography platform, or any other place where the image was made available.
- License Type: The type of license the image is under (e.g., Creative Commons, royalty-free). This is crucial for determining whether you need to provide attribution and how it should be done.
- Link to the Image (if required): Some licenses, especially Creative Commons, may require you to provide a link to the image source or the license itself.
It’s important to check the licensing details of each image you use in PowerPoint, as different images may have different attribution requirements. Always ensure you comply with the terms specified by the image creator or platform.
Also Read This: How to Get into Getty Images for Aspiring Photographers
How to Add Image Credits in PowerPoint Slides

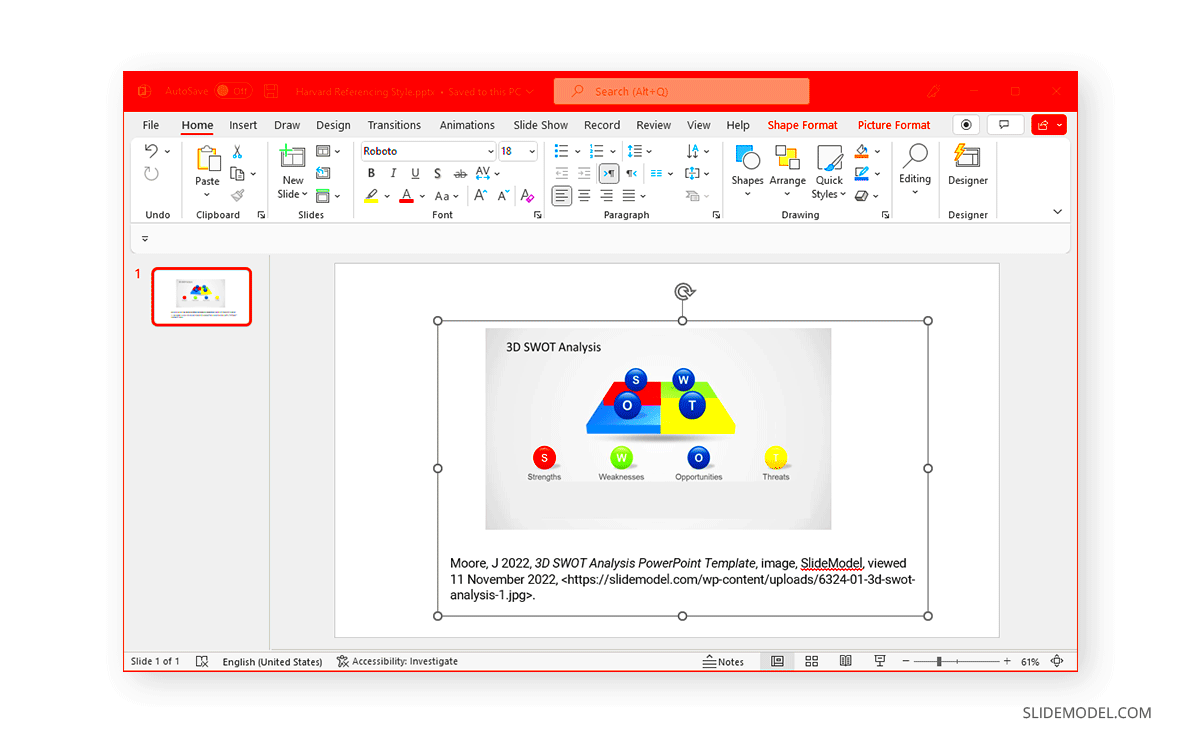
Adding image credits in PowerPoint slides is a simple but important step. Not only does it help you stay compliant with copyright rules, but it also shows respect for the original creators. There are a few different ways to add image credits depending on the style and layout of your presentation. Here are the most common methods:
- Text Box on the Slide: The easiest way to add credit is by inserting a text box on the slide itself. This can be placed at the bottom or in a corner. To do this:
- Click on the “Insert” tab.
- Select “Text Box” and draw it where you want to add the credit.
- Type the creator's name, image source, and licensing information.
- Dedicated Credits Slide: If you’re using multiple images throughout your presentation, you might want to add a dedicated credits slide at the end. This slide can include all the image credits in one place. This is especially helpful for presentations with many images.
- Hyperlinking the Source: If the image source requires a link, you can hyperlink the creator's name or the source URL in your image credit. Simply select the text and click on the “Insert” tab, then select “Link” to add the URL.
Be sure to make the credits legible without distracting from the content of your slides. The font size should be small but still readable, and the color should contrast with the background.
Also Read This: Adding Image Credits in PowerPoint Presentations
Different Ways to Provide Image Attribution in PowerPoint
There’s no one-size-fits-all way to provide image attribution in PowerPoint, but there are a few methods you can use depending on the image source and the type of license. Below are the different ways to give proper credit:
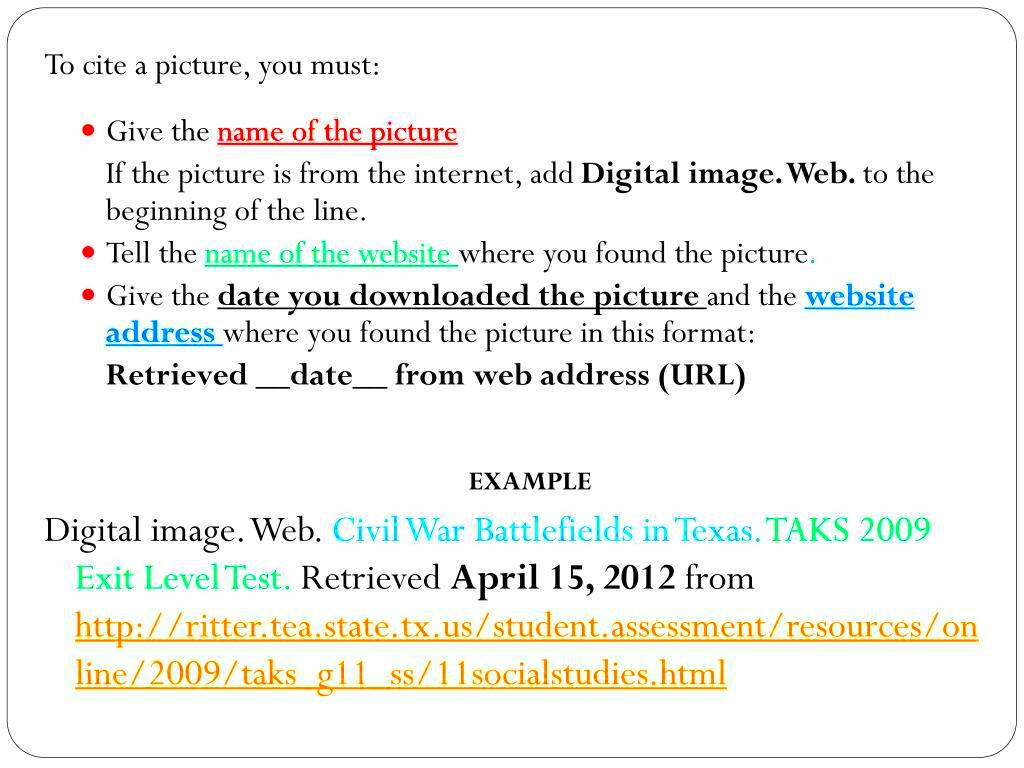
- Standard Text Attribution: For most images, you can simply write the creator's name and the source. For example, "Photo by John Doe on Unsplash." If the image is under a Creative Commons license, include the specific license type, like "CC BY 4.0."
- Hyperlinks for Online Sources: If you found the image on a website like Flickr or a stock image platform, you may need to include a clickable link to the image. For example, "Image courtesy of Pexels" with a hyperlink to the image page.
- Footer Credit: For a more seamless design, you can place image credits in the footer of the slide, especially if you're using a uniform design throughout your presentation. This allows you to give credit without cluttering the slide itself.
- Watermarking: In some cases, adding a small watermark with the creator's name or source on the image itself can also be a good way to give credit. This method is most effective for images that you’ll be distributing or using in public presentations.
When in doubt, always check the image’s licensing requirements. If it's a Creative Commons image, the attribution will likely need to follow a specific format, including the creator's name, source, and license type.
Also Read This: People Flashing Identity Cards Across the USA Captured in Photos
Tips for Properly Citing Images in PowerPoint
Properly citing images in PowerPoint is essential for both respecting copyright and ensuring your presentation looks professional. Here are some tips to help you get it right:
- Be Consistent: Use the same format for image credits throughout your presentation. This ensures a clean, uniform look and avoids confusion. For instance, if you list creator names and sources at the bottom of each slide, do the same for every image.
- Provide Complete Attribution: Don’t leave out important information like the creator's name, source, or license type. Omitting even one part of the attribution can lead to copyright issues.
- Check License Terms: If the image is licensed under Creative Commons or a similar license, make sure you follow the specific attribution rules. Some licenses may require you to mention if the image has been modified or provide a link to the license.
- Keep It Legible: The credit text should be legible but not overpowering. Keep the font small but readable, and choose a color that contrasts well with the slide background.
- Use the Notes Section: If you don’t want to clutter the slides with image credits, you can add the attribution information in the notes section of the slide. This is helpful if you're presenting in person and don’t want to distract from your visuals.
Following these tips ensures that your image credits are accurate, professional, and in compliance with copyright laws. It also shows that you value the work of the creators whose images you use.
Also Read This: how can i find out where an image came from
Common Mistakes to Avoid When Giving Image Credit
Giving proper credit to images is important, but it's easy to make mistakes if you're not careful. To ensure you avoid any pitfalls, here are some common mistakes to watch out for:
- Forgetting to Add Credits: One of the biggest mistakes is not adding any credit at all. This can lead to copyright issues and shows a lack of respect for the image creators. Always remember to include attribution if the image requires it.
- Incorrect Attribution Format: Different licenses and image sources have specific attribution requirements. Failing to follow these can lead to legal complications. For example, a Creative Commons license might require you to include the specific license type, like "CC BY 4.0" along with the source.
- Overcrowding the Slide: While credits are important, placing them in a way that detracts from the slide’s message can be a mistake. Avoid putting large blocks of text in the middle of your slides, and instead, place them in corners or footers.
- Using Unlicensed Images: Sometimes, images might seem free to use but are actually copyrighted. Always verify the source and licensing details before using any image, even if it’s available online.
- Not Providing Links When Required: If the license requires a hyperlink to the image or creator, make sure you include it. Missing links could lead to non-compliance with the terms.
Avoiding these mistakes ensures that your presentations are both legal and professional. Always double-check your image sources and attributions before finalizing your slides.
Also Read This: How to Convert Slides into Digital Images
FAQ About Giving Credit to Images in PowerPoint
If you're unsure about how to properly give credit to images in PowerPoint, you're not alone. Here are some frequently asked questions that might help clear things up:
- Do I always need to give credit for images in PowerPoint? It depends on the image license. For images that are copyrighted or under a specific license like Creative Commons, you must provide attribution. However, royalty-free images often do not require attribution.
- Where should I place the image credit in PowerPoint? You can place the image credit in a text box at the bottom of the slide or in the footer. Some people also prefer to create a dedicated slide at the end for all credits.
- Can I modify an image and still need to give credit? Yes. Modifying an image doesn’t exempt you from giving credit, especially if the image is under a Creative Commons license. Make sure to follow the license terms, which might require you to indicate that changes were made.
- What should I include in the image credit? The credit should generally include the creator’s name, the source (where you found the image), and the license type. Some licenses may also require you to link to the license.
- Can I use a screenshot of an image in PowerPoint without attribution? No, screenshots are still subject to copyright laws. You should always give credit to the original source of the image, even if it’s a screenshot.
These answers should help guide you through the process of giving proper credit in PowerPoint. Always check the license details to ensure you're following the correct procedures for attribution.
Conclusion and Final Thoughts
Giving credit to images in PowerPoint is more than just a legal requirement—it’s a way to show respect to creators and maintain ethical standards in your work. By following the right procedures for attribution, you can avoid legal complications, build trust with your audience, and present your work professionally. Remember to:
- Understand the licensing terms of the images you use.
- Always include the necessary credit details, such as the creator's name, source, and license type.
- Use proper formatting and placement for your image credits, ensuring they don’t distract from your presentation.
By avoiding common mistakes and keeping the tips in mind, you'll be able to create presentations that are both legally sound and visually appealing. Proper image attribution is a simple yet effective way to show professionalism and respect for the work of others. So, the next time you use an image in PowerPoint, remember to give credit where it’s due!

 admin
admin


