Resizing images is a crucial skill in digital design and web development. Whether you're working on a website, a social media post, or an online ad, knowing how to adjust the height and width of an image is essential. Changing the size of an image can impact its visual appeal, loading speed, and overall performance. In this guide, we'll explore why resizing images is important, how to do it, and the different methods available. Let's dive into the basics of
Why You Might Need to Change Image Dimensions

There are many reasons why you might need to adjust the height and width of an image. Here are some of the most common scenarios:
- Website Optimization: Large images can slow down your website, affecting user experience and SEO. Reducing image size can help improve load times.
- Social Media Sharing: Different social media platforms have specific image size requirements. Resizing ensures your images look great on each platform.
- Design Flexibility: Images might need resizing to fit different design layouts, whether it's for a banner, a product image, or a blog post.
- Printing: For printed materials, images often need to be resized to ensure they fit within the required dimensions for clarity and resolution.
Whether you're optimizing images for your website or adjusting them for a specific project, resizing gives you the flexibility to make sure they appear exactly how you want them to. It can also save storage space and reduce file sizes without compromising quality.
Also Read This: How Unsplash Is Impacting Getty and iStock Photos
Methods for Changing Image Height and Width

There are several ways to resize an image, depending on the tools you have at hand and your level of experience. Below are some common methods for adjusting the height and width of an image:
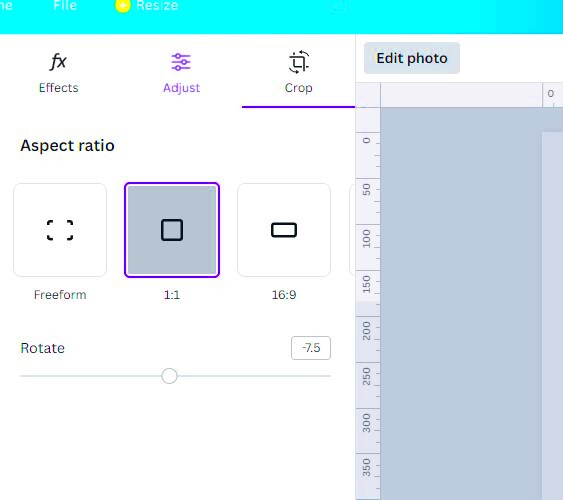
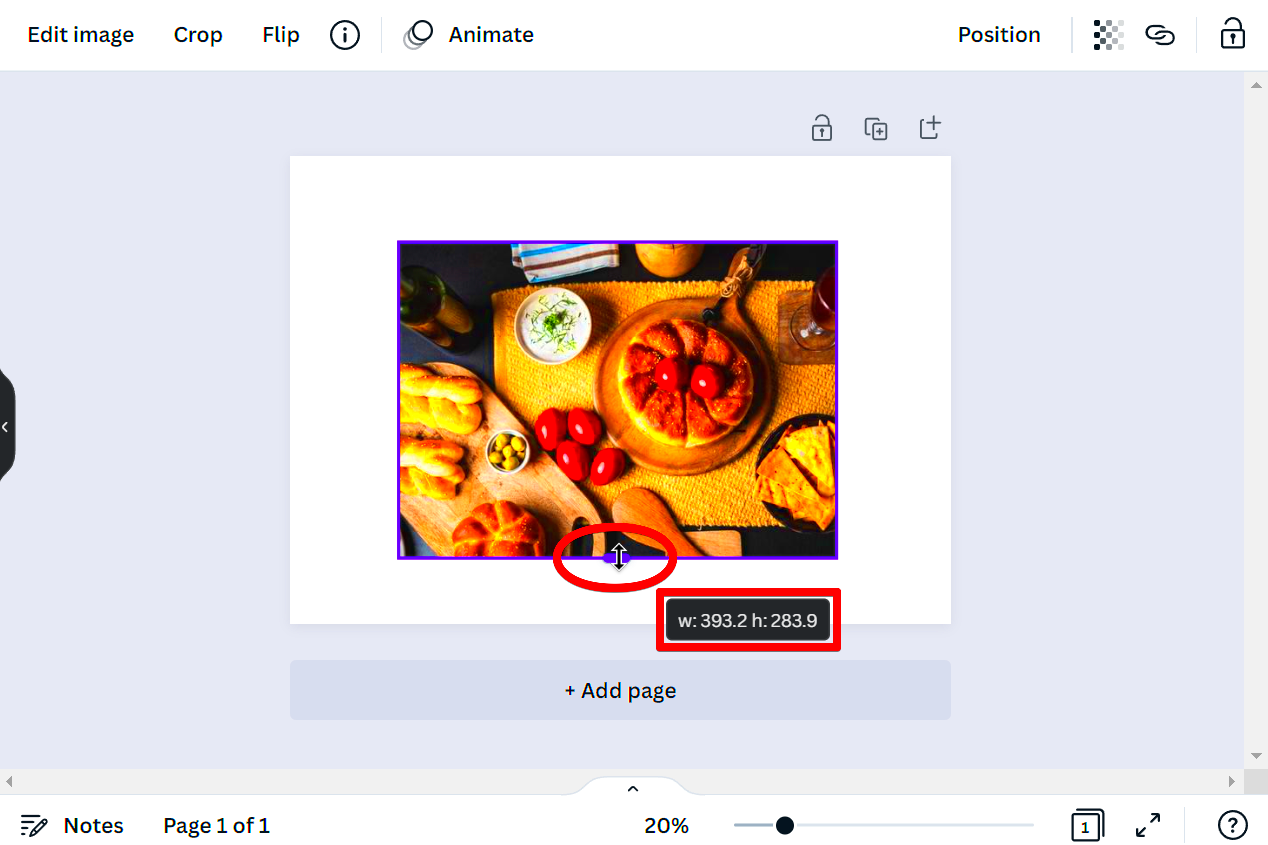
- Online Image Resizers: These tools are perfect for quick adjustments. Websites like Pixlr or Canva allow you to upload an image and resize it directly in your browser. These tools are free and easy to use, making them ideal for beginners.
- Using Photoshop: Photoshop is a powerful tool that gives you precise control over image resizing. You can adjust the height and width, apply custom ratios, and maintain image quality using the 'Image Size' option.
- Mobile Apps: If you’re working from a smartphone, apps like Snapseed or Adobe Lightroom can help resize your images. These apps are great for resizing on the go and are available for both Android and iOS devices.
- CSS for Web: If you're designing a website, you can adjust image size directly in your code using CSS. This allows you to set specific dimensions for images without altering the original file.
No matter which method you choose, resizing an image is straightforward. Some tools are more beginner-friendly, while others give you more advanced features. It’s all about finding what works best for your needs and the level of control you want over the process.
Also Read This: How Much Getty Images Is Worth in the Market
How to Resize an Image Using Online Tools

If you're looking for a quick and easy way to resize an image without downloading any software, online image resizing tools are the perfect solution. These tools are often free and accessible through any browser, so you don't need to worry about compatibility issues or extra installations. Websites like Pixlr, Canva, and Fotor make resizing images straightforward with their user-friendly interfaces.
Here’s how you can resize an image using an online tool:
- Step 1: Visit an online image resizer, like Pixlr or Canva.
- Step 2: Upload the image you want to resize from your computer or a URL.
- Step 3: Set the new dimensions for the image. You can either specify exact pixel values or use preset ratios for a consistent look.
- Step 4: Adjust any additional settings, such as quality or aspect ratio, to maintain image sharpness.
- Step 5: Download the resized image and use it as needed.
Online tools are great for quick tasks, especially if you don’t need advanced features. They are easy to navigate and don’t require any special technical skills. Just remember, if you’re working with large images or need more precise control, desktop software might be a better option.
Also Read This: Can You Screen Record YouTube Videos?
How to Resize Images with Photoshop
Adobe Photoshop is a powerful tool widely used for image editing, and resizing is one of its basic yet essential features. Whether you’re preparing images for print or digital use, Photoshop gives you complete control over how you adjust your image’s dimensions. Below is a simple guide on how to resize an image using Photoshop.
Follow these steps:
- Step 1: Open Photoshop and load the image you want to resize by going to File > Open and selecting your file.
- Step 2: Click on Image in the top menu, then select Image Size from the dropdown.
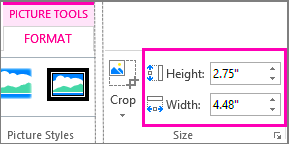
- Step 3: In the Image Size window, you'll see options for adjusting the width, height, and resolution of your image. You can choose to adjust the size in pixels, inches, or percentage.
- Step 4: Make sure the "Constrain Proportions" option is checked to maintain the aspect ratio, which will prevent the image from becoming stretched or squished.
- Step 5: After adjusting the size, click OK to apply the changes.
Photoshop also allows you to adjust the resolution for print and digital use, giving you better control over how the image appears at different sizes. It’s a great option for professional designers and anyone who needs high-quality results.
Also Read This: Tools for Creating a Professional LinkedIn Profile Picture
Adjusting Image Size for Web and Mobile Use
When you’re preparing images for websites or mobile apps, resizing is a crucial step in optimizing their performance and appearance. Properly resized images help improve load times, maintain quality, and adapt to different screen sizes. In this section, we’ll go over how to adjust image size specifically for web and mobile use.
Here’s what you should keep in mind:
- Web Optimization: Web images should be resized to fit the space they occupy on a website. You can use CSS to set the size of images on your webpage, but make sure the actual file size is also reduced for faster loading times.
- Mobile Optimization: Mobile devices have smaller screens, so images must be resized to fit different resolutions. You should aim for images that are optimized for both small and large screens to ensure they look good on all devices.
- File Format: Use file formats like JPEG, PNG, or WebP for web images. WebP is particularly useful as it offers good compression without compromising quality.
- Dimensions: Images should be resized to the exact size needed. For example, if an image will appear in a 300px by 200px box, resizing it to those dimensions avoids wasting bandwidth and storage space.
For mobile, make sure images are responsive. This means that they can automatically adjust to fit different screen sizes without losing their clarity or being cropped awkwardly. Using tools like responsive design frameworks or media queries in CSS will help ensure your images look great on mobile devices and desktops alike.
Also Read This: How to Sell My Photos to Getty Images
Best Practices for Resizing Images Without Losing Quality
Resizing images is a balancing act between maintaining quality and reducing file size. It’s essential to follow some best practices to ensure your images still look sharp and professional after resizing. Whether you’re working with images for web, print, or mobile use, these tips will help you achieve the best results without compromising the visual appeal.
Here are some key practices to keep in mind:
- Maintain the Aspect Ratio: Always resize images while keeping their aspect ratio intact. This prevents your image from being stretched or distorted. Many tools and software, including Photoshop and online resizers, have an option to lock the aspect ratio.
- Use High-Quality Originals: Starting with high-resolution images gives you more flexibility to resize without a noticeable loss in quality. Avoid using images that are already low resolution, as they can become pixelated when enlarged.
- Resample When Reducing Size: When decreasing the size of an image, ensure that it’s resampled correctly. Resampling removes excess pixels to match the new size while keeping the image’s clarity intact.
- Save in the Right Format: Choose the right file format for your resized image. JPEG is ideal for photographs, while PNG is best for images with transparency. WebP offers great compression without losing quality for web images.
- Use Compression Tools: After resizing, use image compression tools to reduce file size without sacrificing quality. Tools like TinyPNG or ImageOptim can help make the file size smaller without affecting the visual quality.
By following these tips, you can resize your images for different platforms and uses while ensuring they maintain a crisp, clear appearance.
Also Read This: Adobe Stock Images Remove Watermark: Online and Offline Methods
Common Mistakes to Avoid When Changing Image Dimensions
When resizing images, it’s easy to make mistakes that can affect the quality and usability of the image. Understanding these common errors and how to avoid them will help ensure your images always look their best.
Here are some of the most frequent mistakes to watch out for:
- Not Maintaining Aspect Ratio: If you don’t lock the aspect ratio, your image may become stretched or distorted. Always check this setting before resizing.
- Enlarging Small Images: Trying to enlarge a low-resolution image can result in pixelation and blurriness. It’s better to start with an image that has a higher resolution to avoid this problem.
- Using the Wrong File Format: Choosing the wrong file format for your image’s intended use can lead to quality loss or inefficient file sizes. For example, JPEG is good for photos but not for graphics with sharp edges, where PNG is more suitable.
- Over-Compression: Compressing images too much can lead to a loss of detail and clarity. It’s important to find the right balance between file size and quality.
- Ignoring File Size for Web Use: Resizing for the web doesn’t just mean changing dimensions—it also involves optimizing the file size. Large files can slow down page load times, affecting user experience and SEO.
Avoiding these mistakes will help you resize your images effectively without compromising on quality, ensuring they look great in every context.
Also Read This: Is Getty Images Worth It? A Realistic Assessment
FAQ
1. How do I resize an image without losing quality?
To resize an image without losing quality, ensure you maintain the aspect ratio, use a high-resolution original image, and use resampling when reducing size. You can also use image compression tools after resizing to further reduce file size without sacrificing quality.
2. What is the best tool for resizing images?
The best tool depends on your needs. For quick resizing, online tools like Pixlr or Canva are great. For more advanced control, Photoshop or GIMP is recommended. All these tools allow you to resize images while maintaining quality.
3. What is the ideal image size for a website?
The ideal image size for a website depends on the layout and where the image will be used. A general rule is to keep images under 1MB for faster loading times, and resize them to fit within the specific dimensions of your web design.
4. Can I resize an image using my phone?
Yes, there are several apps available for resizing images on your phone. Apps like Snapseed and Adobe Photoshop Express allow you to resize images quickly and easily on both Android and iOS devices.
5. Why is my resized image blurry?
Blurriness can occur when resizing an image too much, particularly when enlarging a small image. Always start with a high-resolution image, and avoid enlarging images beyond their original quality to prevent blurriness.
Conclusion
Resizing images is a valuable skill for anyone working with digital content. Whether you're preparing images for a website, social media, or print, understanding how to adjust image dimensions without compromising quality can significantly enhance your workflow. By following the best practices for resizing, avoiding common mistakes, and using the right tools, you can ensure your images look sharp and professional. Always remember to consider factors like aspect ratio, resolution, and file format to achieve the best results. With a little practice, resizing images will become second nature, making your designs, posts, and projects stand out.

 admin
admin


