Resizing images proportionally in Inkscape ensures that your artwork maintains its original proportions, preventing it from becoming stretched or squished. Whether you're working with a vector or raster image, it's essential to resize your image correctly, especially when you're aiming for a perfect fit in design projects. Inkscape, a powerful vector graphics editor, makes resizing simple and intuitive.
In this guide, we'll show you how to resize images proportionally in Inkscape, and why it's important for your designs to keep their aspect ratio intact. Whether you need to scale down a large logo or adjust an image for web use, mastering proportional resizing is key to ensuring that your image looks good at any size.
Understanding Proportional Resizing and Its Importance

When you resize an image proportionally, you are maintaining the ratio between the image's width and height. This ensures that the
Here’s why proportional resizing is important:
- Preserves Quality: By maintaining the correct aspect ratio, your image retains its visual integrity.
- Prevents Distortion: Resizing without proportion can lead to awkward proportions that may ruin the design.
- Uniformity Across Platforms: When resizing images for websites or presentations, proportional scaling ensures your content looks consistent.
In graphics design, whether you're resizing for print or digital use, it’s vital to respect the proportions of the image to avoid loss of quality and ensure that your design communicates clearly and professionally.
Also Read This: Tips for Printing Large Images Without Losing Quality
Step-by-Step Guide to Resize an Image Proportionally in Inkscape

Resizing an image proportionally in Inkscape is easy once you know the right steps. Here’s a detailed guide to help you through the process:
- Open Your Image in Inkscape: Start by importing the image you want to resize. Go to File > Open and select your image file.
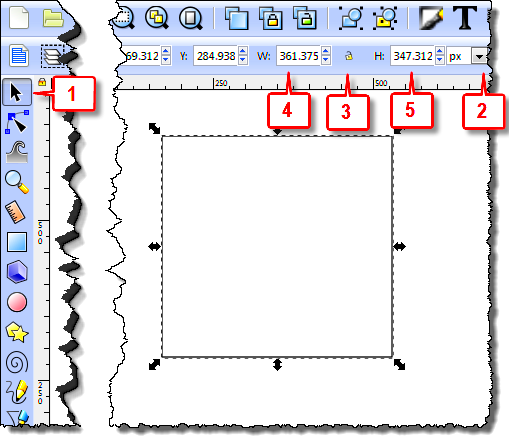
- Unlock the Aspect Ratio: By default, Inkscape locks the width and height together to maintain the image's proportions. If it's locked, you’ll see a lock icon in the toolbar. Make sure the lock is engaged before resizing to keep the proportions intact.
- Select the Image: Click on the image with the Select tool (the arrow icon in the toolbar).
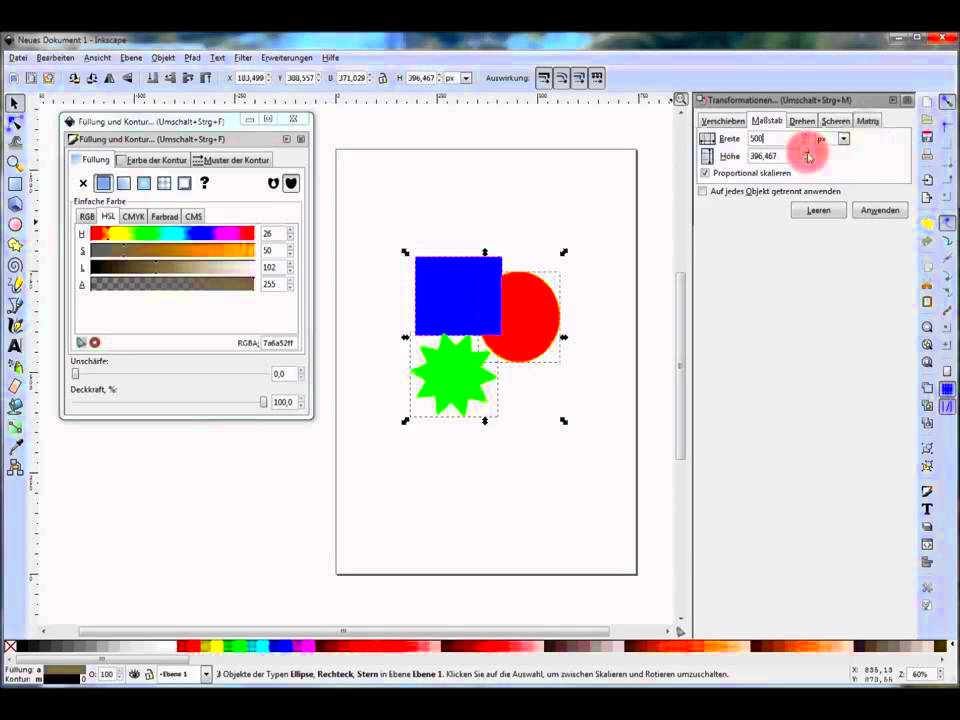
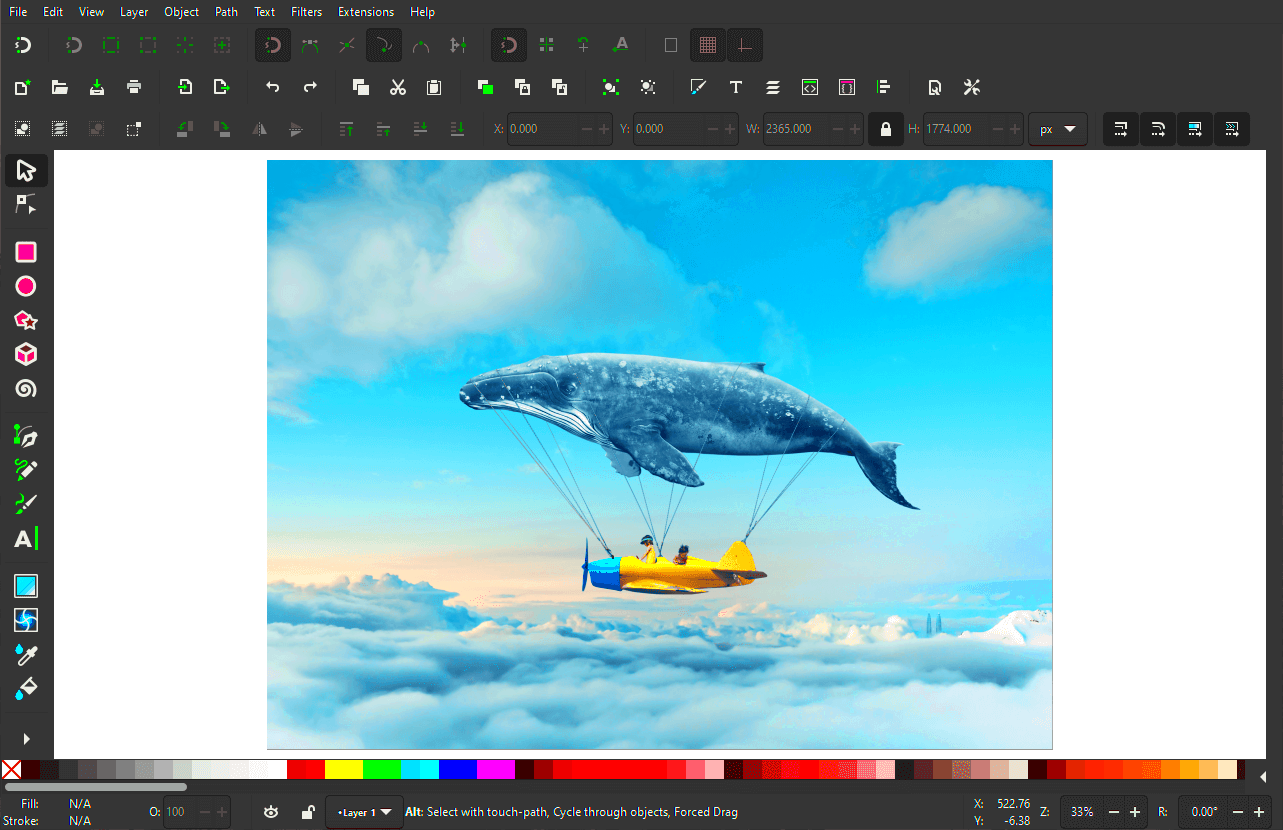
- Resize Using the Toolbar: In the toolbar at the top, you’ll see options to change the width (W) and height (H). Enter the new width or height, and the other dimension will automatically adjust to maintain the proportional relationship.
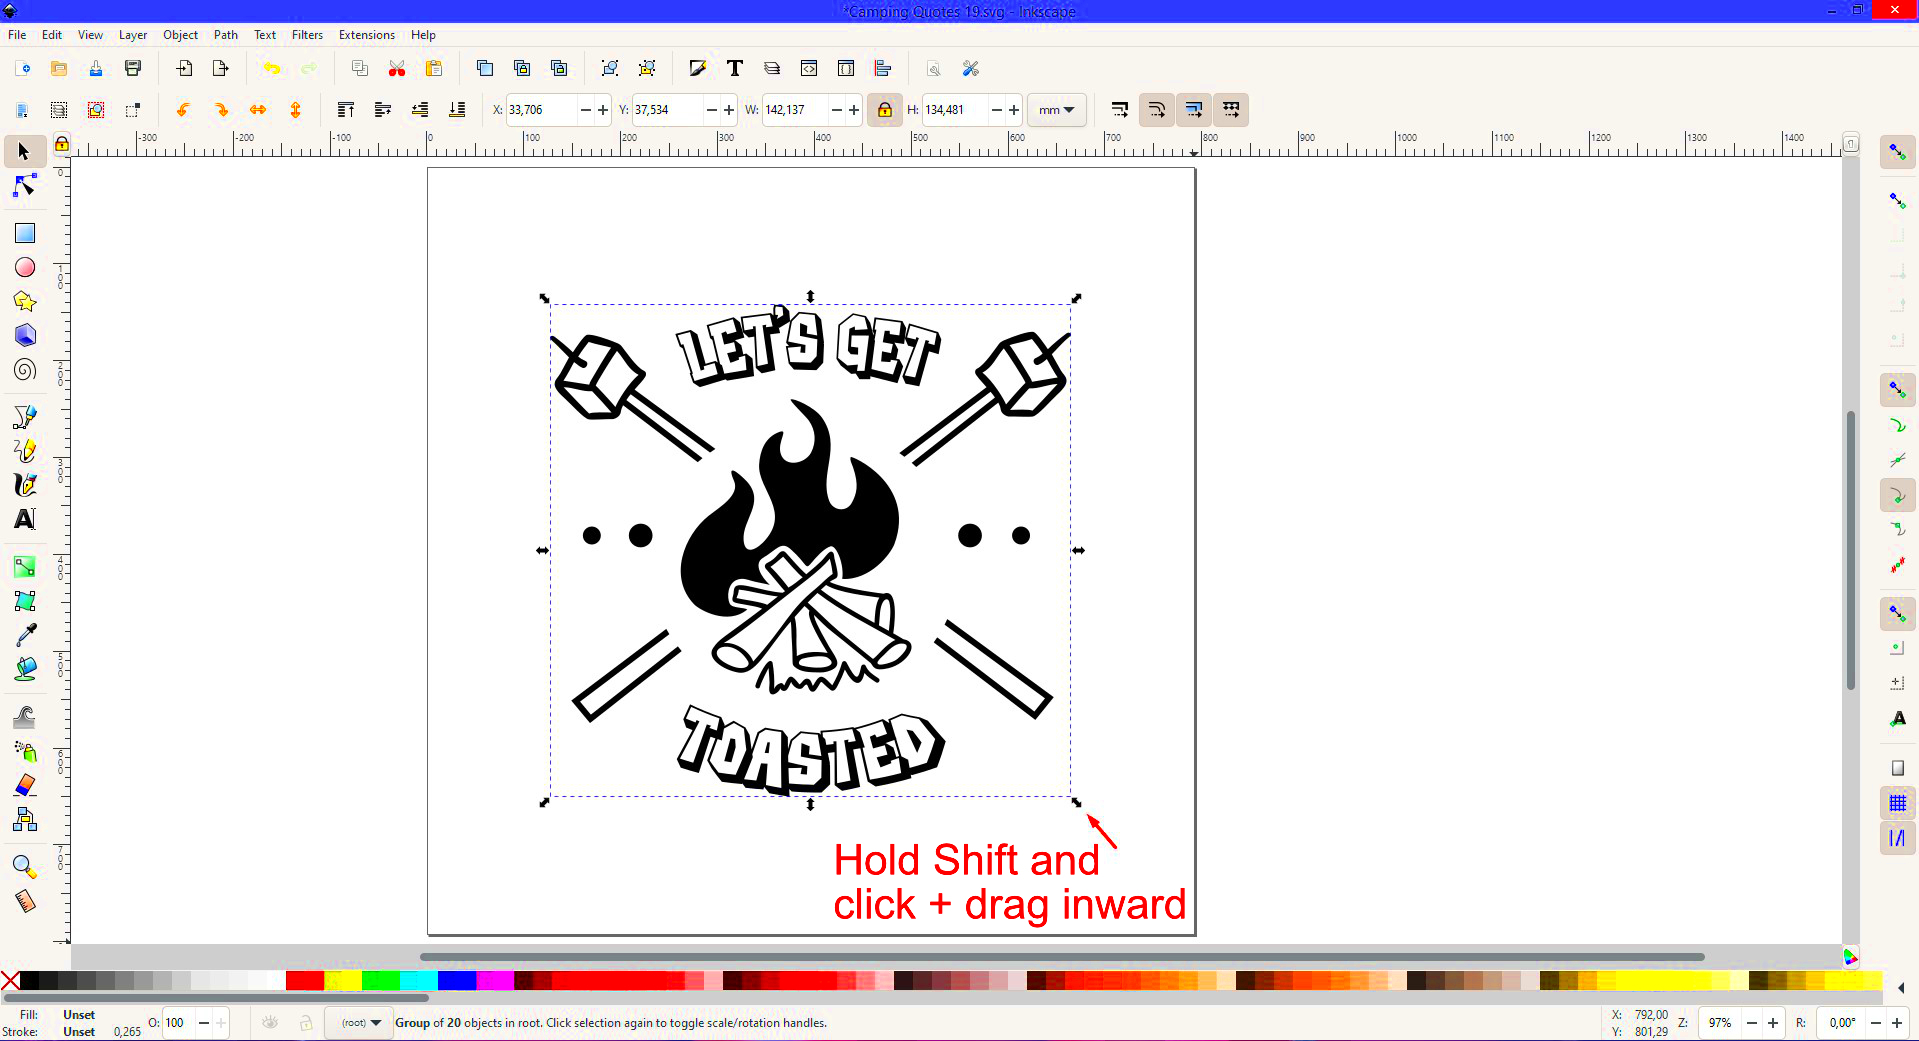
- Drag to Resize (Optional): You can also drag the corners of the image to resize it. Just hold down the Ctrl key while dragging, and the image will resize proportionally as you move the corner.
- Check Your Results: After resizing, make sure the image still looks good. If the proportions are off, undo and try again.
That’s it! You’ve resized your image proportionally in Inkscape. These simple steps will help you scale your images correctly for any project, ensuring your design looks sharp and professional.
Also Read This: Add Text to Reddit Image Post with This Awesome Method
Using the Lock Icon for Proportional Scaling

In Inkscape, one of the easiest ways to resize an image proportionally is by using the lock icon. This feature ensures that when you change the width or height of an image, the other dimension automatically adjusts to maintain the aspect ratio. It’s a simple yet powerful tool for keeping your design neat and proportional without any distortion.
Here’s how it works:
- Unlocking and Locking: You’ll find the lock icon located near the width (W) and height (H) input fields in the toolbar. When the icon is locked, Inkscape will scale both dimensions together proportionally. If the lock is unlocked, you can adjust each dimension independently, which could distort the image.
- Proportional Scaling: With the lock icon engaged, you can change either the width or the height, and Inkscape will automatically adjust the other dimension, ensuring the image remains proportional. This is especially useful when resizing logos, icons, or any other graphics where the aspect ratio is essential.
- Easy to Use: The lock icon is a visual cue, making it clear when proportional resizing is activated. It’s quick to toggle, so you don’t have to worry about accidentally distorting your image during the resizing process.
Using the lock icon simplifies proportional scaling, saving time and effort while ensuring your image maintains its quality. It’s a must-know feature in Inkscape for anyone looking to resize images accurately and efficiently.
Also Read This: How to Apply Eyeliner for Big Eyes
Adjusting Image Size with the Toolbar in Inkscape

The toolbar in Inkscape offers a quick and easy way to adjust the size of an image, whether you need to scale it proportionally or customize its dimensions for a specific project. Inkscape makes it simple to adjust image size using the toolbar, and it’s one of the best ways to resize images accurately.
Here’s how you can adjust image size through the toolbar:
- Select the Image: First, click on the image you want to resize. This activates the Select tool, which lets you modify the image’s properties.
- Enter Specific Dimensions: In the toolbar, you’ll see fields for the width (W) and height (H). Enter the desired dimension in one of these fields. If the lock icon is active, Inkscape will automatically adjust the other dimension to maintain the image’s proportions.
- Adjust Units: You can change the measurement units for the dimensions, such as pixels, millimeters, or inches. This is especially useful when preparing images for print or different digital platforms.
- Preview the Changes: As you make adjustments, the image size will update in real-time, so you can quickly see how it looks. You can also cancel or undo any changes if they don't turn out as expected.
Adjusting image size with the toolbar is a fast, straightforward way to resize your images in Inkscape. It’s especially useful for precise scaling, and it works well for images that require specific measurements or a consistent visual style.
Also Read This: How to Access Recent Satellite Images for Up-to-Date Views
Working with Multiple Images and Proportional Resizing
When you’re working with multiple images in Inkscape, resizing them proportionally can seem challenging, but it’s actually quite easy. Whether you’re creating a layout, designing a set of icons, or adjusting several images for a presentation, Inkscape provides tools that allow you to resize multiple images while keeping their proportions intact.
Here’s how to resize multiple images proportionally at once:
- Select All Images: To resize multiple images, start by selecting all of them. Hold down the Shift key and click on each image you want to resize. Alternatively, you can use Ctrl + A to select everything on the canvas.
- Enable the Lock Icon: Before resizing, make sure the lock icon near the width and height fields is engaged. This ensures that all the selected images will scale proportionally as a group.
- Resize Using the Toolbar: Now, enter a new width or height in the toolbar for one of the images. All the selected images will resize according to the new dimensions, maintaining their individual proportions.
- Individual Adjustments (if necessary): If you want to resize some images differently from the group, you can deselect them and resize individually. Just remember to keep the lock icon engaged when you want to maintain proportions.
Working with multiple images in Inkscape is efficient, especially when resizing them proportionally. It saves time and ensures that your entire design remains consistent in size and proportion, whether you're working on icons, illustrations, or any other type of graphic work.
Also Read This: How to Change the Print Size of an Image on iPhone
Common Mistakes to Avoid When Resizing Images
When resizing images in Inkscape, it’s easy to make mistakes that can result in distorted or low-quality designs. Whether you're a beginner or an experienced user, knowing what to avoid is key to getting the best results. Let’s look at some common mistakes people make when resizing images and how to avoid them:
- Not Locking the Aspect Ratio: One of the most common mistakes is forgetting to engage the lock icon before resizing. This can lead to stretching or squishing of your image. Always make sure the lock icon is enabled to maintain the correct proportions.
- Resizing Without Checking Image Quality: Sometimes, resizing an image too much can reduce its quality. If you’re resizing a small image to a much larger size, it can become pixelated or blurry. Make sure to use high-resolution images when possible and avoid enlarging them beyond their original quality.
- Ignoring Image Units: When resizing, it’s important to be aware of the units you’re working in, such as pixels, inches, or millimeters. Resizing without paying attention to the unit settings can lead to unwanted scaling issues, especially if you’re preparing images for print or web use.
- Not Using the Right Resizing Tool: Inkscape offers several ways to resize an image, such as through the toolbar, the selection tool, and drag handles. Each method has its advantages, and using the wrong tool can cause issues. For proportional resizing, the toolbar and lock icon are the most reliable options.
- Forgetting to Check Image Orientation: After resizing, always check the orientation of your image. Sometimes resizing can cause the image to shift, or its alignment can get off-track, especially in a layout. Ensure it’s properly oriented before finalizing your design.
By avoiding these common mistakes, you can ensure that your resized images maintain their quality and look professional, no matter what size they are.
Also Read This: Making Dreamcore Images: A Step-by-Step Guide
Conclusion and Final Thoughts on Resizing Images in Inkscape
Resizing images proportionally in Inkscape is an essential skill for anyone working with digital graphics, whether you're a designer, artist, or hobbyist. With the right approach, you can resize images without compromising quality, ensuring that your designs look polished and professional at any size.
Throughout this guide, we’ve covered the importance of proportional resizing, how to use the lock icon, the toolbar for precise adjustments, and how to resize multiple images at once. It’s important to keep in mind that resizing should always be done thoughtfully to avoid common mistakes, such as distorting the image or losing resolution.
Inkscape is a powerful tool for resizing images, and mastering its features will help you create designs that stand out. By understanding the basics and paying attention to detail, you can resize any image quickly and easily, maintaining its integrity and visual appeal.
FAQ
1. How can I resize an image without losing quality in Inkscape?
To resize an image without losing quality, make sure to keep the aspect ratio locked and avoid enlarging low-resolution images too much. You can also use vector images, which are infinitely scalable without losing quality.
2. Can I resize multiple images at once in Inkscape?
Yes, you can resize multiple images at once in Inkscape. Select all the images you want to resize, enable the lock icon for proportional scaling, and adjust the size using the toolbar. All the selected images will resize proportionally.
3. What happens if I don’t lock the aspect ratio while resizing?
If you don’t lock the aspect ratio, resizing the width or height of an image will not affect the other dimension, which may lead to distortion. It’s important to lock the aspect ratio to maintain the image's original proportions.
4. How do I check the current resolution of an image in Inkscape?
In Inkscape, you can check the resolution of a raster image by selecting it and looking at the properties in the toolbar. The resolution is often indicated in dots per inch (DPI), which is important for print-quality images.
5. Can I resize images for both print and web use in Inkscape?
Yes, Inkscape allows you to resize images for both print and web use. You can change the image’s resolution and size in different units (like pixels or inches) depending on your needs. Make sure to check the DPI for print purposes and adjust the dimensions accordingly for web use.

 admin
admin


