Vectorizing an image in Photoshop is a great way to convert a raster image (like a JPEG or PNG) into a sharp, scalable graphic. When you vectorize an
Why You Should Vectorize Images

Vectorizing images offers a range of benefits that make it an essential skill for any designer. Here’s why you should consider vectorizing your images:
- Scalability: Unlike raster images, vector graphics can be resized infinitely without losing quality. This means your design will look crisp and clean at any size, whether it's on a business card or a billboard.
- Smaller File Sizes: Vector images are made of paths, which typically results in smaller file sizes compared to high-resolution raster images, making them easier to store and share.
- Editable and Customizable: Once vectorized, your image becomes fully editable. You can change colors, shapes, and sizes without affecting the overall quality, making your design more flexible and versatile.
- Better for Print: Vector graphics are ideal for print. They ensure that your image maintains its sharpness and precision, no matter the size of the printed material.
Vectorizing is especially useful for logos and other designs that need to look professional at every scale, ensuring consistency across digital and print media.
Also Read This: Stunning Images of the 2017 Solar Eclipse Across the USA
Getting Started with Photoshop for Image Vectorization

Before diving into vectorization, it’s important to prepare Photoshop so that the process is smooth and efficient. Here’s how you can get started:
- Open the Image: First, open the image you want to vectorize in Photoshop. It’s essential to choose an image with clear outlines and distinct colors for better results.
- Set Up Your Workspace: To make your vectorization process easier, set up a clean workspace. You can do this by going to Window > Workspace > Essentials. This will give you quick access to all the tools you’ll need.
- Adjust Image Resolution: To get the best results, make sure your image has a good resolution—around 300 dpi (dots per inch) is ideal for detailed work. You can adjust the resolution by going to Image > Image Size.
- Prepare the Image for Tracing: If needed, crop the image to focus on the area you want to vectorize. You can use the Crop Tool to remove any unnecessary parts of the image, ensuring that only the essential elements are traced.
By following these basic steps, you’ll ensure that your image is ready for the vectorization process in Photoshop. With the right setup, the process will be quicker, and your final result will be sharper and more precise.
Also Read This: How to Locate Adobe Stock Images with Transparent Backgrounds
How to Import and Prepare Your Image for Vectorization
Before you start vectorizing, it’s essential to import and prepare your image properly in Photoshop. The process begins by selecting the right image—one with clear, distinct edges works best for vectorization. Whether you are working with logos, illustrations, or simple designs, making sure your
- Import the Image: Open Photoshop and click File > Open to import your image. Select the file from your computer and click Open.
- Adjust Image Resolution: Go to Image > Image Size to adjust the resolution. If you’re working with a small image, increasing the resolution can help make the image clearer before vectorization. Aim for around 300 dpi for detailed work.
- Crop the Image: If your image includes unnecessary elements, crop it using the Crop Tool to focus on the part you want to vectorize. This ensures that only the important parts are worked on, saving you time.
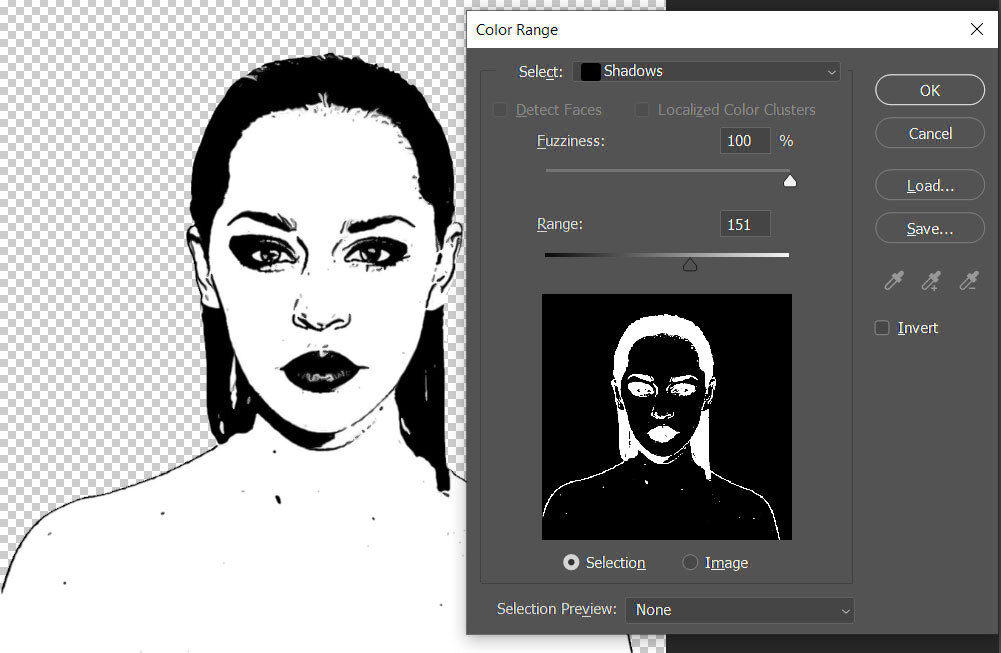
- Remove Noise and Clean Up: Use tools like the Magic Wand or Quick Selection Tool to remove any background noise or unwanted elements. Clean edges will make tracing much easier.
Once your image is cleaned up and ready, you're set for tracing it in Photoshop, making sure every line and detail is crisp and clear for vectorization.
Also Read This: How to Find the Best-Selling Photos on Adobe Stock
Using the Pen Tool to Trace Your Image
Tracing your image with the Pen Tool is the heart of the vectorization process. The Pen Tool allows you to create precise paths that define the outlines of your image, transforming it into a clean, scalable vector graphic. Here’s how you can use the Pen Tool to trace your
- Select the Pen Tool: In Photoshop, choose the Pen Tool from the toolbar or press the P key on your keyboard. The Pen Tool lets you create straight and curved lines, making it perfect for tracing outlines.
- Start Tracing Your Image: Begin by clicking on the edges of your image to create anchor points. Hold Shift to create straight lines or click and drag to create curved lines. Make sure the path follows the natural curves and shapes of the image as closely as possible.
- Close the Path: Once you’ve traced the outline of the image, make sure to close the path by connecting the last anchor point to the first one. This ensures the shape is complete and ready for conversion into a vector.
- Refine the Path: After completing the initial trace, use the Direct Selection Tool (A) to adjust the anchor points and curves for more precision. You can tweak the handles of each anchor point to smooth out any jagged edges or sharp corners.
Tracing with the Pen Tool can take some practice, but it gives you complete control over the accuracy and smoothness of the lines. With patience, you'll be able to create crisp, detailed vector shapes.
Also Read This: Shipping Settings: Turning Off International Shipping on eBay
Converting Paths to Vector Shapes
Once you’ve successfully traced the image with the Pen Tool, the next step is to convert those paths into editable vector shapes. This is where your traced paths turn into scalable objects that can be resized or manipulated without losing quality. Here's how to convert paths into vector shapes in Photoshop:
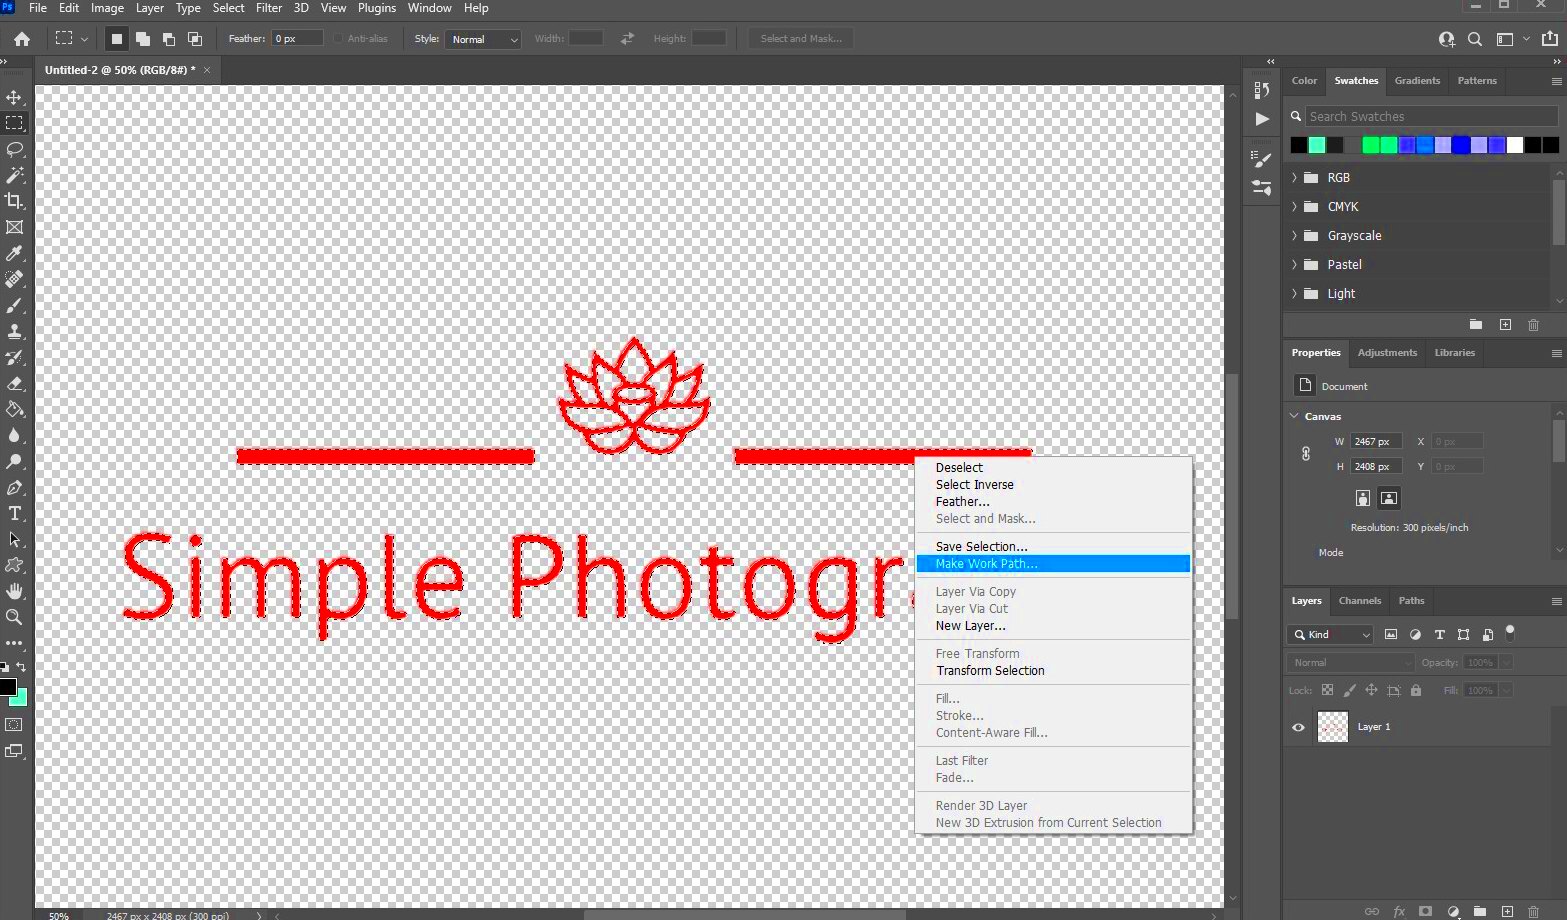
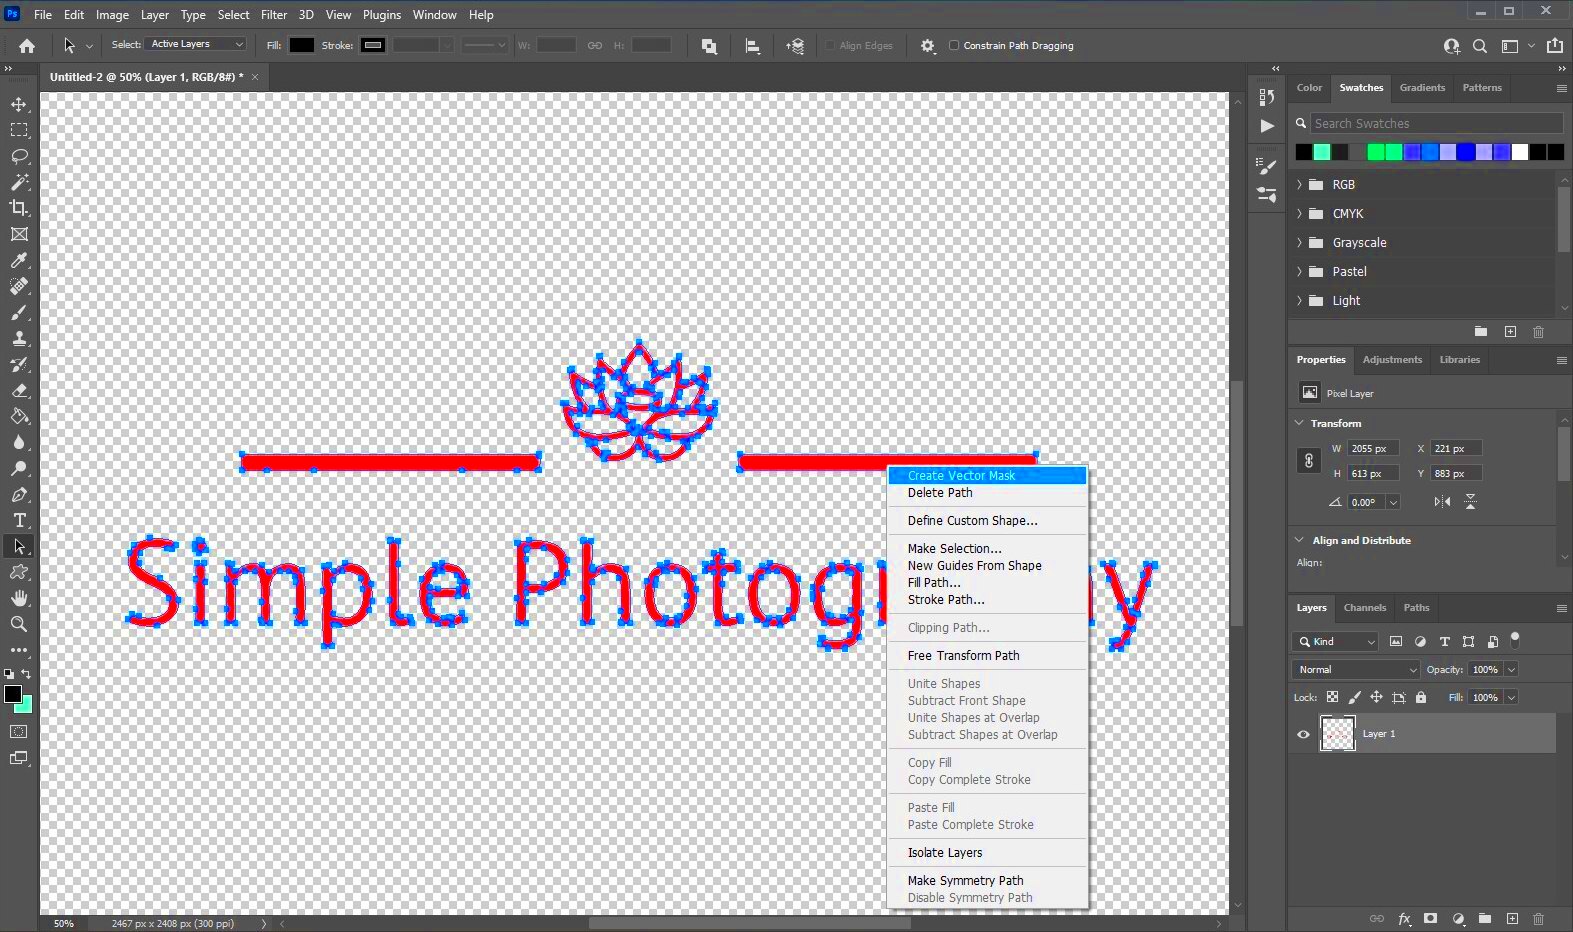
- Convert Paths to Shape Layers: Once your path is complete, right-click on the path layer and choose Make Work Path to turn the path into a vector object. Then, right-click the path and select Fill Path to give it a solid color, which creates the shape.
- Adjust the Shape's Properties: Use the Properties Panel to adjust the fill color, stroke color, and thickness. You can also modify the shape’s style by adding gradients, shadows, or other effects to make it stand out.
- Refine the Shape: If necessary, go back and adjust the anchor points and curves using the Direct Selection Tool (A). This allows you to refine the shape until it's exactly how you want it.
- Group Your Shapes: For easier management, you can group multiple shapes together. Select the shapes you want to group and press Ctrl+G (Windows) or Cmd+G (Mac). This makes it easier to move and edit them as a single unit.
By converting paths into vector shapes, your image is now a fully editable vector graphic, ready to be resized, recolored, or exported for use in other projects. It’s a key step in making sure your image is crisp and scalable at any size.
Also Read This: How to Download Photos Licensed from Adobe Stock
Refining Your Vector Image for Crisp Lines
After converting your paths to vector shapes, the next important step is refining your vector image for crisp, clean lines. This ensures that your design looks polished and professional. Refining is all about adjusting curves, anchor points, and overall alignment to make sure everything is smooth and precise. Here’s how you can refine your vector image:
- Adjust Anchor Points: Use the Direct Selection Tool (A) to select and fine-tune individual anchor points. Moving the anchor points closer or further apart helps refine the shape and smooth out jagged lines.
- Smooth Curves: If your image has curves, you can smooth them out by adjusting the direction handles of the anchor points. By clicking and dragging the handles, you can make the curves smoother and more even.
- Use the Smooth Tool: Photoshop has a built-in Smooth Tool that can automatically refine rough paths and edges. You can find it in the Path Selection Tool options. This tool is great for simplifying curves and making your design look cleaner.
- Check for Uneven Strokes: Sometimes, even after refining the paths, your strokes might look uneven. You can adjust the stroke thickness and line alignment using the Stroke Panel to ensure uniformity across your vector image.
- Zoom In for Detail: Don’t forget to zoom in on your image to check for small imperfections or irregularities. It's easy to miss tiny details, but by zooming in, you can make the necessary adjustments for a perfectly refined vector graphic.
Refining your vector image ensures that every line and curve is smooth and sharp. The more attention you pay to these details, the better your final result will look, especially when scaled up or down.
Also Read This: Generate Character Art with AI: A Complete Guide
Saving and Exporting Your Vector Image
Once your vector image is complete and you’ve refined it to perfection, the next step is saving and exporting it. Depending on your needs, there are different file formats you can use. Saving your vector graphic correctly ensures it’s ready for use in various projects without losing quality. Here's how to save and export your vector image:
- Saving as a PSD File: If you want to preserve all your layers and paths for future editing, save your file as a Photoshop document (PSD). Go to File > Save As and choose the PSD format. This will allow you to reopen the file and make edits anytime.
- Exporting as SVG: For web use, SVG (Scalable Vector Graphics) is a common format. To export, go to File > Export > Export As, and choose SVG. SVG files are lightweight, resolution-independent, and perfect for responsive design.
- Exporting as EPS: If you need to use your vector image in other graphic design software or for professional printing, EPS (Encapsulated PostScript) is a good choice. You can export to EPS by selecting File > Save As and choosing the EPS format.
- Choose the Right Resolution: When exporting for print, choose a high resolution (300 dpi). For web use, 72 dpi is typically sufficient. Make sure to adjust the resolution depending on your output needs.
- Save for Web: If your image is meant for online use, you can optimize the file for faster loading times. Photoshop offers a Save for Web option under the File menu, where you can adjust the file size without losing quality.
By saving and exporting your vector image in the right format, you ensure it remains high-quality and ready for use in various projects, whether digital or print.
Also Read This: How to Make a GIF to Add to Behance Creating and Uploading Animated GIFs to Showcase Your Work
FAQ
- What is the difference between a raster and a vector image? Raster images are made up of pixels and lose quality when resized, while vector images use paths and can be resized infinitely without losing quality. Vector images are ideal for logos, illustrations, and graphics that need to be scaled.
- Can I vectorize any image in Photoshop? While most images can be vectorized, images with clear, defined edges work best. Highly detailed or blurry images may require extra effort to trace and refine.
- What tools in Photoshop are used for vectorization? The Pen Tool is the primary tool for vectorization. It allows you to trace paths that form the outline of your image. Other tools like the Direct Selection Tool and Smooth Tool can be used for refining the paths.
- How do I convert a raster image to a vector in Photoshop? The process involves manually tracing the image with the Pen Tool to create paths and then converting those paths into vector shapes. The image can then be refined and saved in a vector format.
- Can I edit vector images after they are created? Yes, vector images are fully editable. You can change colors, shapes, and sizes without losing quality, making them highly flexible for various uses.
Conclusion
Vectorizing an image in Photoshop is a valuable skill that can transform any raster image into a crisp, scalable graphic. By following the steps outlined—from importing and preparing your image to using the Pen Tool for tracing and refining paths—you can create high-quality vector images that are perfect for any project. Whether you're working on logos, illustrations, or any other type of graphic design, mastering vectorization will allow you to produce images that look sharp and professional, no matter the size. Remember to save and export your files in the right format for web or print to ensure your designs are ready for any platform. With practice and attention to detail, you'll soon be creating vector graphics with ease and precision.

 admin
admin


