Darkening an image in Photoshop is a great way to add mood, depth, and focus to your photos. Whether you're creating a dramatic scene, emphasizing certain elements, or simply improving the overall contrast, adjusting the brightness can have a powerful effect on the final result. Photoshop offers a variety of tools to achieve this effect, ranging from basic adjustments to more advanced techniques, allowing you to achieve the exact mood you're aiming for.
In this guide, we’ll walk you through how to darken your images and explain why it can take your photography to the next level. Let’s dive into the steps and understand the benefits of this simple yet impactful edit.
Why Darkening Images Can Enhance Your Photography

Darkening images isn’t just about making a picture look “darker” – it’s about enhancing the mood and emphasizing key details that might get lost in lighter images. Here’s how darkening can improve your photos:
- Creates Mood: A darker image can evoke emotions such as mystery, drama, or nostalgia. It sets a tone that lighter images simply can’t match.
- Highlights Key Features: Darkening can bring out details in certain parts of the photo, especially in portraits or landscapes, drawing the viewer's attention where it matters.
- Improves Contrast: When you darken an image, the contrast between light and dark areas becomes more pronounced, adding visual interest and depth.
- Hides Unwanted Details: Darkening can help conceal distracting elements in the image, like clutter or bright backgrounds, that might take attention away from the subject.
By strategically adjusting the brightness, you can craft an image that tells a compelling story and captures the viewer’s attention.
Also Read This: How to Download a Specific Portion of a Dailymotion Video
Steps to Darken an Image Using Photoshop

Darkening an image in Photoshop is easy when you know the right steps. Follow these simple guidelines to get the desired effect:
- Step 1: Open Your Image
Begin by opening the image you want to darken in Photoshop. Go to File > Open and select your image file. - Step 2: Adjust Brightness/Contrast
One of the simplest ways to darken an image is by using the Brightness/Contrast adjustment layer. Go to Image > Adjustments > Brightness/Contrast. Move the Brightness slider to the left to darken the image. You can also increase the Contrast to make the dark areas stand out more. - Step 3: Use Levels for Finer Control
For a more advanced approach, use the Levels adjustment. Go to Image > Adjustments > Levels. In the Levels window, move the shadow slider (the one on the left) to the right to make the dark areas even deeper. This gives you more control over how much darkness is added to the image. - Step 4: Refine with Curves
For even more precision, use the Curves tool. Go to Image > Adjustments > Curves. Drag the curve downward to darken the image. This tool allows you to adjust specific tonal ranges, so you can darken just the shadows or midtones, depending on your needs. - Step 5: Apply a Vignette Effect (Optional)
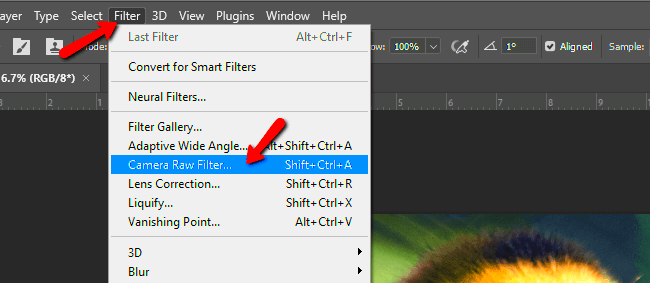
To add a dramatic touch, you can apply a vignette effect. This darkens the edges of the photo, keeping the center bright and drawing attention to the main subject. Go to Filter > Lens Correction, and in the Custom tab, adjust the vignette sliders. - Step 6: Save Your Work
Once you’ve made the necessary adjustments, don’t forget to save your darkened image. Go to File > Save As and choose the file format that suits your needs, such as JPG or PNG.
These steps should help you achieve the darkened effect you desire. With these easy adjustments, you can enhance your photos and make them more visually compelling.
Also Read This: Download iFunny GIFs with Ease Using This Tool
Using the Brightness and Contrast Tool for Darkening

The Brightness and Contrast tool is one of the simplest ways to darken an image in Photoshop. It’s perfect for beginners who want to make quick adjustments. With this tool, you can easily lower the brightness of your image and adjust the contrast to enhance the dark areas. Here’s how to use it:
- Step 1: Open your image in Photoshop.
- Step 2: Go to the menu bar and select Image > Adjustments > Brightness/Contrast.
- Step 3: A dialog box will appear with two sliders: Brightness and Contrast.
- Step 4: To darken the image, drag the Brightness slider to the left. As you do this, the overall brightness will decrease, making the image darker.
- Step 5: Adjust the Contrast slider if you want to make the dark areas more prominent. Increasing contrast can make the shadows more intense, giving the image a more dramatic feel.
The Brightness and Contrast tool is fast and effective for basic darkening adjustments. However, if you need more control over specific tonal ranges in the image, you might want to explore more advanced options like Levels or Curves.
Also Read This: Behind the Scenes of TikTok’s Algorithm: How Your Videos Are Ranked
Adjusting Levels for a More Customized Effect

If you want more control over how the darkening affects your image, the Levels adjustment is the perfect tool. This allows you to fine-tune the shadows, midtones, and highlights individually. Here's how to use the Levels tool for a more customized darkening effect:
- Step 1: Open the image you want to darken in Photoshop.
- Step 2: Go to Image > Adjustments > Levels.
- Step 3: A new window will pop up showing a histogram with three sliders underneath it. These represent the shadows (left), midtones (center), and highlights (right).
- Step 4: To darken the image, drag the shadows slider to the right. This will make the dark areas of your image even darker.
- Step 5: You can also adjust the midtones slider to tweak the overall tone of the image without affecting the lightest and darkest areas.
- Step 6: If you want to reduce any overexposed areas, move the highlights slider slightly to the left.
The Levels adjustment tool provides a high level of customization, giving you more control over the final look of your darkened image. It’s great for photographers who want to enhance specific areas without affecting the overall tone too much.
Also Read This: Photobucket Prodigy: Brit Chandler’s Guide to Creating a Photobucket
Using Curves for Advanced Darkening Techniques
For even more control over the tonal range of your image, the Curves tool is a powerful option. This tool allows you to adjust the brightness and darkness of your image with extreme precision. You can create a custom curve that targets specific parts of the image, from shadows to highlights. Here's how to use Curves for advanced darkening techniques:
- Step 1: Open your image in Photoshop.
- Step 2: Go to Image > Adjustments > Curves.
- Step 3: A graph will appear, with a diagonal line running from the bottom left (darkest) to the top right (lightest). This line represents the tonal range of your image.
- Step 4: To darken the image, click on the curve line to add a point and drag it downward. This will darken the image overall.
- Step 5: For more advanced control, you can adjust specific parts of the image by dragging different parts of the curve. For instance, dragging the lower part of the curve will affect the shadows, while adjusting the top of the curve will affect the highlights.
- Step 6: You can also add multiple points along the curve to darken specific areas without affecting the rest of the image.
Curves is one of the most powerful tools in Photoshop, giving you complete control over how the brightness and darkness are distributed across your image. With a little practice, you’ll be able to create stunning, highly customized effects that can really make your photos pop.
Also Read This: How to Use Estockphoto to Improve Your SEO
Adding a Vignette Effect for Darker Edges
One popular technique to create a more dramatic and focused image is by adding a vignette effect. This effect involves darkening the edges of your photo while keeping the center brighter, naturally drawing attention to the focal point. It’s especially useful for portraits or photos where you want the viewer's eye to stay centered on the subject. Here’s how to apply a vignette effect in Photoshop:
- Step 1: Open your image in Photoshop.
- Step 2: Go to the Filter menu and select Lens Correction.
- Step 3: In the Lens Correction window, select the Custom tab.
- Step 4: Under the Vignette section, adjust the Amount slider to the left to darken the edges of your image. The further you slide it, the darker the corners will become.
- Step 5: You can also adjust the Midpoint slider to control how far into the image the vignette effect extends. A smaller midpoint will make the darkened area more concentrated around the edges.
The vignette effect is an easy yet powerful way to enhance your photo’s composition. It guides the viewer's focus and can make your subject stand out even more. Play around with the settings to find the perfect balance for your image.
Also Read This: Don’t Ignore the Small Stuff on Dailymotion Watch and Learn
Saving and Exporting Your Darkened Image
Once you’ve darkened your image and made the necessary adjustments, it’s important to save and export it in the right format. Whether you’re preparing it for web use, printing, or sharing on social media, Photoshop offers several options. Here’s how to save and export your darkened image properly:
- Step 1: After completing your edits, go to the File menu and select Save As to save the image in its current format.
- Step 2: Choose the file format you prefer. For high-quality prints, choose PSD (Photoshop document) to preserve all layers and settings. If you're exporting for the web or social media, consider using JPEG or PNG for smaller file sizes.
- Step 3: If you're exporting for web use, select File > Export > Export As. This allows you to adjust the quality and resolution for faster loading times.
- Step 4: Set the resolution. For printing, 300 DPI (dots per inch) is recommended, while 72 DPI is ideal for web images.
- Step 5: Click Save, and you’re done!
Choosing the right format and resolution ensures your image maintains its quality, whether you’re sharing it online or printing it out. Always keep a high-resolution copy of your work for future edits or prints.
Also Read This: Do People Still Use Flickr? Discover the Answer
Frequently Asked Questions
If you’re new to darkening images in Photoshop or want to know more about the techniques, here are some frequently asked questions to help clarify any doubts:
- Q: What is the best tool for darkening an image in Photoshop?
A: It depends on your needs. The Brightness/Contrast tool is simple and quick, while the Levels and Curves tools offer more precise control for advanced edits. - Q: Can I darken just a part of the image?
A: Yes! You can use layer masks or the Gradient Tool to apply darkening only to specific areas of your image. - Q: How do I prevent my image from looking too dark or unnatural?
A: Always make subtle adjustments. Gradually darken your image and use tools like Levels or Curves for more controlled edits. Be sure to preview your changes as you go. - Q: Can I use the vignette effect on any image?
A: Yes, you can! It works best on images with a clear subject in the center, but it can be applied to various styles of photography to create mood or emphasize certain elements. - Q: How can I make my darkened image look professional?
A: Focus on balancing the dark areas with highlights. Use tools like Curves and Levels to fine-tune the image, and avoid over-darkening, which can lose important details.
If you have any more questions or want to know more about Photoshop editing, feel free to explore other tutorials or ask for advice. With practice, darkening your images will become second nature!
Conclusion
Darkening an image in Photoshop is a simple yet effective way to enhance your photos, creating mood, depth, and focus. By adjusting the brightness, contrast, levels, and curves, you can achieve precise results that help emphasize your subject or set a specific tone. Adding effects like a vignette can further highlight the key elements of your image. With the right tools and techniques, you can easily turn a standard photo into a more captivating and professional-looking one. Remember to save your work in the appropriate format and resolution, depending on how you plan to use your image. Whether you're sharing it online, printing, or simply saving it for later, Photoshop provides the flexibility you need to get the perfect final result. Practice with these methods, and you'll soon be creating stunning, impactful images with ease.

 admin
admin


