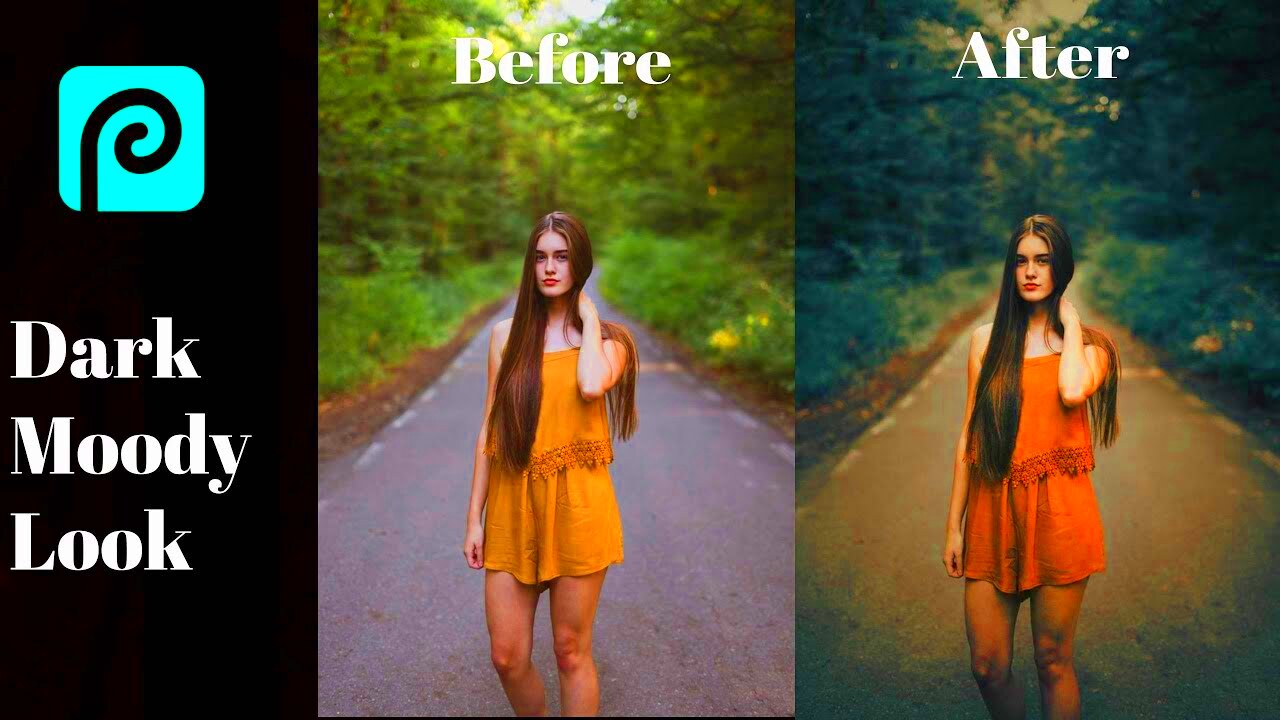
Darkening an image is a common editing technique used to adjust the exposure and tone of a photo. Photopea, a free and powerful online photo editing tool, offers a variety of ways to achieve this effect. Whether you're looking to create a moody atmosphere or simply make an image look more professional, darkening can help. In this guide, we will walk you through how to easily darken your images using Photopea's built-in tools. By the end, you'll be able to enhance your photos to suit your needs with just a few clicks.
Why Darken an Image

Darkening an image can serve several purposes in photo editing. Here are a few reasons why you might want to adjust the brightness and darken your photos:
- Create a Mood: Darker images often convey a sense of mystery, drama, or intimacy, which is perfect for certain themes or concepts.
- Highlight Key Elements: Darkening the overall image can make specific parts of the image stand out more. It’s a great way to focus the viewer’s attention on certain objects or areas.
- Improve Contrast: If an image looks too flat or washed out, darkening can help improve the contrast and make the details more pronounced.
- Enhance Professional Appeal: For product photos or portraits, darkening can give the image a more polished, sophisticated look.
Whatever your reason for darkening, Photopea makes it simple to adjust an image's exposure to meet your needs without losing any quality.
Also Read This: Quick Guide to Cropping Images in MS Paint
Step-by-Step Guide to Darken an Image in Photopea

Now, let’s go through the process of darkening an image in Photopea, step by step. Follow these instructions to adjust the brightness and create the darkened effect you're looking for:
- Open Your Image in Photopea: Start by opening Photopea in your browser. Upload the image you want to darken by going to File > Open and selecting your image from your computer.
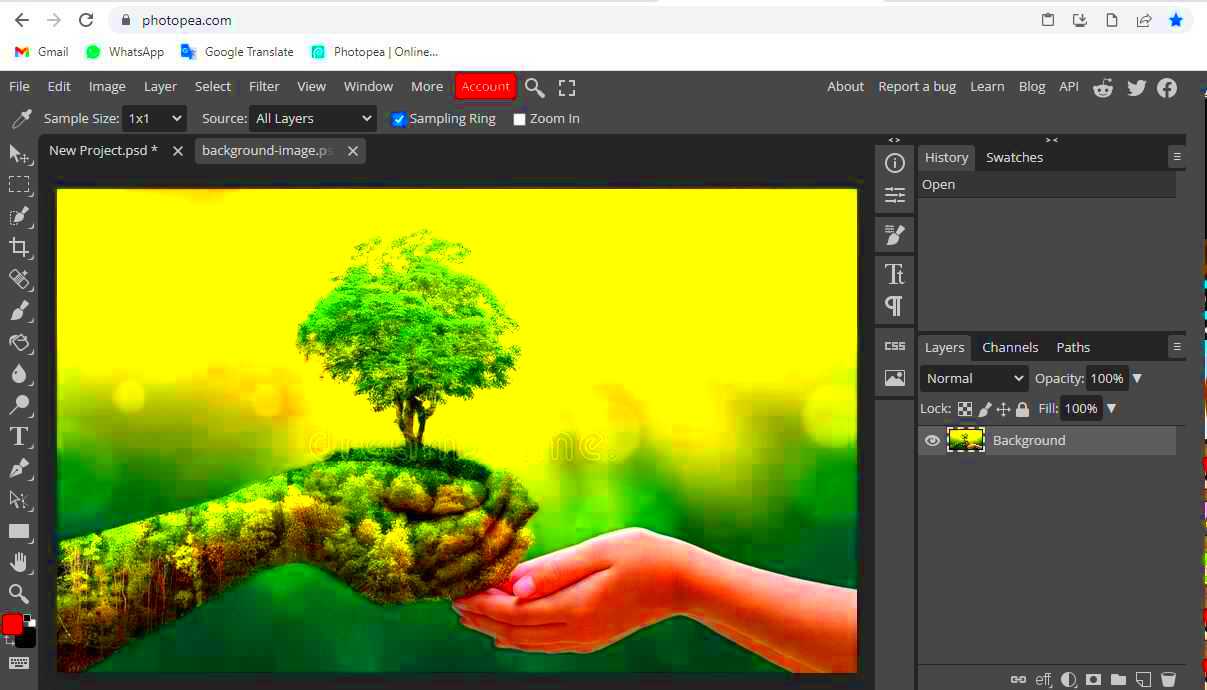
- Select the Adjustment Layer: To keep your edits non-destructive, add an adjustment layer by clicking on the Layer menu at the top and selecting New Adjustment Layer > Brightness/Contrast.
- Adjust the Brightness: A slider will appear. Lower the brightness slider to darken the image. You can also fine-tune the contrast if needed to ensure the details remain sharp and clear.
- Use the Levels Tool for More Control: For a more refined darkening effect, go to Image > Adjustments > Levels. Adjust the shadows slider to deepen the dark areas of the image.
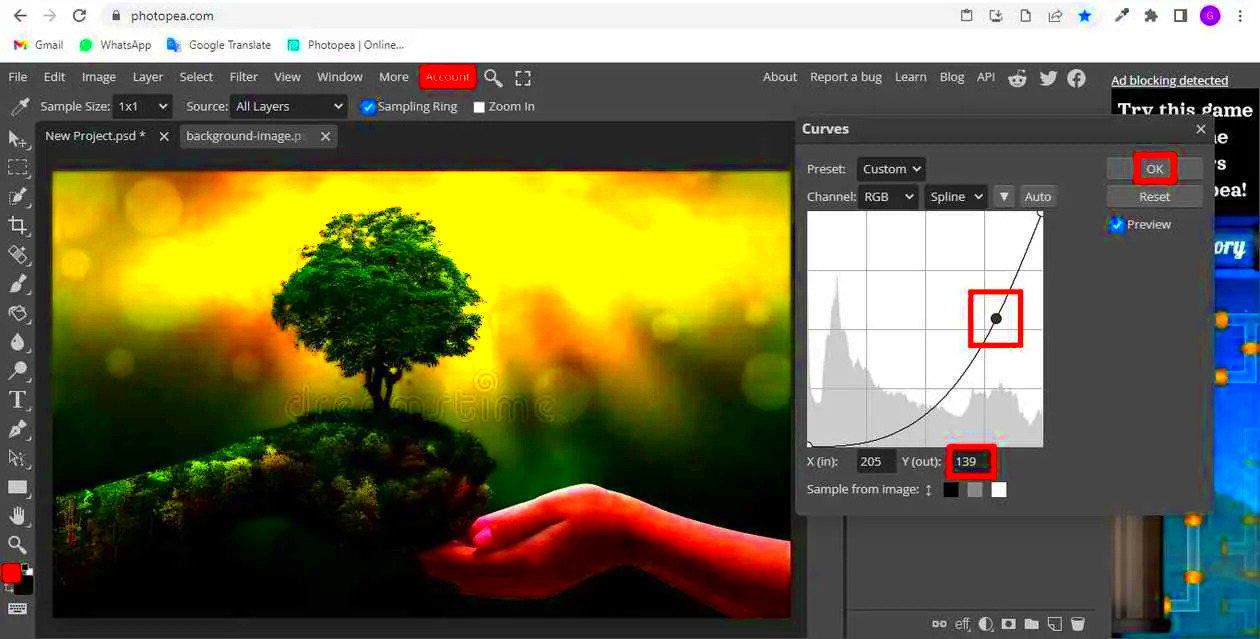
- Fine-Tune the Curves: If you want even more precision, use the Curves tool by going to Image > Adjustments > Curves. Drag the curve down to darken the image while maintaining control over different tonal ranges.
- Preview and Adjust: Continuously preview your changes. Make adjustments until you are satisfied with the darkness level of the image.
- Save Your Image: Once you’re happy with the result, save your darkened image by going to File > Export As and choosing your preferred format.
By following these simple steps, you can darken any image in Photopea without hassle. The flexibility of the tools allows you to create subtle or dramatic darkening effects, depending on your project needs.
Also Read This: how to edit image pixels
Using the Brightness and Contrast Tool
The Brightness and Contrast tool in Photopea is a straightforward way to adjust how light or dark your image appears. This tool is often the first step when you want to darken an image quickly. It allows you to control the overall exposure and make images appear lighter or darker based on your preference. The best part is that it’s very user-friendly and gives immediate results, which makes it ideal for beginners.
Here’s how to use the Brightness and Contrast tool in Photopea:
- Open the Image: Start by uploading your image in Photopea.
- Add a Brightness/Contrast Adjustment Layer: Click on the Layer menu, then choose New Adjustment Layer and select Brightness/Contrast from the list.
- Adjust the Brightness: The tool will give you a slider for brightness. Drag the slider to the left to darken the image. You can see the effect happening in real-time, so fine-tune it as needed.
- Modify the Contrast: The contrast slider allows you to adjust the difference between the light and dark areas. Lowering the contrast can help in creating a more uniform look, while increasing it can make the darkened areas stand out more.
- Check Your Image: Continuously preview your changes to make sure the image is as dark as you want it. When satisfied, you can save the image by exporting it.
With the Brightness and Contrast tool, you get a quick, effective way to darken your image, whether you’re going for a subtle or dramatic change.
Also Read This: Imago Images and Their Pivotal Role in Covering Major Events Through Stunning Visuals
Adjusting the Levels for Darkening an Image
The Levels tool offers more control over darkening an image than the basic Brightness/Contrast tool. It works by adjusting the shadows, midtones, and highlights separately, allowing for a more detailed and tailored darkening effect. If you're looking for precise control over your image’s exposure, the Levels tool is an excellent choice.
Here’s how to adjust the levels for darkening an image in Photopea:
- Open the Image in Photopea: First, upload your image to Photopea.
- Access the Levels Tool: Go to the Image menu at the top and choose Adjustments > Levels.
- Adjust the Shadows: The Levels panel displays three sliders—shadows (on the left), midtones (in the middle), and highlights (on the right). To darken the image, move the shadows slider to the right. This will increase the dark tones of the image.
- Fine-Tune the Midtones: The middle slider controls the midtones of your image. You can adjust this slider to either darken or lighten the midtone areas for a more balanced result.
- Adjust Highlights if Needed: If you want to reduce the brightness of the highlights, you can move the rightmost slider to the left, which darkens the lighter areas of the image.
- Preview and Adjust: Make sure to preview your changes as you go. Fine-tune each slider to get the perfect darkening effect.
- Save Your Image: Once you're happy with the result, save your image by going to File > Export As.
By adjusting the levels, you have more precision in darkening specific parts of the image, giving you greater flexibility over the final result.
Also Read This: Creating a Youtuber in Infinite Craft – A Step-by-Step Guide for Beginners
Darkening with Curves Tool in Photopea
The Curves tool in Photopea is one of the most advanced and flexible methods for darkening an image. It allows you to adjust the brightness and contrast across the entire tonal range of the image, from shadows to highlights. If you want precise control and the ability to apply subtle or dramatic changes, the Curves tool is the best option.
Here’s how to darken an image with the Curves tool in Photopea:
- Open Your Image: Upload your image in Photopea as usual.
- Access the Curves Tool: Go to Image > Adjustments > Curves to open the Curves adjustment panel.
- Adjust the Curve for Darkening: In the Curves panel, you'll see a diagonal line running from the bottom left (shadows) to the top right (highlights). To darken the image, click and drag the line downward in the shadows region. This will darken the darker areas of your image.
- Refine the Midtones and Highlights: You can further adjust the midtones by clicking on the middle of the curve and dragging it downward. This allows you to darken the image even more without affecting the highlights too much.
- Preview the Changes: Keep an eye on the image as you adjust the curve. You can fine-tune the curve for a more precise effect by adding multiple anchor points along the curve and adjusting them as needed.
- Final Adjustments: Once you're satisfied with the darkened look, click OK to apply the changes.
- Save Your Work: Finally, save your darkened image by going to File > Export As and choosing your desired file format.
The Curves tool is perfect for users who want total control over their image’s tonal range, and it can provide subtle or extreme darkening effects depending on how you adjust the curve. Whether you're making fine adjustments or applying a dramatic darkening effect, the Curves tool is an excellent choice.
Also Read This: Understanding the What the Hell Cat YouTube Channel
Using Filters to Darken an Image
Applying filters in Photopea is a quick and creative way to darken your images. Filters can adjust the overall tone, contrast, and brightness of an image, and they can add a unique style or mood to your photos. If you’re looking to not only darken but also add texture or special effects, filters can be a great option. In Photopea, there are various filters that can help darken your image while giving it a more artistic feel.
Here’s how to use filters to darken an image in Photopea:
- Open Your Image: Start by uploading your image to Photopea.
- Apply a Filter: Go to the Filter menu at the top. You’ll find several categories of filters that can darken your image, such as Blur, Noise, and Artistic filters.
- Use the Gaussian Blur Filter: One effective filter for darkening an image is the Gaussian Blur. Applying this filter can make the image appear softer while also blending darker tones, which can be useful for adding a moody effect.
- Adjust the Filter Intensity: When applying a filter, you’ll usually have the option to control the intensity of the effect. For a subtle darkening, lower the strength of the filter. For a more dramatic change, increase the intensity.
- Preview and Finalize: As with any filter, preview your image to ensure the desired darkening effect is achieved. You can always undo the filter or adjust it until you get the perfect result.
- Save Your Image: After applying the filter, save your image by selecting File > Export As.
Filters can darken your image effectively while adding an extra layer of creativity to the process. Try experimenting with different filters to see which one fits your vision best!
Also Read This: Identifying Valuable Editorial Photos on Imago Images
Tips for Darkening an Image Effectively
Darkening an image isn’t just about adjusting the brightness or contrast. To ensure that your darkened image looks great and doesn’t lose important details, it’s important to follow some tips and best practices. Here are some key tips to keep in mind when darkening your photos in Photopea:
- Start with Subtle Adjustments: Begin by making small changes to the brightness or contrast. It’s easier to add more darkness than to fix an image that has been over-darkened.
- Use Layers for Flexibility: Always work with adjustment layers instead of directly editing the image. This way, you can make non-destructive edits and adjust the effect later if needed.
- Pay Attention to Shadows and Highlights: Don’t just focus on darkening the midtones; consider how your adjustments affect shadows and highlights. You may want to preserve highlight details, so use tools like Curves or Levels to adjust them separately.
- Maintain Image Details: Be careful not to darken the image so much that it loses important details, especially in the darker areas. Keep checking the image to ensure that the details remain visible even in the shadows.
- Consider the Mood: Think about the mood you’re trying to convey with the darkening effect. A slightly darkened image may feel more elegant, while extreme darkening can create a dramatic, moody atmosphere.
- Experiment with Multiple Tools: Don’t hesitate to use a combination of tools (Brightness/Contrast, Levels, Curves, Filters) to get the exact effect you’re looking for. Photopea offers a variety of tools that can be used together for more creative results.
By following these tips, you can darken your images without compromising their quality or losing any important details. Experiment with different settings and tools to find the best combination for your images!
Also Read This: Creating Beautiful Paper Flowers for Dailymotion Videos
FAQ
Here are some common questions people have about darkening images in Photopea, along with helpful answers:
- Can I darken only a part of the image?
Yes, you can use layer masks in Photopea to apply darkening effects to specific parts of the image. This is great for focusing on certain areas, like the background or specific objects, while leaving the rest of the image untouched. - Will darkening an image affect its quality?
When done correctly, darkening an image should not negatively affect its quality. However, overdoing the adjustments can lead to loss of details, especially in shadows or highlights. Always keep a close eye on your image as you adjust the darkness. - Is it possible to brighten an image after darkening it?
Yes, you can always reverse or adjust the darkening effect by changing the settings in the adjustment layers. Photopea’s non-destructive editing allows you to tweak your changes at any time. - Can I use filters to darken the image without changing its original tone?
Yes, certain filters can be applied subtly to darken the image without drastically altering its overall tone. Filters like Gaussian Blur can add a soft darkening effect without changing the natural look of the image. - How do I prevent an image from looking too flat after darkening it?
To avoid a flat look, make sure to adjust the contrast along with darkening. You can also try using the Curves tool to maintain depth and richness in your image after making it darker.
If you have any more questions or need help with specific techniques, feel free to explore Photopea’s help resources or reach out to the Photopea community for tips!
Conclusion
Darkening an image in Photopea is a simple yet powerful way to enhance your photos, whether you're looking to create a moody atmosphere or highlight specific elements of the image. By using tools like Brightness/Contrast, Levels, Curves, and Filters, you can fine-tune the darkening process to achieve the exact look you want. It's important to approach the editing process carefully to maintain the image's quality and detail, especially in the shadows and highlights. Remember to experiment with different methods and adjust the intensity of each tool to achieve subtle or dramatic results. With practice, you'll be able to use these techniques to create professional and visually striking images with ease. Happy editing!

 admin
admin


